If there’s one thing I can never get enough of, it’s a gooey, fudgy batch of brownies. Honestly, I’ve been making this recipe for years—my kids ask for it at least once a week, and I always keep the ingredients on hand because I know a hungry, chocolate-craving family will appear before I even get the chance to finish mixing the batter. It’s funny how a simple square of chocolatey goodness can warm your soul and turn a rough day around. I love that these brownies are so easy to whip up, yet they taste like a fancy bakery treat. Plus, they’re perfect when I want something sweet after dinner but don’t want to fuss with complicated recipes. I’ve tested this with everything from almond milk to coconut oil, and let me tell you, each version is a winner in my book. Trust me, once you get the hang of it, these brownies will become your go-to dessert too—straightforward, rich, and just downright addictive.
Thank you for reading this post, don't forget to subscribe!What is brownies?
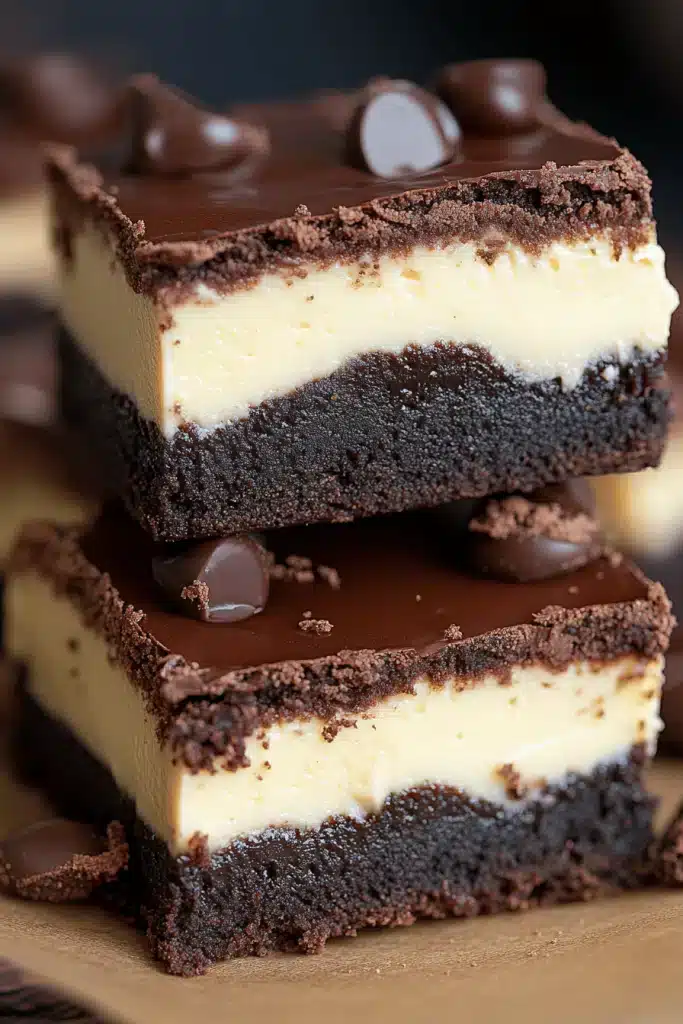
Think of brownies as the chocolatey lovechild of a cake and a cookie—moist, dense, and packed with flavor. The word “brownies” actually comes from the American baking world, and it’s all about that perfect balance of fudginess and a little bit of chew. These treats are essentially a chocolate lover’s dream—made with melted chocolate or cocoa, butter, sugar, eggs, and flour, then baked just until the edges are set but the inside stays delightfully gooey. Think of it as a handheld indulgence that’s sweet, rich, and so satisfying. What’s fun about brownies is how many different variations you can try—adding nuts, swirls of caramel, or even chunks of cookies for extra texture. In my kitchen, brownies are the Ultimate Comfort food for lazy Sundays, quick get-togethers, or when I just need a reason to celebrate something small. They’re accessible, forgiving, and always a hit no matter the occasion.
Why do you love this movie?
What I love most about these brownies is how simple they are to make—no fancy equipment or complicated techniques needed. Just a mixing bowl, a whisk, and a handful of pantry staples. The smell alone when they’re baking will fill your entire house with those warm, chocolatey notes that make everyone come running. And the flavor? Oh, it’s everything you want: deep, rich, and just a little bittersweet with a perfect hint of vanilla. Plus, this recipe is super budget-friendly. You probably have most of the ingredients right now—cocoa, sugar, butter—and it’s a real lifesaver on busy nights or when guests unexpectedly drop by. I’ve made these for birthdays, cozy afternoons with friends, or even as a midnight treat when I want something sweet but can’t be bothered to bake a whole cake. The versatility is what keeps me coming back—whether served warm with a scoop of vanilla Ice Cream or cooled and cut into perfect little squares, they never disappoint.
How do I make brownies?
Quick Overview
This recipe is all about ease and flavor. You start by melting butter and chocolate together—a step that makes your kitchen smell like heaven. Then, you mix in sugar, eggs, and vanilla, followed by the dry ingredients like cocoa powder and flour. Pour half of the batter into your prepared pan, dollop on your favorite filling or swirl, layer on the rest, and bake. It’s a straightforward process that yields perfectly Fudgy Brownies every time. The secret? Not overbaking! You want that center to stay just slightly gooey for the best texture. Once they’re out of the oven, give them a few minutes to cool, then enjoy that first bite—rich, chocolatey, and just a little crispy on the edges. These brownies come together quickly, making them perfect for spontaneous chocolate emergencies or planned baking afternoons alike.
Ingredients
For the Main Batter:
– 1 cup unsalted butter (trust me, real butter makes all the difference)
– 1 cup good-quality Dark Chocolate (bittersweet or semi-sweet, your choice)
– 1 1/2 cups granulated sugar
– 3 large eggs
– 2 teaspoons vanilla extract
– 1 cup all-purpose flour
– 1/2 cup unsweetened cocoa powder
– 1/2 teaspoon salt
For the Filling:
– 1/2 cup chocolate chips, nuts, or caramel swirls (optional but so good!)
– A pinch of Sea Salt for sprinkling (my secret weapon for depth)
For the Glaze:
– 1/4 cup melted chocolate or chocolate ganache
– Sprinkles or flaky sea salt for finishing
“Packed with flavor and so simple. Exactly what I wanted from this Easy Nutty Chocolate Brownies Recipe!”
Step-by-Step Instructions
Step 1: Preheat & Prep Pan
Set your oven to 350°F (175°C). Line a 9×13-inch baking pan with parchment paper or generously butter it and dust with flour. This helps you get that perfect, clean cut later. Trust me, nothing’s worse than cracking a warm brownie trying to lift it out of the pan!
Step 2: Mix Dry Ingredients
In a medium bowl, whisk together the cocoa powder, flour, and salt. Mixing these first ensures even distribution, so every bite is consistently chocolaty. I always do this step before adding the wet ingredients—it’s my little ritual for fluffy, fudgy brownies.
Step 3: Mix Wet Ingredients
In a large heatproof bowl, melt the butter with the chopped chocolate using either a double boiler or microwave in short bursts, stirring until smooth. Let it cool just a little—you don’t want the eggs scrambling! Whisk in the sugar, then add eggs one at a time, mixing well after each. Finish with vanilla. This mixture should be glossy and rich, like a chocolate silk.
Step 4: Combine
Gradually add your dry ingredients to the wet, folding gently with a spatula until just combined—overmixing can make the brownies tough. Stop as soon as you see no streaks of flour. The batter will be thick and beautifully shiny.
Step 5: Prepare Filling
If you’re adding chips, nuts, or swirls, fold or sprinkle them evenly into the batter now. For a marbled effect, drop spoonfuls of caramel or peanut butter and swirl with a toothpick or skewer—trust me, this makes the brownies so much more exciting.
Step 6: Layer & Swirl
Pour half the batter into your prepared pan, spread evenly, then dollop on your filling or add a swirl of extra chocolate or caramel. Cover with the rest of the batter and gently swirl with a knife to create a marbled effect. Visualize making a gentle figure-eight pattern—this gives your brownies that gorgeous, artistic look.
Step 7: Bake
Bake for about 25-30 minutes. You’ll know they’re done when the edges look set but the center still jiggles slightly when shaken. A toothpick inserted into the middle should come out with a few moist crumbs—not wet batter. Every oven is different, so start checking around 24 minutes.
Step 8: Cool & Glaze
Once out, let the brownies cool in the pan for at least 20 minutes. If you cut too early, they’ll fall apart! For that glossy finish, pour melted chocolate or ganache over the cooled surface, then sprinkle with sea salt or sprinkles to jazz it up.
“Made the Easy Nutty Chocolate Brownies Recipe tonight and wow — perfect weeknight dinner. Will definitely make again!”
Step 9: Slice & Serve
Use a sharp knife warmed with hot water for clean cuts. Serve warm with a scoop of vanilla ice cream or simply as they are, with a big glass of cold milk. My kids love slicing these into little squares and sharing with friends—every single time, they disappear in minutes.
What to Serve It With
Brownies are basically a blank canvas—just waiting for your favorite accompaniments. For breakfast (hey, no judgment here!), try serving a warm brownie alongside your morning coffee, topped with a dollop of whipped cream or a drizzle of caramel. It’s a decadent way to start the day. At brunch, pair a thick slice with fresh berries and a side of yogurt or mimosas—you’ll impress everyone with your creative flair. When it’s dessert time, nothing beats a warm brownie drizzled with vanilla ice cream and sprinkled with chopped nuts or more sea salt. For those cozy nights in, I love cutting them into little squares, piling them into a bowl, and nibbling away while watching a movie. Brownies are as versatile as they are delicious, and I promise they’ll make even ordinary days special.
Top Tips for Perfecting Your Brownies
Over the years, I’ve learned a few tricks that really elevate these brownies from good to downright spectacular. First off, use real butter and high-quality cocoa—trust me, it makes a huge difference in flavor. To keep your brownies moist, don’t overbake and resist the urge to open the oven door early—they need that full baking time for that perfect fudginess. When mixing, fold in ingredients gently; overmixing can lead to dense, tough brownies. Want them extra gooey? Take them out just a minute or two before the toothpick test. When adding toppings, sprinkle them evenly and press some slightly into the batter—this makes sure they stay in place during baking. For batches of chocolate chips or nuts, fold gently at the end and avoid overmixing, or you’ll end up with chips sinking to the bottom. I’ve tested different sugar levels; reducing sugar slightly can give a richer chocolate flavor without sacrificing sweetness. Keep experimenting—this recipe is forgiving, and with a little practice, you’ll nail your perfect brownie every time. Remember, baking is all about instincts and a little patience, so don’t be discouraged by small mishaps—every mistake is a step closer to your *dream* brownie.
Storing and Reheating Tips
Leftovers? No problem. These brownies keep well in an airtight container at room temperature for about 2 days—cover loosely so they stay soft but don’t dry out. If you want them to last longer, pop them in the refrigerator for up to a week. Wrap individual pieces tightly with plastic wrap or store in a sealed container to prevent them from drying out. For freezing, wrap each brownie tightly with plastic wrap, then aluminum foil—good for up to 3 months. When you’re craving a treat, just thaw at room temperature for 15-20 minutes or microwave for about 15 seconds for that just-baked warmth. I recommend adding the glaze after reheating if you’re going for that shiny, luscious top. Reheating directly in the microwave for a few seconds makes them irresistibly gooey again—almost as if freshly baked. Proper storage and gentle reheating preserve that amazing texture and flavor, making sure each bite is just as delicious as the first.
Frequently Asked Questions
Final Thoughts
Honestly, making these brownies is like wrapping yourself in a cozy blanket—warm, familiar, and so satisfying. I’ve shared this recipe countless times, and it’s always a hit. The best part? It’s flexible enough to adapt to whatever you have in your pantry or your mood for the day. I genuinely believe that a great brownie can turn any ordinary moment into a little celebration. Whether you’re baking for loved ones, need a quick pick-me-up, or just want a quiet moment with a fork and a good book, these brownies will never let you down. Don’t be shy—try adding your favorite mix-ins or switching up the glaze. I’d love to hear your tweaks and stories—leave a comment or share a picture! Happy baking, my dear friend. And remember, the secret ingredient in every good brownie is a pinch of love.
brownies
Ingredients
Main Ingredients
- 0.75 cup all-purpose flour
- 0.5 cup unsweetened cocoa powder
- 0.5 teaspoon baking powder
- 0.5 cup chocolate chips milk, semi-sweet or dark
- 0.5 cup salted butter melted and cooled
- 0.75 cup granulated sugar
- 0.75 cup light brown sugar
- 2 large eggs room temperature
- 2 teaspoons vanilla extract
- 0.5 teaspoon kosher salt
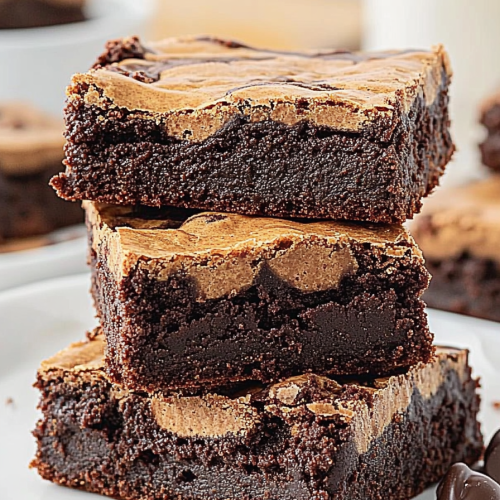
- 0.6667 cup creamy peanut butter divide for batter and swirls
Instructions
Preparation Steps
- Preheat oven to 350°F. Line a 9x9 inch baking dish with parchment paper and lightly spray with nonstick spray.
- In a small bowl, whisk together flour, cocoa powder, baking powder, and chocolate chips.
- In a medium bowl, combine melted butter, granulated sugar, and brown sugar. Add eggs and vanilla extract, mix until smooth.
- Gradually mix dry ingredients into wet ingredients until just combined.
- Pour batter into prepared baking dish and spread evenly. Dollop and swirl ⅔ cup peanut butter on top.
- Bake for 30 minutes or until a toothpick inserted comes out with moist crumbs. Let cool.


