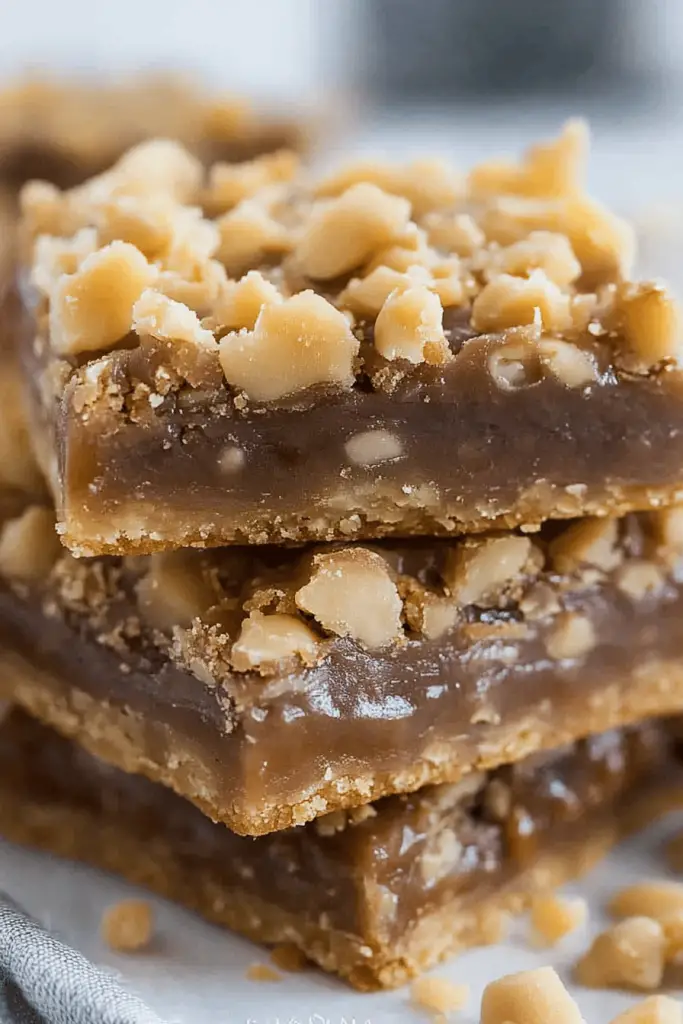
You know those days when a serious craving hits, the kind that requires something rich, buttery, and just a little bit decadent? For me, that’s usually a sign to whip up a batch of my absolute favorite toffee bars. These aren’t just any toffee bars; they’re the kind that make your kitchen smell like a bakery and disappear from the plate faster than you can say “second helping!” My mom used to make something similar when I was a kid, and the memory of that sweet, caramelized aroma always brings me right back to her kitchen. These toffee bars are like a warm hug in dessert form. They’re incredibly comforting, ridiculously easy to make, and honestly, they’re a lifesaver when you need a crowd-pleaser or just a little something sweet to brighten your day. They have that perfect balance of a chewy, buttery base and a rich, toffee-like topping that just melts in your mouth. Forget those complicated recipes that take all day; this one is a game-changer.
Thank you for reading this post, don't forget to subscribe!
What are toffee bars?
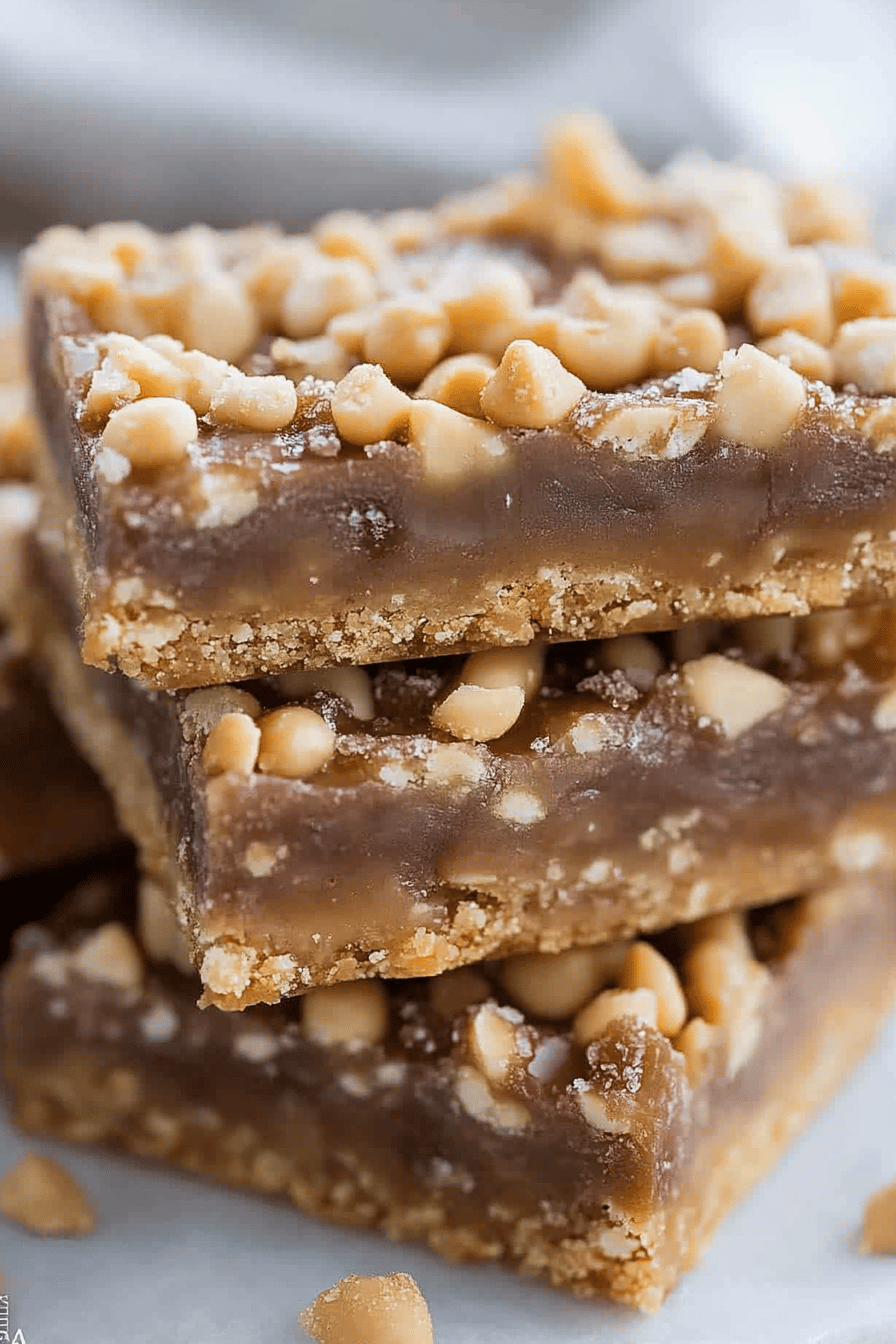
So, what exactly are these magical toffee bars? Think of them as a delightful cross between a perfect shortbread and a chewy caramel candy, all baked into one easy-to-handle bar. They have a tender, buttery base that’s lightly sweetened and has just the right amount of give. The real magic, though, happens with the topping. It’s a glorious concoction that bakes up into a rich, deep golden toffee layer, often studded with nuts (though you can totally skip them if that’s not your thing). It’s the kind of treat that feels special enough for guests but is so simple you’ll want to make it just for yourself on a random Tuesday. The name really says it all – it’s a bar, and it’s infused with that irresistible toffee flavor. It’s essentially a shortcut to that classic toffee candy experience, all in a wonderfully portable and shareable format. They’re chewy, they’re rich, and they’re utterly addictive!
Why you’ll love this recipe?
Honestly, I could sing the praises of these toffee bars all day, but let me give you the highlights of why I think you’ll fall head over heels for them, just like my family and friends have. First off, the flavor is simply out of this world. You get that deep, buttery, caramelized toffee goodness that’s balanced by a tender, slightly crumbly base. It’s not overly sweet, which I really appreciate, allowing the richness of the butter and sugar to truly shine. Then there’s the simplicity. I know, I know, “simple” and “delicious” sometimes feel like they’re in different galaxies, but these toffee bars genuinely bridge that gap. You don’t need any fancy equipment or complicated techniques. Most of the ingredients are probably already in your pantry, and the process itself is pretty straightforward. What I love most about this recipe is how cost-effective it is. You get a substantial number of bars from one batch, and the ingredients are all standard pantry staples. It feels like a gourmet treat without the gourmet price tag. Plus, they’re surprisingly versatile. While they’re divine on their own, they also pair wonderfully with a cup of coffee, a scoop of vanilla Ice Cream, or even chopped up and sprinkled over a simple salad for a sweet crunch (don’t knock it till you try it!). Compared to other bar cookies, like blondies or brownies, these toffee bars offer a unique, buttery crunch and chew that’s truly special. They’re my go-to when I’m short on time but still want to impress, or when I just need a little pick-me-up. They’re the kind of recipe that makes you feel like a baking superstar with minimal effort.
How do you make toffee bars?
Quick Overview
How do I make these delicious toffee bars? I’ll start by preparing a simple, buttery base dough, then top it with an amazing mixture. What is the best way to make a toffee cake? The whole process, from mixing to baking, takes under an hour, and the results are consistently consistent. Is this the kind of recipe that makes you feel like a baking pro without all the fuss? How do I make a tray of deliciousness?
Ingredients
For the Main Batter:
You’ll need unsalted butter, softened – I always opt for good quality butter because you can really taste the difference. Then, there’s granulated sugar, which gives us that essential sweetness and helps with browning. An egg yolk adds richness and helps bind everything together beautifully. And of course, all-purpose flour for the structure. A touch of vanilla extract is a must for that warm, comforting aroma, and a pinch of salt is crucial to balance all the sweetness. I’ve found that making sure your butter is truly softened, not melted, is key to getting that perfect tender base.
For the Filling:
Where does the magic happen? Why we’ll use unsalted butter, melted this time, which will form the base of our toffee. Then comes packed Brown Sugar – light or dark both work wonderfully, but dark brown gives a smooth, smoky texture. What is the flavor of molasse What is the flavor of toffee? For texture and extra flavor, chopped nuts are a classic addition – pecans or walnuts are my favorite. What are your favorite nuts? If you’re not a fan of nuts, no worries, you can absolutely leave them out, and they’ll still be there.
For the Glaze:
This part is optional, but highly recommended for that extra touch of indulgence. A simple glaze made with powdered sugar and a splash of milk or cream creates an elegant finish. Can you add a little almond extract to the glaze? How do I get the consistency right – thick enough to coat but thin enough for drizzle?
“Packed with flavor and so simple. Exactly what I wanted from this toffee bars!”
What are the steps to
Step 1: Preheat & Prep Pan
First things first, let’s get our oven preheated to 350 degrees Fahrenheit (175 degrees Celsius). While the oven is warming up, grab an 8×8 inch baking pan. I like to line mine with parchment paper, leaving an overhang on the sides. This makes lifting the bars out so much easier later on. You can grease the pan first and then lay the parchment, or just grease the parchment itself. Just make sure the entire bottom and sides are covered so nothing sticks!
Step 2: Mix Dry Ingredients
In a medium bowl, whisk together your all-purpose flour, granulated sugar, and salt. Set aside. A good whisking ensures everything is evenly distributed, which means no pockets of salt or sugar in the whisk. What are your finished bars? How do you create a uniform texture?
Step 3: Mix Wet Ingredients
In a separate, larger bowl, cream together the softened unsalted butter and the egg yolk until it’s smooth. Set aside. Light and fluffy. Is it possible to do this with an electric mixer? Stir in the vanilla extract. The mixture should be smooth and well combined.
Step 4: Combine
Gradually add the dry ingredients to the wet ingredients. Mix on low speed or stir with a spatula until just combined. Be careful not to overmix! Overmixing can develop the gluten in the flour, leading to tougher bars. You want a soft, slightly crumbly dough that comes together. I always err on the side of under-mixing; it’s better to have a few streaks of flour than to end up with tough bars. If the dough seems too crumbly to press into the pan, that’s usually okay; it will firm up as it bakes.
Step 5: Prepare Filling
In a small saucepan, combine the melted butter, packed Brown Sugar, and the remaining vanilla extract. Cook over medium heat, stirring constantly, until the mixture comes to a boil and the sugar is dissolved. Let it bubble for about 1-2 minutes, stirring occasionally. Remove from heat and stir in your chopped nuts, if using. This quick caramelization is what gives our toffee layer its signature flavor and texture.
Step 6: Layer & Swirl
Now for the fun part! Press about two-thirds of the dough evenly into the bottom of your prepared baking pan. You can use your hands or the bottom of a measuring cup to get a nice, even layer. Don’t worry if it’s not perfectly smooth; rustic is good! Then, carefully pour the toffee mixture evenly over the dough. If you have any remaining dough, you can either crumble it over the top of the toffee layer or create a simple lattice pattern. I sometimes just crumble it, as it gives little pockets of chewy goodness throughout the toffee. This step is where you can get creative!
Step 7: Bake
How do you put a pan in the oven? Bake for about 25-30 minutes, or until the edges are golden brown and the toffee topping is bubbly. What are some of the best examples of amber color? How can toffee go from perfectly caramelized to burnt very quickly? If the edges are browning too fast, you can loosely tent the pan with foil for the last few minutes.
Step 8: Cool & Glaze
Once baked, remove the pan from the oven and let it cool on a wire rack for about 15-20 minutes. How do you set toffee? While it’s cooling, you can prepare the optional glaze by whisking together powdered sugar and milk. Once the bars are slightly cooled but still warm, drizzle the glaze over the top. The warmth helps the glaze spread nicely. Let them cool completely in the pan before cutting – this is crucial for clean slices!
Step 9: Slice & Serve
Once completely cool, use the parchment paper overhang to lift the entire slab out of the pan. Place it on a cutting board. Using a sharp knife, cut the toffee bars into squares or rectangles. For the cleanest cuts, you can warm your knife under hot water and wipe it dry between slices. Serve them as is, or enjoy them with a cup of coffee or tea. They are absolutely delightful served at room temperature.
“New family favorite! This toffee bars was so flavorful and ridiculously easy. Crowd-pleaser for sure.”
What should I serve it with?
These toffee bars are so versatile, they truly fit into any occasion, any time of day. For breakfast, they’re a delightful treat alongside a strong cup of coffee or a creamy latte. Imagine a quick, sweet bite to start your morning – it’s a little indulgence that feels perfectly acceptable! At brunch, these bars are a guaranteed hit. They look beautiful cut into smaller squares and served on a tiered stand. I love pairing them with fresh fruit salad or a light yogurt parfait; it offers a nice contrast to the richness of the bars. For dessert, they’re a dream. Serve them alongside a scoop of vanilla bean Ice Cream for an incredible warm-and-cold contrast, or pair them with a simple cup of decaf after a big meal. They’re also fantastic with a dollop of whipped cream or a drizzle of chocolate sauce. And for those cozy, quiet moments, they’re the ultimate snack. I often find myself having one (or two!) with a cup of herbal tea in the afternoon or late at night when I need a little something sweet. My kids absolutely adore them, and they’re always the first thing to disappear from any gathering. We also have a family tradition of making a big batch around the holidays; they’re the perfect edible gift because they travel so well. Honestly, any time you need a moment of delicious comfort, these toffee bars are the answer.
How do I make a perfect toffee bar?
Over the years, I’ve learned a few tricks that really elevate these toffee bars from good to absolutely phenomenal. First, for the base, don’t be tempted to use melted butter unless the recipe specifically calls for it. Softened butter, creamed properly with sugar, creates that tender, almost cookie-like texture we’re after. If you use melted butter for the base, you’ll end up with a denser, almost candy-like bar for the bottom, which isn’t quite the same delightful contrast. When you’re mixing the wet and dry ingredients for the base, resist the urge to overmix. A few streaks of flour are perfectly fine; overmixing develops gluten, which can make your bars tough instead of tender. My kids have a tendency to “help” by stirring too vigorously, and I always have to gently remind them to be gentle with the dough! For the toffee topping, the quality of your Brown Sugar really matters. Dark brown sugar will give you a deeper, richer toffee flavor due to the molasses content, but light brown sugar works just as well if that’s what you have on hand. When you’re cooking the toffee mixture, use a medium heat and stir constantly. This prevents the sugar from scorching. If you’re using nuts, toasting them lightly before adding them to the toffee mixture can really enhance their flavor and crunch – just a few minutes in a dry pan until fragrant! I learned this after a batch where the nuts tasted a bit bland, and toasting them made a world of difference. When it comes to baking, watch the edges closely. Toffee can go from perfectly golden to burnt in a blink. If the edges are browning too quickly before the center is set, you can loosely tent the pan with foil. For the glaze, the consistency is key. If it’s too thick, add milk a teaspoon at a time. If it’s too thin, add more powdered sugar, a tablespoon at a time, until you reach that perfect drizzling consistency. I’ve also experimented with adding a pinch of sea salt on top of the glaze once it’s applied, which gives a lovely sweet-and-salty contrast. Lastly, patience is a virtue when it comes to cooling! Let them cool completely in the pan before slicing. Trying to cut them while they’re still warm will result in a gooey mess – which, while delicious, isn’t quite the tidy bar we’re aiming for.
Storing and Reheating Tips
One of the best things about these toffee bars is how well they store. If you find yourself with leftovers (which is rare in my house!), you can keep them at room temperature for up to 3 days. Just make sure to store them in an airtight container. If you want them to stay fresher for longer, or if your kitchen tends to be warm, the refrigerator is your best bet. They’ll stay delicious for up to a week when stored in an airtight container in the fridge. When you want to enjoy one, they’re usually best at room temperature, so just let them sit out for about 15-20 minutes. For longer storage, you can absolutely freeze them! I usually cut them into individual portions and wrap each one tightly in plastic wrap, then place them in a freezer-safe bag or container. They’ll keep well in the freezer for up to 2-3 months. To reheat, you can pop a frozen bar into a warm oven (around 300°F or 150°C) for a few minutes until warmed through, or simply let them thaw at room temperature. If you’ve applied the glaze, it’s generally best to add it after baking and cooling, just before serving or storing. If you plan to freeze them with the glaze, it can sometimes get a bit sticky, so you might prefer to add a fresh glaze after thawing, or just enjoy them plain. The key to keeping them tasting fresh is ensuring they are well-sealed to prevent them from drying out or picking up any unwanted fridge odors.
What are the most frequently asked questions?
Final Thoughts
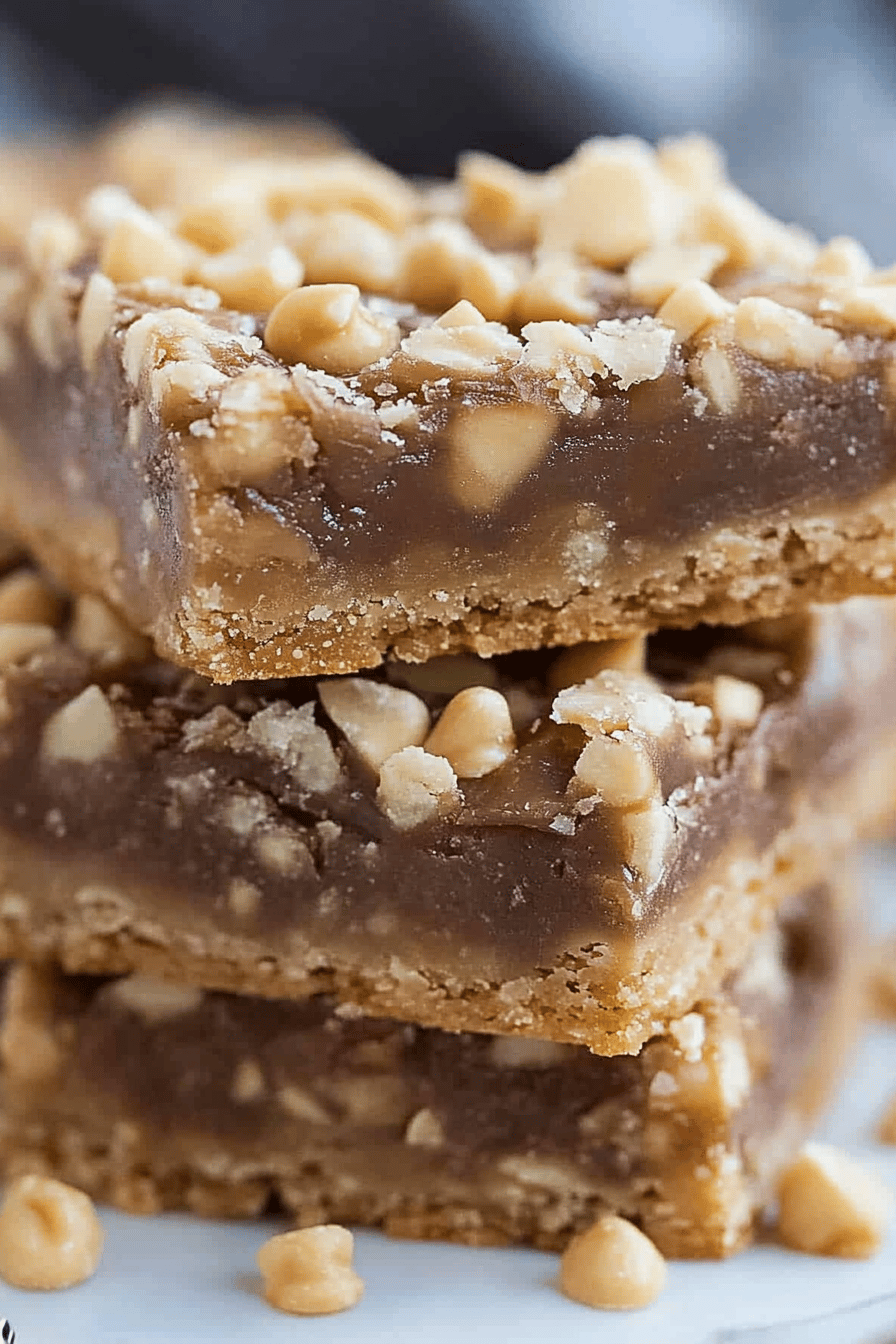
I truly believe that everyone needs a go-to recipe for something simple, yet incredibly satisfying, and for me, these toffee bars are it. They deliver that perfect combination of chewy, buttery goodness and rich, caramelized toffee that just makes you happy. They’re proof that you don’t need fancy ingredients or hours in the kitchen to create something truly special. Whether you’re baking for a holiday, a potluck, or just a weeknight treat, these bars are always a winner. They’re so easy, so delicious, and they bring a little bit of joy with every bite. If you love classic chocolate chip cookies or rich brownies, I have a feeling you’re going to adore these toffee bars. Give them a try, and I promise you won’t be disappointed. I can’t wait to hear what you think and how they turn out for you! Don’t forget to leave a comment below and share your own variations or any tips you discover. Happy baking, everyone!
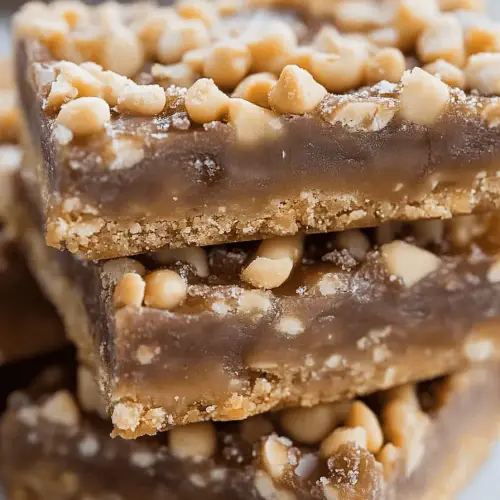
toffee bars
Ingredients
Toffee Base
- 0.5 cup unsalted butter softened
- 1 cup granulated sugar
- 1 teaspoon vanilla extract
- 2 cups all-purpose flour
Topping
- 1 cup chocolate chips
- 0.5 cup chopped pecans optional
Instructions
Preparation Steps
- Preheat oven to 350°F (175°C). Grease and flour a 9x13 inch baking pan.
-
In a large bowl, cream together the softened butter and granulated sugar until light and fluffy. Stir in the vanilla extract.0.5 cup unsalted butter
-
Gradually add the flour to the wet ingredients and mix until just combined, forming a thick dough.0.5 cup unsalted butter
- Press the dough evenly into the prepared baking pan.
- Bake for 15-20 minutes, or until the edges are lightly golden.
-
Remove from oven and immediately sprinkle the chocolate chips evenly over the hot base. Let sit for a few minutes until melted, then spread into a smooth layer. Sprinkle with chopped pecans if desired.0.5 cup unsalted butter
- Let the bars cool completely in the pan before cutting into squares. Store in an airtight container at room temperature.


