Oh, this Tennessee onions recipe. Just saying it makes my mouth water! It’s one of those dishes that feels like a warm hug, perfect for a Sunday dinner or even just a special weeknight treat when you want something truly comforting. I remember my Grandma making something similar when I was a kid, and honestly, her version was legendary. This recipe is my nod to hers, with a few little tweaks I’ve picked up over the years that I think make it even better. It’s got that sweet, savory, caramelized onion goodness that just melts in your mouth. If you’re a fan of French Onion Soup, but want something you can slice and serve, this is absolutely for you. It’s deceptively simple, but the flavor payoff is HUGE. Seriously, the first time I made this Tennessee onions recipe, my family devoured it. My husband asked for seconds before he even finished his first plate, and my kids, who can be picky eaters, were asking “When can we have those yummy onions again?” It’s that good.
Thank you for reading this post, don't forget to subscribe!
What is a Tennessee onion recipe?
So, what exactly is this “Tennessee Onions Recipe”? Think of it as the ultimate savory side dish, a beautiful, baked creation starring sweet, tender onions that have been slow-cooked to caramelization perfection. It’s not quite a casserole, and it’s definitely not just plain baked onions. It’s layered with flavor and has this wonderful, almost custardy texture underneath all that sweet onion topping. The “Tennessee” part, I think, comes from the way it’s traditionally made down South – with a generous hand and a lot of love. It’s the kind of dish that feels special without requiring a culinary degree. It’s essentially a testament to how simple ingredients, when treated with care, can transform into something truly magical. It’s a celebration of onions in their most glorious form, a dish that’s hearty enough to be a star but also the perfect supporting actor to any main course.
Why you’ll love this recipe?
Honestly, there are so many reasons why this Tennessee onions recipe has become a staple in my kitchen. First and foremost, the FLAVOR is just out of this world. We’re talking deep, rich, caramelized sweetness from the onions, balanced by a creamy, savory base and a hint of something special from the seasonings. It’s complex without being complicated. Then there’s the SIMPLICITY. I know it looks fancy, but trust me, it’s incredibly easy to put together. Most of the magic happens in the oven, which means less hovering and more time for you. On busy nights, this recipe is a lifesaver because the prep is quick, and the oven does all the hard work. It’s also incredibly COST-EFFECTIVE. Onions are budget-friendly, and the other ingredients are pantry staples for most of us. You get a restaurant-quality side dish without the restaurant price tag! And don’t even get me started on its VERSATILITY. I’ve served this alongside grilled steak, roasted chicken, Pork Chops, and even with a big green salad for a lighter meal. It’s also fantastic for holiday gatherings – it always gets rave reviews! What I love most about this Tennessee onions recipe, though, is the feeling it evokes. It’s pure comfort food, reminiscent of simpler times and home-cooked meals. It’s the dish that makes everyone gather around the table, asking for the recipe.
How do I make [Recipe Name]?
Quick Overview
Making this Tennessee Onions recipe is all about layering those delicious flavors and letting the oven do its magic. You’ll start by slicing your onions nice and thin, then creating a simple, creamy base. The onions are then nestled into this base and baked until they’re incredibly tender and sweet. A final touch of seasoning and maybe a little something extra, and you’re ready to go. It’s a straightforward process that guarantees a stunning result, making it perfect for both experienced cooks and those just starting out. The key is patience – letting those onions caramelize slowly is where all the flavor truly develops.
Ingredients
For the Main Dish:
Onions: About 3 pounds of yellow onions. I find yellow onions give the best balance of sweetness and savory flavor for this recipe. Look for ones that are firm and heavy for their size, with dry, papery skins. Avoid any with soft spots or green sprouts. I’ve tried sweet Vidalia onions too, and they’re fantastic, but sometimes a little *too* sweet, so yellow is my go-to. Slice them about 1/4-inch thick. A mandoline slicer can be a lifesaver here for uniform slices, but a sharp knife works just fine if you take your time.
Butter: 4 tablespoons unsalted butter. This starts the caramelization process and adds richness.
All-Purpose Flour: 2 tablespoons. This helps thicken the creamy base.
Milk: 2 cups whole milk. Whole milk gives the creamiest result, but I’ve successfully used 2% in a pinch. Just don’t go too low-fat, or it might not be as rich.
Heavy Cream: 1/2 cup. This adds that luxurious, velvety texture that makes this dish so decadent.
“I don’t know if I’ve ever eaten a better Tennessee onions recipe. The rub alone is wonderful, but the sauce??? Over the top!”
Salt: 1 teaspoon kosher salt, plus more to taste. This is crucial for bringing out the natural sweetness of the onions and balancing the flavors.
Black Pepper: 1/2 teaspoon freshly ground black pepper, plus more to taste. Freshly ground makes a world of difference!
Nutmeg: A tiny pinch of freshly grated nutmeg (optional, but I highly recommend it!). It sounds unusual, but it adds a subtle warmth that complements the onions beautifully. Just a whisper is all you need.
For the Topping (Optional but Recommended!):
Parmesan Cheese: 1/4 cup grated Parmesan cheese. This adds a salty, nutty finish that gets wonderfully golden brown.
Breadcrumbs: 1/4 cup panko breadcrumbs. For a lovely crunch!
Step-by-Step Instructions
Step 1: Preheat & Prep Pan
First things first, let’s get our oven preheated to 375 degrees Fahrenheit (190 degrees Celsius). While that’s warming up, grab a baking dish. A 9×13 inch dish works perfectly for this amount, but an oval gratin dish or even a cast-iron skillet would be gorgeous. Lightly butter or grease your chosen dish. This just ensures everything releases beautifully later.
Step 2: Sauté the Onions
In a large skillet or Dutch oven over medium heat, melt the 4 tablespoons of butter. Once it’s shimmering, add your thinly sliced onions. Now, here’s where patience comes in. We’re not trying to brown them hard here, but we want them to soften and start to become translucent. This usually takes about 10-15 minutes. Stir them occasionally so they don’t stick. You want them tender and starting to smell sweet. This step is crucial for developing that deep onion flavor.
Step 3: Make the Creamy Base
Once the onions have softened, sprinkle the 2 tablespoons of flour over them. Stir well to coat the onions and cook for about a minute. This little step helps to cook out the raw flour taste. Now, slowly pour in the 2 cups of milk while stirring constantly. Keep stirring until the mixture begins to thicken. Next, stir in the 1/2 cup of heavy cream, 1 teaspoon of salt, 1/2 teaspoon of Black Pepper, and that tiny pinch of nutmeg if you’re using it. Let it simmer gently for another couple of minutes until it’s nice and creamy, like a thin gravy.
Step 4: Combine and Season
Now, gently pour the creamy onion mixture into your prepared baking dish. Give it a little stir to distribute the onions evenly. Taste a tiny bit of the sauce (carefully, it’s hot!) and adjust salt and pepper if needed. Remember, the onions will release more moisture and flavor as they bake, so you want it seasoned well now.
Step 5: Add Topping (Optional)
If you’re going for that extra bit of texture and flavor, mix the grated Parmesan cheese and panko breadcrumbs together in a small bowl. Sprinkle this mixture evenly over the top of the onions. This creates a lovely golden crust that’s just irresistible.
Step 6: Bake to Perfection
Pop the baking dish into your preheated oven. Bake for about 45-55 minutes. You’re looking for the topping (if using) to be golden brown and bubbly around the edges. The onions underneath should be incredibly tender, and the sauce should be thick and luscious. If the top is browning too quickly before the inside is cooked, you can loosely tent it with foil for the last 15-20 minutes.
“The Tennessee onions recipe turned out amazing. My kids asked for seconds. Saving this one!”
Step 7: Rest and Serve
This is probably the hardest part: letting it rest! Once it comes out of the oven, let it sit for about 10 minutes before serving. This allows the sauce to set up a bit, making it easier to serve and preventing you from burning your tongue (trust me, I’ve done it!).
Step 8: Slice and Enjoy
Carefully slice into the Tennessee onions recipe, serving generous portions. The aroma alone will have everyone at the table eagerly anticipating their plate!
What to Serve It With
This Tennessee onions recipe is so wonderfully versatile; it genuinely elevates just about any meal. For breakfast or brunch, it’s fantastic alongside a stack of fluffy pancakes or waffles. Imagine savory and sweet working together – pure bliss! We often have it with scrambled eggs or a simple omelet for a hearty start to the weekend. If you’re serving it for a special brunch, try pairing it with some smoked salmon or a crusty baguette for dipping. For a more elegant dinner, this dish is a natural partner for roasted meats. Think perfectly seared steak, tender pork loin, or a beautifully roasted chicken. The richness of the onions complements the savory notes of the meat perfectly. It’s also surprisingly good with lamb! As a dessert? Well, not technically, but it satisfies a sweet and savory craving in a way that feels indulgent, especially after a lighter main course. I’ve even had it with a simple side salad and a glass of crisp white wine for a lovely light dinner. For those cozy, stay-at-home nights, it’s wonderful alongside a hearty shepherd’s pie or even just with a big bowl of Mashed Potatoes. It’s a dish that brings people together, and my family has its own traditions – we always make it for Thanksgiving and Christmas, and the leftovers (if there are any!) are my husband’s favorite midnight snack.
Top Tips for Perfecting Your [Recipe Name]
I’ve made this Tennessee onions recipe more times than I can count, and over the years, I’ve picked up a few tricks that make it even better. First, about the ONIONS: slice them consistently. If they’re all the same thickness, they’ll cook evenly. I really do love using a mandoline if you have one, just be super careful! If you don’t, a sharp knife and a little patience will do. Don’t rush the softening process; let them get truly tender and sweet before adding the flour. For the MIXING, it’s key to add the milk and cream slowly while whisking. This prevents lumps and creates that smooth, luscious sauce. Don’t overcook the sauce once the milk and cream are in; you just want it to thicken slightly. The baking is where the real transformation happens. Make sure your oven is properly preheated. If your onions seem a bit dry during baking, you can carefully add a splash more milk or cream. For the TOPPING, if you want it extra crispy, I like to add the breadcrumbs about 15-20 minutes before the end of the baking time. This way, they get perfectly golden without burning. If you’re not a fan of Parmesan, a good sharp cheddar or Gruyere also works beautifully here! I’ve experimented with INGREDIENT SWAPS quite a bit. For instance, a touch of Dijon mustard stirred into the creamy base adds a lovely tang. Some people add a splash of White Wine to the onions while they’re sautéing for an extra layer of flavor, which is lovely too. And while whole milk is best, I’ve found that a mix of milk and half-and-half works wonders if you want it even richer. For BAKING TIPS, remember that ovens can vary. Keep an eye on your dish, especially if it’s your first time making it. If the edges are bubbling vigorously and the center isn’t quite set, you can always lower the oven temperature slightly for the last 10-15 minutes. The resting period after baking is non-negotiable! It truly allows the flavors to meld and the texture to become perfect. I learned this lesson the hard way after serving it too soon and having a runnier sauce than I intended.
Storing and Reheating Tips
One of the best things about this Tennessee onions recipe is how well it stores and reheats. If you have any leftovers (which is rare in my house!), you can store them in an airtight container in the refrigerator for up to 3-4 days. The flavors actually tend to deepen overnight, which is pretty neat! For the best quality, I try to let it cool completely before covering it and popping it in the fridge. When you’re ready to reheat, there are a few ways to go. The easiest is in the microwave, but I find the oven gives a much better texture. Transfer the leftovers to an oven-safe dish, cover loosely with foil, and reheat at around 325 degrees Fahrenheit (160 degrees Celsius) for 20-30 minutes, or until heated through. You might need to add a tiny splash of milk or cream if it seems a little dry after refrigerating. For the topping, if you want to revive its crispness, you can remove the foil for the last 5-10 minutes of reheating. If you’re really thinking ahead, this dish freezes surprisingly well! Let it cool completely, then transfer to freezer-safe containers. It should keep in the freezer for up to 2-3 months. Thaw it overnight in the refrigerator before reheating as described above. I’ve found that for freezing, it’s best if you don’t add the breadcrumb topping until *after* reheating, just before serving, to ensure maximum crunch. Just remember, the creamy base is what makes it so delicious, so treat it gently when storing and reheating to preserve that wonderful texture.
Frequently Asked Questions
Final Thoughts
Honestly, making this Tennessee onions recipe is more than just cooking; it’s about creating a comforting, delicious experience. It’s a dish that brings smiles to faces, sparks conversation, and truly nourishes the soul. It reminds me of why I love being in the kitchen – the magic of transforming simple ingredients into something extraordinary. If you love onions, if you love creamy, savory Comfort Food, or if you’re just looking for a side dish that will absolutely wow your guests, you *have* to give this a try. It’s a recipe that I’m so proud to share, and I truly hope it becomes a favorite in your home too. I can’t wait to hear what you think! Feel free to leave a comment below with your thoughts, any variations you tried, or how your family enjoyed it. And if you snap a picture of your beautiful dish, I’d love to see it – tag me on social media!
Tennessee onions recipe
Ingredients
Main Ingredients
- 4 large Sweet onions
- 0.5 cup Butter
- 0.25 cup Brown sugar
- 0.25 teaspoon Salt
- 0.125 teaspoon Black pepper
Instructions
Preparation Steps
- Preheat your oven to 375°F (190°C).
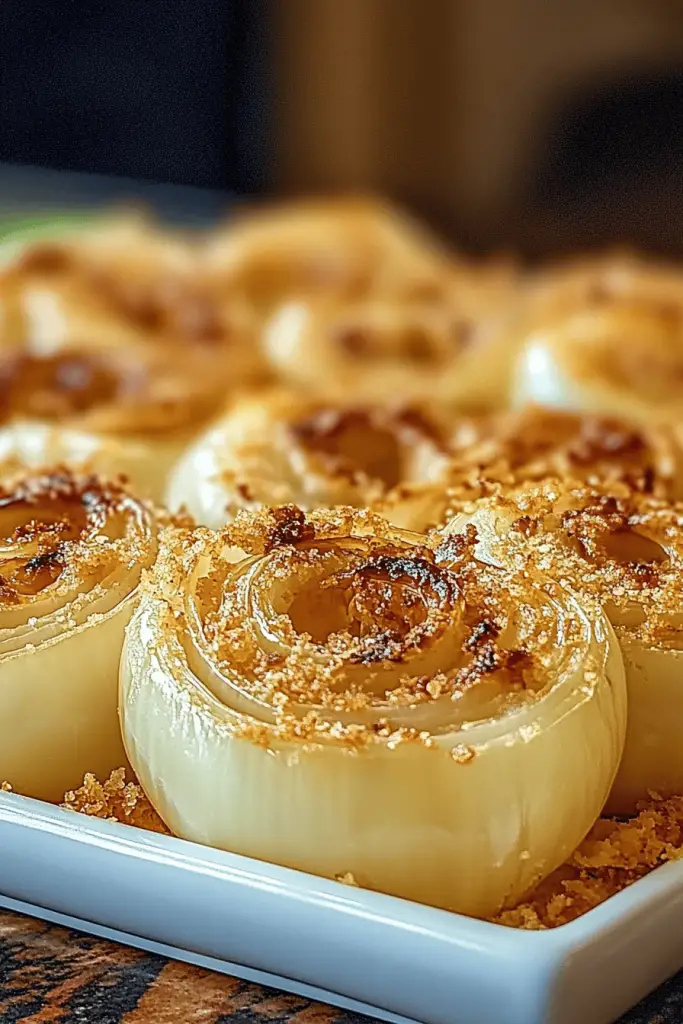
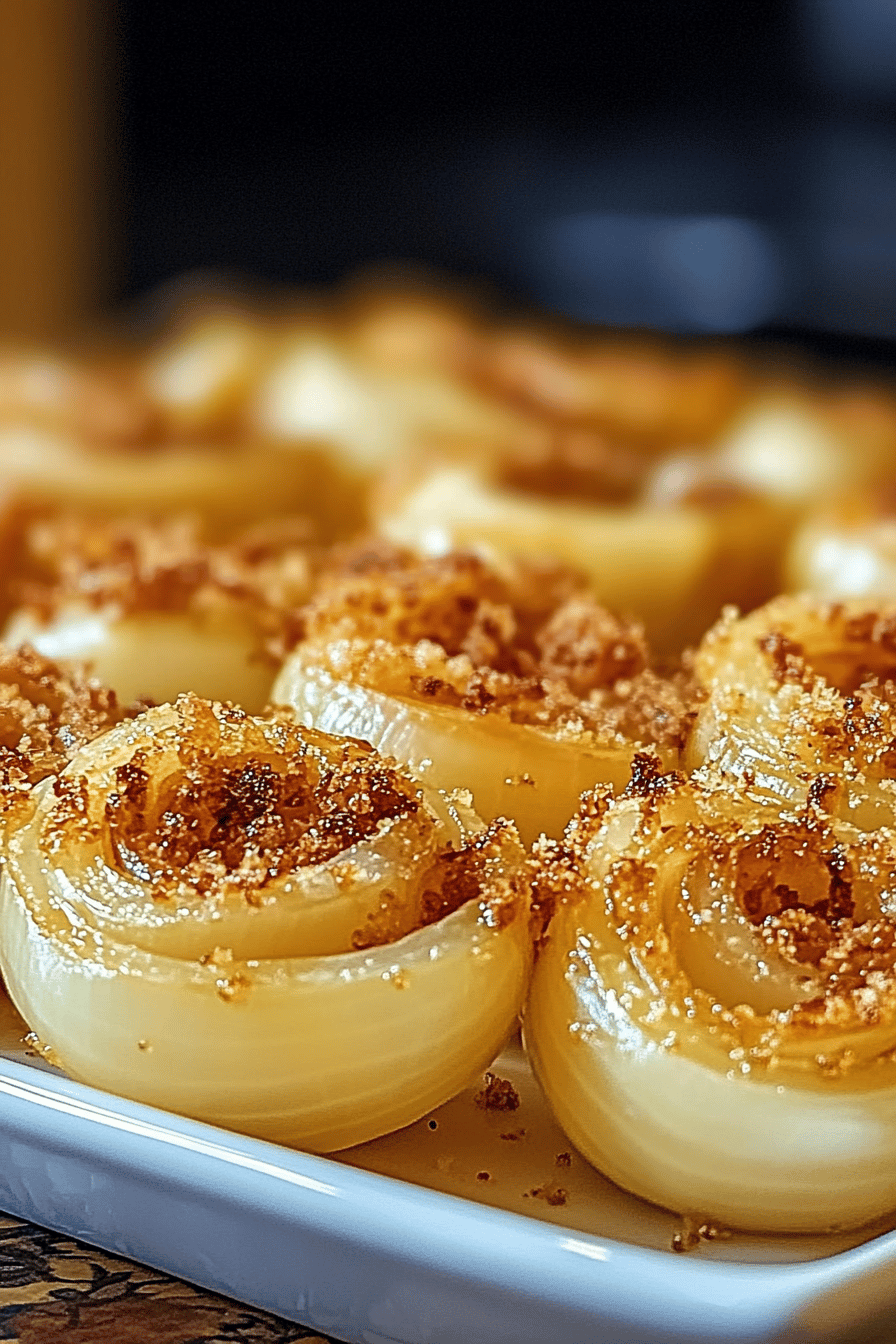
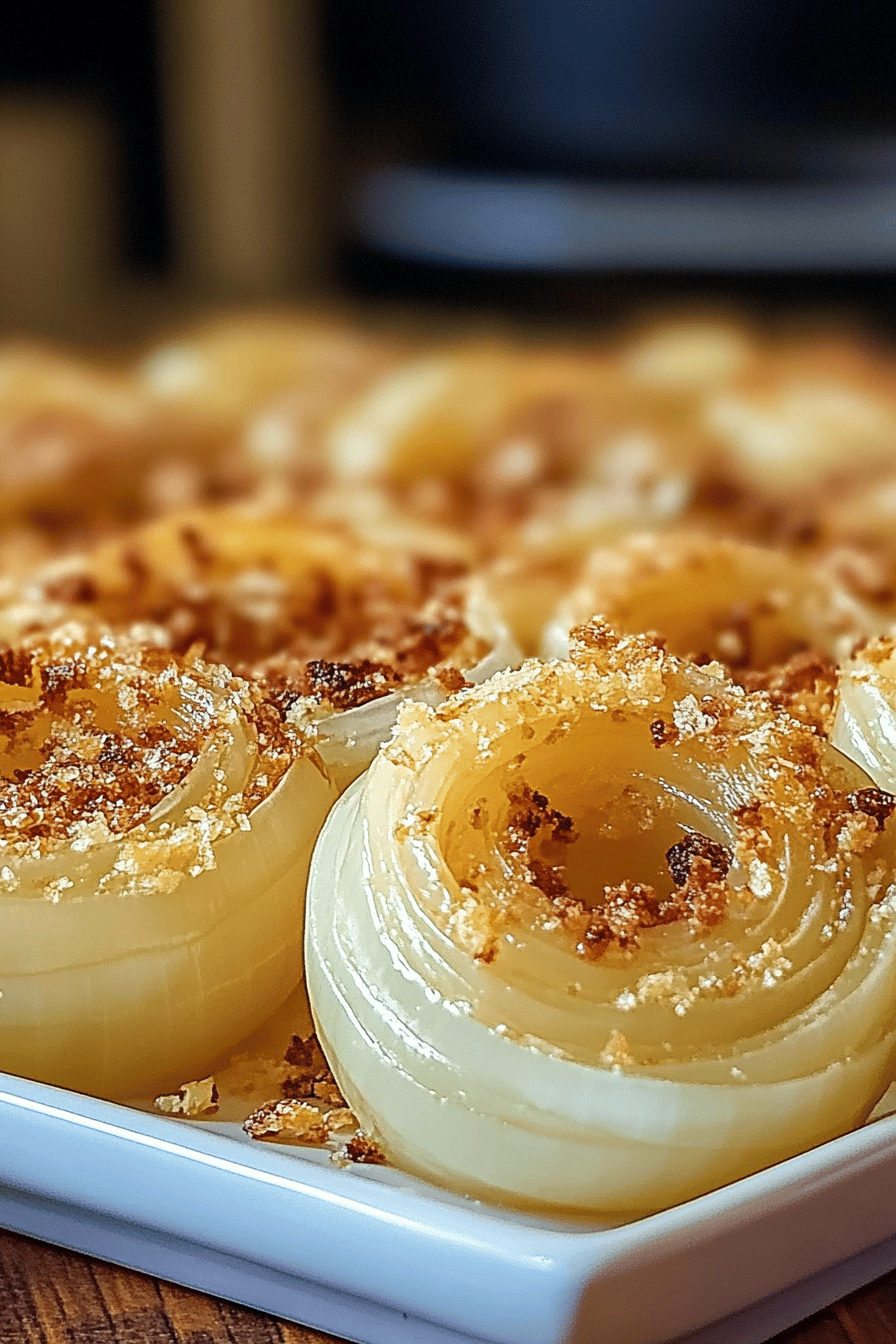
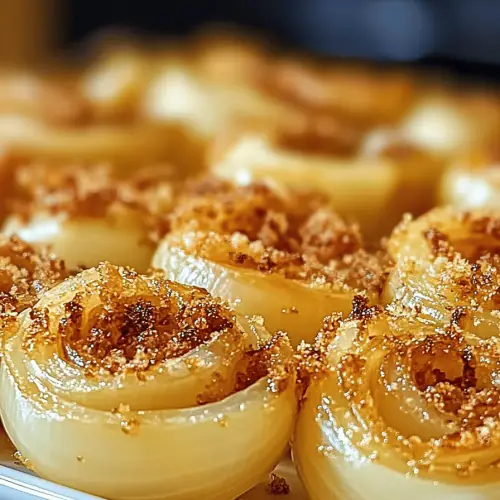
- Wash and peel the onions. Slice off the top and bottom of each onion, then cut them in half lengthwise.
- Place the onion halves cut-side down in a baking dish.
- In a small bowl, melt the butter. Stir in the brown sugar, salt, and pepper.
- Spoon the butter mixture evenly over the cut surfaces of the onions.
- Cover the baking dish tightly with foil.
- Bake for 25 minutes, or until the onions are tender.
- Remove the foil and bake for an additional 5-10 minutes, or until slightly caramelized.
- Serve hot.


