
You know those days, right? The ones where payday feels like a distant dream, but your sweet tooth is staging a full-on rebellion? Or maybe it’s just a Tuesday, and you need a little something to lift your spirits. This is precisely when my Payday Truffles come to the rescue. Seriously, they’re my secret weapon. I remember the first time I whipped these up – it was after a particularly long week, and I had absolutely zero energy to bake anything remotely complicated. I was staring into my pantry, hoping for a miracle, and stumbled upon some forgotten Peanut Butter and chocolate chips. Fast forward about 30 minutes, and I had these little gems. They’re not exactly like the candy bar, but they capture that incredible salty-sweet, peanut-buttery goodness in a way that’s just… pure joy. Think of them as a sophisticated, homemade version of that nostalgic candy craving, but way easier and so much more satisfying. If you’ve ever loved a no-bake cookie or a simple chocolate bark, you’re going to fall head over heels for these Payday Truffles.
Thank you for reading this post, don't forget to subscribe!What is a payday truffle?
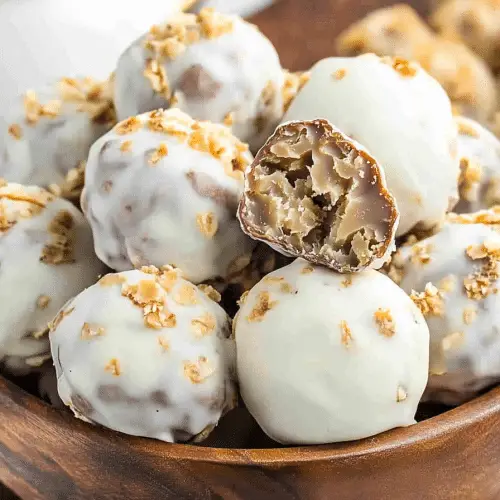
So, what exactly are these magical little bites? At their heart, Payday Truffles are a no-bake confection that beautifully marries the classic flavors of peanut butter and chocolate. The name might make you think of the actual Payday candy bar, and while they share that irresistible salty-sweet peanut butter profile, these truffles are their own delightful entity. They’re essentially a rich, Creamy Peanut Butter mixture that’s been rolled into balls and then enrobed in a smooth, decadent chocolate coating. It’s that perfect balance – the creamy, slightly salty peanut butter center that melts in your mouth, contrasted with the crisp, sweet chocolate shell. It’s the kind of treat that feels incredibly indulgent but is surprisingly simple to pull off. It’s like a hug in dessert form, perfect for when you need a little pick-me-up without the fuss of preheating ovens or complicated steps. They’re so straightforward, even a beginner can nail them on the first try!
Why you’ll love this recipe?
Honestly, the list of reasons why I adore this Payday Truffles recipe is practically endless, but let me try to narrow it down for you. First and foremost, the FLAVOR! Oh my goodness, it’s a symphony. You get that deep, roasted Peanut Butter flavor that’s just so comforting, perfectly complemented by the rich chocolate. And here’s the secret kicker: a touch of salt in the peanut butter mixture. It elevates everything, creating that irresistible salty-sweet dance that keeps you coming back for more. It’s a flavor combination that just works, and it works beautifully. Then there’s the SIMPLICITY. This is a no-bake wonder, folks! No oven required, no complex techniques. You can have these ready in less time than it takes to decide what to watch on TV. It’s the ultimate lifesaver for busy weeks, unexpected guests, or those late-night cravings when the thought of baking a whole cake feels utterly overwhelming. And let’s talk COST-EFFICIENCY. The ingredients are pantry staples for many of us – peanut butter, powdered sugar, a bit of butter, chocolate chips. You don’t need fancy, expensive items to create something truly special. It proves that deliciousness doesn’t have to break the bank. Finally, the VERSATILITY is incredible. While they’re fantastic on their own, you can totally customize them. Add some chopped peanuts for extra crunch, a pinch of sea salt on top for that artisanal touch, or even a swirl of white chocolate. They’re perfect for a quick treat, an impressive-looking dessert for a potluck, or even a sweet little gift. What I love most about this recipe is that it delivers maximum impact with minimal effort. It’s that perfect sweet spot between something that tastes like you spent hours on it and something you can whip up in a flash. If you enjoy simple chocolate-covered treats or things like my easy Fudgey Brownies, you’ll find yourself making these Payday Truffles again and again.
How do I make a batch of Payday Truffles?
Quick Overview
The beauty of these Payday Truffles lies in their straightforward, no-bake approach. You’ll simply mix together a creamy Peanut Butter base, shape it into balls, and then dip them in melted chocolate. It’s a three-part harmony of deliciousness: mix, roll, dip! This method ensures a wonderfully smooth and decadent truffle every time, with minimal fuss and maximum reward. You can have these cooling on parchment paper in under an hour, proving that incredible flavor can come from the simplest of processes.
Ingredients
For the Peanut Butter Centers: For the Peanut Butter Centers: For the Peanut Butter
2 cups creamy peanut butter (use your favorite, but one that’s not too oily works best)
1/2 cup unsalted butter, softened (this makes it nice and smooth!)
3 cups powdered sugar, sifted (sifting is key to avoid lumps!)
1 teaspoon vanilla extract
1/2 teaspoon salt (adjust to your taste, especially if your peanut butter is unsalted)
For the Chocolate Coating:
2 cups semi-sweet chocolate chips (or milk chocolate if you prefer)
1 tablespoon coconut oil or vegetable shortening (this helps the chocolate melt smoothly and sets nicely)
Step-by-Step Instructions
Step 1: Prepare Your Workstation
First things first, let’s get organized. Line a baking sheet or a large platter with parchment paper or wax paper. This is crucial because it prevents the truffles from sticking as they set. You want a nice, clean surface for them to chill on. Have all your ingredients measured out and ready to go. Trust me, when you’re working with a quick-setting mixture, having everything at your fingertips makes the process so much smoother. It’s like setting up your station before a big cooking project – it just makes life easier!
“The Payday Truffles turned out amazing. My kids asked for seconds. Saving this one!”
Step 2: Mix the Peanut Butter Base
In a large mixing bowl, combine the creamy peanut butter and the softened unsalted butter. Cream them together with an electric mixer (or a sturdy whisk if you’re feeling ambitious!) until they’re smooth and well combined. This is where the magic starts to happen, creating that rich, luscious foundation. Next, gradually add the sifted powdered sugar, about a cup at a time, mixing on low speed until it’s incorporated. You want a dough-like consistency that’s firm enough to handle. Finally, stir in the vanilla extract and salt. Give it a good mix until everything is perfectly uniform. The mixture should be thick but pliable, almost like cookie dough.
Step 3: Shape the Truffles
Now for the fun part: rolling! Take about a tablespoon of the peanut butter mixture and roll it between your palms to form a smooth ball. If the mixture feels a bit too sticky, you can lightly dampen your hands with water or even dust them with a tiny bit of powdered sugar. Aim for consistency in size so they all bake (well, chill!) evenly and look uniform when coated. Place each rolled ball onto your prepared parchment-lined sheet. I usually aim for about 1 to 1.5 inches in diameter. This is where you can really feel the texture change as you work the dough. It gets smoother and firmer with each roll.
Step 4: Chill the Centers
Once all your peanut butter balls are rolled and lined up on the parchment paper, it’s time for a quick chill. Pop the entire baking sheet into the refrigerator for at least 20-30 minutes, or until the balls are firm to the touch. This step is super important because it helps the truffles hold their shape when you dip them in the warm chocolate. If they’re too soft, they’ll just fall apart in the chocolate bath! While they’re chilling, you can get your chocolate ready.
Step 5: Melt the Chocolate Coating
In a microwave-safe bowl, combine the semi-sweet chocolate chips and the coconut oil (or shortening). Microwave in 30-second intervals, stirring well after each interval, until the chocolate is completely melted and smooth. Be patient here; you don’t want to scorch the chocolate! Alternatively, you can use a double boiler method if you prefer. The coconut oil or shortening is really helpful here; it makes the chocolate silky smooth and gives it a nice sheen once it sets, preventing it from becoming brittle.
Step 6: Dip the Truffles
This is where your chilled peanut butter balls get their glamorous makeover. Take one firm peanut butter ball and drop it into the melted chocolate. Use a fork or a dipping tool to gently coat the ball completely, ensuring no peanut butter peeks through. Lift the truffle out of the chocolate, allowing any excess to drip back into the bowl. You can gently tap the fork on the side of the bowl to help with this. Then, carefully place the coated truffle back onto the parchment-lined sheet. If you want to get fancy, you can use a toothpick to drag lines through the wet chocolate for a decorative swirl pattern before it sets.
Step 7: Let Them Set
Once all your truffles are coated and back on the parchment paper, let them sit at room temperature for about 10-15 minutes, or until the chocolate coating has started to firm up. Then, you can transfer the baking sheet to the refrigerator for another 15-20 minutes, or until the chocolate is completely set and hardened. This ensures they have a nice, crisp shell. You’ll see the chocolate transform from a glossy liquid to a solid, matte finish. Resist the urge to taste one straight away – the patience is worth it!
Step 8: Finishing Touches (Optional but Recommended!)
If you want to add that extra something, this is the time! While the chocolate is still slightly soft on some truffles, you can sprinkle them with a tiny pinch of sea salt, some chopped peanuts, or even drizzle them with a bit of melted white chocolate for contrast. This is where you can really make them your own and give them that professional, store-bought look. My kids love when I add a few mini peanut butter cups chopped up on top!
Step 9: Serve and Enjoy!
Once the chocolate is completely set, your Payday Truffles are ready to be enjoyed! They’re best served at room temperature or slightly chilled. Arrange them on a pretty platter and watch them disappear. Seriously, they go so fast! I usually make a double batch because they’re always requested for snacks, parties, and just because.
“I don’t know if I’ve ever eaten a better Payday Truffles. The rub alone is wonderful, but the sauce??? Over the top!”
What to Serve It With
These Payday Truffles are so versatile, they honestly fit into almost any occasion! They’re not just a standalone treat; they can elevate a whole spread. For BREAKFAST (yes, I said breakfast!), I love having one or two with a strong cup of coffee. It’s like a little sweet indulgence to start the day that feels way more special than just cereal. The coffee’s richness really cuts through the sweetness beautifully. For BRUNCH, they become little stars. I’ll arrange them on a tiered stand with fruit salads, pastries, and maybe some mini quiches. They add a touch of decadence without being too heavy. They look particularly elegant dusted with a little cocoa powder or a few extra chopped peanuts. As a DESSERT, they’re fantastic after dinner. I’ll serve them alongside a cheese board, with a glass of dessert wine or a rich espresso. They’re the perfect bite-sized ending to a meal. And for COZY SNACKS? This is their natural habitat! They’re amazing with a tall glass of cold milk, or even alongside a scoop of vanilla ice cream if you’re feeling really indulgent. My family has a tradition of having these with hot cocoa on movie nights during the winter. It’s pure comfort food bliss. They’re also fantastic tucked into lunchboxes as a surprise treat or shared around a bonfire with friends. They just bring a smile to everyone’s face, no matter the setting!
Top Tips for Perfecting Your Payday Truffles
Over the years, I’ve learned a few little tricks that make these Payday Truffles absolutely perfect every single time. So, let’s dive into some expert advice! First, regarding the PEANUT BUTTER. Use a good quality, creamy peanut butter that you love the taste of. Avoid natural peanut butters that have a lot of oil separation, as they can make the mixture too greasy. If your peanut butter is very stiff, let it sit at room temperature for a bit before mixing. The butter helps to smooth things out, but starting with a good base is essential. For MIXING ADVICE, don’t overmix once you add the powdered sugar. You want the mixture to come together smoothly, but overmixing can lead to a tough texture. Stop as soon as it’s well combined and forms a cohesive dough. When it comes to SHAPING, the trick is consistency. Try to make all your balls roughly the same size so they melt and set evenly. If the mixture is sticking to your hands, a tiny bit of water or powdered sugar can be your best friend. For the CHOCOLATE COATING, the coconut oil or shortening is your secret weapon. It’s not strictly essential, but it makes the chocolate much smoother and easier to work with, and it helps it set to a lovely, firm finish. If you don’t have it, just use the chocolate chips alone, but you might need to melt it a bit longer. When it comes to DIPPING, using a fork is the easiest way for most people. Let excess chocolate drip off for a few seconds before placing it back on the parchment. For MELTING, be super patient. Microwaving in short bursts and stirring is the safest bet to avoid burning. Burnt chocolate is a tragedy! If you’re feeling adventurous with SWIRL CUSTOMIZATION, try drizzling contrasting chocolate (like white chocolate on dark) over the top using a piping bag or even a fork. For ingredient swaps, I’ve tested this with almond butter and it works beautifully, though the flavor will be slightly different. You can also use milk chocolate chips for a sweeter coating, or even dark chocolate for a more intense flavor. For BAKING TIPS (even though they’re no-bake!), think of the chilling and setting steps as their ‘baking’ time. Ensure your fridge is cold enough to firm them up properly. A properly chilled truffle will yield a much cleaner chocolate dip. And finally, for GLAZE VARIATIONS (though we’re not glazing here, think of decorative drizzles), experiment with different flavors of candy melts or even mix a tiny bit of food coloring into white chocolate for a fun pop of color. These little tweaks can turn a simple treat into something truly spectacular!
Storing and Reheating Tips
Storing these delightful Payday Truffles is thankfully quite straightforward, and they tend to stay fresh for a good while if handled correctly. For ROOM TEMPERATURE storage, if they’re fully set and your house isn’t too warm, they can last for about 3-4 days. Keep them in an airtight container, making sure they aren’t squished together, perhaps with a layer of parchment paper between them. REFRIGERATOR STORAGE is your best bet for longer freshness. They’ll keep beautifully in an airtight container in the fridge for up to two weeks. They’ll be firmer straight from the fridge, which some people actually prefer! Just let them sit out for about 10-15 minutes before serving to take the chill off. For FREEZER INSTRUCTIONS, these truffles are surprisingly freezer-friendly. You can freeze them for up to 2-3 months. The best way to do this is to place them in a single layer on a baking sheet and freeze until solid, then transfer them to a freezer-safe airtight container or a heavy-duty zip-top bag. Thaw them overnight in the refrigerator before enjoying. When it comes to GLAZE TIMING ADVICE (or decorative drizzles), it’s best to add any extra decorative drizzles or toppings *after* the main chocolate coating has set, and then let that final layer set up before storing. If you add drizzles while the base is still wet, they might smudge. For any storage, the key is that AIRTIGHT CONTAINER to prevent them from drying out or absorbing any unwanted odors from the fridge. And always check for quality indicators: they should smell fresh, the chocolate should be firm, and the peanut butter center should still be moist and delicious!
Frequently Asked Questions
Final Thoughts
So there you have it – my recipe for these absolutely delightful Payday Truffles! I truly believe this is one of those recipes that everyone should have in their back pocket. They’re a testament to the fact that you don’t need a lot of time or complicated steps to create something incredibly delicious and satisfying. The way the creamy, salty peanut butter center meets that crisp, sweet chocolate shell is just pure magic. It’s the perfect treat for those “just because” moments, a welcome addition to any party spread, or frankly, a little reward for making it through the week. If you love easy, no-bake desserts that pack a flavor punch, you absolutely have to give these a try. They’re a favorite in my house, and I have a feeling they’ll become a favorite in yours too! I’m already planning my next batch, maybe with some added toasted coconut this time! For those of you who enjoy these, you might also want to check out my recipe for No-Bake Peanut Butter Bars or my ultimate Chocolate Lava Cakes for more sweet inspiration. I can’t wait to hear how your Payday Truffles turn out! Please leave a comment below and let me know your favorite way to enjoy them, or if you added any fun twists. Happy truffle-making!
Payday Truffles
Ingredients
Main Ingredients
- 453.592 g saltine crackers crushed
- 226.796 g butter melted
- 240 ml light corn syrup
- 300 g peanut butter creamy
- 300 g chocolate chips semisweet
- 100 g peanuts chopped, salted
Instructions
Preparation Steps
- In a large bowl, combine the crushed saltine crackers, melted butter, and light corn syrup. Mix well until everything is evenly moistened.
- Stir in the peanut butter until thoroughly combined. The mixture should be thick and sticky.
- Gently fold in the chopped salted peanuts.
- Roll the mixture into small balls, about 1-inch in diameter. Place them on a parchment-lined baking sheet.
- Melt the chocolate chips in a microwave-safe bowl in 30-second intervals, stirring in between, until smooth.
- Dip each truffle into the melted chocolate, coating it completely. Return to the parchment-lined baking sheet.
- Allow the chocolate to set at room temperature, or refrigerate for faster setting. Serve and enjoy!


