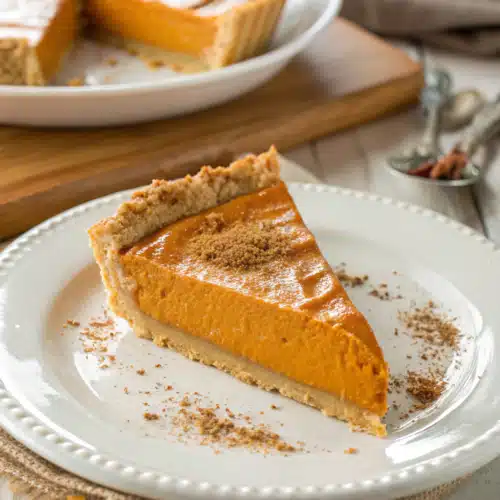
No Bake Pumpkin Pie That Melts in Your Mouth
Picture this: it’s a crisp autumn evening, the kind where the air smells like cinnamon and woodsmoke. You’re hosting friends for dinner, and you want something warm, cozy, and undeniably delicious—but you don’t have hours to spend in the kitchen. Enter no bake Pumpkin Pie. This recipe isn’t just a shortcut; it’s a revelation. With its creamy, spiced filling nestled inside a buttery graham cracker crust, all set in under an hour (and chilling time doesn’t count!), it’s become my go-to dessert for everything from Thanksgiving prep to spontaneous sweet cravings. What makes this version truly special? It’s light yet decadent, deeply flavorful without being overwhelming, and—best of all—it’s foolproof.
Thank you for reading this post, don't forget to subscribe!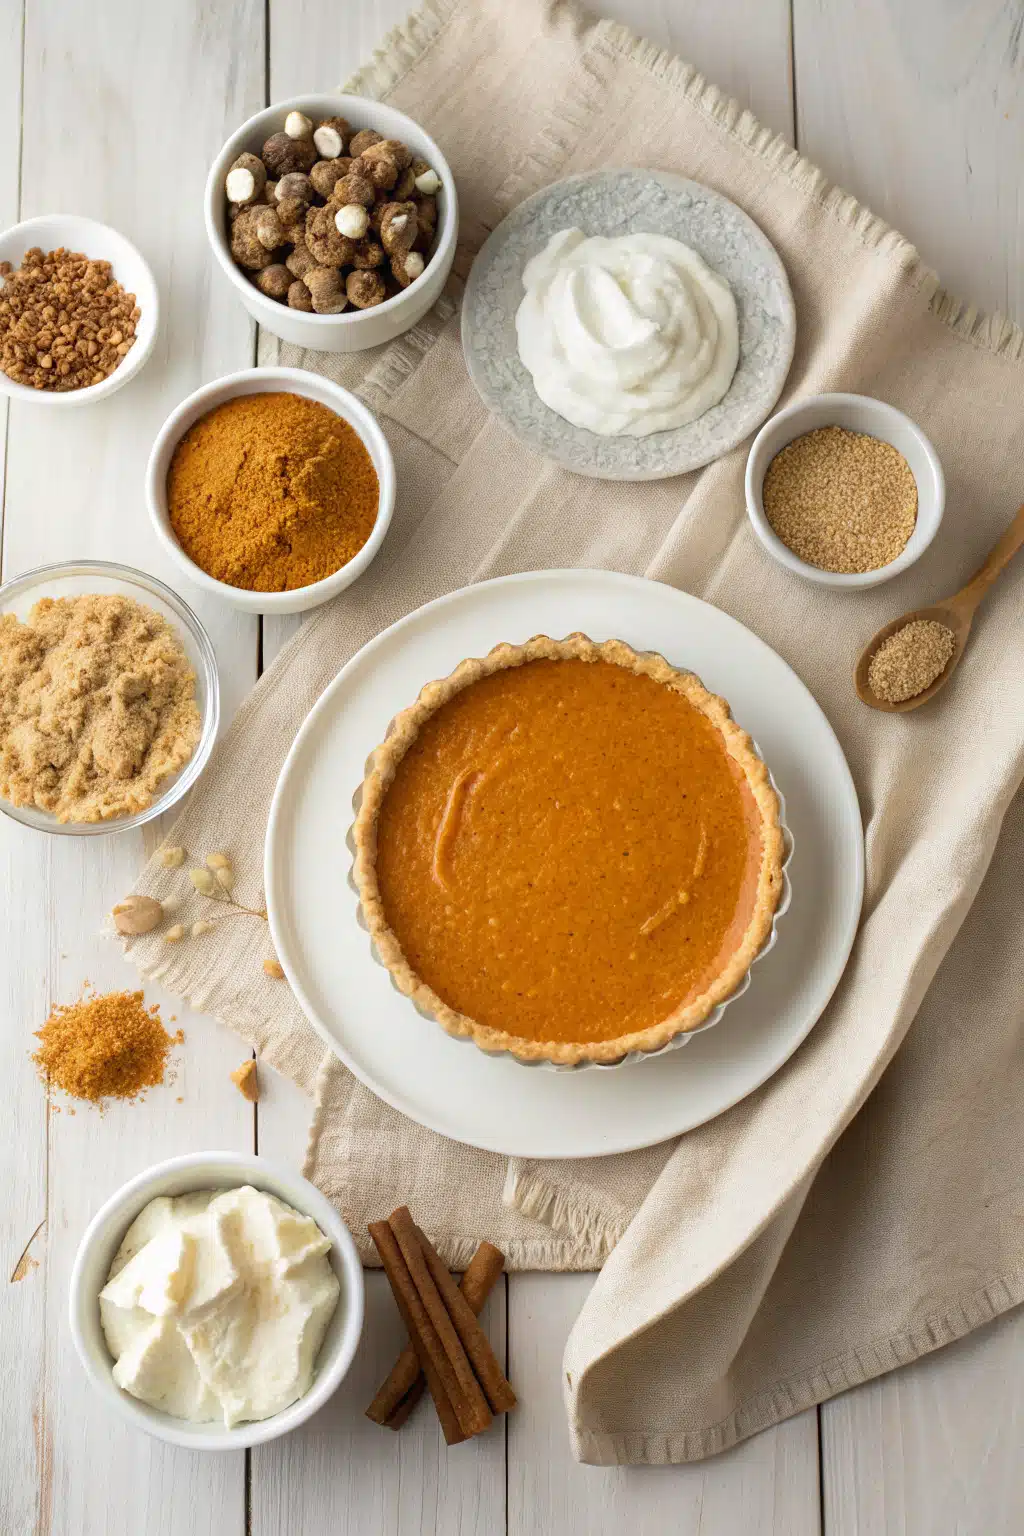
What Is No Bake Pumpkin Pie?
No bake pumpkin pie is exactly what it sounds like: a classic pumpkin pie that skips the oven entirely. Instead of baking, the filling sets by thickening with gelatin or Cream Cheese, creating a silky-smooth texture that’s firm enough to slice but melts luxuriously on your tongue. Unlike traditional pumpkin pies that rely on eggs and long bake times, this version uses simple ingredients like canned pumpkin puree, condensed milk, vanilla, and warming spices such as cinnamon, nutmeg, and cloves. The result? A dessert that feels indulgent but is surprisingly easy to whip up—even if you’re not a seasoned baker. It’s perfect for those who love pumpkin flavor but want to avoid the hassle of preheating ovens or monitoring custard-like fillings.
Why You’ll Love This Recipe
If you’ve ever made pumpkin pie before, you know how labor-intensive it can be: rolling out dough, blind baking crusts, watching over bubbling edges… ugh. But this no bake version? It’s a game-changer. First off, there’s zero chance of cracking the crust or burning the edges—because there’s no oven involved! Second, the flavors are rich and balanced without needing extra sugar. The Condensed Milk adds natural sweetness while keeping everything ultra-creamy. And let’s talk about versatility: top it with whipped cream, a drizzle of caramel, or even some toasted pecans, and it transforms into something restaurant-worthy. Plus, it keeps beautifully in the fridge for days, making it ideal for meal prep or last-minute guests. Whether you’re new to baking or just short on time, this pie delivers satisfaction every single time.
How to Make No Bake Pumpkin Pie
Quick Overview
This recipe comes together in about 20 minutes of active prep, then requires just 4–6 hours to chill (though I often leave it overnight for best results). You’ll need a 9-inch pie dish, a food processor (or mixer), and basic pantry staples. The key lies in balancing sweet, spice, and creaminess so each bite feels like autumn comfort. Once assembled, the pie sets into a firm-yet-jiggly consistency that holds its shape beautifully when sliced. Trust me, after one taste, you’ll wonder why anyone ever bakes Pumpkin Pie!
Ingredients
- 1 ½ cups graham cracker crumbs (about 12 full crackers)
- ¼ cup granulated sugar
- 6 tablespoons melted unsalted butter
- 1 teaspoon ground cinnamon
- ¼ teaspoon ground nutmeg
- Pinch of salt
- 1 (15 oz) can pumpkin puree (not pumpkin pie filling!)
- 1 (14 oz) can sweetened condensed milk
- 2 large egg yolks
- 1 teaspoon vanilla extract
- ½ teaspoon ground ginger (optional but recommended)
- Whipped cream, for serving
“The no-bake pumpkin pie turned out amazing. My kids asked for seconds. Saving this one!”
Step-by-Step Instructions
Step 1: Preheat & Prep Pan
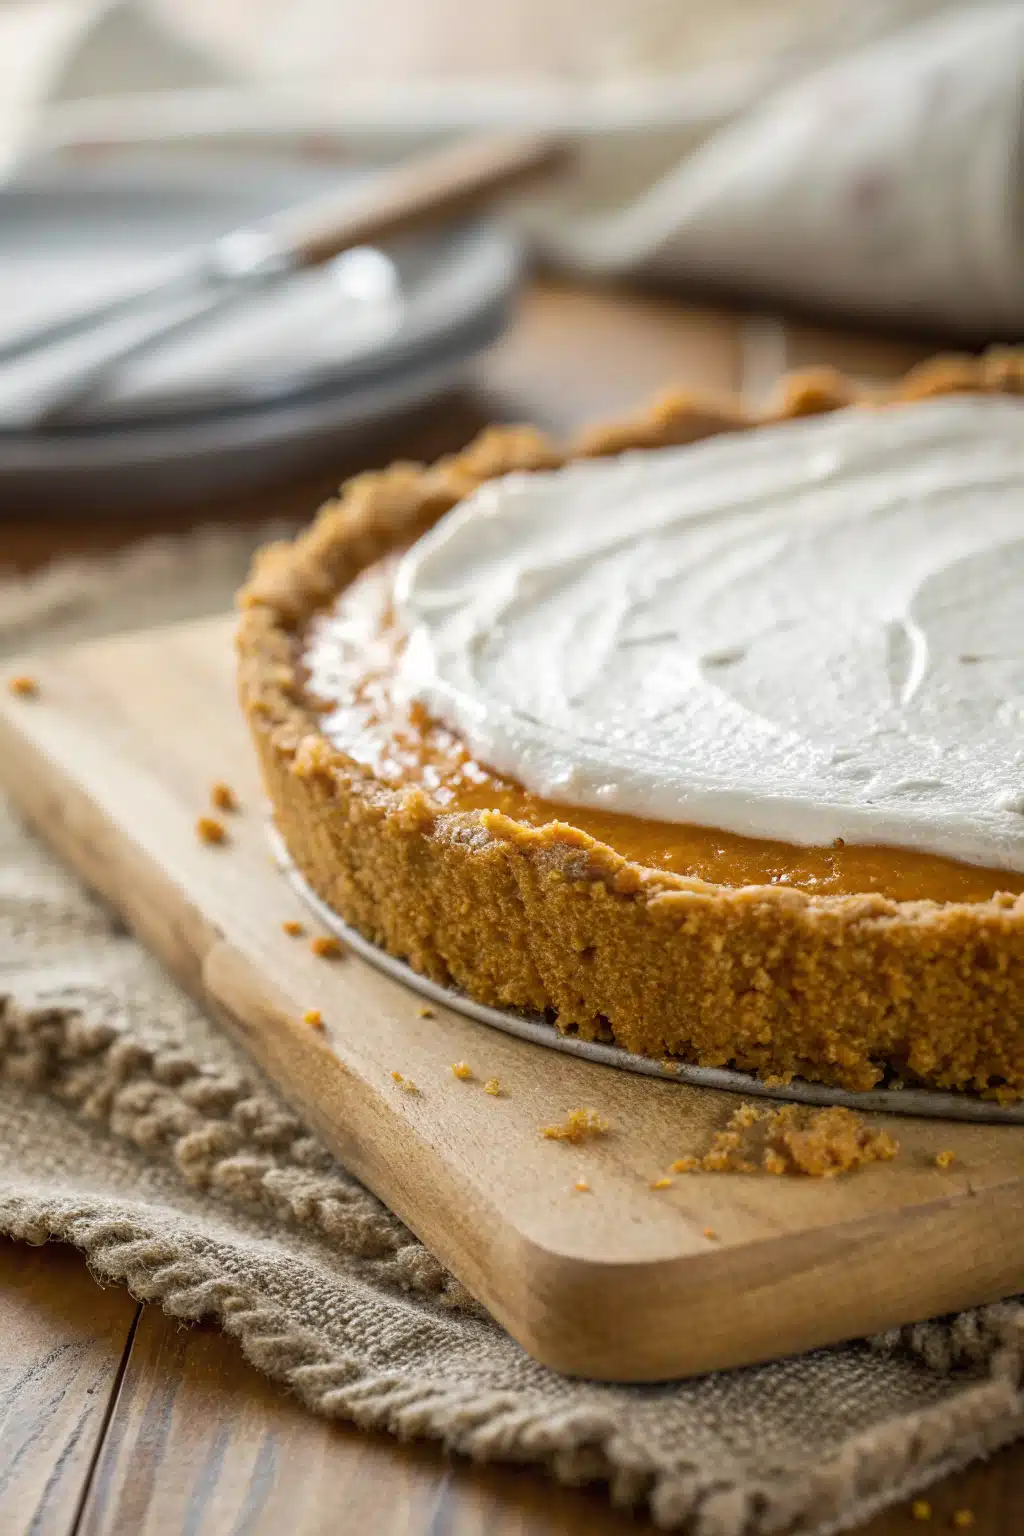
Skip preheating! That’s the beauty of no bake. While your pie dish gets ready, mix Graham Cracker crumbs, sugar, cinnamon, nutmeg, and salt in a bowl. Slowly pour in melted butter and stir until everything sticks together like wet sand. Press firmly into a 9-inch pie dish, making sure the bottom and sides are evenly coated—about ¼ inch thick works perfectly. Pop it into the freezer while you make the filling; this helps the crust hold its shape.
Step 2: Whisk Filling
In a large bowl, whisk pumpkin puree, condensed milk, egg yolks, and vanilla until completely smooth. Add ginger if using—it pairs wonderfully with the other spices. Taste the mixture (yes, really!) and adjust sweetness if needed, though most brands of condensed milk are plenty sweet already.
Step 3: Pour & Chill
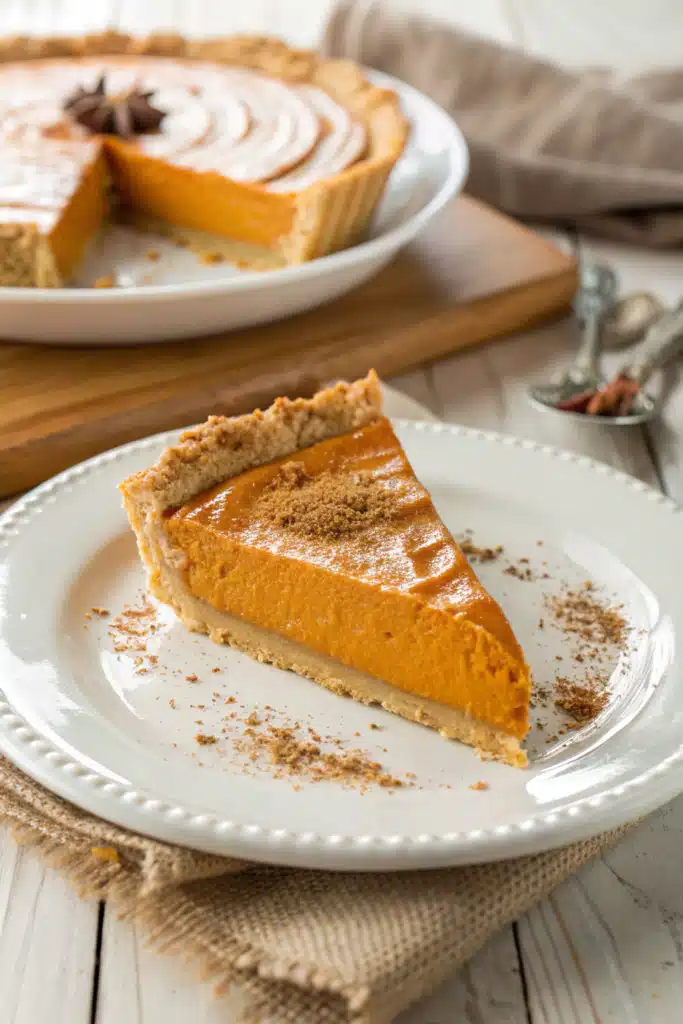
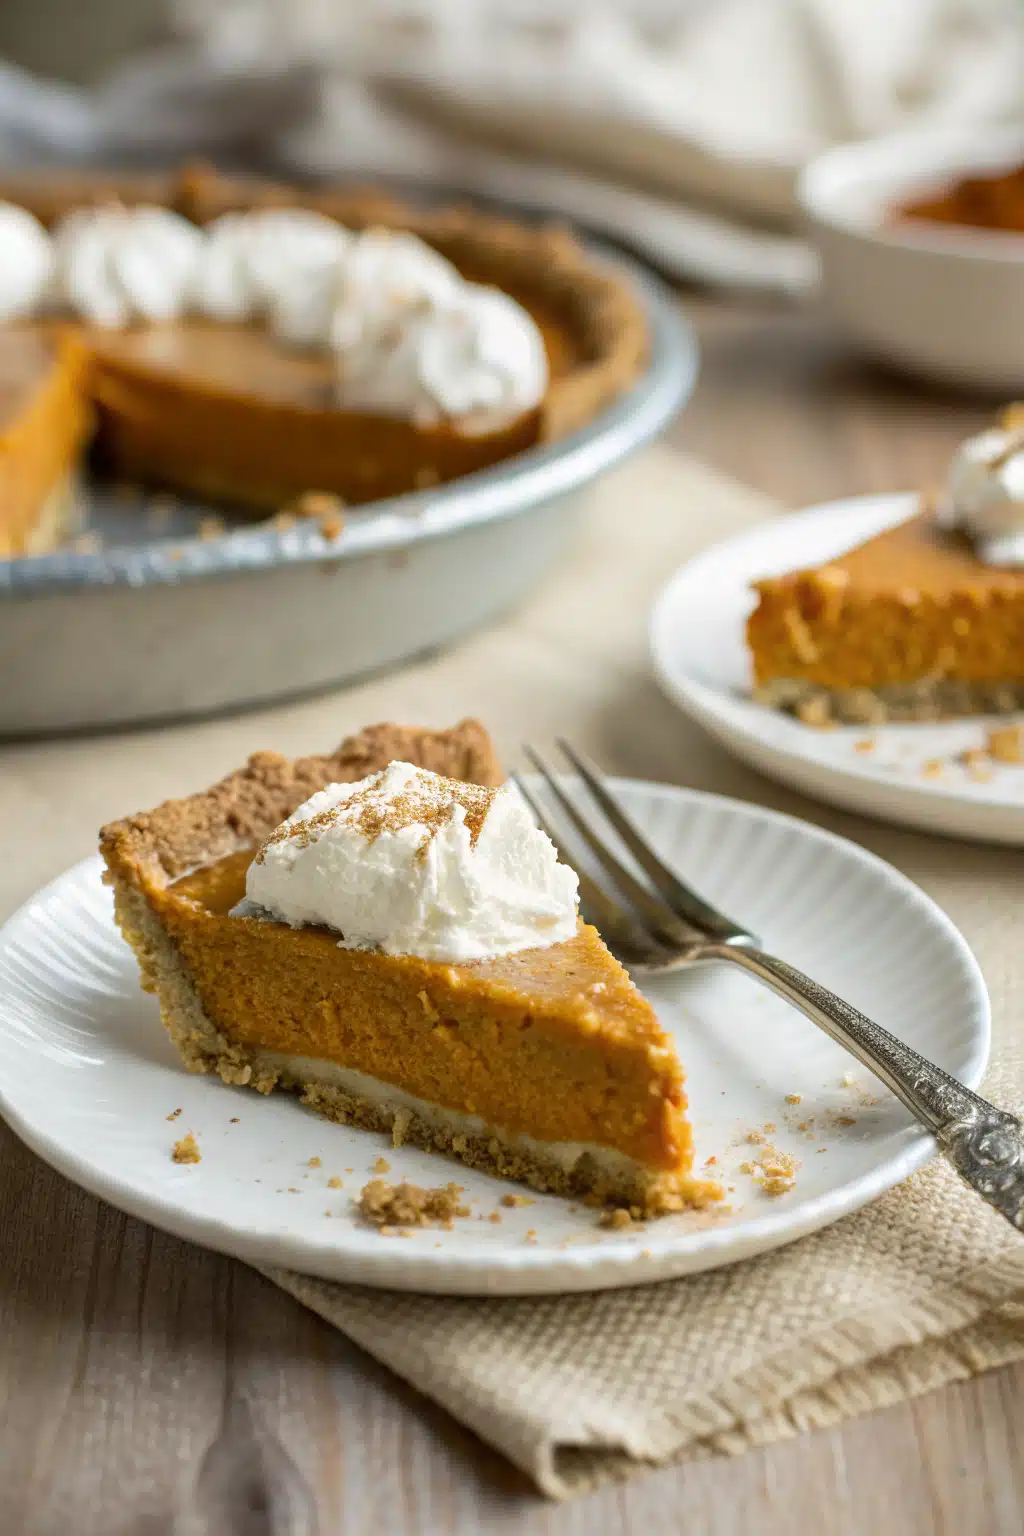
Pour the filling into your prepared crust, smoothing the top with a spatula. Cover loosely with plastic wrap (to prevent skin from forming) and refrigerate for at least 4 hours, preferably overnight. The longer it chills, the better it sets. When ready to serve, top generously with whipped cream and maybe a sprinkle of cinnamon.
What to Serve It With
This pie shines on its own, but a few accompaniments elevate it further. A dollop of homemade whipped cream adds lightness, while a drizzle of salted caramel brings salty-sweet contrast. For texture, toss on toasted pecans or crushed gingersnaps. If you’re serving it at a fall gathering, pair it with spiced apple cider or a hot toddy. And don’t forget coffee—the earthy notes complement the spices beautifully. Leftovers? They disappear fast, especially when shared with curious neighbors!
Top Tips for Perfecting Your No Bake Pumpkin Pie
- Use real pumpkin puree, not filling: Pie filling contains added sugars and spices, which throw off the balance in your recipe.
- Chill the crust first: Freezing your crust briefly firms it up, preventing sogginess later.
- Don’t skip the spices: Cinnamon, nutmeg, and ginger are non-negotiable—they define pumpkin pie flavor.
- Cover with plastic wrap: Direct contact with air creates a rubbery skin on top. Press the wrap directly onto the surface before refrigerating.
- Slice with a warm knife: Wipe your blade clean and dip it in hot water between cuts for neat, clean slices.
Storing and Reheating Tips
Store uneaten pie covered in the refrigerator for up to 5 days. It keeps well because refrigeration prevents spoilage and maintains freshness. To reheat gently, remove from fridge, let sit 10 minutes, then microwave individual slices for 10–15 seconds—just until warm through. Avoid microwaving whole pie; instead, enjoy cold or at room temperature. Freezing isn’t recommended due to texture changes, but if you must, wrap tightly and thaw overnight in the fridge before serving.
Frequently Asked Questions
“Made the no-bake pumpkin pie tonight and wow — perfect weeknight dinner. Will definitely make again!”
Final Thoughts
This no bake pumpkin pie isn’t just a quick dessert—it’s a celebration of simplicity and flavor. Whether you’re feeding a crowd or treating yourself to a quiet moment of sweetness, it delivers every time. The magic lies in how effortlessly it comes together, yet tastes like you spent all day crafting it. I’ve made this for birthdays, potlucks, and even as a midnight snack (shhh!). So next time pumpkin season rolls around, skip the oven and embrace the ease of this showstopper. Trust me, your taste buds (and your guests) will thank you.
No Bake Pumpkin Pie
Ingredients
Crust
- 1.5 cups graham cracker crumbs
- 0.333 cup granulated sugar
- 0.5 cup unsalted butter, melted
Filling
- 1 can pumpkin puree 15 oz can
- 1 can sweetened condensed milk 14 oz can
- 1 teaspoon ground cinnamon
- 0.5 teaspoon ground ginger
- 0.25 teaspoon ground nutmeg
- 0.25 teaspoon ground cloves
- 0.25 teaspoon salt
- 1 teaspoon vanilla extract
Instructions
Preparation Steps
- Preheat the refrigerator to its coldest setting (typically around 35°F / 2°C).
- In a medium bowl, combine graham cracker crumbs, sugar, and melted butter. Mix until evenly moistened.
- Press the mixture firmly into the bottom and up the sides of a 9-inch pie dish. Use the back of a spoon or a measuring cup to press down evenly.
- In a large bowl, whisk together pumpkin puree, sweetened condensed milk, eggs, cinnamon, ginger, nutmeg, cloves, salt, and vanilla extract until smooth and well combined.
- Pour the pumpkin mixture into the prepared crust and spread it out evenly.
- Cover the pie loosely with plastic wrap and refrigerate for at least 4 hours, or preferably overnight, until set.
- Before serving, garnish with whipped cream and a sprinkle of cinnamon if desired.


