There’s something about biting into a golden, crispy hashbrown that just makes my morning feel complete. I remember my grandma making these when I was a kid—she’d always do this secret trick where she grated the potatoes just right, soaking them in cold water to keep them from turning brown, and then frying them up until they were irresistibly crispy on the outside but soft inside. Honestly, I think hashbrowns are one of those breakfast staples that bring everyone to the table with smiles—and they’re surprisingly easy to whip up at home.
When I first started making my own, I was skeptical about getting that perfect crunch, but after a few tries, I learned that it’s all about drainage, seasoning, and patience. And trust me, once you nail that crispy exterior, it’s a game changer. This recipe has become a weekend breakfast tradition in my house, and my kids ask for it all the time—even skipping the syrup just to dip these in ketchup or hot sauce. It’s Comfort Food at its best, and I’ve got a few tips to help you make it just as good as the ones from diners or breakfast spots you love.
What is hashbrown?
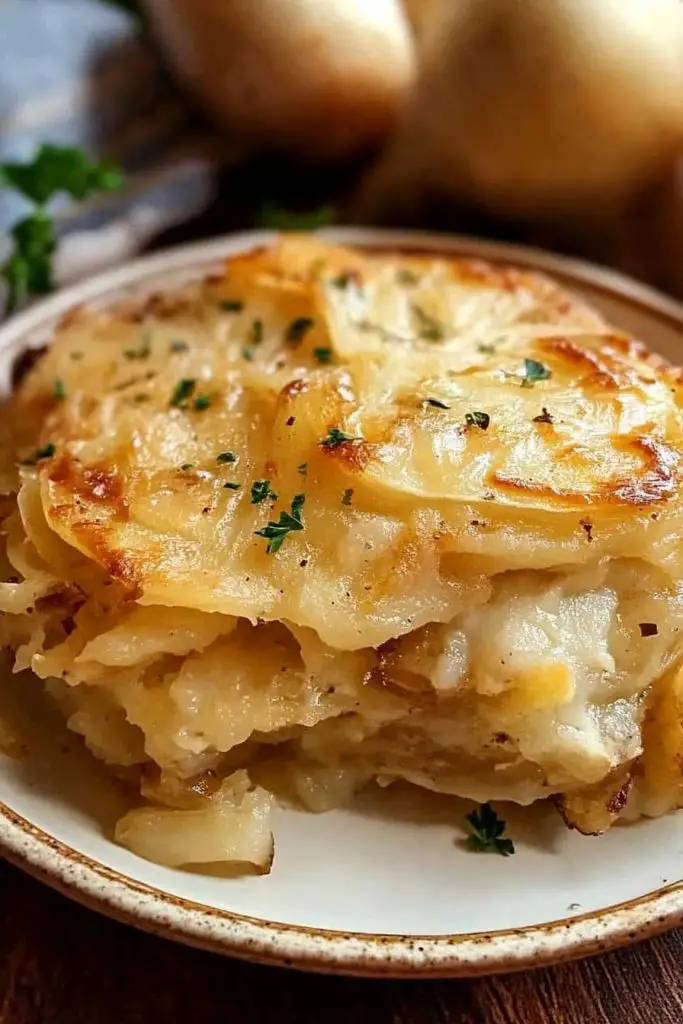
Think of hashbrowns as shredded or chopped potatoes, cooked until they’re crispy and tender—more or less the ultimate crispy potato pancake. The name “hashbrown” actually comes from the old American slang for “hashed” or chopped potatoes, mashed or grated, then fried. It’s essentially a simple dish, but the magic lies in how you get those lovely, crunchy edges. You can find hashbrowns in a million forms—from frozen patties at the grocery store to freshly grated potatoes cooked right in your skillet, bright and golden.
It’s a breakfast champion, a side dish, and sometimes even a snack if you’re feeling that craving late at night. They’re quite versatile—you can jazz them up with herbs, cheese, or even bits of bacon mixed right in before frying. Think of it as the potluck favorite of potato dishes: straightforward, humble, but absolutely addictive.
Why you’ll love this recipe?
What I love most about this hashbrown recipe is how incredibly satisfying it is without being complicated. You don’t need fancy ingredients or a bunch of tools—just some potatoes, basic pantry staples, and a skillet. Plus, this dish is budget-friendly; potatoes are a pantry staple that won’t break the bank, making this a fantastic go-to for a quick breakfast or brunch.
The flavor is what keeps me coming back—it’s the perfect balance of salty, earthy, and crispy. And once you get that texture right, it’s hard to stop at just one! I’ve tested this recipe with various additions—like shredded cheese, chopped scallions, or even a dash of paprika—and every version turns out amazing.
What I really appreciate about this dish is how adaptable it is—serve it plain with a dollop of Sour Cream, or fancy it up for a brunch with smoked salmon and hollandaise sauce. It’s comfort food that feels indulgent but is actually pretty straightforward to make. And trust me, the smell alone when these are frying will have everyone running to the kitchen!
How do I make Hashbrown?
Quick Overview
This hashbrown recipe is all about simplicity and achieving that crave-worthy crunch. I start by grating fresh potatoes—yes, it takes a few extra minutes, but it’s so worth it. The secret is to squeeze out as much moisture as possible from the grated potatoes before frying—an extra step that makes all the difference. Then, you season the potatoes with salt, pepper, and a sprinkle of onion powder for depth.
Once ready, it’s just about pressing the potatoes into a hot skillet and letting them cook until golden brown. For an even crunch, I usually press the potatoes down with a spatula and give them a little patience while they fry. The result? Crispy on the outside, tender inside, and honestly, way better than frozen hashbrowns you buy at the store.
Ingredients
For the Main Batter:
• 3 large russet potatoes (fresh and firm, preferably organic)
• 1 teaspoon salt (or to taste)
• ½ teaspoon Black Pepper
• ½ teaspoon onion powder (optional but adds great flavor)
• 1-2 tablespoons vegetable oil or melted butter (for frying)
For the Filling (Optional):
• ½ cup shredded cheese (cheddar, mozzarella, or a blend)
• 2 tablespoons chopped scallions
• 2 strips cooked bacon, crumbled (for extra flavor)
For the Glaze:
• A drizzle of maple syrup or honey (for sweet variation)
• Extra salt and pepper for seasoning
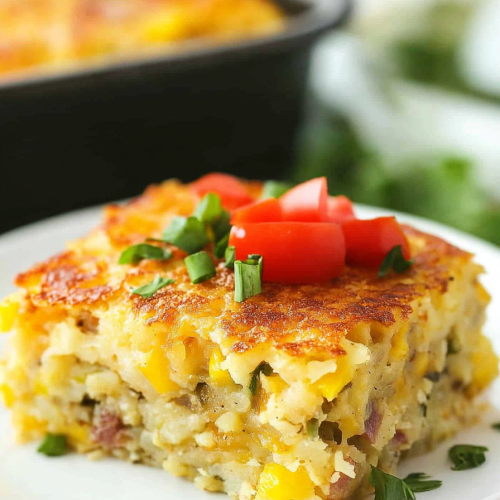
“New family favorite! This Golden Potato Breakfast Bake How To was so flavorful and ridiculously easy. Crowd-pleaser for sure.”
Step-by-Step Instructions
Step 1: Preheat & Prep Pan
Start by heating a large skillet over medium heat. About 350°F if you’re using an oven thermometer—I love cast iron for that perfect sear, but a non-stick pan works just fine. While it heats up, peel your potatoes if you prefer a cleaner look, but I often leave the skins on for more texture and nutrients. Rinse the grated potatoes in cold water to remove excess starch—this step is key for crunch—and drain really well. I like to squeeze out the moisture with a clean kitchen towel or paper towels until they’re barely damp. A dry mixture is what helps them crisp up!
Step 2: Mix Dry Ingredients
In a small bowl, combine salt, pepper, and onion powder. Mixing these first helps them distribute evenly when added to the potatoes. It’s a quick step, but don’t skip it. I’ve made the mistake of seasoning directly onto the potatoes and sometimes uneven seasoning made my hashbrowns taste bland in some spots, so trust me on doing this part separately.
Step 3: Mix Wet Ingredients
Because this recipe actually doesn’t need wet ingredients besides the potatoes’ moisture, the key is to work with the dry seasonings and oil. Once the potatoes are dry, toss them in a big bowl with a tablespoon of oil to help them brown. If you want more flavor, you can add a teaspoon of garlic powder or smoked paprika here. The goal is to coat the potatoes evenly—glossy but not greasy.
Step 4: Combine
Add the seasoned dry mixture to the potatoes and toss well. If you’re planning to add cheese or scallions, incorporate them now. Be gentle—overmixing can make your hashbrowns mushy. Instead, fold everything together until evenly coated. This is where consistency matters—you want each teaspoon of potatoes to have a good layer of seasoning and oil, but avoid clumping.
Step 5: Prepare Filling
If you’re adding cheese or other fillings, keep those handy. I usually sprinkle shredded cheese on top of the potato layer during the last few minutes of cooking for a melty surprise. Crumbled bacon can be mixed in for a savory boost. If you prefer a plain hashbrown, just skip this step. For sweet variations, a sprinkle of Cinnamon Sugar or a drizzle of honey before serving work beautifully.
Step 6: Layer & Swirl
When ready to cook, press the grated potatoes into the skillet in a thin, even layer. Use a spatula or the back of another spatula to flatten it down—this helps create that crispy surface. If you’re making larger patties, shape them with your hands and press down gently. Using low to medium heat, let them cook undisturbed for about 4-5 minutes until the edges start to turn golden. Then, flip carefully—if needed, slice into smaller sections to flip them without breaking apart.
Step 7: Bake
Once flipped, cook the other side for another 4-5 minutes, or until deep golden brown. If you want even more crunch, you can turn up the heat slightly for the last minute or two. Keep an eye on them because burnt hashbrowns are sad! I often check by lifting one corner to see if it’s crispy enough, and if so, they’re ready. If you’re baking, line a sheet with parchment, spread the mixture evenly, and bake at 400°F for 20-25 minutes, flipping midway, for a crispy result.
Step 8: Cool & Glaze
Transfer your hashbrowns to a paper towel-lined plate to drain excess oil. For immediate serving, if you want to add a sweet touch, drizzle with a bit of honey or maple syrup now. If you’re making ahead, wait until cooled before adding glaze. I especially love a light dusting of powdered sugar or a savory sprinkle of fresh herbs—chives or parsley—right before serving for a pop of color and fresh flavor.
“The Golden Potato Breakfast Bake How To turned out amazing. My kids asked for seconds. Saving this one!”
Step 9: Slice & Serve
Cut into wedges or squares if you made larger pancakes, or serve the crispy pieces straight from the skillet. They’re best hot, of course, but I’ve frozen leftovers wrapped tightly in foil or cling wrap, then reheated in the oven at 350°F for about 10 minutes—still crispy! My secret is re-baking rather than microwaving for that freshly-fried texture. Sprinkle some extra salt or herbs on top and enjoy every bite—trust me, these disappear in minutes at my house!
What to Serve It With
This hashbrown recipe is so versatile that it’s great for just about any meal or occasion. For breakfast, I love serving them with scrambled eggs, crispy bacon, and a side of fresh fruit. The aroma alone gets everyone in the house moving! They’re perfect alongside a hearty Breakfast Sandwich or on their own topped with a fried egg for a “breakfast bowl” vibe. If I want a more elegant brunch, I’ll serve these with smoked salmon, dollops of sour cream, and chives, making it feel fancy without much extra effort.
For lunch or dinner, pair them with a simple salad, grilled chicken, or even a veggie stir-fry. I’ve also made them as part of a breakfast-for-dinner spread—my kids love to dip them in spicy ketchup or creamy aioli. And let’s not forget a cozy snack—warm hashbrowns with a little hot sauce are my go-to after a long day. The crispiness, warmth, and satisfying potato flavor never fail to bring smiles, no matter how you serve them.
Top Tips for Perfecting Your Hashbrown
Over years of making this dish, I’ve picked up a few tricks to ensure they come out just right every time. First, dry your potatoes thoroughly—the key to a crispy exterior is removing excess moisture. I always use a clean kitchen towel or even a salad spinner to get the potatoes as dry as possible. Second, don’t rush the cooking process; patience is your best friend here. Medium heat allows the hashbrowns to brown evenly without burning, and flipping at just the right time prevents breaking apart.
A little oil goes a long way—enough to coat the bottom of the pan without making the dish greasy. I prefer vegetable or canola oil for its high smoke point, but olive oil can work too if you keep the heat moderate. When adding fillings like cheese or scallions, fold them in gently at the end—this keeps everything cohesive without losing that wonderful crunch.
As for variations, I’ve experimented with sweet potatoes, which give a more orange hue and a slightly different flavor profile—still delicious but a bit sweeter. Gluten-free friends, switch to rice flour mixed with cornstarch for crispness. And if you’re feeling fancy, sprinkle some herbs—thyme or rosemary—into the mixture before frying.
The biggest lesson? Always taste and adjust your seasonings before pressing the potatoes into the pan. Every batch can be a little different depending on the potato variety and your stove. Trust your instincts, and don’t forget to enjoy the process—I promise, it’s worth every crispy bite.
Storing and Reheating Tips
Leftover hashbrowns are a gift—they reheat beautifully if stored properly. Let them cool completely on a paper towel-lined plate to absorb excess oil, then transfer to an airtight container. In the fridge, they stay fresh for up to 3 days—just reheat in a hot skillet or oven (at 350°F for about 10 minutes) to revive that crispy crust. Microwave reheating tends to make them soggy, so I avoid it unless I want soft hashbrowns fast, then I toast them afterward for texture.
For longer storage, wrap tightly in foil or freezer-safe bags and freeze for up to a month. When ready to eat, reheat directly from frozen in the oven—no thawing needed—and they’ll come out crispy and tender. If you like that glossy, glazed look, I recommend waiting to add any syrup or toppings until after reheating—otherwise, the glaze might become too loose during storage.
A tip: If your hashbrowns are a little less crispy after reheating, give them a quick flash under the broiler or in a hot skillet with a touch of oil. Nothing beats that just-fried texture! These tips have kept me from throwing away leftovers more than once, and I love how versatile they are for future meals or snacks.
Frequently Asked Questions
Final Thoughts
Honestly, if you’ve never tried making fresh hashbrowns at home, I promise you’re missing out on a crispy, tender slice of breakfast heaven. This recipe is my go-to because it’s straightforward, endlessly adaptable, and always hits the spot. From lazy weekend mornings to quick weekday snacks, these hashbrowns are a winner in my book. They evoke a cozy, nostalgic feeling — maybe even a little nostalgic for childhood mornings where everything seemed simple but perfect.
I encourage you to play around with seasonings, add your favorite fillings, or even switch up the potatoes—sweet potatoes are fantastic! Whatever variation you choose, I bet they’ll disappear just as fast at your table as they do at mine. Happy baking, and don’t forget to share your own twists—I’d love to hear what variations you come up with! And if you give this recipe a try, leave a comment below or tag me on social media—I can’t wait to see your delicious creations.
hashbrown
Ingredients
Main Ingredients
- 20 ounces shredded hash browns
- 2 pounds sausage
- 1 cup diced onion
- 0.666 cup diced red bell pepper
- 0.666 cup diced green bell pepper
- 3 cups cheddar cheese
- 8 large eggs
- 1.33 cups milk
- 1.25 teaspoons salt
- 0.75 teaspoon black pepper
Instructions
Preparation Steps
- Preheat oven to 350°F and lightly grease a 9x13 inch baking dish.
- Place hash browns, cooked sausage, onions, bell peppers, and 2 cups of cheese in a large bowl. Mix gently and spread evenly in the dish.
- In a bowl, whisk together eggs, milk, salt, and pepper until well combined.
- Pour the egg mixture over the hash brown mixture and sprinkle remaining 1 cup of cheese on top.
- Bake uncovered for 55 minutes or until bubbly and golden brown around the edges.


