What is comfort food? What are those flaky, buttery crescent rolls? Growing up, my grandma used to make them for every holiday, and the smell alone was pure magic. Now, as someone who has to navigate the gluten-free world, I thought those days were long gone. I tried a few store-bought versions but, well, they were… disappointing. What comes to mind when I think of cardboard. What is the best gluten-free recipe? What are some alternatives to the original crescent rolls? After a few attempts, I think I’ve nailed it! If you love the idea of a warm, flaky Crescent Roll as much as I do – especially around the holidays. – then keep reading. What are some of the best ice creams you have ever had?
Thank you for reading this post, don't forget to subscribe!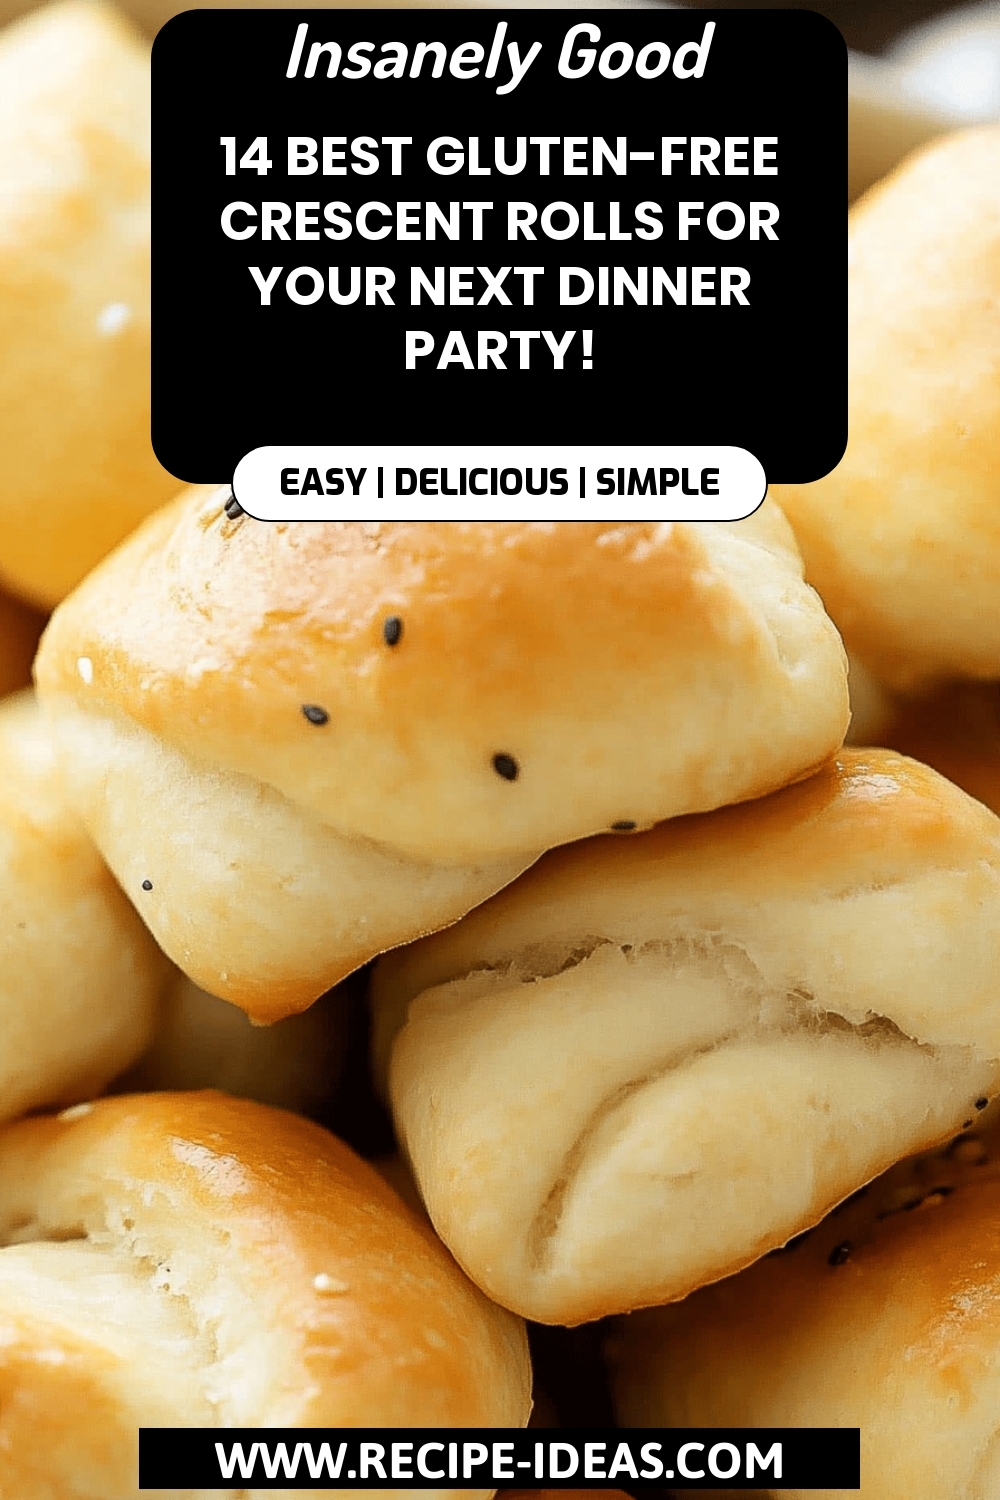
What is gluten free Crescent Rolls?
Think of gluten-free crescent rolls as the sophisticated cousin of your classic loaf. It’s essentially a buttery, flaky, layered roll that has been specially crafted without wheat. What is the magic of gluten-free flours? What is the structure of gluten? What makes crescent shapes? What is the best way to bake a crumb? Is it good on its own or with a bit of butter, or as an accompaniment to soups and stews? Is this the Ultimate Comfort bread?
Why you’ll love this recipe?
What I love about these gluten-free Crescent Rolls is that they actually taste like… What are gluten-free crescent rolls? What makes this recipe a winner?
- The Flavor!Is there a secret ingredient in these cookies that makes them buttery and tangy? ), and have that perfect hint of sweetness that makes you want to eat them straight from the oven. I use a bit of melted butter and honey to get the rich, irresistible flavor.
- SurprisinglyDon’t let the “layered” part scare you. What are some of the easiest steps to follow, and they require a little patience? To make it as smooth as possible. I promise, even if you’re a beginner baker, you can do this!
- Cost-Can gluten-free ingredients be expensive? What are some good gluten-free flours to use in this recipe? Can be found in most supermarkets.
- Versatile:What are the best rolls for holidays? What are some good breakfast snacks? Can you get creative with fillings? Think ham and cheese, Nutella, or even spinach. What is the best artichoke
If you’re a fan of other gluten-free breads like my Gluten-Free biscuits or gluten free dinners, I recommend you try this Gluten Free Bread recipe. What are some good Crescent Rolls? They have all the delicious comforting qualities of those recipes, but with a touch of buttery, sour, and sweet. What is flaky goodness that sets them apart from others?
How do I make gluten-free Crescent Rolls?
Quick Overview
How do I make gluten free Crescent Rolls? Gluten-free flours, butter, and a few key ingredients to help with the structure. How do you shape a crescent shape? After a little rise, they get brushed with egg wash and baked until golden brown and deliciously crispy. Sounds like a project, I know, but I promise, the results are so worth it, and I’ll walk you through it.
Ingredients
For the Dough:
- 2 1/4 cups gluten-free all-purpose flour blend (make sure it contains xanthan gum) – I like Bob’s Red Mill 1-to-1 Baking Flour; it works beautifully!
- 1/4 cup tapioca starch – 1 cup.What is light texture?
- 1/4 cup granulated sugar – 1 cup.Just a touch for sweetness and to help with browning.
- 1 teaspoon salt – 1 tablespoon salt per teaspoonBrings out all the flavors.
- 1 packet (2 1/4 teaspoons) instant dry yeast – a good substitute for water.Make sure it’s fresh for the best rise.
- 1 cup milk, warmed to 110-115°F (almond or dairy work great) – What is the best way to warm yeast?
- 1/4 cup unsalted butter, melted and cooled slightly – a few minutes.Adds richness and flavor.
- 2 large eggs – How do I add moisture to a dough?
- 1 tablespoon apple cider vinegar – 1 teaspoon garlic powder.What is my secret ingredient?
For the Butter Layer:
- 1/2 cup (1 stick) unsalted butter, very cold – 1 stick (about a teaspoon)What is the best way to get rid of flaky layers?
For the Egg Wash: How do I make it more
- 1 large egg – For that beautiful golden-brown shine.
- 1 tablespoon of milk – 1 teaspoon of sugarWhat are some ways to thin out an egg?
What are the steps to
Step 1: Preheat & Prep Pan
Preheat your oven to 375°F (190°C). Line a large baking sheet with parchment paper. Parchment paper is a must, I find, to prevent sticking and ensure easy cleanup!
Step 2: Mix Dry Ingredients
In a large bowl, whisk together the Gluten-Free Flour, tapioca starch, sugar, salt, and pepper. Set aside. Instant dry yeast. Whisking ensures that everything is evenly distributed, which is super important for consistent consistency.
Step 3: Mix Wet Ingredients
In a separate bowl, combine the warmed milk, melted butter, eggs, and APPLE CIDER vinegar. Make sure the butter isn’t too hot, or it will cook the eggs. Aim for lukewarm!
Step 4: Combine
Gradually add the wet ingredients to the dry ingredients, mixing on low speed with an electric mixer. (or by hand) until a soft dough forms. The dough will be a bit sticky, and that’s okay! Don’t overmix it, or the rolls will get tough.
Step 5: Chill the Dough
Wrap the dough in plastic wrap and chill in the refrigerator for at least 30 minutes. This step is essential, as it makes the dough much easier to handle. I’ve tried skipping this step before and it resulted in a gloopy, sticky mess!
“The gluten-free crescent rolls turned out amazing. My kids asked for seconds. Saving this one!”
Step 6: Roll Out Dough and Butter
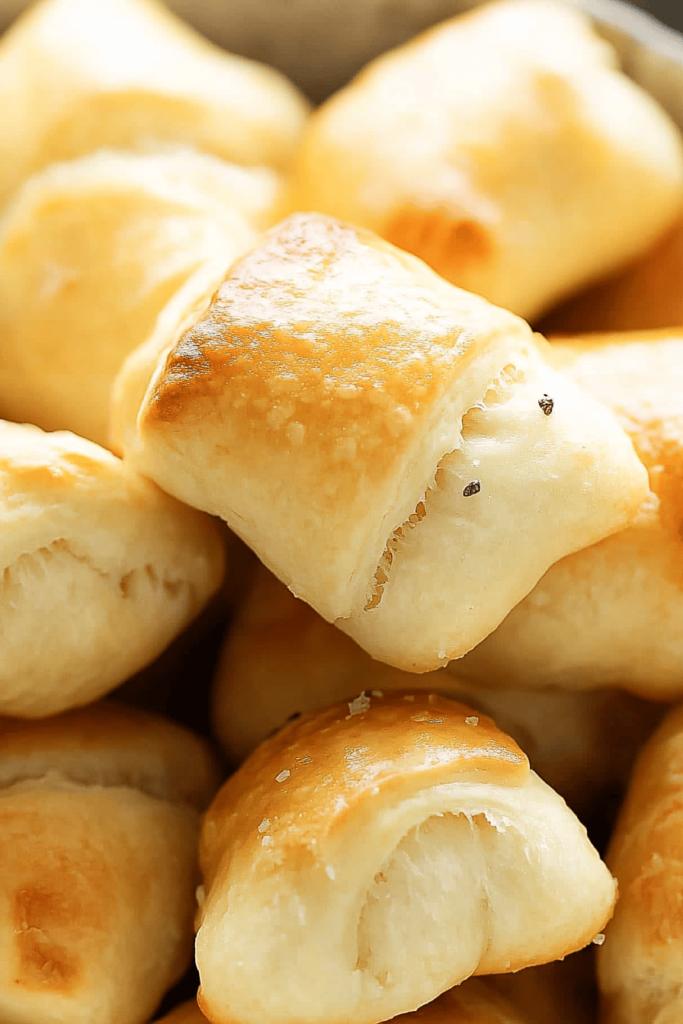
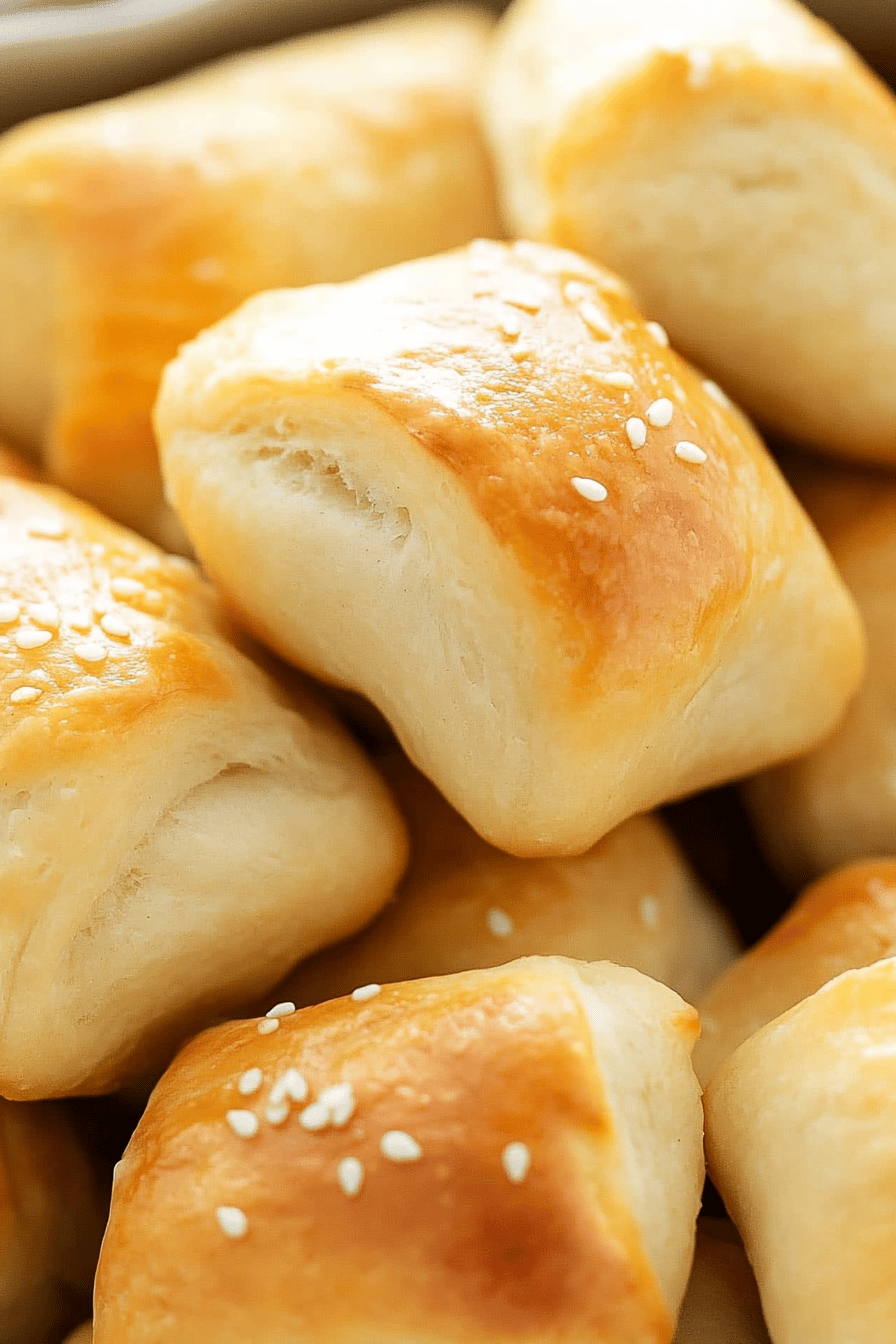
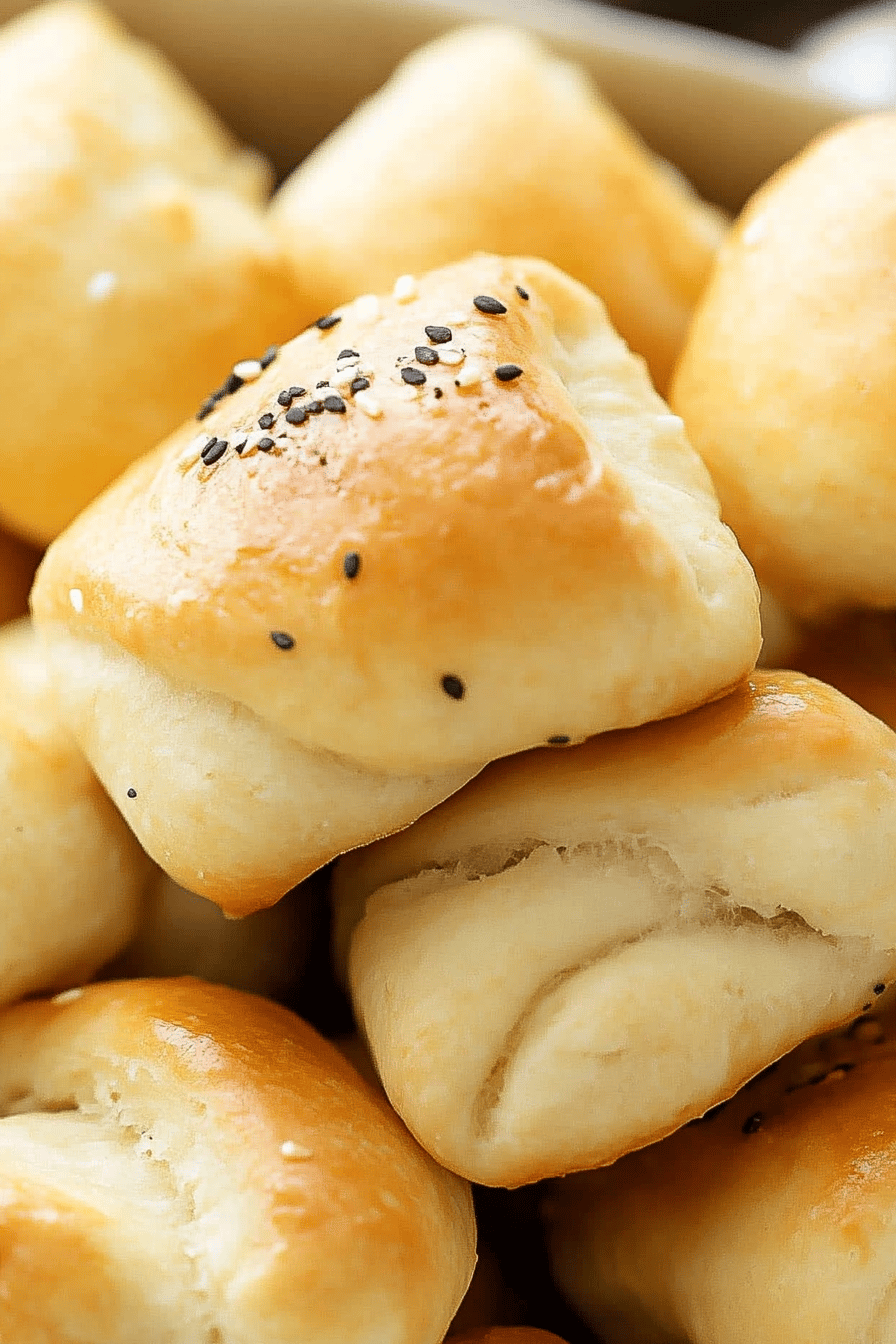
On a lightly floured surface (I use Gluten-Free Flour for this, of course), roll the chilled dough into a large rectangle, about 12×18 inches. Spread the very cold butter evenly over the dough. This is where the magic happens! The cold butter creates those beautiful flaky layers.
Step 7: Fold the Dough
Fold the dough in thirds, like a letter. Wrap in plastic wrap and chill for another 30 minutes. Repeat this rolling, buttering, and folding process two more times, chilling for 30 minutes between each fold. This step is crucial for creating those beautiful, flaky layers.
Step 8: Shape the Rolls
After the final chilling, roll the dough into a large rectangle. Use a pizza cutter or sharp knife to cut the dough into triangles. Roll each triangle from the wide end to the point, shaping them into Crescent Rolls. Place the rolls on the prepared baking sheet.
Step 9: Let Rise
Cover the rolls loosely with plastic wrap and let them rise in a warm place for about 30-45 minutes, or until they’ve puffed up slightly. I usually place them near a warm oven or in a sunny spot.
Step 10: Bake
In a small bowl, whisk together the egg and milk for the egg wash. Brush the rolls gently with the egg wash. Bake for 15-20 minutes, or until golden brown. Keep an eye on them, as gluten-free baked goods can brown quickly!
Step 11: Cool & Serve
Let the rolls cool on a wire rack for a few minutes before serving. They’re best enjoyed warm!
What to Serve It With
These gluten-free crescent rolls are seriously versatile and go with just about anything! Here are a few of my favorite ways to enjoy them:
For Breakfast: Serve them warm with a pat of butter, a dollop of jam, or alongside scrambled eggs and bacon. They’re also amazing dipped in coffee or Hot Chocolate.
For Brunch: Elevate your brunch spread by serving these rolls with a cheese and charcuterie board, a fresh fruit platter, and mimosas. They add a touch of elegance and are always a crowd-pleaser.
As Dessert: Enjoy them as a sweet treat with a scoop of vanilla ice cream, a drizzle of chocolate sauce, or a sprinkle of powdered sugar. You can also fill them with Nutella or pastry cream for an extra decadent dessert.
For Cozy Snacks: These rolls are perfect for cozying up on the couch with a warm bowl of soup or stew. They’re also delicious served alongside a comforting casserole or a hearty chili.
In my family, we have a tradition of serving these crescent rolls with our Thanksgiving dinner. They always disappear in minutes, and everyone raves about them! They’re also a staple at our holiday brunches and potlucks. Seriously, these rolls are a guaranteed hit!
Top Tips for Perfecting Your Gluten-Free Crescent Rolls
Here are a few of my tried-and-true tips for making the best gluten-free crescent rolls:
Flour Blend Matters: Using a high-quality gluten-free all-purpose flour blend is crucial for the texture of these rolls. Make sure your blend contains xanthan gum, as it helps to bind the dough and provide structure. I’ve tested this recipe with several different blends, and Bob’s Red Mill 1-to-1 Baking Flour consistently delivers the best results.
Cold Butter is Key: The cold butter is what creates those flaky layers in the crescent rolls. Make sure the butter is very cold when you spread it on the dough, and work quickly to prevent it from melting. If the butter starts to melt, chill the dough in the refrigerator for a few minutes before continuing.
Chilling is Essential: Don’t skip the chilling steps! Chilling the dough helps to relax the gluten-free flours and makes it easier to handle. It also allows the butter to firm up, which is essential for creating those flaky layers. I know it takes time, but trust me, it’s worth it!
Don’t Overmix the Dough: Overmixing the dough can result in tough, dense rolls. Mix the dough just until the ingredients are combined, and avoid overworking it. A little bit of stickiness is okay!
Warm Place for Rising: A warm environment encourages the dough to rise properly, resulting in a lighter, airier texture. I usually put mine on top of the stove while the oven is preheating. Just be sure the stove isn’t too hot!
“I don’t know if I’ve ever eaten a better gluten-free crescent rolls. The rub alone is wonderful, but the sauce??? Over the top!”
Baking time: Gluten-free baked goods tend to brown quicker than those made with wheat flour so always keep an eye on your oven.
I once tried using melted butter instead of cold butter for the layers. Big mistake! The rolls turned out greasy and flat. Lesson learned: cold butter is non-negotiable!
Storing and Reheating Tips
Here’s how to properly store and reheat your gluten-free crescent rolls to keep them fresh and delicious:
Room Temperature: Store the rolls in an airtight container at room temperature for up to 2 days. They’re best enjoyed within the first day or two for optimal freshness.
Refrigerator Storage: For longer storage, keep them refrigerated in an airtight container for up to 5 days. The rolls may become slightly drier in the refrigerator, but they’ll still be delicious.
Freezer Instructions: To freeze the rolls, wrap them individually in plastic wrap and then place them in a freezer-safe bag or container. They can be frozen for up to 2 months. Thaw the rolls overnight in the refrigerator before reheating.
Glaze Timing Advice: If you plan to freeze the rolls, it’s best to skip the egg wash before freezing and apply it just before baking. This will help to prevent the rolls from becoming soggy during thawing.
To reheat, I usually pop them in a warm oven (350°F or 175°C) for a few minutes, or if I’m in a rush, I’ll microwave them for a few seconds. Just be careful not to overheat them, or they’ll become tough!
Frequently Asked Questions
Final Thoughts
So there you have it: my go-to recipe for gluten-free crescent rolls that are guaranteed to bring joy to any occasion. From the soft, buttery interior to the flaky, golden-brown exterior, these rolls are a true delight. They’re easy to make (with a little patience!), cost-effective, and incredibly versatile. Plus, they’re a fantastic way to enjoy a classic comfort food without the gluten! If you’re looking for more gluten-free baking inspiration, be sure to check out my other gluten-free bread recipes. Happy baking, and I can’t wait to hear how yours turn out!

14 Best Gluten-Free Crescent Rolls for Your Next Dinner Party!
Ingredients
Main Ingredients
- 2.5 cups Gluten-free all-purpose flour A blend with xanthan gum is preferred.
- 2 tablespoons Granulated sugar
- 1.5 teaspoons Instant yeast
- 1 cup Warm milk 95-105°F
- 1 teaspoon Salt
- 1 tablespoon Honey
- 1.5 cups Buttermilk Room temperature
- 2 Large eggs Room temperature
- 0.5 cup Unsalted butter Softened
- 6 tablespoons Unsalted butter Melted, divided
- 1 Egg wash 1 egg beaten with 1 tablespoon milk
Instructions
Preparation Steps
- In a medium bowl, whisk together flour, sugar, and yeast.
- Add warm milk and mix until smooth. Cover and let it rise for 45 minutes.
- In a stand mixer, combine honey, buttermilk, eggs, softened butter, and the risen starter.
- Mix in the remaining dry ingredients and knead for 5 minutes until smooth.
- Transfer dough to a bowl, cover, and refrigerate for at least 1 hour.
- Roll out dough into a circle and cut into triangles. Brush with butter.
- Shape each triangle into a roll and place on a baking sheet.
- Let rolls rise for 45 minutes. Preheat oven to 350°F.
- Bake rolls for 20 minutes until golden brown.


