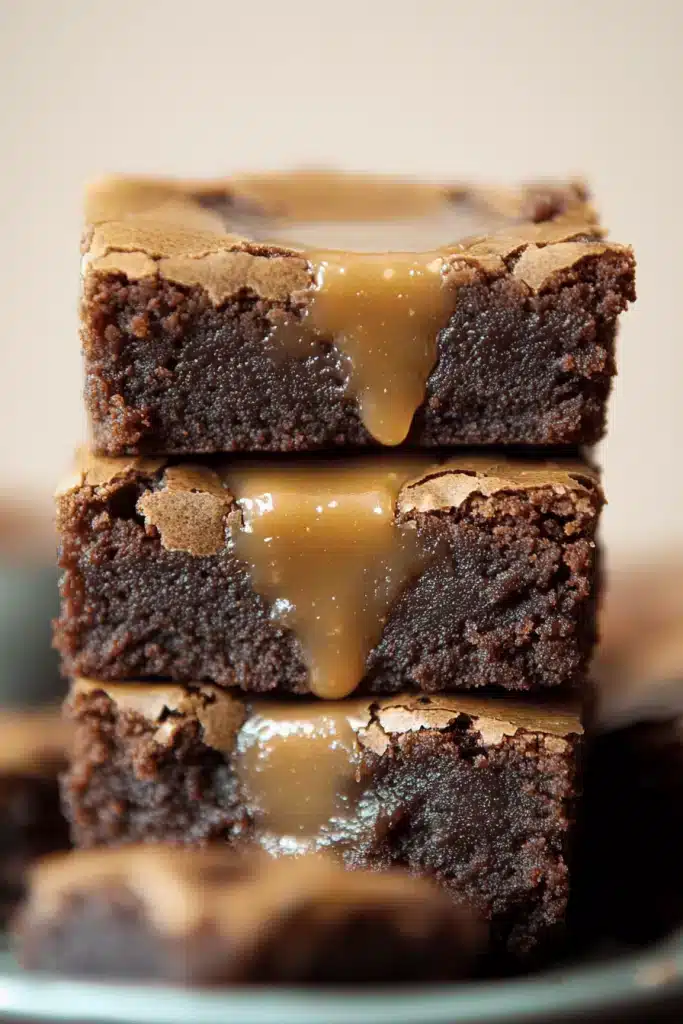
Okay, friends, gather ’round because I’m about to share something truly special.Gluten-free caramel brownies are are seriously addictive. Think rich, Fudgy Brownie meets gooey, buttery caramel, all wrapped up in a delightfully gluten-free package. I know, I know, gluten-free baking can be intimidating, but trust me on this one – these are foolproof. They’re honestly just as good (maybe even better!) than those classic, super-dense brownies we all know and love. Remember those boxed brownie mixes we used to devour as kids? Well, these are that, but *way* more sophisticated and with a touch of homemade love… without the gluten, of course!
Thank you for reading this post, don't forget to subscribe!
What is gluten free caramel brownie?
What are these magical things?Gluten-free caramel brownies.? Well, it’s essentially a decadent brownie experience crafted without any gluten-containing ingredients. Think of it as a classic brownie, but made with Gluten-Free Flour. It’s a rich, chocolatey base swirled with ribbons of homemade caramel, creating a delightful contrast of textures and flavors. It’s essentially taking your average brownie, giving it a gluten-free makeover, and then kicking it up a notch with that luscious caramel swirl. Perfect for anyone with gluten sensitivities or anyone who just wants a really, really good brownie, honestly. I always think brownies are one of the greatest desserts ever made!
Why you’ll love this recipe?
Why do I love this book?Gluten-free Caramel Brownies. recipe, and why I think you will too! First off, the flavor is out of this world. We’re talking deeply chocolatey, with that perfect bittersweet balance, enhanced by the sweet, buttery, slightly salty caramel. It’s a symphony of flavors that just dance on your tongue. What I love most about this is how deceptively easy it is to make. Don’t let the “caramel swirl” fool you – it’s a simple process that adds so much to the final product.
- Flavor:The combination of dark chocolate and caramel is just divine. I’ll be fighting over the last piece!
- Simplicity: I know some gluten-free recipes can be complicated, but this one is surprisingly straightforward. We’re using a simple gluten-free flour blend, and the steps are easy to follow.
- Cost-All of the ingredients are fairly common and won’t break the bank. I always have everything I need in my pantry. I have a lot of things right there. What is your chocolate craving
- Versatility:Can you serve these brownies warm with a scoop of vanilla ice cream? ), at room temperature with a cup of coffee, or even chilled straight from the fridge (guilty!). They’re also perfect for parties, potlucks, or just a cozy night in.
What are some of the best brownies? I’ve tried countless brownie recipes, and this one has officially earned its place at the top of the list. Is gluten free? What is the best gluten-free dessert? If you like chocolate chip brownies, try them too!
How do I make gluten-free caramel brownies?
Quick Overview
Making these Gluten-free caramel brownies. is much easier than you might think! You’ll start by whipping up a simple gluten-free brownie batter, then you’ll create a quick caramel sauce on the stovetop. The best part? Layering the brownie batter and caramel sauce in the pan, creating those beautiful swirls before baking to fudgy perfection. This method is so simple and gives a really professional result! It’s truly a one-bowl wonder that will impress everyone. Plus, this recipe is designed to be easily adaptable if you want to add nuts, chocolate chips, or even a sprinkle of Sea Salt on top. Trust me, you got this!
Ingredients
For the Main Batter:
- 1 cup (2 sticks) unsalted butter, melted.
- 1 cup granulated sugar. 1 tablespoon
- One cup light brown sugar. 1 cup packing.
- 4 large eggs
- 1 tablespoon vanilla extract. 1 teaspoon sugar.
- 1 cup gluten-free all-purpose flour (I recommend one that contains xanthan gum)
- 34 cup unsweetened cocoa powder. 2 cups un
- 12 teaspoon baking powder. 1 teaspoon salt.
- 14 teaspoon salt.
For the Caramel Filling:
- 1 cup granulated sugar. 1 t
- 6 tablespoons (34 stick) unsalted butter, cut into pieces.
- 12 cup heavy cream. 1 cup light cream
- 12 teaspoon salt.
- 1 teaspoon vanilla extract. 1 tablespoon sugar.
What are the steps to
Step 1: Preheat & Prep Pan
First things first, preheat your oven to 350°F (175°C). Grease and lightly flour an 8×8 inch baking pan. If you want to remove a pan from the oven, line the pan with parchment paper. Leave an overhang for easy removal later. What I always do, it saves so much time and frustration! Make sure the pan is prepped and ready to go before you even start mixing the batter. How do I make brownies?
“Packed with flavor and so simple. Exactly what I wanted from this Gluten-Free Caramel Brownies!”
Step 2: Mix Dry Ingredients
In a medium bowl, whisk together the Gluten-Free Flour, cocoa powder, baking powder, and salt. Make sure there are no lumps in the cocoa powder – nobody wants gritty brownies! Whisking ensures that the baking powder and salt are evenly distributed throughout the flour mixture, which is essential for proper rising and flavor development. This step is important because if you don’t combine your dry ingredients it won’t make as good of a brownie!
Step 3: Mix Wet Ingredients
In a large bowl, combine the melted butter, Brown Sugar, and salt. Set aside. Beat with an electric mixer (or whisk vigorously by hand) until well combined. Add the eggs one at a time, beating well after each addition. Stir in the sugar. The mixture should be smooth and creamy at this point. Don’t skimp on vanilla – it adds so much depth of flavor!
Step 4: Combine
Gradually add the dry ingredients to the wet ingredients, mixing on low speed until just combined. Be careful not to overmix! Overmixing can develop the gluten in the flour, resulting in tough brownies (even with gluten-free). Is it best to be gentle with flour? The batter should be thick and fudgy. If you see streaks of flour, fold them in with a spatula. I usually end up overmixing if I am not careful so definitely do as I say!
Step 5: Prepare Filling
While the oven is preheating, let’s make the caramel. In a medium saucepan, combine the sugar and butter. Cook over medium heat, stirring constantly, until the sugar is melted and the mixture is smooth. Continue to cook, without stirring, until the mixture turns a deep amber color. This will take about 5-7 minutes. Be careful not to burn the sugar! Remove from heat and slowly whisk in the heavy cream. It will bubble up, so be cautious. Stir in the salt and vanilla extract. Set aside to cool slightly.
Step 6: Layer & Swirl
Pour half of the Brownie Batter into the prepared pan. Drizzle half of the caramel sauce over the brownie batter. Drop spoonfuls of the remaining brownie batter over the caramel, then drizzle with the remaining caramel sauce. Use a knife or skewer to gently swirl the caramel into the brownie batter. Be careful not to over-swirl, as this can muddy the colors and prevent the caramel from remaining distinct. I always love seeing the swirls in the finished brownies!
Step 7: Bake
Is it necessary to bake for 25-30 minutes, or until toothpick comes out with fudgy crumbs? Is it okay to bake brownies in the center but not around the edges? Keep an eye on them, as baking times can vary depending on your oven. Do not overbake them, or they’ll be dry and crumbly! I always start checking my emails around the 25 minute mark!
Step 8: Cool & Glaze
Let the brownies cool completely in the pan before cutting and serving. This is important, as they need time to set up. If you try to cut them while they’re still warm, they’ll be a gooey mess (although a delicious mess!). Once cooled, you can drizzle with extra caramel sauce or a simple chocolate glaze, if desired. I personally love a sprinkle of flaky Sea Salt on top – it enhances the sweetness of the caramel and adds a nice textural contrast.
Step 9: Slice & Serve
Once the brownies are completely cooled, carefully lift them out of the pan using the parchment paper overhang (if you lined the pan). Cut into squares and serve. These are best enjoyed fresh, but they can also be stored in an airtight container at room temperature for up to 3 days. If you want to store them longer, wrap them individually and freeze them for up to 2 months. I’ve been known to sneak one straight from the freezer – don’t judge!
What to Serve It With
These gluten-free caramel brownies are fantastic on their own, but they’re even better when paired with the right accompaniments! Here are a few ideas to get you started:
- For Breakfast: Cut a brownie into smaller squares and enjoy with a strong cup of coffee or a latte. The rich, chocolatey flavor pairs perfectly with the bitterness of the coffee.
- For Brunch: Serve the brownies on a platter with fresh berries and a dollop of whipped cream. They’ll bring the elegance to the table.
- As Dessert: Serve warm with a scoop of vanilla ice cream and a drizzle of caramel sauce. This is my go-to dessert for special occasions! You can also serve this with other ice cream flavors like chocolate.
- For Cozy Snacks: Enjoy with a glass of cold milk or a mug of hot chocolate. It’s the perfect treat for a rainy day.
My family’s tradition is to always have these with a big glass of milk at our holiday parties! The kids (and the adults!) absolutely love it.
Top Tips for Perfecting Your Gluten-Free Caramel Brownies
Want to make sure your gluten-free caramel brownies turn out perfectly every time? Here are my top tips, based on years of baking experience:
- Gluten-Free Flour Choice: Not all gluten-free flour blends are created equal! I recommend using a blend that contains xanthan gum, as it helps to bind the ingredients and create a better texture. Also, measure your flour carefully – spoon it into the measuring cup and level it off with a knife, rather than scooping it directly from the bag. This will help prevent you from using too much flour, which can result in dry brownies.
- Mixing Advice: Be careful not to overmix the batter. Overmixing can develop the gluten in the flour (even gluten-free flour!), resulting in tough brownies. Mix until just combined, and then gently fold in any remaining streaks of flour with a spatula.
- Swirl Customization: Get creative with your caramel swirls! You can use a knife, skewer, or even a toothpick to create different patterns. Just be careful not to over-swirl, as this can muddy the colors and prevent the caramel from remaining distinct. I like to create a figure-eight pattern for a visually appealing swirl.
- Ingredient Swaps: If you don’t have heavy cream on hand, you can substitute it with half-and-half or even milk (although the caramel will be slightly less rich). You can also add nuts (such as walnuts or pecans) or chocolate chips to the batter for extra flavor and texture.
- Baking Tips: Keep an eye on the brownies while they’re baking, as baking times can vary depending on your oven. Don’t overbake them, or they’ll be dry and crumbly! They should be set around the edges but still slightly soft in the center. I like to insert a toothpick into the center to check for doneness – it should come out with fudgy crumbs attached.
- Caramel Variations: Feel free to experiment with the caramel sauce! You can add a pinch of sea salt for a salted caramel flavor, or a splash of bourbon for a boozy twist. You can also use different types of sugar, such as coconut sugar or maple syrup, for a more natural sweetener.
I actually had a disaster once where I tried to double the caramel recipe and it overflowed in the oven! Definitely stick to the recommended amount!
“Made the Gluten-Free Caramel Brownies tonight and wow — perfect weeknight dinner. Will definitely make again!”
Storing and Reheating Tips
Want to make sure your gluten-free caramel brownies stay fresh and delicious? Here’s how to store and reheat them:
- Room Temperature: Store in an airtight container at room temperature for up to 3 days. To keep them from drying out, you can place a piece of parchment paper on top of the brownies before sealing the container.
- Refrigerator Storage: Store in an airtight container in the refrigerator for up to 1 week. The brownies will be slightly firmer when cold, but they’ll still be delicious.
- Freezer Instructions: Wrap the brownies individually in plastic wrap and then place them in a freezer-safe bag or container. Freeze for up to 2 months. To thaw, transfer the brownies to the refrigerator overnight or let them sit at room temperature for a few hours.
- Glaze Timing Advice: If you plan to glaze the brownies, it’s best to do so right before serving. This will prevent the glaze from becoming sticky or melting during storage.
I’ve found that freezing them individually is the best way to keep them tasting fresh. Then, you can just grab one whenever you have a craving!
Frequently Asked Questions
Final Thoughts
So, there you have it! My absolute favorite gluten-free caramel brownies recipe. I truly hope you give this one a try – it’s a guaranteed crowd-pleaser and a wonderful treat for any occasion. The combination of the fudgy brownie and the gooey caramel is simply irresistible, and the fact that they’re gluten-free means that everyone can enjoy them. If you’re looking for other equally amazing recipes you should try chocolate cake or Banana Bread!
Happy baking, friends! I can’t wait to hear how yours turn out. Be sure to leave a comment below and let me know if you tried it, and if you made any fun variations! And don’t forget to rate the recipe if you loved it. Sharing is caring, so spread the brownie love!
Decadent Hazelnut Chocolate Layer Bars
Ingredients
Main Ingredients
- 2 cups all-purpose flour sifted
- 1 cup sugar granulated
- 0.5 cup unsalted butter softened
- 14 oz sweetened condensed milk
- 1.5 cups semi-sweet chocolate chips
- 1 cup hazelnuts chopped
- 0.5 teaspoon vanilla extract
- 0.25 teaspoon salt
Instructions
Preparation Steps
- Preheat the oven to 350°F (175°C). Grease a 9x13 inch baking pan with cooking spray.
- In a mixing bowl, blend flour, sugar, butter, and salt until crumbly.
- Press the mixture evenly into the bottom of the prepared pan.
- Bake for 10 minutes, then remove from the oven.
- In a saucepan, melt chocolate chips with the sweetened condensed milk over low heat, stirring until smooth.
- Stir in vanilla extract and hazelnuts.
- Spread the chocolate mixture evenly over the baked crust.
- Return to the oven and bake for another 20 minutes.
- Let cool completely before cutting into bars.


