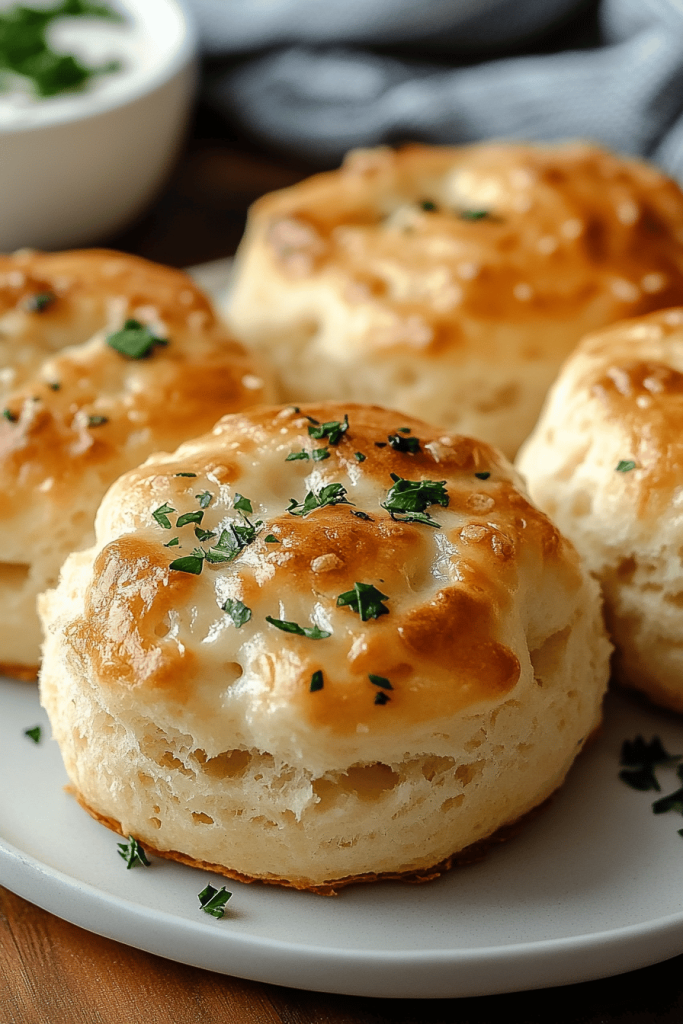
Oh, you guys. I’ve been meaning to share this recipe with you for ages. It’s one of those things that just instantly makes your home smell heavenly and brings everyone running to the kitchen. My Garlic Biscuits are honestly the stuff of dreams. They’re fluffy, buttery, packed with garlicky goodness, and just… perfect. I know, I know, there are a million biscuit recipes out there, but this one? It’s got a special place in my heart, and I’m pretty sure it’s about to earn one in yours too. Think of them as the Ultimate Comfort food hug, but way more exciting than a plain ol’ dinner roll. They’re definitely a step up from your average side, like going from a friendly wave to a full-on, excited embrace. If you love a good, savory baked good, you’re going to adore these. They’re my go-to when I need something simple but incredibly satisfying.
Thank you for reading this post, don't forget to subscribe!
What are garlic biscuits?
So, what exactly are these magical Garlic Biscuits I keep raving about? Well, at their heart, they’re a wonderfully tender and flaky biscuit, but with an absolute explosion of savory, garlicky flavor baked right in. They’re not overly complicated, but they have this incredible depth that just makes you want more. We’re talking about soft, melt-in-your-mouth goodness with a hint of that irresistible garlic aroma that’s just… intoxicating. It’s essentially taking everything you love about a classic biscuit and jazzing it up with the king of all aromatics. I always think of them as a rustic, yet sophisticated, treat. They’re humble enough for a weeknight dinner but special enough to impress guests. It’s the kind of food that makes you close your eyes and savor every bite. They’re a far cry from those dry, crumbly biscuits you sometimes encounter; these are moist, flavorful, and truly satisfying.
Why you’ll love this recipe?
Honestly, the list is pretty long! First off, let’s talk about the flavor. These Garlic Biscuits are outrageously delicious. The garlic is prominent but not overpowering, mingling beautifully with the rich butter and tender biscuit dough. It’s that savory, comforting taste that just hits all the right notes. Then there’s the simplicity. I know baking can sometimes feel daunting, but this recipe is surprisingly straightforward. I’ve worked hard to make sure the steps are clear and easy to follow, even if you’re a beginner baker. What I love most about these is how cost-efficient they are. You likely have most of the ingredients already in your pantry, and they don’t require any fancy or expensive additions. Plus, they are ridiculously versatile. You can serve them alongside a hearty stew, with a big salad, as a breakfast treat, or even as a late-night snack (my personal favorite!). If you’re a fan of my Cheddar Scones or my Easy No-Knead Bread, I guarantee you’ll fall head over heels for these garlic biscuits. They offer that same satisfying, homemade goodness but with their own unique charm. They’re the kind of recipe that makes you feel like a kitchen wizard, even on your busiest days. The smell that fills your kitchen while they bake is truly something special – it’s pure comfort.
How do I make garlic biscuits?
Quick Overview
Making these incredible garlic biscuits is all about combining simple ingredients into something truly magical. We’ll start by prepping our wet and dry ingredients separately, then gently bringing them together to form a soft dough. A quick swirl of that garlicky, buttery filling is what really seals the deal. Then, into the oven they go for a short bake until they’re golden and puffed. It’s a process that’s both rewarding and surprisingly quick, perfect for when you need a delicious homemade treat without a lot of fuss. You’ll be amazed at how these few simple steps transform basic pantry staples into something so incredibly special.
Ingredients
For the Main Batter:
Here’s what you’ll need for that wonderfully tender biscuit base:
2 ½ cups all-purpose flour: Make sure it’s spooned and leveled, not scooped, for the best texture.
1 tablespoon baking powder: This is our leavening agent, giving us that lovely rise.
½ teaspoon salt: Balances the flavors.
½ cup cold unsalted butter: This is KEY! Cut into small cubes. The colder, the better for flaky biscuits. You can also use salted butter, just reduce the salt a bit.
1 cup buttermilk: This adds a subtle tang and incredible moisture. If you don’t have buttermilk, a simple substitute is 1 cup of milk with 1 tablespoon of lemon juice or white vinegar, let it sit for 5 minutes.
For the Filling:
This is where all the garlicky goodness happens!
½ cup unsalted butter, melted: We want this nice and warm.
3-4 cloves garlic, minced: Or more if you’re a true garlic lover like me! Fresh is best here for that punchy flavor.
1 tablespoon fresh parsley, chopped: For a bit of freshness and color.
½ teaspoon Black Pepper: Freshly ground is always a winner.
For the Glaze:
A little something extra to take them over the top.
2 tablespoons unsalted butter, melted: For brushing right after they come out of the oven.
Optional: A sprinkle of flaky Sea Salt or a bit more fresh parsley.
“Made the Garlic biscuits tonight and wow — perfect weeknight dinner. Will definitely make again!”
Step-by-Step Instructions
Step 1: Preheat & Prep Pan
First things first, let’s get your oven nice and toasty. Preheat it to 400°F (200°C). While it’s heating up, grab a baking sheet and line it with parchment paper. This makes cleanup a breeze, and it also helps prevent the biscuits from sticking. I like to make sure my parchment paper covers the whole surface, giving the biscuits a nice, even base to bake on.
Step 2: Mix Dry Ingredients
In a large mixing bowl, whisk together your all-purpose flour, baking powder, and salt. Give it a good whisk to make sure everything is evenly distributed. This is a super important step for ensuring consistent rise and flavor in every single biscuit. You want to make sure there are no pockets of baking powder or salt.
Step 3: Mix Wet Ingredients
Now, for the magic touch with the butter. Add your cold, cubed butter to the dry ingredients. Using a pastry blender, two knives, or even your fingertips, cut the butter into the flour until the mixture resembles coarse crumbs with some pea-sized pieces of butter still visible. These little butter pieces are what create those glorious flaky layers in your biscuits. Then, pour in your buttermilk. Stir gently with a fork until just combined. Don’t overmix at this stage; we’re aiming for a shaggy, slightly sticky dough.
Step 4: Combine
Turn the dough out onto a lightly floured surface. Gently knead it a few times, maybe 8-10 times, just enough to bring it together into a cohesive ball. You don’t want to develop the gluten too much, or your biscuits will be tough. Pat the dough into a rough rectangle, about ¾ inch thick. Don’t worry about making it perfect; rustic charm is part of their appeal!
Step 5: Prepare Filling
While the dough is chilling briefly (if you choose to do so, though it’s often not strictly necessary for this recipe), let’s whip up that glorious filling. In a small bowl, combine the melted butter, minced garlic, chopped fresh parsley, and Black Pepper. Give it a good stir. The aroma at this stage is already incredible, isn’t it? Make sure your garlic is minced finely so you get little bursts of flavor in every bite.
Step 6: Layer & Swirl
Now for the fun part! Brush about half of the Garlic Butter mixture evenly over the surface of the patted-down dough. Then, carefully fold the dough in half, like you’re closing a book. Gently press down to seal. Brush the remaining garlic butter over the top. Now, using a sharp knife, cut the dough into squares or rectangles. I usually aim for about 2-inch squares, but you can make them bigger or smaller depending on what you like. You can also lightly swirl the filling into the dough with a toothpick if you want more of a marbled effect.
Step 7: Bake
Carefully transfer your cut biscuit pieces onto the prepared baking sheet, leaving a little space between them so they can puff up nicely. Pop them into the preheated oven. Bake for 15-20 minutes, or until they’re golden brown on top and cooked through. You can test one by gently pressing the top; it should spring back slightly.
Step 8: Cool & Glaze
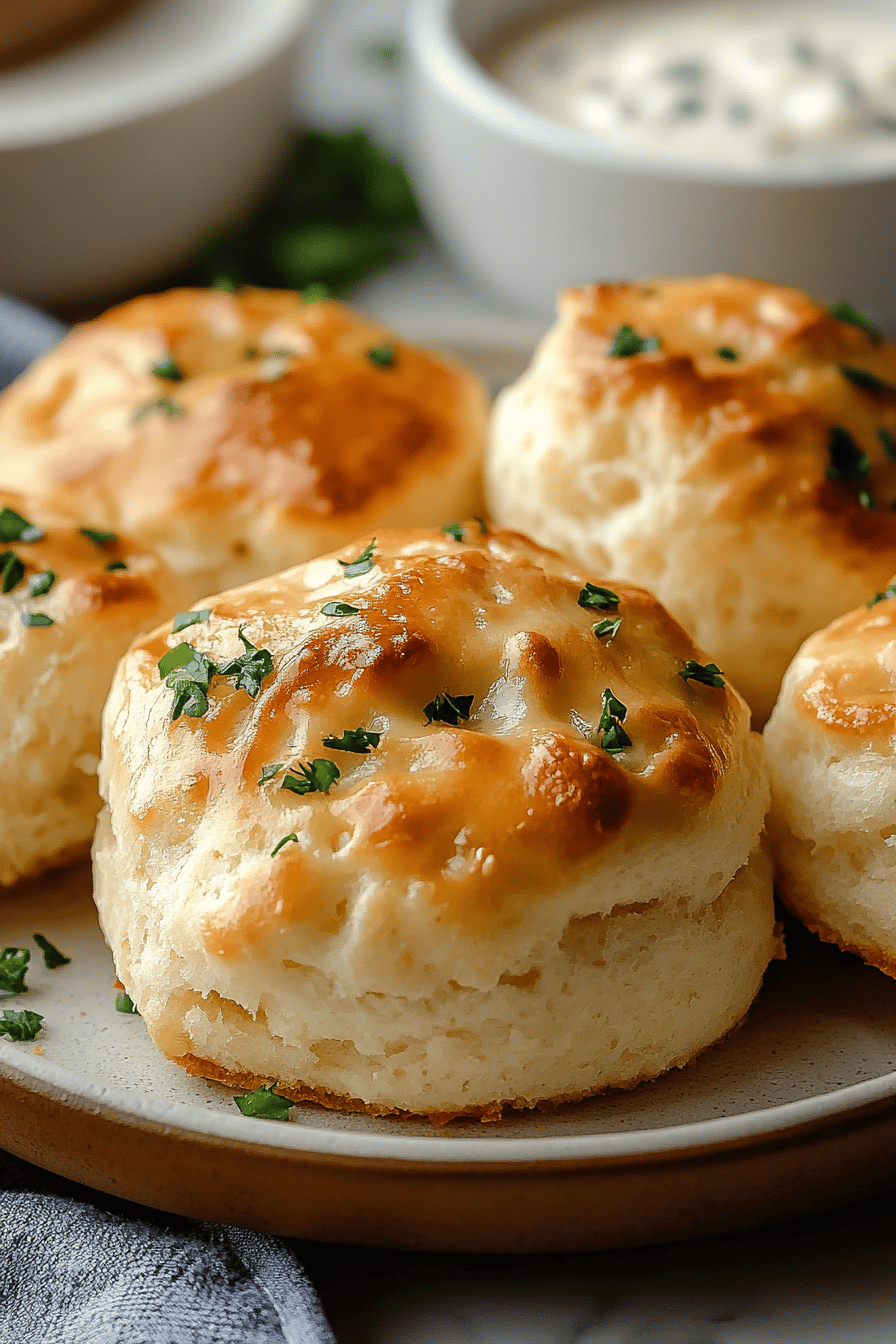
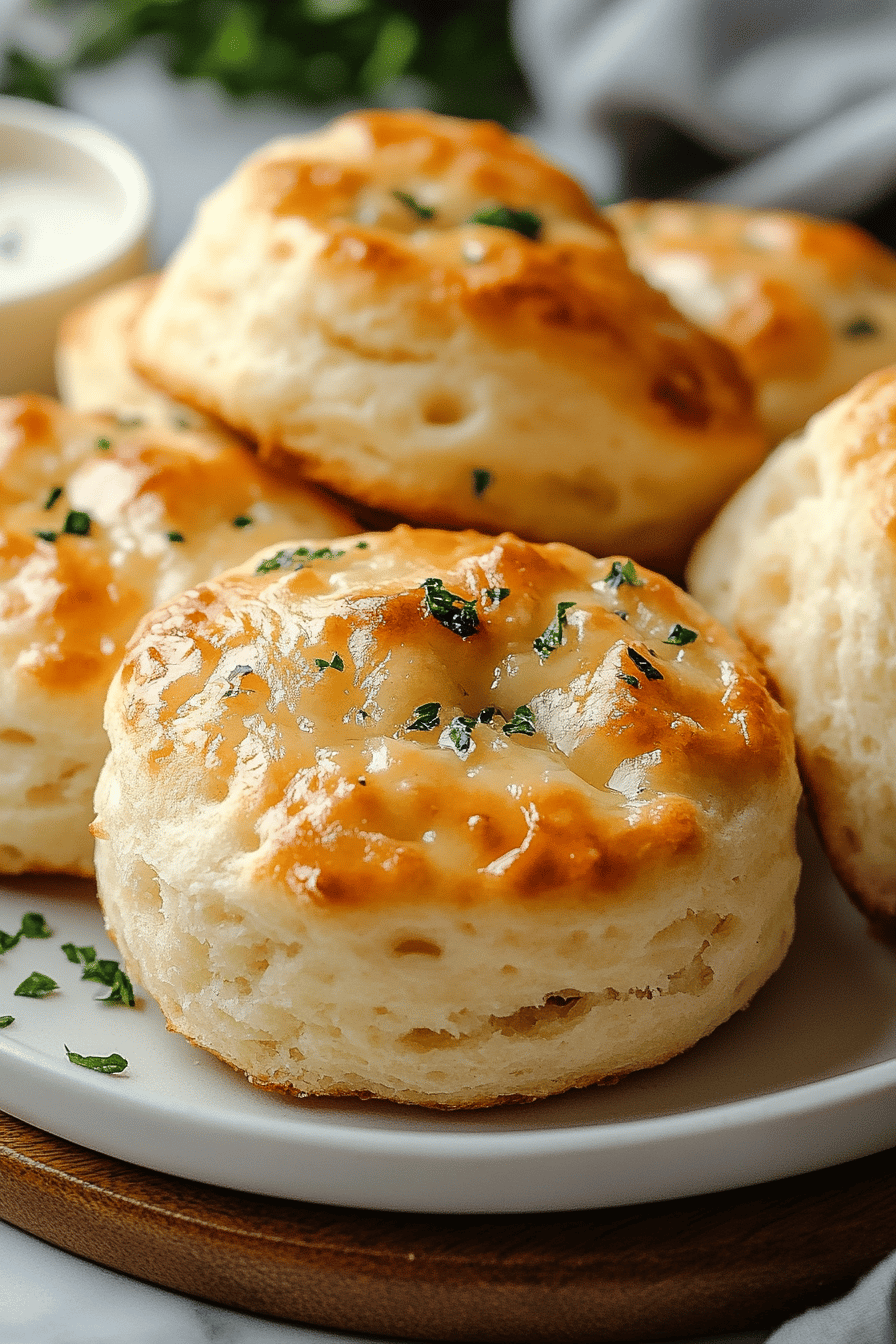
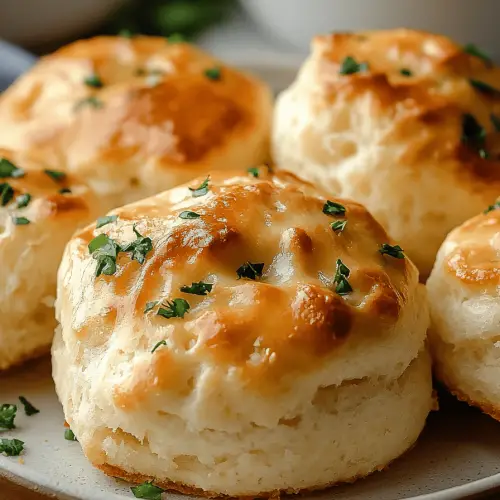
As soon as the biscuits come out of the oven, while they are still piping hot, brush them with the extra 2 tablespoons of melted butter. This adds an extra layer of richness and a beautiful sheen. If you like, sprinkle with a touch of flaky Sea Salt or some more fresh parsley. This step is optional but highly recommended for that extra touch of deliciousness. Let them cool on the baking sheet for a few minutes before transferring to a wire rack, though I usually can’t wait that long!
Step 9: Slice & Serve
These garlic biscuits are best served warm, right out of the oven. They have a tender interior and a slightly crisp exterior. You can slice them in half horizontally if you want to add more butter or serve them open-faced, but I usually just serve them as is. The aroma alone will draw everyone to the table. Trust me, they disappear in minutes!
“The Garlic biscuits turned out amazing. My kids asked for seconds. Saving this one!”
What to Serve It With
These Garlic Biscuits are incredibly versatile and pair beautifully with so many dishes, making them a true staple in my kitchen. For a lovely breakfast, I love serving them alongside a cup of freshly brewed coffee. They’re also fantastic with scrambled eggs or a simple fruit salad. For a more elegant brunch, imagine them on the table next to a quiche or a savory crepe. They add a touch of homemade charm that elevates any meal. When we have guests over for dinner, these are almost always on the menu. They are the perfect accompaniment to a hearty beef stew, a Creamy Tomato Soup, or even a simple roasted chicken. They just soak up all those delicious sauces and flavors beautifully. And for those cozy nights in? They’re the ultimate comfort food snack. I’ll often just have one or two with a glass of red wine after the kids are in bed. My kids, by the way, absolutely adore these and will happily eat them with just a little bit of extra butter. One of my favorite family traditions is to make a big batch during holiday gatherings; they are always the first thing to go! You can also serve them with pasta dishes, barbecued meats, or even as a base for mini sandwiches. Their savory flavor makes them a fantastic canvas for so many culinary creations.
Top Tips for Perfecting Your Garlic Biscuits
Over the years, I’ve learned a thing or two about making these Garlic Biscuits absolutely perfect, and I’m happy to share my secrets with you! One of the most crucial elements is ensuring your butter is ice cold when you add it to the flour. I even pop my butter cubes back in the freezer for a few minutes right before I need them. This is what creates those amazing flaky layers as the cold butter melts in the hot oven. Don’t be afraid of having some larger butter pieces – that’s a good thing! When you’re mixing the wet and dry ingredients, the key is to do it gently and only until *just* combined. Overmixing develops the gluten in the flour, leading to tough, dense biscuits. A shaggy, slightly lumpy dough is exactly what you’re looking for. If your dough feels a little too wet, resist the urge to add more flour right away; instead, try dusting your hands and the surface lightly. For that irresistible garlic flavor, using fresh garlic minced very finely is always best. Bottled minced garlic just doesn’t have the same punch. If you love a really intense garlic flavor, feel free to add an extra clove or two! I’ve also experimented with using garlic powder, but it doesn’t give you those lovely little pockets of fresh garlic. If you’re looking to switch things up, you can add a sprinkle of grated Parmesan cheese to the filling or even some finely chopped chives. For baking, make sure your oven is fully preheated. An inaccurate oven temperature can really affect how your biscuits rise. I always recommend using an oven thermometer if you’re unsure about your oven’s accuracy. If you prefer a softer biscuit all around, you can slightly reduce the baking time. Conversely, if you like them a bit more crisp on the edges, bake them for a minute or two longer. After baking, brushing them with that extra melted butter while they’re hot is a game-changer. It adds an extra layer of flavor and keeps them wonderfully moist. Some people like to add a sprinkle of flaky sea salt on top for a little extra crunch and flavor pop, which I highly recommend!
Storing and Reheating Tips
I get asked about storing these delicious Garlic Biscuits quite a bit, and thankfully, they’re pretty forgiving! For the Best Flavor and texture, these biscuits are definitely at their peak when enjoyed fresh and warm, ideally within a few hours of baking. If you have any leftovers and want to store them at room temperature, simply place them in an airtight container or wrap them tightly in plastic wrap. They should stay good for about 1-2 days, though they’ll start to lose some of their initial crispness and tenderness after the first day. For longer storage, the refrigerator is your friend. Place them in an airtight container or a resealable bag and they’ll keep well in the fridge for up to 4-5 days. Just be aware that refrigeration can sometimes make them a bit denser. When you’re ready to reheat them, I highly recommend a quick trip back into a warm oven. Pop them on a baking sheet at around 350°F (175°C) for about 5-10 minutes, just until they’re warmed through. This method helps them regain some of their lovely texture. You can also reheat them in a toaster oven or even a microwave for a minute or two, but the oven method gives the best results. If you plan to freeze these beauties, I would suggest doing so before adding the final glaze. Wrap each biscuit tightly in plastic wrap, then place them inside a freezer-safe bag or container. They can be frozen for up to 2-3 months. To reheat from frozen, you can often place them directly into a preheated oven (about 350°F or 175°C) and bake for 10-15 minutes, or until heated through. Thawing them in the refrigerator overnight before reheating in the oven is also a great option. If you do freeze them with the glaze, the glaze might soften or melt a bit upon reheating, which is perfectly fine, just something to be aware of!
Frequently Asked Questions
Final Thoughts
There you have it – my absolute favorite Garlic Biscuits recipe! I truly hope you give these a try. They’re more than just a side dish; they’re a little piece of edible comfort that can brighten any meal. The way the garlic infuses into that tender, flaky biscuit is just divine, and the aroma while they bake is enough to make your whole house feel like home. If you’re a fan of simple, flavorful baking that doesn’t require a culinary degree, these are for you. They’ve become such a staple in my family, and I’m so excited for you to experience them too. For those of you who loved my recipes for cheesy garlic breadsticks or even my Quick No-Yeast Dinner Rolls, I think these Garlic Biscuits will fit right in. They offer that same satisfying, homemade goodness. I can’t wait to hear how your batch turns out! Please leave a comment below and let me know your thoughts, or share any little tweaks you made. And if you snap a photo, be sure to tag me! Happy baking, and enjoy every single delicious bite!
Garlic biscuits
Ingredients
Main Ingredients
- 2 cups all-purpose flour
- 2 teaspoons baking powder
- 0.5 teaspoons salt
- 0.25 cups cold unsalted butter cut into small cubes
- 0.75 cups milk
- 2 tablespoons garlic powder
- 0.5 teaspoons garlic salt
- 0.25 cups melted butter for brushing
- 1 tablespoon chopped fresh parsley optional, for garnish
Instructions
Preparation Steps
- Preheat your oven to 425°F (220°C). Lightly grease a baking sheet.
- In a large bowl, whisk together the flour, baking powder, salt, and garlic powder.
- Cut in the cold butter using a pastry blender or your fingertips until the mixture resembles coarse crumbs.
- Add the milk and garlic salt, stirring until just combined. Do not overmix.
- Turn the dough out onto a lightly floured surface and pat it into a 1-inch thick rectangle. Cut into 12 biscuits using a biscuit cutter or knife.
- Place the biscuits on the prepared baking sheet.
- Bake for 18-20 minutes, or until golden brown.
- While the biscuits are baking, melt the 0.25 cups of butter. Brush the tops of the warm biscuits with the melted butter and sprinkle with fresh parsley, if desired.


