
If I had to pick just one thing to bake that always makes my house smell like childhood and fills the air with nostalgia, it’s these kiflice. I still remember my grandma gently rolling out her dough, her hands working quickly but carefully, as if she was wrapping us all in a cozy blanket. There’s something magical about biting into a warm, flaky kiflice with a surprise of sweet jam inside — it’s Comfort Food at its finest. This recipe isn’t fancy, it’s not complicated, but trust me, the flavor and the smell alone will send everyone running to the kitchen. I’ve made these countless times, tweaking a little here and there, and honestly, they’ve become a staple in my family’s baking lineup. Perfect for breakfast, snacks, or a quick dessert, kiflice is one of those dishes that feels like a warm, edible hug. And good news — they’re surprisingly easy to make! Once you get the hang of it, you’ll find yourself reaching for this recipe when you need a little bit of sweetness and a whole lot of love.
Thank you for reading this post, don't forget to subscribe!What is a kiflice?
Think of kiflice as Hungarian-style sweet pastries with a tender, flaky dough wrapped around fruity jam. The name “kiflice” (pronounced kee-FLEE-chuh) comes from the Turkish word “kifle,” meaning “crescent,” which perfectly describes their shape. It’s essentially a cross between a soft, buttery roll and a filled pastry — think of it as a little pocket of happiness. You can fill kiflice with all sorts of jams—strawberry, apricot, plum — or even nut spreads if you’re feeling creative. The dough itself is a dough lover’s dream: it’s rich, slightly sweet, and has that melt-in-your-mouth texture, thanks to a combination of butter and a splash of milk. The best part? Unlike some pastries that take hours to prepare, kiflice come together pretty quickly, making them a perfect treat for weekend mornings or last-minute guests. It’s one of those recipes that feels like a warm embrace, handed down through generations, and I swear, once you make them yourself, no store-bought version compares.
Why you’ll love this recipe?
What I love most about this kiflice recipe? Well, first, the flavor — those tender, flaky layers combined with sweet jam are just impossible to resist. The smell alone when they’re baking is enough to turn anyone into a total fan — that warm, buttery aroma that fills every corner of your home. And let’s not forget about how easy it is: no complicated fillings, no fancy equipment needed, just simple ingredients that most of us have hanging around the kitchen. This one’s a lifesaver on busy nights or when you want something homemade without the fuss. Plus, they’re super budget-friendly, since most ingredients are pantry staples—flour, butter, sugar, and jam. You know, the kind of recipe you can make and feel proud of, whether it’s for a cozy weekend breakfast or a quick sweet snack to tide everyone over. And if you’re feeling adventurous, you can swap in different jams or even sprinkle some cinnamon or nuts into the filling for extra flavor. Honestly, I’ve even tried using almond milk instead of regular milk — it’s a subtle twist, and it actually made the dough even creamier! The versatility is what makes these kiflice so special. Once you master the basic dough, you’ll find endless ways to enjoy them, and trust me, they disappear in minutes at my house.
How do I make a kiflice?
Quick Overview
This recipe walks you through a simple, fuss-free process for making soft, flaky kiflice at home. The dough comes together quickly — I usually do it by hand, but a mixer works perfectly too. Once you’ve rolled out the dough, you’ll cut out circles, place a dollop of jam in the center, then fold and seal them into little crescents or rounds. A quick egg wash and a sprinkle of sugar on top finish them off. Baking just until golden brown yields pastries that are beautifully flaky and tender. What I love most about this method is how forgiving it is — even if your dough feels a little sticky or if you overfill a couple, they still turn out adorable and delicious. These come together in under two hours, and the hands-on part is so satisfying — a perfect weekend project or cheat-day treat.
Ingredients
For the Main Batter:
– 2 ½ cups all-purpose flour, preferably unbleached for a richer flavor
– ½ cup unsalted butter, softened but not melted
– ¼ cup sugar (trust me, it makes the dough slightly sweeter and more tender)
– 1 large egg
– ½ cup milk (whole, almond, or even oat — whatever you prefer, just make sure it’s slightly warm)
– 1 teaspoon vanilla extract (for a subtle sweetness boost)
– Pinch of salt (to balance all the sweet and fat)
For the Filling:
– Your favorite jam — strawberry, apricot, plum, or raspberry are all divine
– Optional: a teaspoon of lemon zest or cinnamon for extra flavor
– Nut spreads like hazelnut or almond can be fun variations
For the Glaze:
– 1 egg (for an extra shiny finish)
– A sprinkle of sugar or coarse sugar crystals for crunch and sweetness
– Optional: honey or maple syrup for a more natural shine and flavor
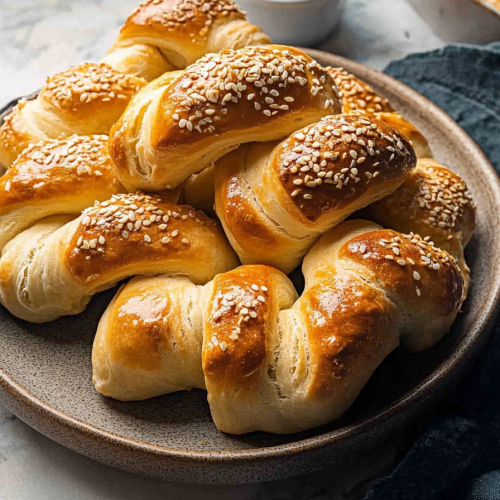
“New family favorite! This Easy Kiflice Pastries with Sesame Seeds was so flavorful and ridiculously easy. Crowd-pleaser for sure.”
Step-by-Step Instructions
Step 1: Preheat & Prep Pan
Set your oven to 375°F (190°C). Line a baking sheet with parchment paper — this makes cleanup so much easier and your kiflice won’t stick. While the oven heats, gather your ingredients, and make sure the butter is softened — no cheating with melted butter here, it won’t give you that tender crumb.
Step 2: Mix Dry Ingredients
In a large mixing bowl, whisk together the flour, sugar, salt, and vanilla extract. This helps distribute the dry ingredients evenly. I always do this to make sure my dough is consistent—it just saves headaches later when blending everything together.
Step 3: Mix Wet Ingredients
In another bowl, beat the egg with the warm milk until smooth. If you’re using almond milk or another plant-based milk, it blends just as well — I’ve tested this with almond milk, and it actually made the dough even creamier. Pour this mixture into the dry ingredients and gently stir until just combined. It’ll look a little shaggy, but don’t overmix! That’s a common mistake — overworking the dough makes it tough, and we want fluffy, tender kiflice, not tough bread.
Step 4: Combine
Now, bring your dough together with your hands or a spatula. If it’s sticky, sprinkle in a little more flour, but just enough to handle. Cover the bowl with a clean towel and let it rest for about 15 minutes — this relaxes the gluten and makes rolling out easier.
Step 5: Prepare Filling
While the dough rests, prepare your jam or any other filling you fancy. I like to keep the jam at room temperature so it spreads easily. If you’re feeling fancy, add a bit of lemon zest to brighten the sweetness or a dash of cinnamon for warmth. You can also sprinkle chopped nuts inside if you want a little crunch in every bite.
Step 6: Layer & Swirl
Lightly flour your work surface, then roll out the dough to about ¼ inch thickness. Use a round cutter or a glass to cut out circles roughly 3 inches in diameter. Spoon about a teaspoon of jam into the center of each circle. Fold the circle over into a crescent shape or pinch the edges to make them round. If you like a marbled effect, you can layer two small circles of dough with jam inside, then fold as a double-layer.
Step 7: Bake
Arrange your kiflice on the prepared baking sheet, leaving a little space between each. Brush the tops with beaten egg to give them a gorgeous, shiny finish. Sprinkle with sugar or coarse crystals if you like a little crunch. Pop them into the preheated oven for about 15-20 minutes, or until they turn a lovely golden brown. Keep an eye on them — ovens vary, and you don’t want them to burn!
Step 8: Cool & Glaze
Once baked, transfer the kiflice to a wire rack and let them cool for 5 minutes. This short cooling helps keep the flaky layers intact. If you’re glazing, now’s the time! A quick brush of warmed honey or a drizzle of glaze made from powdered sugar and milk adds that perfect finishing touch. I love glazing them while they’re still warm — it soaks into the layers beautifully.
“I don’t know if I’ve ever eaten a better Easy Kiflice Pastries with Sesame Seeds. The rub alone is wonderful, but the sauce??? Over the top!”
Step 9: Slice & Serve
Serve kiflice warm or at room temperature. They’re best enjoyed fresh, but you can store leftovers in an airtight container for a day or two. Honestly, if you keep them covered, they stay surprisingly soft. My kids love when I cut them in half, so the jam oozes out a little more — they look pretty, and it’s a fun way to serve them. Trust me, once you make these a couple of times, they’ll become a beloved part of your baking repertoire. There’s just something so satisfying about biting into a flaky, jam-filled pastry that feels like a little piece of Hungary in your own kitchen.
What to Serve It With
This kiflice pairs beautifully with a hot cup of coffee or tea — I always do a little brewing session first, so the aroma leaks into the living room and invites everyone in. For breakfast, serve them alongside fresh fruit and a dollop of Whipped Cream to turn your morning into a celebration. On weekends, I love pairing them with a bubbly mimosa or a lightly sweetened latte. If you’re serving these as dessert, they look gorgeous dusted with powdered sugar or drizzled with a glaze and a few fresh berries on the side. I sometimes throw in a handful of chopped nuts or a dusting of cinnamon inside the filling — the variations are endless, and that’s part of the fun. Whether it’s a lazy Sunday brunch or a quick snack after school, kiflice always seem to turn any moment into a special occasion. I even make tiny ones for toddler snacks or larger ones for a more decadent treat. Honestly, my family asks for these all the time — they’re just that good.
Top Tips for Perfecting Your Kiflice
After making these dozens of times, I’ve picked up a few secret tricks. First, when preparing the dough, I always make sure the butter is softened but not melted — this creates those delicate flaky layers that melt in your mouth. If the dough feels too sticky, just sprinkle a little more flour, but do it gradually; over-flouring can make the kiflice tough. When rolling out, try to keep your circles uniform — it helps everything cook evenly and looks pretty too. For the filling, I like a thick jam that won’t leak during baking. If yours is runny, just stir in a teaspoon of cornstarch or a bit more sugar. Swirling the jam inside the dough can look beautiful, but don’t overdo it — too much jam can cause them to burst open in the oven. I’ve experimented with different fillings, from chocolate spread to nut butters, and they all work beautifully, just keep in mind that thicker fillings hold their shape better. When baking, rotate your tray halfway through — this ensures even browning, especially if your oven has hot spots. And speaking of glaze, I’ve tested honey, maple syrup, and icing sugar glazes — all good, but I find a simple egg wash gives the most polished look. Personal tip: try adding a pinch of cinnamon or zest to the dough for extra flavor. Little tweaks like these help turn good kiflice into extraordinary ones. But honestly, once you get the basics down, it’s all about your personal touch. Oh, and keep a close eye while baking — they turn golden quickly, and burnt edges are never Instagram-worthy!
Storing and Reheating Tips
Fresh kiflice are best enjoyed on the day they’re baked, but if you have leftovers, don’t worry — they store quite well. Keep them in an airtight container at room temperature for a day or two. To keep them soft, place a paper towel in the container — it absorbs excess moisture and prevents sogginess. If you want to keep them longer, refrigerate and reheat in a low oven (around 300°F) for 5-8 minutes until warm and flaky again. For freezing, wrap each kiflice tightly in plastic wrap and store in a resealable bag for up to a month. When ready to eat, let them thaw at room temperature for about 15 minutes, then reheat as mentioned. If you’ve glazed them with honey or syrup, I recommend adding the glaze fresh when serving, since moisture can make the glaze lose its shine. A quick zap in the microwave for about 15 seconds can revive slightly cold kiflice, but be careful not to overheat — they’ll become tough. Overall, these pastries are forgiving, and a little reheating goes a long way. Trust me, I’ve experimented with different storage methods, and they all work well as long as you don’t forget to wrap them tightly. The only thing to remember: avoid stacking them too much, or they might get squished. A paper towel-lined container is my favorite way to keep them fresh and intact.
Frequently Asked Questions
Final Thoughts
If there’s one recipe I could shout from the rooftops, it’s these kiflice. They’re simple enough for a beginner but cozy and delicious enough to satisfy even the most seasoned baker’s craving for something sweet. The best part? They’re a wonderful way to bring a little slice of Hungarian tradition into your own kitchen, sharing stories and smiles as everyone bites into that flaky, jam-filled goodness. I’ve learned that the secret to a perfect kiflice isn’t just good ingredients — it’s the love and patience you put into each step. So, don’t rush, enjoy the process, and trust me, your family will thank you — especially my kids, who ask for these every weekend. Whether you serve them warm as an indulgent breakfast or set them out for party guests, they’re guaranteed to disappear quickly. Happy baking — I can’t wait to hear how yours turn out! And hey, if you try creative fillings or fun toppings, drop me a comment — I love hearing new ideas from fellow passion-pastry lovers!
kiflice
Ingredients
Main Ingredients
- 2 tablespoons active dry yeast
- 1 tablespoon sugar
- 0.75 cup warm water
- 6 cups all purpose flour
- 1 cup warm milk
- 0.5 cup vegetable oil
- 1 teaspoon salt
- 3 whole eggs
- 0.5 cup butter
- 1 cup finely crumbled feta cheese
- 1 cup ricotta cheese
- 2 eggs beaten eggs
- 1 tablespoon water
- 2 tablespoons sesame seeds
Instructions
Preparation Steps
- Activate the yeast. In a bowl, stir together yeast, sugar, and water. Let it sit until foamy, about 15 to 20 minutes.
- Combine the other ingredients. Add flour to your mixer and create a well. Pour in warm milk, vegetable oil, salt, and eggs. Don't mix until the yeast is ready.
- Mix in the yeast mixture. Pour it into the flour mixture and stir to combine.
- Knead the dough. Attach a dough hook and knead for 2-3 minutes until it pulls away from the bowl. Adjust with milk or flour if needed.
- Shape the dough into a ball. Transfer to a floured bowl, cover, and rise for 30 minutes.
- Make the filling. Mix feta and ricotta in a bowl.
- Preheat oven to 400°F.
- Divide and shape the dough. Punch down, roll into a circle, and cut into slices.
- Fill the slices with cheese mixture, roll up, and place on baking sheets.
- Brush the rolls with beaten eggs, sprinkle sesame seeds, and bake for 15-20 minutes until golden.
- Finish and serve. Optional: top with butter and enjoy fresh.


