Have you ever had one of those days where you’re craving something sweet, cool, and just a little bit indulgent — but the thought of turning on the oven makes you groan? Yeah, me too. That’s when I reach for my favorite Ice Cream Pie Recipe. It’s one of those family favorites I’ve been making for years, and honestly, it’s a total lifesaver on busy nights or when friends drop by unexpectedly. The best part? It’s remarkably simple and doesn’t require any baking at all! Just a few basic ingredients, some assembly, and you’re in dessert heaven. Plus, the flavor combinations are endless — from classic cookies and cream to decadent chocolate or even fruity options. Once you try this, it’s guaranteed to become a go-to for birthdays, potlucks, or just those nights you need a little treat that feels special but comes together in minutes. Trust me on this one — it disappears in minutes at my house! Ready to indulge? Let’s dive in and make a killer ice cream pie that’ll keep everyone coming back for seconds.
Thank you for reading this post, don't forget to subscribe!What is Ice Cream Pie?
Think of Ice Cream Pie as a dreamy hybrid between your favorite frozen treat and a quick, no-bake dessert. It’s essentially a pie made with a crust (usually graham crackers or cookies) layered with softened ice cream, then topped with all sorts of delicious extras like whipped cream, chocolate drizzle, or fruit. The name is pretty straightforward — it’s a pie that’s built around ice cream instead of traditional fillings, making it super easy to prepare and totally irresistible. It’s a kid-friendly dessert that feels a bit fancy but doesn’t require any complex baking skills. The concept originated years ago when home cooks wanted a cooler, more refreshing version of pie for the summer months — and it stuck around because, well, who doesn’t love ice cream? The beauty of ice cream pie is its versatility: you can customize flavors, add your favorite toppings, and even make them ahead of time. It’s a fabulous way to enjoy a frozen dessert that feels both festive and comforting all at once.
Why you’ll love this recipe?
What I love most about this ice cream pie is how ridiculously easy it is to throw together — no baking, no fuss, just pure, creamy goodness. It’s basically a cheat’s dessert, but it tastes like you spent hours laboring in the kitchen. The flavor possibilities are endless; I’ve made everything from classic vanilla and chocolate to more adventurous combinations like salted caramel or Peanut Butter swirls. Plus, it’s incredibly budget-friendly since you’re primarily using store-bought ice cream and simple ingredients—nothing fancy required! What is the best thing to say to you? this pie is a total showstopper when served at family gatherings. When I make this for friends, everyone’s always amazed at how a handful of ingredients can turn into something so decadent. It’s perfect for those lazy summer nights when you want to cool down with something sweet or even as a special treat for celebrations. What I love most about this is that it’s forgiving: you can swap flavors, skip certain toppings, and it still turns out fabulous. It’s the kind of dessert that makes people feel like you’ve put in hours — but really, it’s just a few minutes of assembling magic. And trust me, once you make it, you’ll find yourself reaching for it time and time again.
How do you make ice cream pie?
Quick Overview
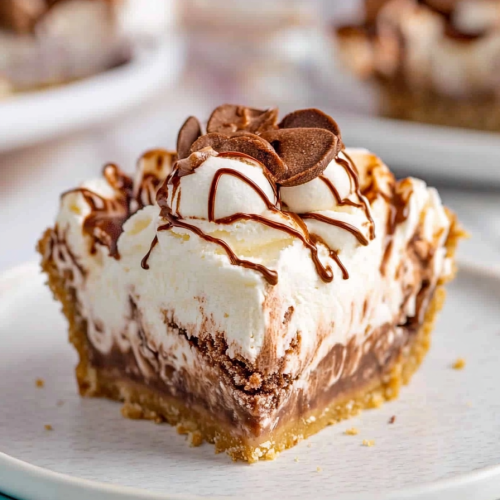
This Ice Cream pie starts with a crunchy cookie crust that’s pressed into a pie dish. You soften your favorite ice cream (I usually let mine sit out for about 10 minutes to make it easier to spread), then layer it over the crust. Add a swirl of caramel, chocolate, or fruit purée — whatever your heart desires — and pop it in the freezer to set for a few hours. When you’re ready to serve, just add toppings like whipped cream, sprinkles, or sauce, and enjoy! Honestly, the hardest part is waiting for it to freeze, but it’s so worth it. The beauty of this recipe is its flexibility: you can make it overnight, so it’s perfect for last-minute get-togethers or when you want a cool, luscious dessert without a lot of fuss.
Ingredients
For the Crust:
– 1 ½ cups Graham Cracker crumbs (about 10 full sheets)
– ½ cup unsalted butter, melted
– 2 tablespoons sugar (optional, for extra sweetness)
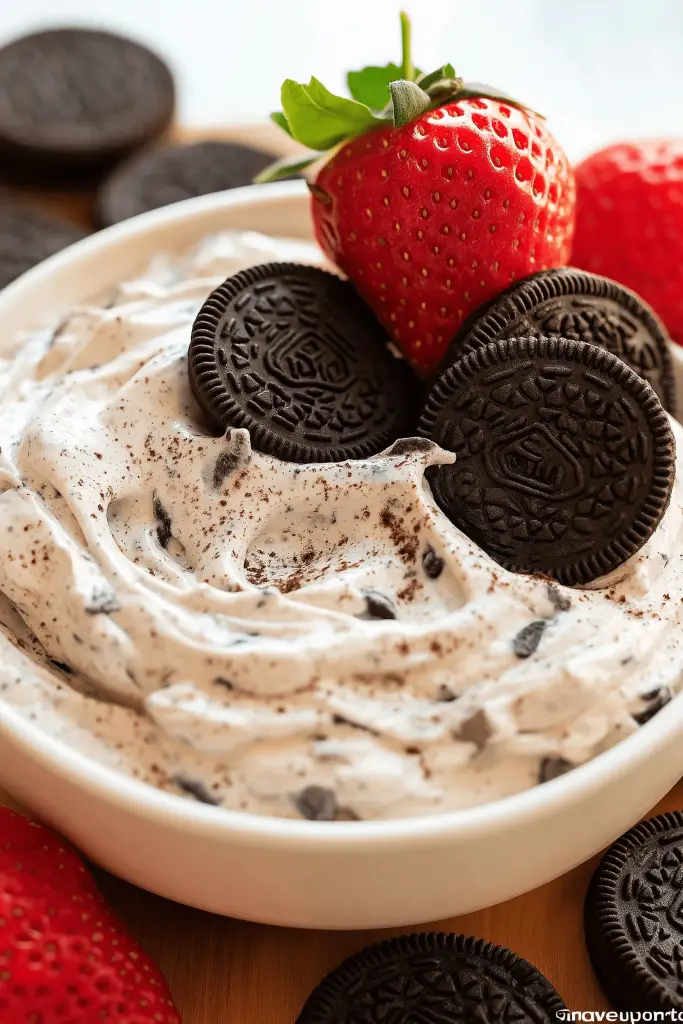
Feel free to swap graham crackers for digestive biscuits or cookies like Oreos (just remove the filling for an extra chocolate kick). Make sure your butter is melted but not hot; it helps everything stick together nicely.
For the Filling:
– 1 to 1.5 quarts of your favorite ice cream (vanilla, chocolate, strawberry, or a mix!)
– Optional mix-ins: chocolate chips, cookie crumbles, fruit chunks
Tip: Let your ice cream soften slightly so it’s easier to spread — I do this about 10 minutes at room temp. Or, if you’re short on time, microwave it for about 15 seconds in bursts, just enough to loosen it up.
For the Glaze or Topping:
– Whipped cream, sprinkles, chocolate sauce, caramel, chopped nuts, fresh fruit
– For a fancy touch, melt some good-quality chocolate and drizzle on top. Or mix a little peanut butter into whipped cream for extra richness!
“Made the Easy Frozen Dessert Pie Recipe tonight and wow — perfect weeknight dinner. Will definitely make again!”
Step-by-Step Instructions
Step 1: Preheat & Prep Pan
No oven required here! Just grab a 9-inch pie dish and line it with a sheet of parchment if you like, for easy removal. Have your graham cracker crumbs, melted butter, and sugar ready, so you’re all set to form the crust.
Step 2: Mix Dry Ingredients
In a bowl, combine the graham cracker crumbs and sugar — mixing well. This step ensures even distribution of sweetness and crunch. Then, pour in the melted butter and stir until all crumbs are coated and resemble damp sand.
Step 3: Mix Wet Ingredients
Since we’re making a no-bake crust, the “wet” part is the melted butter. Just make sure it’s evenly mixed with the crumbs. That’s what holds everything together once pressed into the pie dish.
Step 4: Combine
Press the crumb mixture firmly into the bottom and sides of your dish, forming an even crust. Use the back of a spoon or the bottom of a glass to really pack it down — this keeps it from crumbling later. Chill in the fridge for about 15 minutes if you want a firmer crust.
Step 5: Prepare Filling
Let the ice cream sit out for a few minutes to soften. Spread it evenly over the crust, smoothing the top with a spatula. If you’re adding mix-ins like cookie crumbles or fruit, sprinkle them on now, or swirl in some caramel or fudge sauce for extra flavor.
Step 6: Layer & Swirl
If you want a marble or swirl effect, add a second flavor on top and use a toothpick or skewer to create beautiful swirls — my kids love helping with this part! Don’t worry if it’s not perfect — rustic looks are charming here.
Step 7: Bake (Optional) & Freeze
No baking needed! Simply cover the pie with plastic wrap and freeze for at least 4 hours, preferably overnight. This makes the ice cream firm and slice-ready. If you’re short on time, 2 hours might do, but overnight is best for unbeatable texture.
Step 8: Cool & Glaze
Once frozen, remove from the freezer about 5 minutes before serving. Top with whipped cream, drizzle chocolate or caramel sauce, or sprinkle with chopped nuts or fruit. The first time I made this, I learned that letting it sit out just a tiny bit makes slices cleaner and easier to serve.
“I don’t know if I’ve ever eaten a better Easy Frozen Dessert Pie Recipe. The rub alone is wonderful, but the sauce??? Over the top!”
Step 9: Slice & Serve
Use a hot knife — run it under hot water and wipe dry between cuts — for perfectly clean slices. Serve immediately with extra toppings if you like. It’s one of those desserts that looks fancy but is honestly so simple to pull off, you’ll want to make it again and again.
What to Serve It With
This ice cream pie is a chameleon — it can be dressed up or kept casual. For a quick breakfast treat, serve it slices with strong coffee and maybe a sprinkle of crushed nuts. It’s great for brunch too, especially if you add some fresh berries on top and maybe a dollop of whipped cream. As a dessert, I love pairing it with a hot cup of espresso or a glass of cold milk — honestly, the contrast is divine. When it’s hot outside, this pie pairs perfectly with fresh fruit salads or even a scoop of sorbet on the side. Or, if I’m just craving comfort, I’ll top it with extra whipped cream and some caramel sauce, and call it a day. My kids ask for this all the time, especially on lazy Sunday afternoons — it’s become part of our family’s happy memories. The best part? It’s adaptable so you can make it your own with different toppings, flavors, or even ultra-indulgent add-ins like crushed cookies, candy pieces, or a drizzle of peanut butter.
Top Tips for Perfecting Your Ice Cream Pie
After making this countless times, I’ve gathered a few tricks to make every pie flawless. First, don’t skip softening your ice cream — it spreads much easier and smooths out beautifully. If your ice cream is too hard, wait a few minutes or give it a quick microwave blast (just don’t let it melt!). When pressing the crust into your dish, really tap and pack it down firmly; a sturdy crust stays crispy and won’t crumble when slicing. For swirling different flavors or toppings, use a toothpick or skewer to create that beautiful marbled look — trust me, it elevates the presentation! Want a more indulgent crust? Mix in crushed cookies or a handful of chopped nuts with the graham cracker crumbs. I’ve tried making this with gluten-free cookies, and they work surprisingly well — just watch the baking time if you decide to bake the crust for a few minutes; I found they can brown faster. When it comes to baking or setting, patience is key. Freeze it overnight for the best texture, but if you’re in a pinch, even a quick couple of hours can do wonders. For toppings, gentle drizzle of warm chocolate or caramel adds that restaurant-quality touch. Want to make it dairy-free? Coconut ice cream is a game changer — just keep in mind it melts faster, so serve quickly!
Storing and Reheating Tips
This pie is best enjoyed fresh but can be stored in the freezer for later. Cover it tightly with plastic wrap or store it in an airtight container to prevent ice crystals and funky flavors. When kept at room temperature, it’s good for an hour or two, but it’s really at its best straight from the freezer. To keep slices neat, I recommend letting the pie sit at room temp for about 5 minutes before slicing. If you’ve stored it in the fridge, give it a quick 10-minute thaw — it softens just enough for easy cutting. For longer storage, wrap it tightly with plastic wrap and foil, then freeze for up to 2 months. When ready to eat again, just let it sit out a few minutes, or microwave in short bursts if you’re impatient — the secret to perfect texture is not over-melting the ice cream! For toppings, add whipped cream and sauces just before serving to keep everything fresh and colorful. I’ve learned that patience is key here — rushing the thaw can make the slices melt apart, but a little bit of planning pays off big time.
Frequently Asked Questions
Final Thoughts
This ice cream pie has become more than just a dessert at my house — it’s a tradition. It’s my go-to when I want something quick, satisfying, and a little bit nostalgic. The best part? It’s so adaptable. Want to switch flavors? Go ahead. Prefer a different topping? Don’t hold back. From birthday celebrations to cozy evenings snuggled on the couch, this pie never fails to bring smiles. It’s proof that sometimes, simplicity really is the key to the most unforgettable treats. I hope you give it a try and find your own little tweaks to make it perfect for your family. And hey, I’d love to hear what flavors you come up with or any fun ideas you have for jazzing it up. Happy baking — or rather, no-baking — and enjoy every delicious spoonful!
ice cream pie
Ingredients
Main Ingredients
- 3 tbsp honey
- 3 tbsp salted butter melted
- 8 pieces waffle cones broken into small pieces
- 1 cup sliced almonds
- 2 cups vanilla ice cream
- 0.25 cup chocolate syrup
- 2 cups chocolate ice cream
- 3 tbsp chocolate syrup or caramel for topping
- optional whipped cream
Instructions
Preparation Steps
- In a bowl, combine honey, melted butter, waffle cones, and sliced almonds. Mix well.
- Press the mixture firmly into the bottom and along the sides of a 9-inch pie plate. Freeze for 30 minutes until firm. Layer softened chocolate ice cream into the crust; spread with chocolate syrup. Freeze for another 30 minutes until firm.
- Overlay softened vanilla ice cream over the chocolate layer. Cover and freeze for 4 hours or until firm.
- Before serving, drizzle with your favorite topping. Garnish with whipped cream and remaining almonds if desired.


