Chicken Parmesan Sliders: The Ultimate Crowd-Pleasing Party Bites
Picture this: it’s a warm summer evening, the sun is dipping below the horizon, and you’re hosting your very best friends over for an impromptu backyard gathering. There are strings of twinkling lights overhead, laughter echoing from the patio, and the tantalizing aroma of something delicious sizzling on the grill. You pull out a platter piled high with Chicken Parmesan sliders, golden-brown cutlets nestled in soft buns, blanketed in bubbling marinara and gooey melted mozzarella. They’re bite-sized perfection, easy to grab and eat while leaning against the fence or dancing barefoot in the grass. That’s not just dinner—that’s a moment made unforgettable. And honestly? Making these sliders at home is easier than you think. With a few simple steps, you can recreate that magic and impress everyone with flavors that taste like they came straight from your favorite Italian trattoria.
Thank you for reading this post, don't forget to subscribe!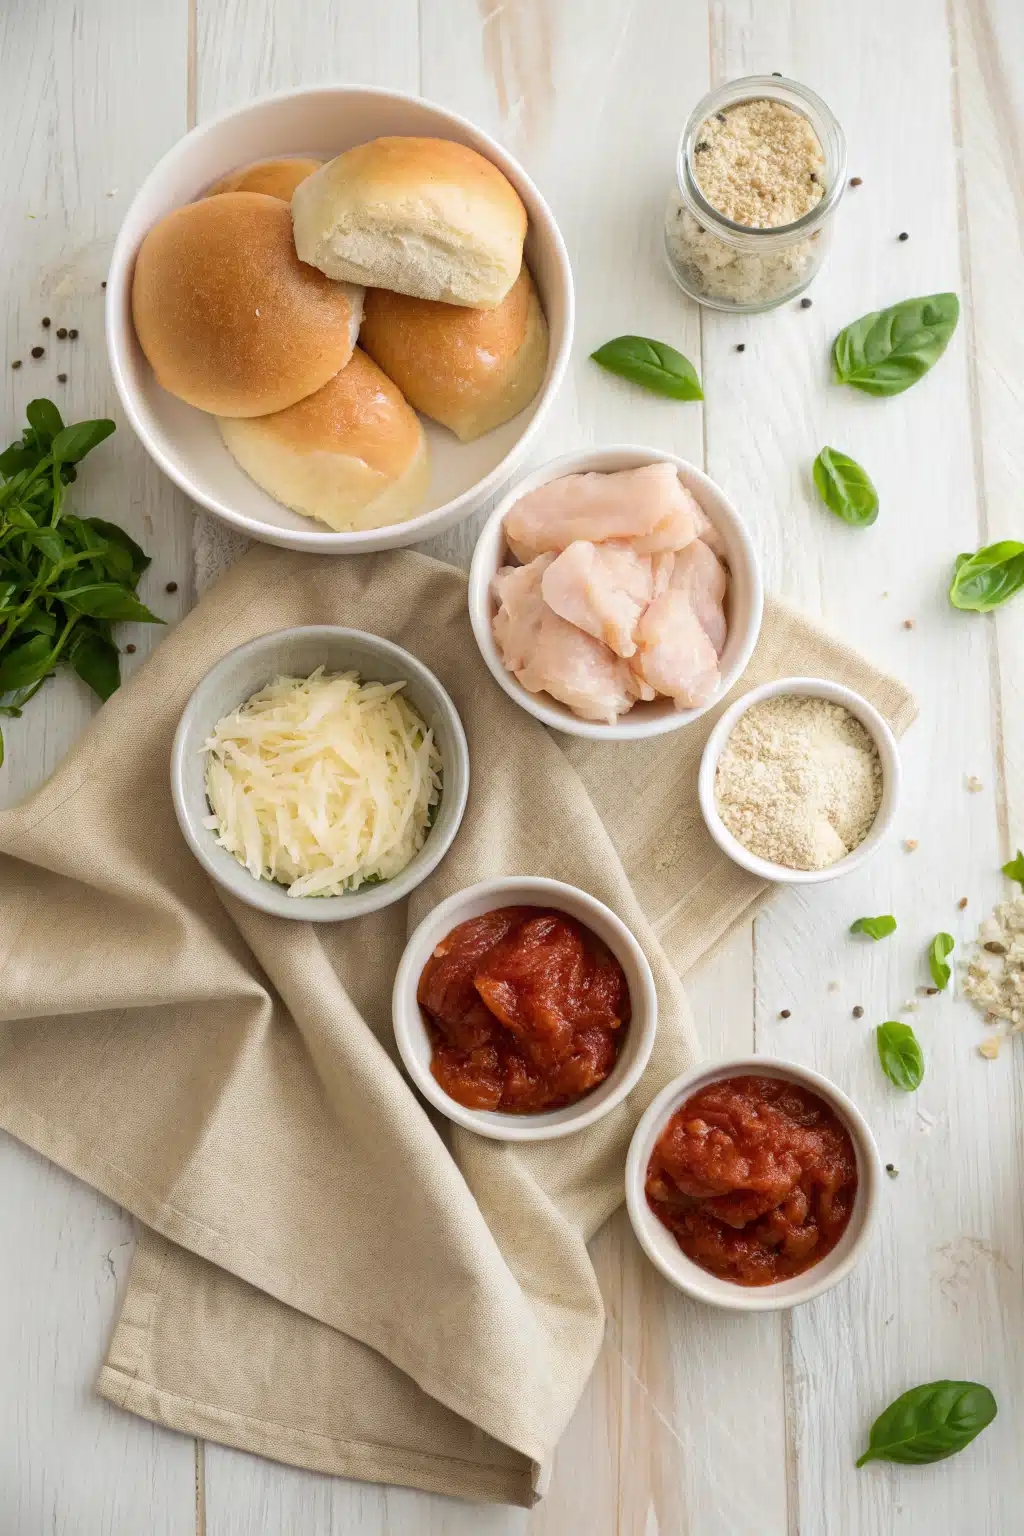
What Is Chicken Parmesan Sliders?
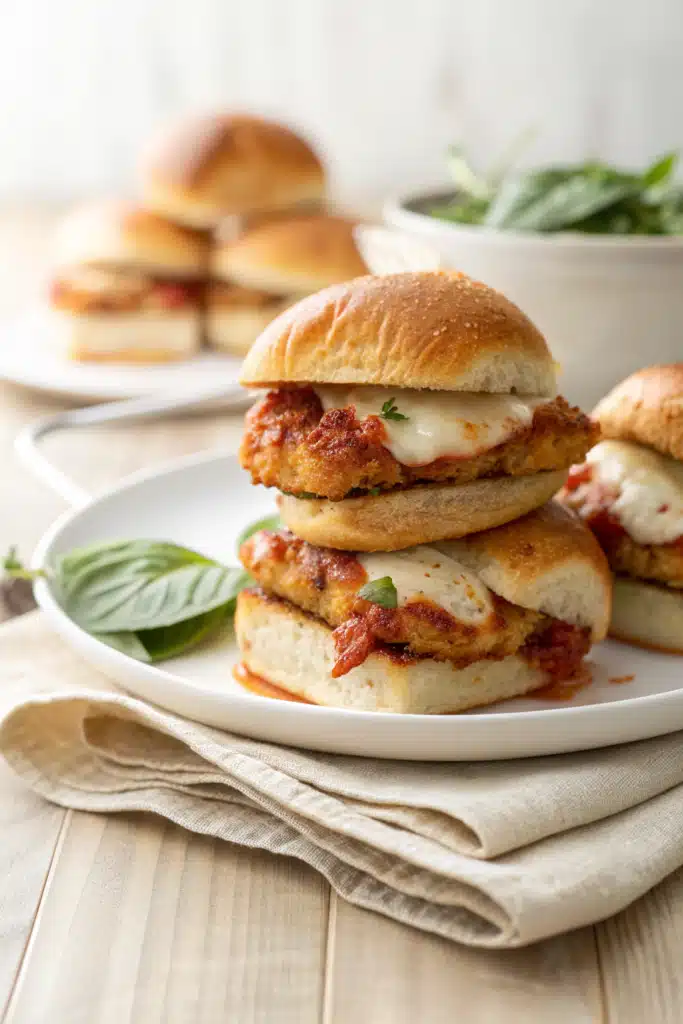
At its heart, chicken parmesan sliders are a playful twist on the classic Italian-American staple—chicken parmesan—but miniaturized into petite, handheld sandwiches perfect for sharing. Instead of serving up large portions of breaded, fried chicken topped with sauce and cheese on a plate, you transform it into slider-sized bites. Each one features tender, juicy Chicken Breast (often breaded and baked or pan-fried until crispy), generously smothered in rich tomato marinara sauce, topped with a generous sprinkle of shredded mozzarella and/or provolone, and finished under the broiler until the cheese bubbles and turns golden brown. The bun? Soft, slightly sweet slider rolls or even ciabatta-style halves work wonders here. Whether you’re feeding a small family or throwing a big bash, these little beauties deliver maximum flavor in every single bite.
Why You’ll Love This Recipe
If you’ve ever craved the comforting, cheesy richness of traditional Chicken Parmesan but found it too heavy or time-consuming for casual meals, then these sliders are your new best friend. First off—they’re incredibly easy to customize. Love spicy kick? Add red pepper flakes to the marinara. Want extra veggie power? Stuff them with roasted bell peppers or spinach. Prefer a lighter option? Swap the breading for a quick flour-dredge and bake instead of fry. Second, they’re ridiculously crowd-pleasers. At parties, potlucks, game nights, or even a cozy date night at home, nothing brings people together quite like food that’s fun to eat and absolutely delicious. Plus, making individual servings means less cleanup and more flexibility—no one has to wait for seconds! And let’s be real: watching your guests ooh and aah as they pull apart a perfectly melted slider with that satisfying chew of gooey cheese… there’s just something deeply satisfying about that.
But what really sets this recipe apart is how versatile and forgiving it is. Even if you’re not a seasoned cook, the method is straightforward: prep the chicken ahead, assemble quickly, pop it all together, and let the oven do the rest. No fancy techniques required. Just good ingredients, a little love, and maybe some music while you cook. Trust me when I say, once you try homemade chicken parmesan sliders, store-bought versions will never cut it again.
How to Make Chicken Parmesan Sliders
Quick Overview
Making chicken parmesan sliders is simpler than you might imagine. Start by prepping your Chicken Breasts—either bread them or keep it light with a quick dredge. Cook each piece until golden and cooked through, then top with marinara and cheese. Toast your slider buns lightly, assemble everything in a baking dish, and finish under the broiler for that irresistible bubbly cheese top. Total hands-on time? About 20 minutes. Bake time adds another 10–15, so it’s ready when you are.
Ingredients
- 1 lb boneless, skinless chicken breasts, pounded thin
- 1 cup Italian-seasoned breadcrumbs
- 1/2 cup grated Parmesan cheese
- 1 egg, beaten
- 1 tsp garlic powder
- Kosher salt and black pepper to taste
- 1/4 cup olive oil (for greasing pan)
- 1 jar (24 oz) marinara sauce (homemade or quality store-bought)
- 1 cup shredded mozzarella cheese
- 8 slider buns or small dinner rolls
- Fresh basil leaves (optional, for garnish)
Step-by-Step Instructions
Step 1: Preheat & Prep Pan
Preheat your oven to 375°F (190°C). Lightly grease a large skillet with olive oil and place it on medium-high heat. While the pan warms, prepare your chicken: trim any excess fat, then pound each breast between two sheets of plastic wrap until about 1/4-inch thick. This ensures even cooking and prevents dryness. Season both sides generously with salt and pepper.
“I don’t know if I’ve ever eaten a better Chicken Parmesan Sliders. The rub alone is wonderful, but the sauce??? Over the top!”
Step 2: Bread the Chicken
In a shallow bowl, whisk together the egg. In another bowl, mix breadcrumbs, half the Parmesan, and garlic powder. Dredge each chicken breast first in the egg, letting excess drip off, then coat thoroughly in the breadcrumb mixture, pressing gently to adhere. Place breaded breasts on a plate and refrigerate for 5–10 minutes (this helps the coating stick better).
Step 3: Sear the Chicken
Once the skillet is hot, add a thin layer of olive oil and sear the chicken for 3–4 minutes per side, until golden brown and internal temperature reaches 165°F. Transfer cooked chicken to a cutting board; slice into strips or leave whole depending on your preference.
Step 4: Assemble the Sliders
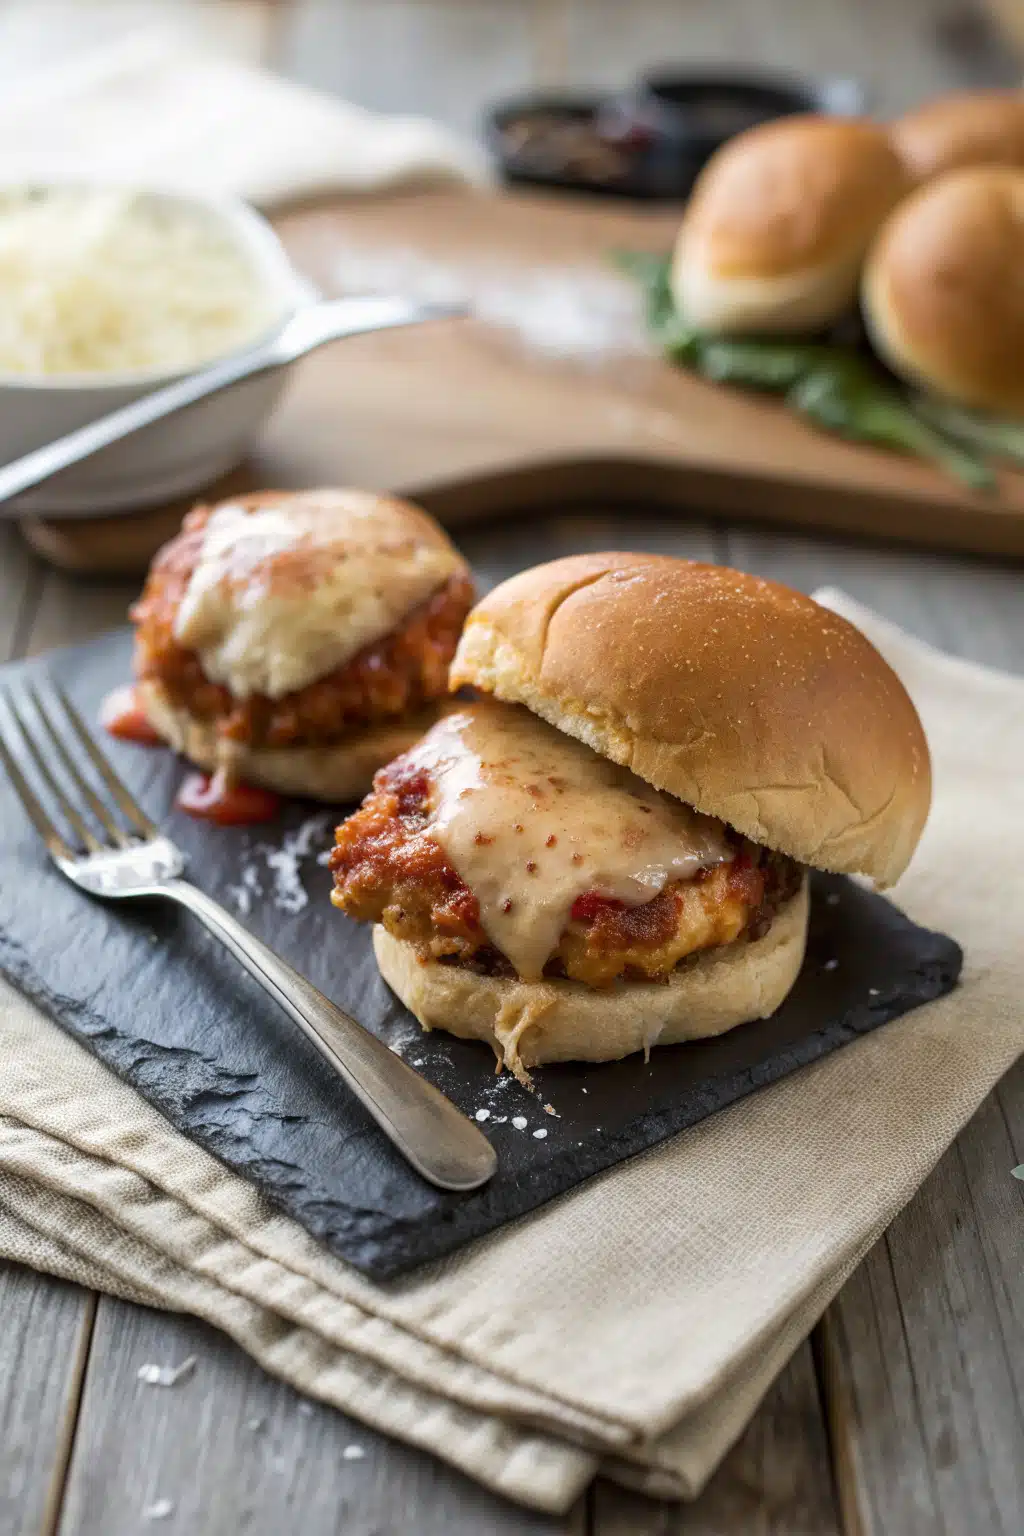
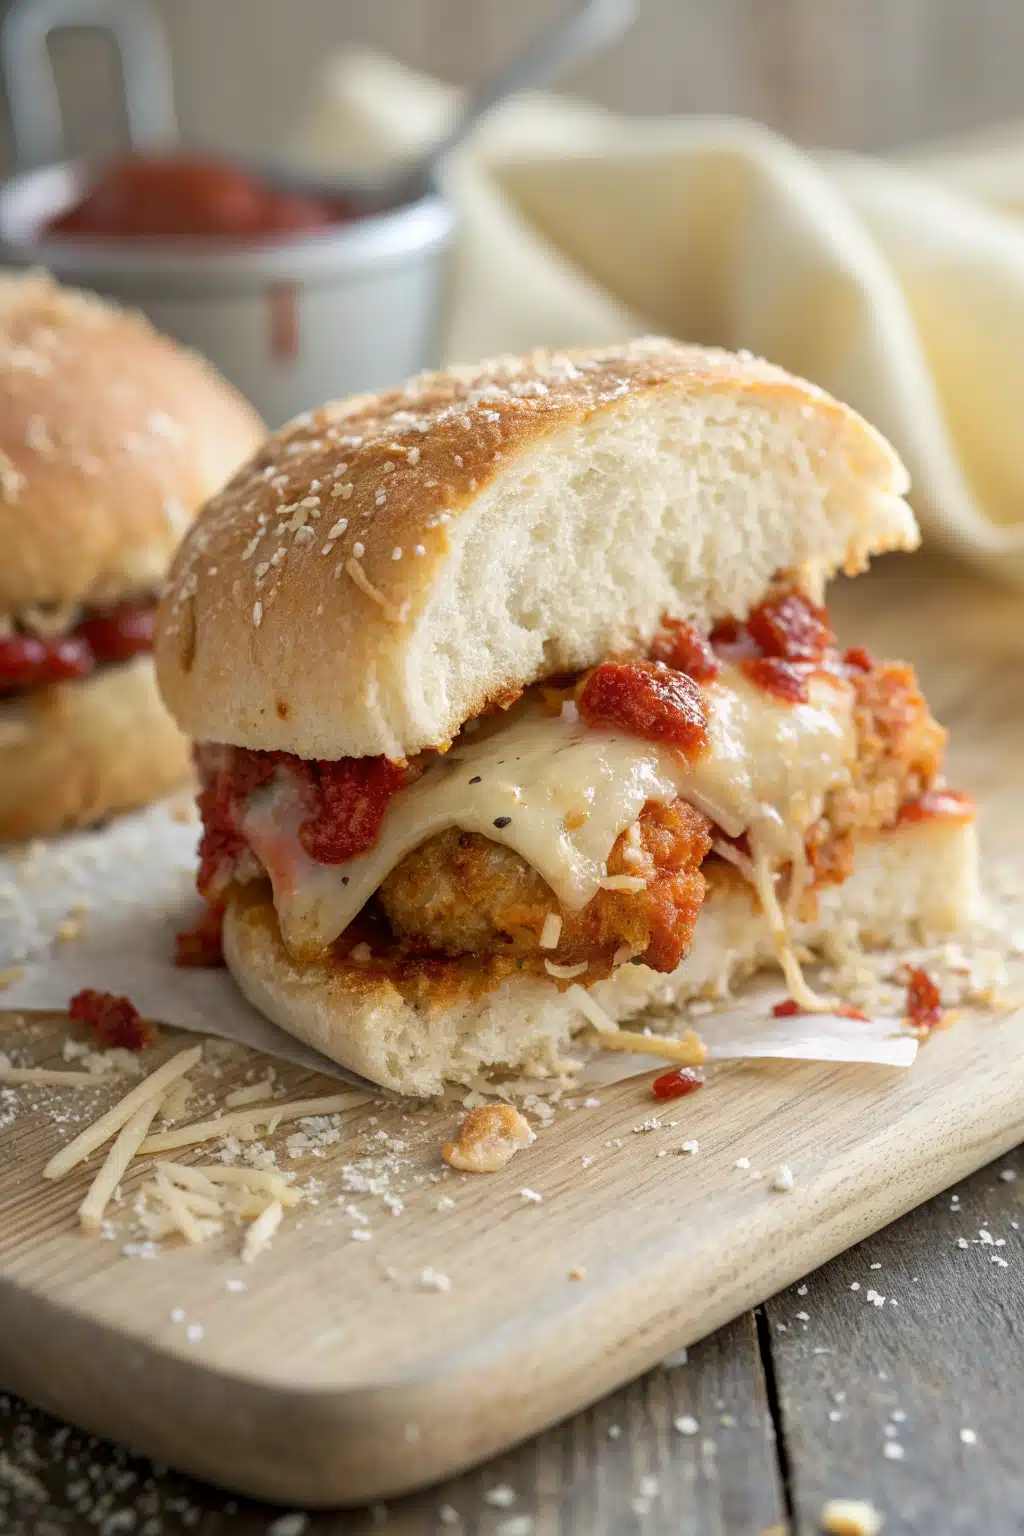
Lightly toast the bottom halves of your slider buns. Spread a generous spoonful of marinara on each toasted base, then layer chicken slices on top. Spoon more marinara over the chicken, followed by a handful of mozzarella and a sprinkle of remaining Parmesan. Cover with the top bun halves.
Step 5: Broil Until Bubbly
Place assembled sliders in a baking dish and transfer to the oven. Broil on high for 3–5 minutes, or until cheese is melted, bubbly, and starting to brown around the edges. Keep a close eye—broiling happens fast!
Step 6: Serve Immediately
Carefully remove from the oven, garnish with fresh basil if desired, and serve warm. These sliders are best enjoyed right away while the cheese is still molten and the buns are soft.
What to Serve It With
Chicken parmesan sliders shine brightest when paired with sides that balance their rich, savory flavor. A crisp green salad with a tangy vinaigrette cuts through the heaviness, while garlic knots or warm focaccia provide that perfect carb-to-cheese ratio. For a true Italian vibe, toss in some roasted broccoli rabe or sautéed escarole—it’s a classic combo that elevates the meal. If you’re keeping things light, a simple caprese skewer or cherry tomatoes with balsamic glaze works beautifully. And don’t forget the drinks! Refreshing lemonade, sparkling water with mint, or even a light white wine all complement the savory notes without overwhelming them.
Top Tips for Perfecting Your Chicken Parmesan Sliders
Cooking should feel joyful—not stressful—so here are my tried-and-true tips to make sure your chicken parmesan sliders turn out restaurant-quality every single time:
- Pound those chicken breasts: Uniform thickness = even cooking. Don’t skip this step!
- Don’t overcrowd the pan: When searing, give each piece space so it browns instead of steams. Work in batches if needed.
- Use quality marinara: Skip the low-sodium, sugar-heavy stuff. Look for sauces with minimal additives and recognizable ingredients.
- Cheese matters: Shred your own mozzarella for better meltability. Pre-shredded often contains anti-caking agents that prevent proper melting.
- Toast the buns: This keeps them from getting soggy before assembly. A quick 1-minute toast in a dry pan does wonders.
- Broil carefully: Cheese burns fast! Set a timer and watch closely during the last minute.
- Make-ahead friendly: Assemble unbaked sliders up to a day ahead, cover tightly, and refrigerate. Just add 5–10 minutes to baking time.
Storing and Reheating Tips
Leftovers? Happens to the best of us. Store cooled sliders in an airtight container in the fridge for up to 3 days. To reheat, place on a baking sheet and warm at 350°F for 10–12 minutes, or until heated through. Avoid microwaving—it makes the buns soggy. For best results, pop them back under the broiler for 1–2 minutes after reheating to refresh the cheese texture. Freezing is trickier due to the buns, but if you freeze unbaked assembled sliders (without cheese!), wrap tightly and freeze for up to 1 month. Thaw overnight in the fridge, add fresh cheese, and broil until melty.
Frequently Asked Questions
“The Chicken Parmesan Sliders turned out amazing. My kids asked for seconds. Saving this one!”
Final Thoughts
There’s something truly special about food that feels indulgent yet approachable, comforting yet exciting. Chicken parmesan sliders capture that magic perfectly. They’re the kind of dish that sparks conversation, brings smiles, and leaves everyone reaching for “just one more.” Whether you’re feeding a hungry crowd or treating yourself to a cozy night in, this recipe delivers pure joy in every bite. So next time you’re craving that classic comfort flavor in a fun, shareable format, don’t hesitate—grab your apron, gather your ingredients, and get ready to make memories one delicious slider at a time. Trust me, your taste buds (and your guests) will thank you.

Chicken Parmesan Sliders
Ingredients
Main Ingredients
- 1 lb boneless, skinless chicken breasts
- 1 cup all-purpose flour
- 2 large eggs beaten
- 1 cup Italian-seasoned breadcrumbs
- 0.5 cup grated Parmesan cheese
- 1 tsp garlic powder
- 0.5 tsp salt
- 0.25 tsp black pepper
- 0.5 cup olive oil for frying
- 12 slider buns split
- 1 cup marinara sauce warmed
- 1.5 cup shredded mozzarella cheese
- 0.25 cup fresh basil leaves chopped (optional)
Instructions
Preparation Steps
- Preheat oven to 375°F (190°C). Line a baking sheet with parchment paper.
- Set up a breading station: Place flour in one shallow bowl, beaten eggs in another, and mix breadcrumbs, Parmesan, garlic powder, salt, and pepper in a third bowl.
- Dredge each chicken piece in flour, dip in egg, then coat thoroughly with the breadcrumb mixture. Place on a plate.
- Heat olive oil in a large skillet over medium-high heat. Fry chicken pieces until golden brown and cooked through, about 3–4 minutes per side. Transfer to the prepared baking sheet.
- Place a spoonful of marinara sauce on the bottom half of each slider bun. Top with a fried chicken piece, then sprinkle with mozzarella cheese.
- Bake in the preheated oven for 8–10 minutes, or until the cheese is melted and bubbly.
- Remove from oven, top with chopped basil if desired, and serve warm.


