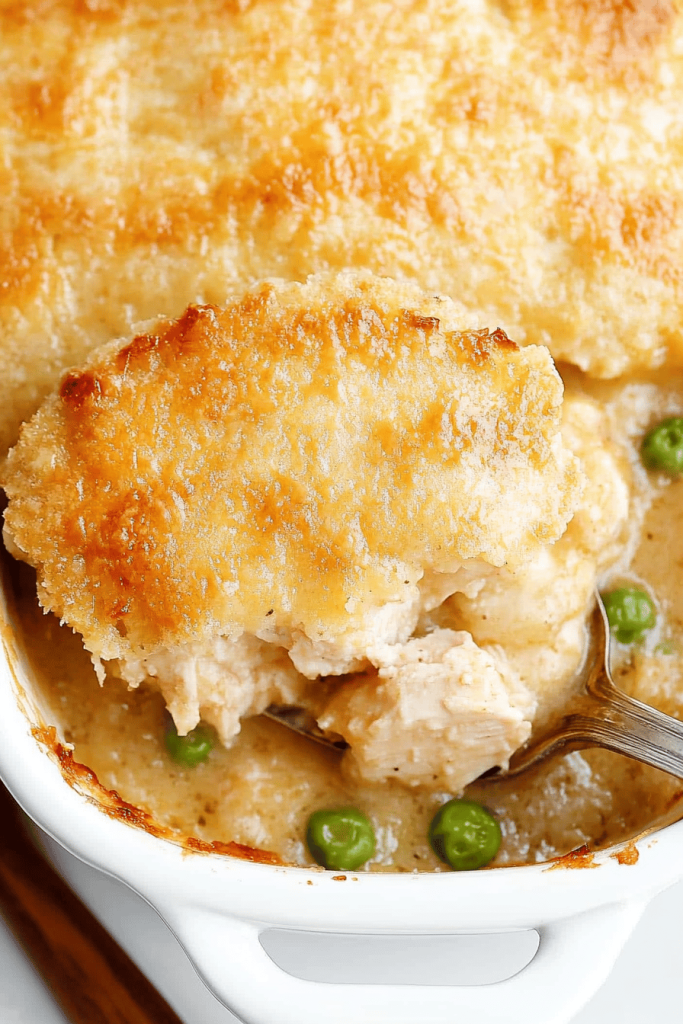
Okay, friends, let’s talk about the ultimate comfort food: Chicken Cobbler. This isn’t just any chicken dish; it’s a hug in a bowl, a warm blanket on a chilly evening, and a guaranteed crowd-pleaser all rolled into one. Forget complicated casseroles, this Chicken Cobbler Recipe is deceptively simple to make, and the flavor payoff is HUGE. Think of it as a savory pot pie, but with a biscuit-like topping that’s light, fluffy, and perfectly golden. It’s way easier than making Pie Crust, trust me! I always find myself craving this on rainy days or whenever I need a little extra TLC.
Thank you for reading this post, don't forget to subscribe!
What is chicken Cobbler?
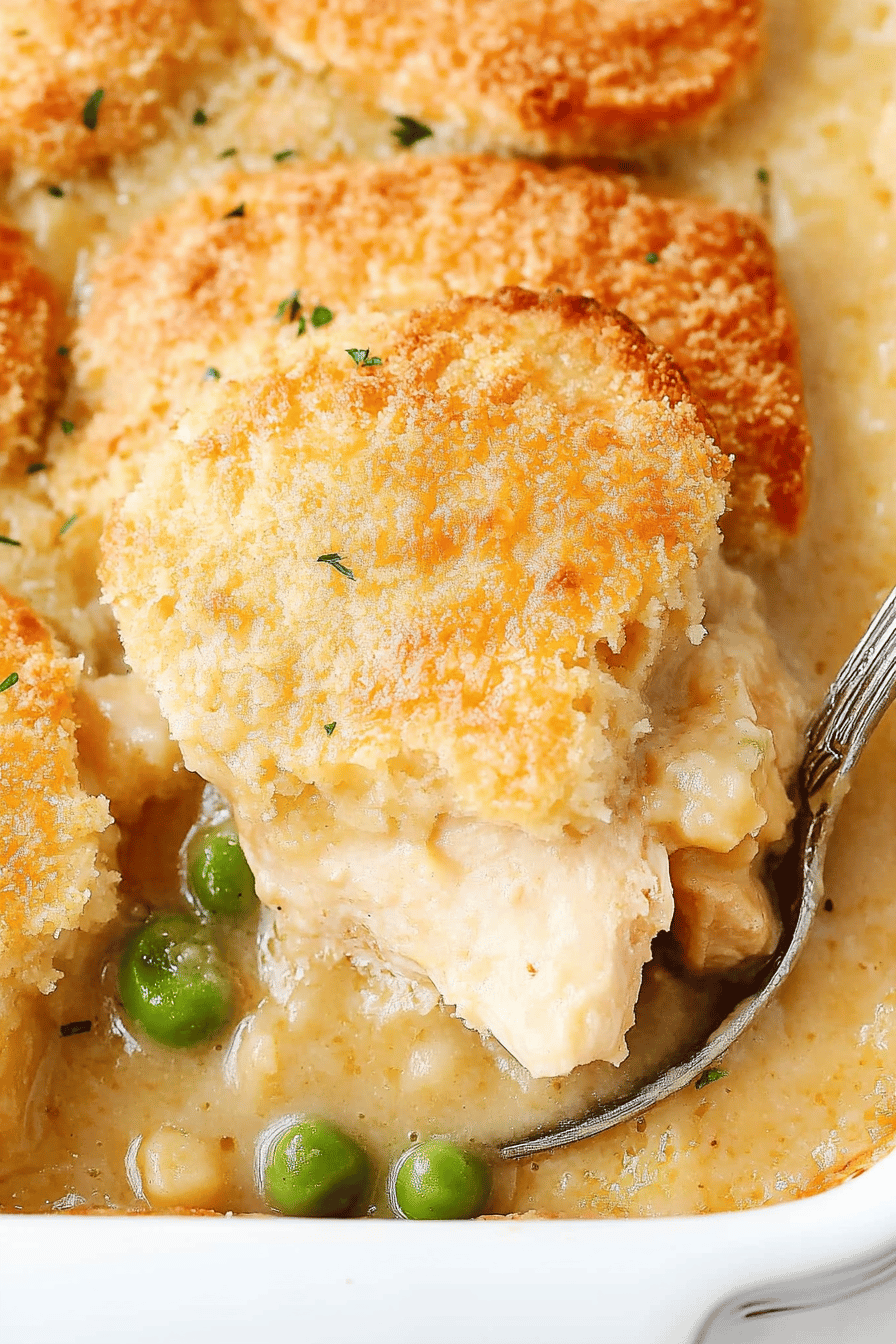
So, what exactly *is* Chicken Cobbler? Well, imagine a delicious, Creamy Chicken stew – rich with tender chicken, veggies, and a savory gravy – all topped with a golden, biscuit-like crust. Think of it as the savory cousin of a fruit cobbler. It’s essentially a one-dish meal that’s hearty, satisfying, and incredibly comforting. The beauty of a chicken cobbler recipe is that you can really adapt it to your own tastes and what you have on hand. Don’t have peas? Throw in some green beans! Prefer thighs to breasts? Go for it! It’s a forgiving and flexible recipe, perfect for beginner cooks and seasoned pros alike.
Why you’ll love this recipe?
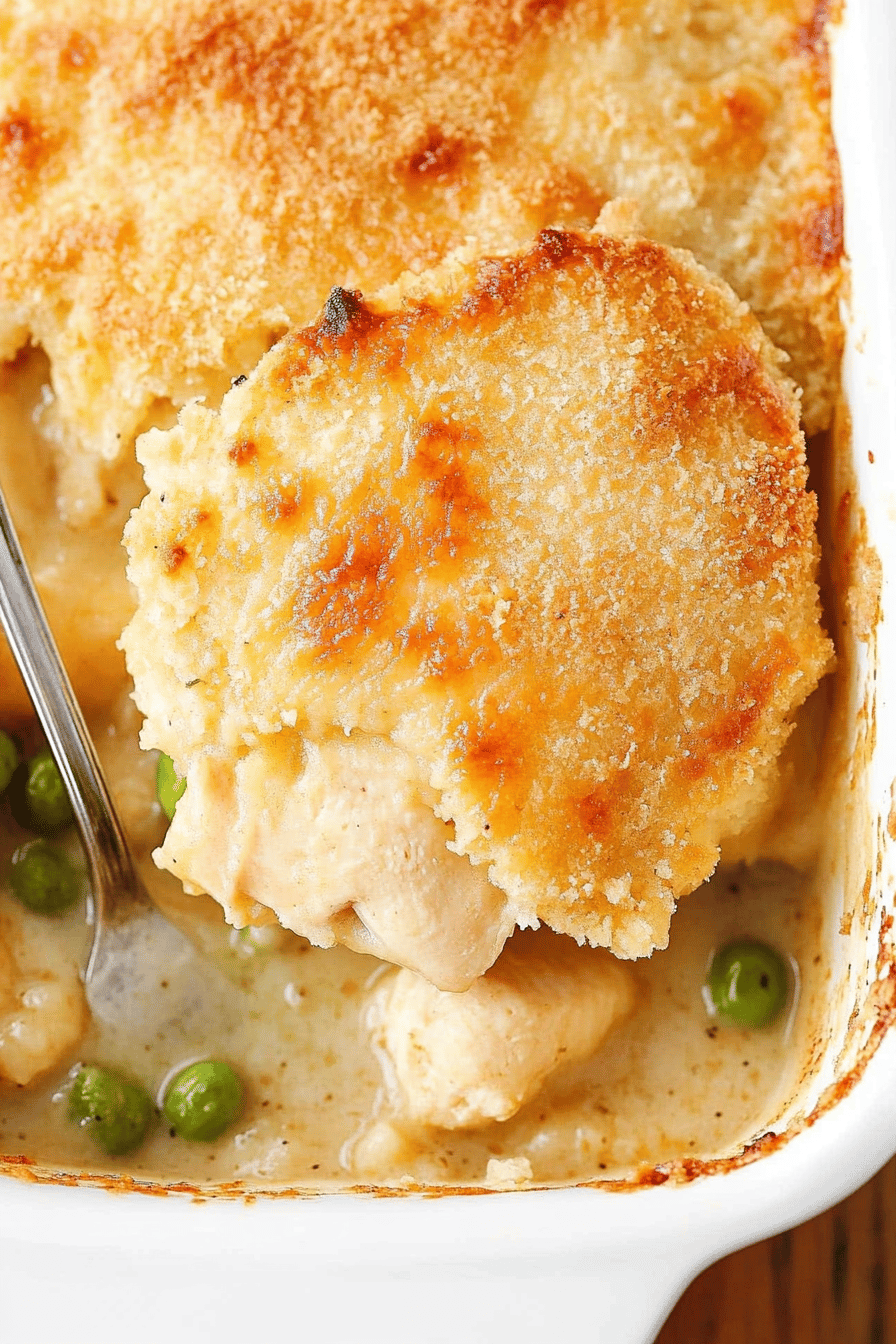
Oh, where do I even begin? I’m absolutely convinced this will become your new favorite chicken dinner. What I love most about this Chicken Cobbler Recipe is how ridiculously easy it is to make. Seriously, you can whip it up in under an hour, which makes it a lifesaver on busy weeknights. Plus, it’s so much cheaper than ordering takeout! The flavor is phenomenal, too. The Creamy Chicken filling is savory and satisfying, while the biscuit topping adds a touch of buttery richness that just melts in your mouth. It’s truly the perfect combination of textures and flavors.
My kids ask for this all the time, and honestly, I don’t mind making it because it’s so versatile. You can use leftover cooked chicken, rotisserie chicken, or even frozen veggies to cut down on prep time. And let’s not forget how comforting it is! There’s something so soul-satisfying about a warm bowl of Chicken Cobbler on a cold day. It’s like a hug from the inside out. I even love this even more than the classic Chicken Pot Pie – the biscuit topping is lighter and flakier. It’s just pure comfort food bliss, plain and simple.
How do you make a chicken Cobbler?
Quick Overview
Making this Chicken Cobbler Recipe is easier than you think! You’ll start by whipping up a simple Creamy Chicken mixture with vegetables. Then, you’ll prepare the biscuit topping – it’s just a quick mix of flour, baking powder, butter, and milk. Finally, you’ll spoon the chicken filling into a baking dish, top it with the biscuit mixture, and bake until golden brown and bubbly. This method is special because it uses everyday ingredients and requires minimal effort, yet delivers maximum flavor.
Ingredients
For the Main Filling:
- 2 tablespoons butter
- 1 onion, chopped
- 2 carrots, chopped.
- 2 celery stalks, chopped.
- 1 pound boneless, skinless chicken breasts, cut into bite-sized pieces (You can also use leftover cooked chicken!)
- 1/2 cup all-purpose flour.
- 4 cups chicken broth. 2 cups milk. 3 cups
- 1 cup frozen peas. 1 ts
- 1 cup frozen corn.
- 1 teaspoon dried thyme. 1 tablespoon dried
- 1/2 teaspoon salt
- 1/4 teaspoon black pepper. 1/2 teaspoon salt.
For the Biscuit Topping: For a simple
- 1 1/2 cups all-purpose flour. 1 1/4 cups whole wheat flour
- 2 teaspoons of baking powder. 1 teaspoon baking soda
- 1/2 teaspoon salt
- How much cold butter should I use?
- 3/4 cup milk
What are the steps to
Step 1: Preheat & Prep Pan
First, preheat your oven to 400°F (200°C). While the oven is heating up, grease a 9×13 inch baking dish. How do you prevent a cobbler from sticking and making it easier to serve? I usually spray mine with cooking spray, but you can also use butter or shortening.
Step 2: Sauté Vegetables
In a large skillet or pot, melt the butter over medium heat. Add the onion, carrots, and celery and cook until softened, about 5-7 minutes. This step is crucial for building flavor, so don’t rush it. Make sure the veggies are tender before moving on.
Step 3: Cook Chicken
Add the chicken to the skillet and cook until browned on all sides. It doesn’t need to be fully cooked at this point, as it will continue to cook in the oven. Just make sure it has a nice sear for added flavor.
Step 4: Make Roux
Sprinkle the flour over the chicken and vegetables and cook for 1 minute, stirring constantly. This creates a roux, which will thicken the sauce. Make sure to cook it long enough to get rid of the raw flour taste.
Step 5: Add Broth & Simmer
Gradually whisk in the chicken broth until smooth. Bring to a simmer and cook until the sauce has thickened, about 5-7 minutes. Stir frequently to prevent sticking.
“New family favorite! This Chicken Cobbler Recipe was so flavorful and ridiculously easy. Crowd-pleaser for sure.”
Step 6: Add Veggies & Season
Stir in the frozen peas, corn, thyme, salt, and pepper. Taste and adjust seasonings as needed. This is where you can really customize the flavor to your liking.
Step 7: Make Biscuit Topping
While the chicken filling is simmering, prepare the biscuit topping. In a large bowl, whisk together the flour, baking powder, and salt. Set aside. How do you cut butter in a pastry blender or your fingers until the mixture resembles coarse. The colder the butter, the flakier biscuits will be.
Step 8: Add Milk & Combine
Stir in the milk until just combined. Do not overmix biscuits, as this will result in tough biscuit. The dough should be slightly shaggy.
Step 9: Assemble & Bake
Spoon the chicken filling into the prepared baking dish. Drop spoonfuls of the biscuit dough over the filling, leaving a little space between each biscuit. Bake for 20-25 minutes, or until the biscuits are golden brown and the filling is bubbly. I always rotate the dish halfway through baking to ensure even browning.
Step 10: Cool & Serve
Let the cobbler cool for a few minutes before serving. This will allow the filling to thicken slightly and prevent it from being too runny. Serve hot and enjoy!
What should I serve it with?
This Chicken Cobbler Recipe is a complete meal on its own, but you can definitely pair it with some of your favorite sides. What are some of the best sides to round out the experience?
For a Light Lunch: A simple green salad with a vinaigrette dressing is a perfect way to balance the richness of the cobbler.
For a Cozy Dinner: Serve with roasted vegetables like Brussels sprouts or asparagus for a heartier meal.
For a Potluck: This cobbler is always a hit at potlucks! Bring a side of cranberry sauce or a Fruit Salad for a festive touch.
My Family’s Favorite: Honestly, we just love it as is! Sometimes I’ll serve it with a side of cornbread for extra comfort.
Top Tips for Perfecting Your Chicken Cobbler Recipe
Want to take your Chicken Cobbler Recipe to the next level? Here are some expert tips to help you achieve perfection every time:
Chicken Prep: Use cooked shredded chicken or diced Chicken Breasts. If using chicken breasts, sear them in the pan before adding other ingredients.
Vegetable Variety: Experiment with different vegetables like mushrooms, potatoes, or Green Beans for added flavor and texture. I find that adding potatoes helps thicken the stew.
Thickening Tips: If the filling is too thin, mix a tablespoon of cornstarch with a tablespoon of cold water and stir it into the simmering sauce. This will thicken it up quickly.
Biscuit Variations: Add herbs like thyme or rosemary to the biscuit dough for a savory twist. You can also brush the tops of the biscuits with melted butter or milk before baking for a golden brown finish. I sometimes grate a bit of parmesan cheese on top before baking.
Oven Temperature: Be sure to preheat your oven to the correct temperature before baking. This will ensure that the biscuits rise properly and the filling is cooked through.
Doneness Test: The cobbler is done when the biscuits are golden brown and the filling is bubbly. You can also insert a toothpick into the center of a biscuit to check for doneness. If it comes out clean, the cobbler is ready.
“Made the Chicken Cobbler Recipe tonight and wow — perfect weeknight dinner. Will definitely make again!”
Make Ahead Magic: Prepare the filling ahead of time and store it in the refrigerator for up to 2 days. You can also make the biscuit dough ahead of time and store it in the refrigerator for up to 24 hours. Just be sure to bake the cobbler right before serving.
I also made this with almond milk to try and make it dairy free, and honestly it was still great – maybe even a little bit sweeter than usual.
Storing and Reheating Tips
Got leftovers? Here’s how to store and reheat your Chicken Cobbler Recipe for maximum deliciousness:
Room Temperature: Let the cobbler cool completely before storing it. You can leave it at room temperature for up to 2 hours. Cover with foil.
Refrigerator Storage: Store the cooled cobbler in an airtight container in the refrigerator for up to 3 days. This will keep it fresh and prevent it from drying out.
Freezer Instructions: For longer storage, freeze the cobbler in an airtight container for up to 2 months. Thaw it in the refrigerator overnight before reheating.
Reheating Methods: To reheat, bake the cobbler in a preheated oven at 350°F (175°C) until heated through. You can also microwave individual portions for a quick and easy meal. Just be sure to cover it with a paper towel to prevent splattering.
Glaze Timing Advice: If you made a glaze for the topping it’s best to store without the glaze, or store the glaze separately, and add right before serving.
Frequently Asked Questions
Final Thoughts
So there you have it – my family’s favorite Chicken Cobbler Recipe! I truly believe this is the ultimate comfort food, and I hope you enjoy making it as much as I do. It’s easy, delicious, and guaranteed to put a smile on everyone’s face. If you love this Chicken Cobbler Recipe, be sure to check out my other comfort food recipes like my Creamy Tomato Soup or my Mac and Cheese Bake. Happy cooking, friends! I can’t wait to hear how yours turns out – be sure to leave a comment and let me know what you think!
How to Whip Up an Easy Chicken Cobbler: 5 Simple Steps!
Ingredients
Main Ingredients
- 4 tablespoons unsalted butter melted
- 4 cups shredded chicken cooked
- 12 oz frozen mixed vegetables peas and carrots
- 1 teaspoon garlic powder
- 1 teaspoon onion powder
- 0.5 teaspoon black pepper freshly ground
- 10.5 oz condensed cream of mushroom soup can
- 2 cups chicken stock
- 11.36 oz Honey Butter Biscuit Mix such as Pioneer brand, seasoning packet reserved
- 2 cups whole milk
- 0.5 cup shredded mozzarella cheese
- 2 tablespoons unsalted butter melted, for topping
Instructions
Preparation Steps
- Preheat your oven to 350°F (175°C).
- Coat a 9x13 inch baking dish with 4 tablespoons of melted butter.
- Spread the cooked shredded chicken evenly over the butter, then top with frozen vegetables. Season with garlic powder, onion powder, and black pepper. Do not stir.
- Mix the condensed cream of mushroom soup with chicken stock until smooth. Pour evenly over the chicken and vegetables.
- In another bowl, combine Honey Butter Biscuit Mix with whole milk and mozzarella cheese. Mix gently, and spoon the mixture over the chicken filling. Spread to cover evenly.
- Bake for 50-60 minutes, or until the biscuit topping is golden and the filling is bubbling.
- After baking, brush the top with 2 tablespoons of melted butter mixed with the reserved seasoning packet.
- Allow to cool slightly before serving.


