Oh, my goodness, have I got a treat for you today! If there’s one thing that instantly makes me feel like I’ve stepped into a little slice of heaven, it’s a dollop of perfectly creamy, airy homemade whipped cream. Forget the stuff from the can – it just can’t compare, not even a little bit. This recipe is my absolute go-to, the one I whip up when we have guests, for special desserts, or honestly, just when I’m having one of those days that calls for something sweet and incredibly comforting. It’s so simple, so ridiculously delicious, and it tastes a million times better than anything you’d buy in a tub. I remember the first time I made it from scratch for a birthday cake; I was honestly a little intimidated, thinking it would be tricky, but it was unbelievably easy. My husband took one bite and his eyes just lit up. That’s when I knew I’d found a winner. If you’ve ever felt like making your own whipped cream was a big undertaking, then pull up a chair, grab a cup of coffee, and let me show you how utterly simple and rewarding it can be. This is less of a recipe and more of a kitchen hug, truly.
Thank you for reading this post, don't forget to subscribe!What is a homemade whipped cream?
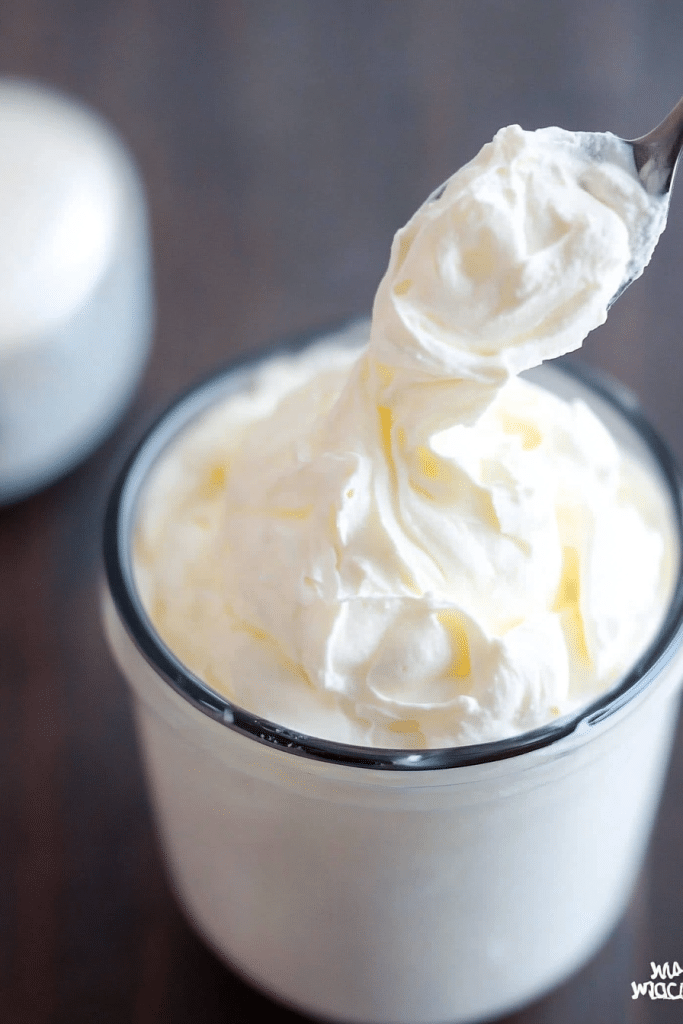
So, what exactly is this magical stuff? In its simplest form, homemade whipped cream is just heavy cream that’s been beaten until it’s light, fluffy, and holds soft peaks. Think of it as transforming humble cream into something airy and decadent with just a whisk (or an electric mixer, if you’re feeling fancy!). It’s essentially the cloud that tops all your favorite desserts. The beauty of it is its purity. You’re not dealing with a long list of ingredients or preservatives; it’s just the pure, unadulterated goodness of dairy. It’s the original topping, the OG of dessert adornments, and when you make it yourself, you control exactly what goes into it. It’s the kind of thing that makes a simple bowl of berries feel like a gourmet experience, or a slice of pie feel like a true celebration. It’s comfort in a bowl, really.
Why you’ll love this recipe?
There are so many reasons why I keep coming back to this simple homemade whipped cream recipe, and I’m willing to bet you’ll fall in love with it too. First off, let’s talk about flavor. The taste is just pure, rich, creamy dairy goodness. There’s a subtle sweetness that’s just right, not overpowering, allowing the pure cream flavor to shine. It’s not cloying or artificial like some store-bought options. Then there’s the texture. Oh, the texture! It’s so light and airy, melting in your mouth with every bite. It’s like eating a sweet cloud. When it’s perfectly whipped, it holds its shape beautifully, but still has that lovely softness. You’ll love how incredibly simple it is to make. Seriously, if you can boil water, you can make this whipped cream. It takes mere minutes, especially if you’ve got an electric mixer. No complicated steps, no weird techniques required. It’s a lifesaver on busy nights when you need a quick dessert topping or a little something special to elevate a simple treat. And for how amazing it tastes, it’s surprisingly cost-effective. A carton of heavy cream is much cheaper than buying pre-made whipped toppings, and the yield is so much better. What I love most about this is its versatility. You can use it for almost anything! Top pies, cakes, cobblers, fruit salads, or even just a simple mug of hot chocolate. It’s the perfect accompaniment to so many things. It truly elevates whatever it’s served with, turning ordinary into extraordinary without any fuss. It’s a staple in my kitchen, and I think it will become one in yours too.
How do I make homemade whipped cream?
Quick Overview
This is honestly one of the quickest and most rewarding things you can make in your kitchen. You’ll start with cold heavy cream, a touch of sweetener, and maybe a hint of vanilla. The magic happens when you whip it up until it’s beautifully soft and holds lovely peaks. It’s all about chilling your tools and using quality ingredients, and then a few minutes of whisking. The result is a light, airy, and unbelievably delicious topping that will make you question why you ever bought it from a store.
Ingredients
For the Creamy Goodness:
2 cups heavy whipping cream, very cold. This is key! Make sure it’s cold from the fridge. Don’t use half-and-half or light cream; you really need that high fat content for it to whip up properly. I always keep an extra carton in the fridge just in case I have a sudden craving.
2 tablespoons powdered sugar (or more, to taste). Powdered sugar dissolves much more easily than granulated sugar, which helps prevent a grainy texture. You can adjust this amount based on how sweet you like your whipped cream.
1 teaspoon vanilla extract. Use good quality vanilla; it really makes a difference in the final flavor. You could also use a splash of almond extract or even a bit of bourbon for a grown-up twist!
Step-by-Step Instructions
Step 1: Chill Everything
This is probably the MOST important step. Pop your mixing bowl and your whisk attachment (if using an electric mixer) into the freezer for at least 15-20 minutes. The colder everything is, the better and faster your cream will whip up. Seriously, don’t skip this part!
Step 2: Pour the Cream
Pour the cold heavy whipping cream into your chilled mixing bowl. Make sure there’s enough room for the cream to expand as it whips.
Step 3: Add Flavorings (Optional but Recommended!)
Add the powdered sugar and vanilla extract to the cream. If you’re using granulated sugar, it’s best to dissolve it in a tiny bit of warm water first and let it cool completely before adding it to the cream. But honestly, powdered sugar is the way to go for ease and texture.
Step 4: Whip it Good!
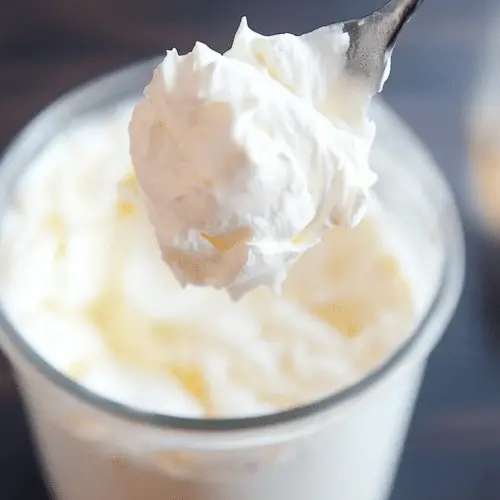
Start whipping! If you’re using an electric mixer, start on low speed to avoid splattering, then gradually increase to medium-high. If you’re doing it by hand with a whisk, be prepared for a bit of an arm workout! Keep whipping until soft peaks form. This means when you lift the whisk, a peak forms, but the tip gently curls over. This is usually around 3-5 minutes with an electric mixer, longer by hand.
Step 5: Watch for Stiff Peaks
Continue whipping until the mixture thickens and forms stiff peaks. When you lift the whisk, the peaks should stand straight up without drooping. Be careful not to overbeat, or you’ll end up with butter! It’s a fine line, so keep an eye on it. If you accidentally go too far, don’t despair; you can sometimes whisk in a tablespoon or two of unwhipped cream to loosen it up.
Step 6: Taste and Adjust
Give it a quick taste. Need a little more sweetness? Add another teaspoon of powdered sugar and briefly whip to combine. Want more vanilla? Add a tiny splash. Adjust to your personal preference.
“Made the homemade whipped cream tonight and wow — perfect weeknight dinner. Will definitely make again!”
Step 7: Serve Immediately or Chill
Your homemade whipped cream is ready! Serve it right away for the freshest, lightest texture. If you’re not using it immediately, cover the bowl tightly with plastic wrap (pressing it directly onto the surface of the cream helps prevent a skin from forming) and chill in the refrigerator.
Step 8: Gentle Re-whip (If Needed)
If your whipped cream has been in the fridge for a bit and has slightly deflated, don’t worry! Just give it a quick whisk for about 15-30 seconds to bring back its lovely fluffy peaks before serving.
Step 9: Enjoy Your Creation!
Spoon it generously over your favorite desserts, berries, or even just eat it with a spoon. You’ve earned it!
What to Serve It With
Honestly, the possibilities are endless, but here are some of my favorite ways to enjoy this luscious homemade whipped cream:
For Breakfast: A dollop on fresh berries is a morning dream! It makes oatmeal feel incredibly special. I also love it on pancakes or waffles, especially when I’m feeling a bit decadent. It’s like a mini dessert to start the day!
For Brunch: Imagine this alongside some perfectly ripe fruit salad, or atop some homemade scones. It adds such an elegant touch without any extra effort. A little swirl on a mimosa glass rim? Why not!
As Dessert: This is where it truly shines. It’s the classic topping for apple pie, cherry pie, chocolate cake, or any fruit crumble. It’s also divine on a simple slice of angel food cake or pound cake. For a quick fancy treat, just pour some hot fudge sauce over vanilla ice cream and top with a generous swirl of my homemade whipped cream.
For Cozy Snacks: My kids love having this with a mug of hot chocolate, and honestly, so do I! It’s also fantastic on a warm brownie or a baked apple. It’s that little bit of comfort that makes any moment feel sweeter and more special. My family tradition is to have it with fresh strawberries in the summer; it’s just pure bliss.
Top Tips for Perfecting Your Homemade Whipped Cream
Over the years, I’ve learned a few tricks that make this recipe foolproof. These are the little things that make a big difference!
Cream Quality: Always use heavy whipping cream with at least 30% fat, but 35% or higher is even better. The fat is what creates the structure. Don’t try to cheat with lighter creams!
Cold is King: I can’t stress this enough: your cream, your bowl, and your whisk attachment (if using an electric mixer) should be as cold as possible. If you have time, let them chill in the freezer for 30 minutes. If you’re in a rush, place the bowl and whisk in the fridge for 15 minutes, and pour your cream from the coldest part of your fridge.
Don’t Over-Whip: This is the most common mistake. Whipping too long turns your beautiful cream into butter and buttermilk. Keep a close eye on it. As soon as you see stiff peaks forming, stop. It happens faster than you think, especially with an electric mixer.
Sweetness Adjustment: Start with the recommended amount of powdered sugar, but don’t be afraid to taste and adjust. Some people prefer it less sweet, others like it a bit sweeter. Powdered sugar is best because it dissolves easily and doesn’t make the cream grainy.
“Packed with flavor and so simple. Exactly what I wanted from this homemade whipped cream!”
Flavor Boosts: Vanilla extract is classic, but think about other flavorings! A little espresso powder can make it mocha-flavored, citrus zest adds brightness, or a tiny pinch of cinnamon can be lovely. Experimentation is fun!
Stabilizing for Longevity: If you need your whipped cream to hold its shape for a longer period (like on a cake that needs to sit out for a few hours), you can stabilize it. Whisk in 1-2 tablespoons of cream cheese or mascarpone cheese (softened) at the beginning with the cream, or gently fold in 1-2 tablespoons of dissolved unflavored gelatin at the end once it’s just reached soft peaks. Just make sure you don’t overmix after adding these stabilizers.
Manual Whipping Benefits: While electric mixers are fast, whisking by hand gives you incredible control over the texture. Plus, it’s a great way to get some arm exercise! If you’re whisking by hand, use a large bowl so you have plenty of room to move.
Storing and Reheating Tips
Homemade whipped cream is best enjoyed fresh, but it does keep for a little while. Here’s how to store it:
Refrigerator Storage: Once whipped, cover the bowl tightly with plastic wrap, pressing the wrap directly onto the surface of the cream. This prevents a skin from forming and keeps it fresh. It will stay beautifully fluffy for about 24-48 hours. After that, it might start to lose some of its airiness.
Freezer Instructions: While not ideal, you *can* freeze homemade whipped cream. Spoon it into dollops onto a parchment-lined baking sheet and freeze until firm. Then, transfer the frozen dollops to an airtight container or freezer bag. It’s best used within 1-2 months. To thaw, let it sit in the refrigerator overnight or at room temperature for about 30 minutes. It might be a little softer after freezing, so a quick re-whip might be needed.
Glaze Timing Advice: If you’re making a dessert that requires a glaze, I always recommend adding the whipped cream *just* before serving, especially if it’s going to sit out for a while or be transported. This ensures it stays at its peak fluffiness and doesn’t melt or deflate.
Frequently Asked Questions
Final Thoughts
So there you have it – the simplest, most delightful homemade whipped cream recipe. It’s one of those little kitchen victories that makes you feel like a pro, even though it requires minimal effort. It’s the pure, unadulterated taste of cream, sweetness, and vanilla that truly can’t be beaten. I hope you give this a try, and I can’t wait to hear how much you love it. It’s perfect for those moments when you need a little something special without a whole lot of fuss. If you enjoy this, you might also love my recipes for [link to a related dessert recipe, e.g., Easy Chocolate Mousse] or my guide to [link to another related content, e.g., Perfect Pie Crust]. Happy whipping, and I’d love to see your creations or hear about your favorite ways to use this dreamy cream in the comments below!
homemade whipped cream
Ingredients
Main Ingredients
- 2 cups heavy cream chilled
- 0.25 cup powdered sugar
- 1 teaspoon vanilla extract
Instructions
Preparation Steps
- In a large chilled bowl, combine the heavy cream, powdered sugar, and vanilla extract.
- Using an electric mixer, beat the mixture on medium-high speed until stiff peaks form. This usually takes about 3-5 minutes.
- Serve immediately or refrigerate until ready to use.