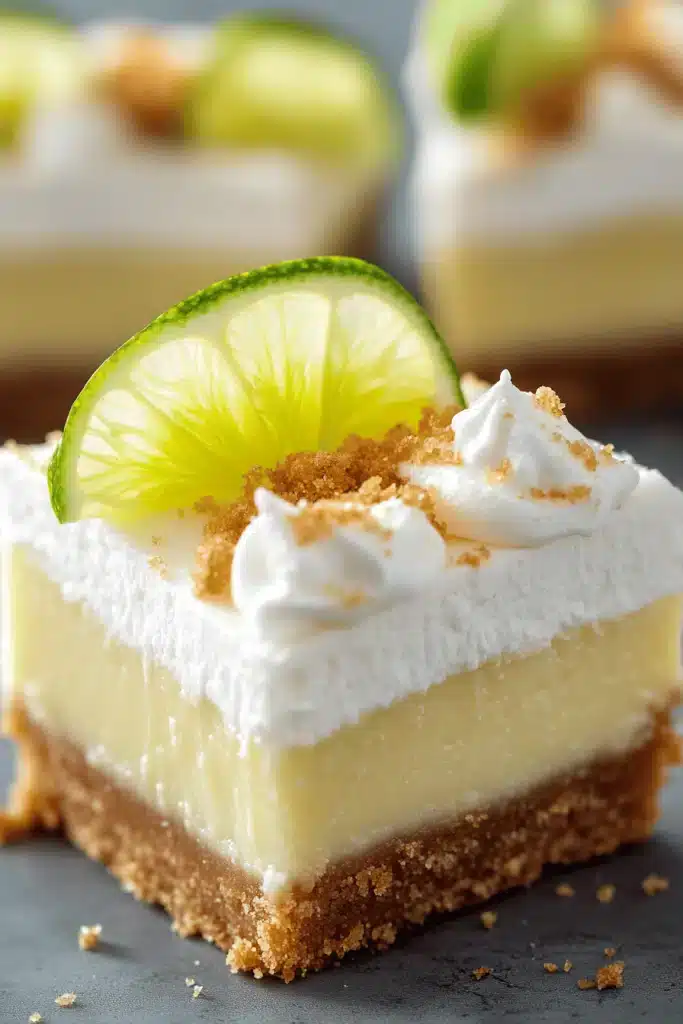
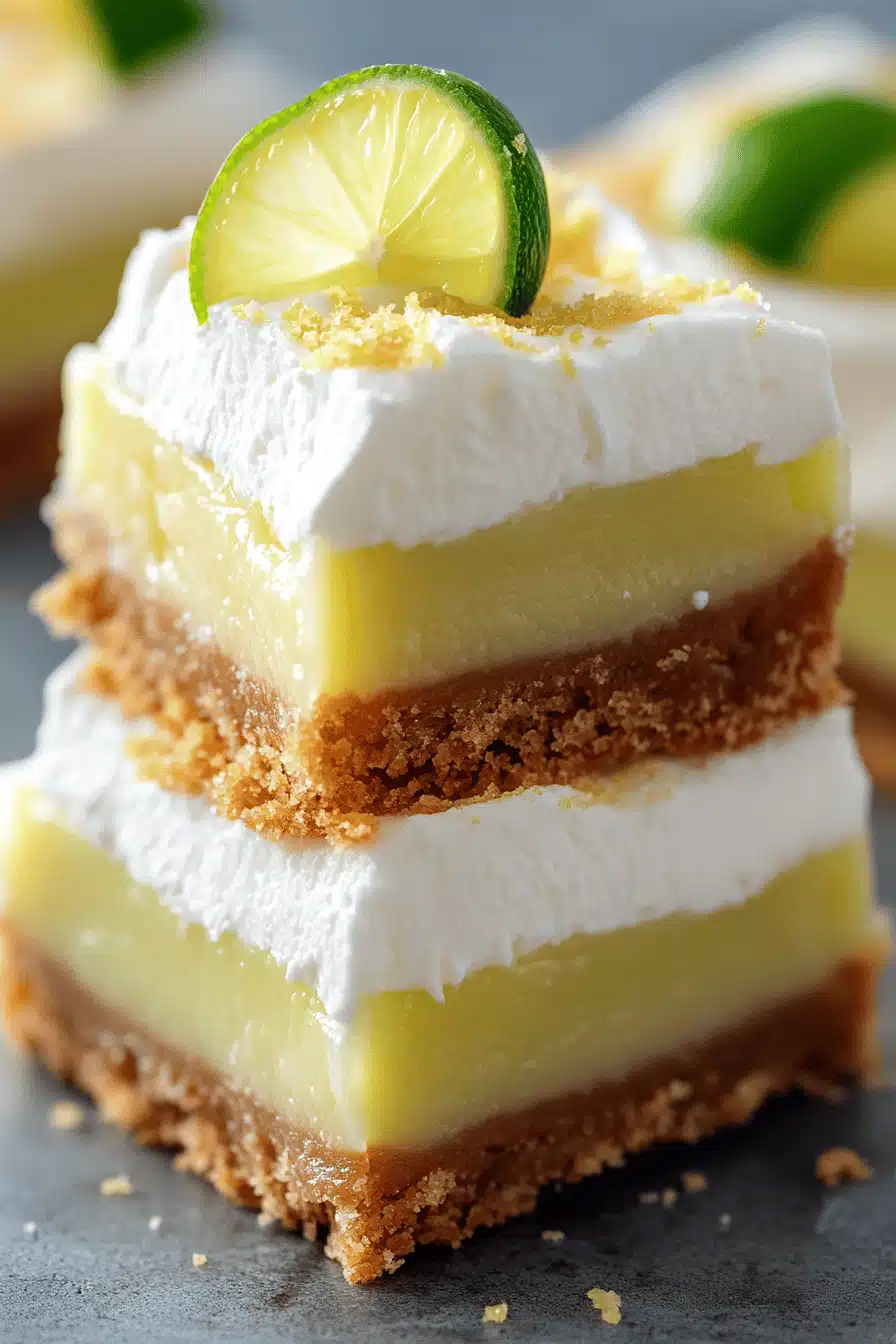
Okay, friends, let me tell you about these Key Lime Pie Bars. Seriously, forget everything you thought you knew about key lime pie because these are about to rock your world. I’m talking the tangy zip of key lime, the smooth creaminess of a perfect filling, all sitting on a buttery, slightly salty crust. It’s like sunshine in every single bite. I love Key Lime Pie, but let’s be honest, sometimes you just want something a little less fussy. These bars are the answer! They’re way easier to throw together than a whole pie, but still deliver that amazing key lime flavor that makes my taste buds sing. And trust me, these are a total crowd-pleaser – they never last long when I bring them to parties or potlucks!
Thank you for reading this post, don't forget to subscribe!
What is a Key Lime Pie Bar?
Think of these Key Lime Pie Bars as the cooler, younger cousin of traditional key lime pie. They’ve got all the familiar flavors you crave – that bright, citrusy tang, the rich and creamy filling – but in a fun, shareable bar form. It’s essentially a key lime pie filling baked over a crisp, buttery crust, and then cut into individual bars. The name comes from key limes, obviously! They are the smaller, more aromatic limes that are traditional to the Florida Keys. Don’t worry if you can’t find them though – regular limes will work in a pinch. The great thing about these bars is that they are so much easier to make than a whole pie. No blind baking crusts, no worrying about a soggy bottom. Just press, pour, and bake!
Why you’ll love this recipe?
Listen, there are a million dessert recipes out there, I know. But trust me when I say that these Key Lime Pie Bars are something special. What I love most about this is how the bright, tangy key lime flavor cuts through the richness of the filling and the buttery crust. It’s a perfectly balanced sweet treat that isn’t overly heavy or cloying. It’s just *chef’s kiss* divine! And the best part? They’re ridiculously easy to make. Seriously, even if you’re not a seasoned baker, you can whip these up without any stress. The ingredients are simple and readily available, which means you don’t have to break the bank to create a show-stopping dessert. I mean, who doesn’t love a delicious recipe that won’t empty your wallet? Plus, these bars are incredibly versatile. They’re perfect for everything from backyard barbecues to elegant dinner parties. Serve them chilled on a hot summer day, or pair them with a cup of coffee for a cozy afternoon treat. You can even customize them with different toppings or crusts to suit your personal preferences. These are so much faster than traditional Key Lime Pie. My family also loves lemon bars, but I think this key lime version might just take the crown for our favorite citrus bar!
How do I make Key Lime Pie Bars?
Quick Overview
Making these Key Lime Pie Bars is a breeze! Basically, you’re going to press a simple Graham Cracker crust into a baking pan, whip up a tangy key lime filling, pour it over the crust, and bake until set. Then, after cooling, you can add a simple glaze. The best part is that there’s no fancy equipment required and the whole process takes less than an hour. I promise you won’t be disappointed!
Ingredients
For the Crust:
* 1 1/2 cups graham cracker crumbs: I like to crush my own fruit. You can buy them pre-made, but I prefer to use fresher fruits. 1/2 cup (1 stick) unsalted butter, melted: Make sure it’s completely melted for easy mixing. * 1/4 cup granulated sugar: Adds a touch of sweetness to the crust.
For the Filling:
* 1 (14 ounce) can Sweetened Condensed Milk: This is key for the creamy, rich texture of the filling.
* 1/2 cup key lime juice: Freshly squeezed is always best, but bottled will work in a pinch.
* 1/4 cup sour cream: Adds a little tang and helps to balance the sweetness. I’ve even used plain Greek yogurt in a pinch!
* 2 large egg yolks: Adds richness and helps the filling set up properly.
For the Glaze (Optional):
* 1 cup powdered sugar: For a smooth, sweet glaze. * 2-3 tablespoons lime juice: Add more or less to reach your desired consistency.
How do I follow step
Step 1: Preheat & Prep Pan
Preheat your oven to 350°F (175°C). Grease and line a 9×13 inch baking pan with parchment paper, leaving an overhang on the sides. How do I lift a bar out? I always do this, even if it seems like a pain, because it really does save you from many of the things. What do you think of
Step 2: Mix Dry Ingredients
In a medium bowl, combine the graham cracker crumbs and sugar. Mix well until evenly distributed. This ensures that the sweetness is evenly spread throughout the crust.
Step 3: Mix Wet Ingredients
What is the best way to stir together the crumb mixture and the melted butter? How do you make a wet sand mixture? What is important for creating a crust that holds together well?
Step 4: Combine
Bake for 30 minutes or until golden brown. Place the crumb mixture into the prepared baking pan, making an even layer. Use the bottom of a measuring cup or flat-bottomed glass to help press the crust down evenly. Bake for 8-10 minutes, or until lightly golden. Do not over bake. How do I prevent my crust from getting soggy?
Step 5: Prepare Filling
While the crust is baking, prepare the filling. In a large bowl, whisk together the Sweetened Condensed Milk, key lime juice, sour cream, and egg. Set aside. How do you mix egg yolks until Do not over-mix filling as this can cause it to become tough.
Step 6: Layer & Swirl
What should I do with the filling? Pour it over the warm crust and spread evenly. If you want to get fancy, you can swirl a little extra key lime juice into the filling for marbled results. I sometimes do this when I’m feeling extra!
Step 7: Bake
Bake for 15-20 minutes, or until the filling is set around the edges but still slightly wobbly in the center. The filling will continue to set as it cools. Don’t overbake, as this can cause the filling to crack. Every oven is different, so keep an eye on it!
Step 8: Cool & Glaze
Let the bars cool completely in the pan before glazing. Once cool, whisk together the powdered sugar and key lime juice until smooth. Drizzle the glaze over the bars and let it set before slicing. If you’re not a fan of glaze, you can simply dust the bars with powdered sugar. I usually skip the glaze if I’m in a hurry, and they’re still delicious!
Step 9: Slice & Serve
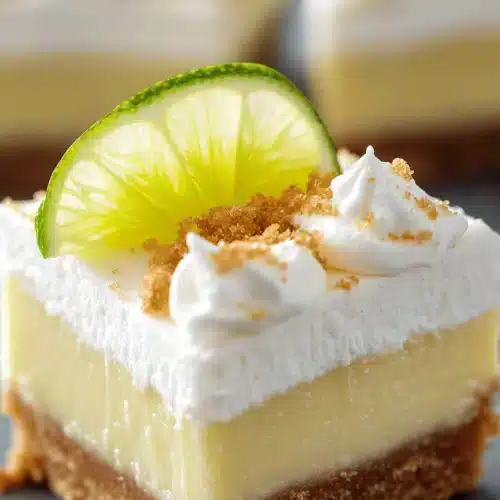
Using the parchment paper overhang, lift the bars out of the pan and transfer them to a cutting board. Slice into even squares and serve chilled. I like to garnish with lime wedge or a sprinkle of lime zest for extra flavor and visual appeal. What are the best ways to serve them cold?
What should I serve it with?
What are some of the best Key Lime pie bars? Other treats and beverages.
For Breakfast:If you’re feeling extra indulgent, serve a small square of coffee with an espresso. The bitterness of coffee will balance the sweetness of the bars perfectly. I sometimes have one with my morning coffee for a real treat!
For Brunch:What are some of the best brunch bars to serve? Arrange them on a platter with fresh berries and mint for an elegant presentation. What are the best cocktails to serve with a glass of lemonade?
As Dessert:After a light meal, these bars make scrumptious dessert. Serve with a scoop of vanilla ice cream or Whipped Cream. A glass of chilled white wine or a dessert wine would also complement the flavors nicely.
For Cozy Snacks:What is a good herbal tea to enjoy in the afternoon? What are some good picnic bags to pack in your lunchbox? I’ll just grab one straight from the fridge when I want something sweet. My family makes these for summer barbecues, and they’re always a hit!
What are some tips for making Key Lime Pie Bars?
How do you take Key Lime Pie Bars to the next level? What are some of the best tips for achieving perfection every time?
Graham Cracker Prep: What isWhat are some good ways to add cinnamon to graham crackers? What are cracker The salt will enhance the sweetness, while the cinnamon will add a warm, comforting note.
Mixing Advice:Do not overmix the filling, as this can cause it to become tough. Mix just until the ingredients are combined. I’ve found that a gentle hand is key to smooth and creamy filling.
Swirl CustomizationIf you’re adding swirls, use a toothpick or skewer to create your design. Don’t overdo it, as too much swirling can muddy the colors. How do you create a marble effect?
Ingredient Swaps:If you can’t find key limes, regular lime will work just fine. What is the flavor of key limes? How much juice should I drink? I’ve also used lemon juice in a pinch, and they were still delicious, just not “key lime” anymore!
Baking Tips:To prevent the crust from burning, you can tent the pan with foil during the last few minutes of baking. How do I set up the filling without over-browning the crust? I always rotate the pan halfway through baking for even cooking.
Glaze Variations:How do you add lime zest to a glaze? What are some ways to add green food coloring to your food? I prefer to keep my glaze simple, but feel free to experiment with different flavors and colors.
I’ve learned these tips the hard way over years of baking these, so trust me, they’ll make a difference!
Storing and Reheating Tips
These Key Lime Pie Bars are best enjoyed fresh, but they can also be stored for later. Here’s how to keep them in tip-top shape:
Room Temperature: These bars can be stored at room temperature for up to 2 days, but they’re best kept in the refrigerator. Make sure to cover them tightly to prevent them from drying out.
Refrigerator Storage: These bars will keep in the refrigerator for up to 5 days. Store them in an airtight container to prevent them from absorbing any unwanted flavors or odors. I always use a container with a tight-fitting lid.
Freezer Instructions: For longer storage, you can freeze these bars for up to 2 months. Wrap them tightly in plastic wrap and then place them in a freezer-safe bag or container. Thaw overnight in the refrigerator before serving.
Glaze Timing Advice: If you’re planning to freeze the bars, it’s best to add the glaze after thawing. This will prevent the glaze from becoming sticky or cracked during the freezing process. I’ve found that the glaze holds up better when added fresh.
Frequently Asked Questions
Final Thoughts

So there you have it: my go-to recipe for Key Lime Pie Bars! These are seriously addictive, and the perfect way to satisfy your sweet tooth without spending hours in the kitchen. What makes these bars special is that incredible balance of tangy and sweet, all nestled on that buttery, crumbly crust. Plus, they’re just so easy to make – I swear, anyone can do it! If you love this recipe, you might also enjoy my lemon bars or my Coconut Cream Pie. Both are equally delicious and easy to make. Happy baking! I can’t wait to hear how yours turn out. Be sure to leave a comment below and let me know what you think! And if you try any variations, I’d love to hear about them. Don’t forget to rate the recipe if you enjoyed it!
Lemon Cheesecake Squares: 5 Ways to Make it Perfect!
Ingredients
Crust Ingredients
- 2 cups shortbread cookie crumbs finely crushed
- 0.25 cup granulated sugar
- 0.5 cup unsalted butter melted
Filling Ingredients
- 16 ounces cream cheese softened
- 3 large eggs room temperature
- 1 cup sour cream
- 0.5 cup lemon juice freshly squeezed
- 1 tablespoon lemon zest
- 1 teaspoon vanilla extract
- 1 cup granulated sugar
Instructions
Preparation Steps
- Preheat the oven to 350°F (175°C). Line a 9x13 inch baking pan with parchment paper, leaving an overhang on the sides for easy removal. Set aside.
- In a medium bowl, combine the cookie crumbs, granulated sugar, and melted butter. Mix until well combined. Press the mixture firmly into the bottom of the prepared pan. Bake for 10 minutes, then remove and let cool slightly.
- In a large bowl, beat the cream cheese until smooth. Add the eggs, one at a time, beating just until blended. Add the sour cream, lemon juice, lemon zest, vanilla extract, and sugar; beat until smooth and creamy.
- Pour the filling over the crust and spread evenly. Bake until the center is set but still slightly jiggly, about 25-30 minutes. Remove and let cool to room temperature.
- Refrigerate the cheesecake squares for at least 3 hours, preferably overnight, before slicing and serving.