
Turkey Cheese Sliders That’ll Steal the Show
Oh, honey—if you’re looking for a crowd-pleasing appetizer that’s equal parts cozy and impressive, let me introduce you to these turkey Cheese Sliders. They’re not just a snack; they’re a full-blown flavor party in a mini sandwich form. I first brought them to a potluck last summer and watched them disappear faster than my patience during rush hour traffic. Seriously. One bite of tender, seasoned turkey tucked between buttery dinner rolls with gooey melted cheddar and a hint of smoky mayo, and everyone was asking for seconds (or thirds).
Thank you for reading this post, don't forget to subscribe!
What Is Turkey Cheese Sliders?
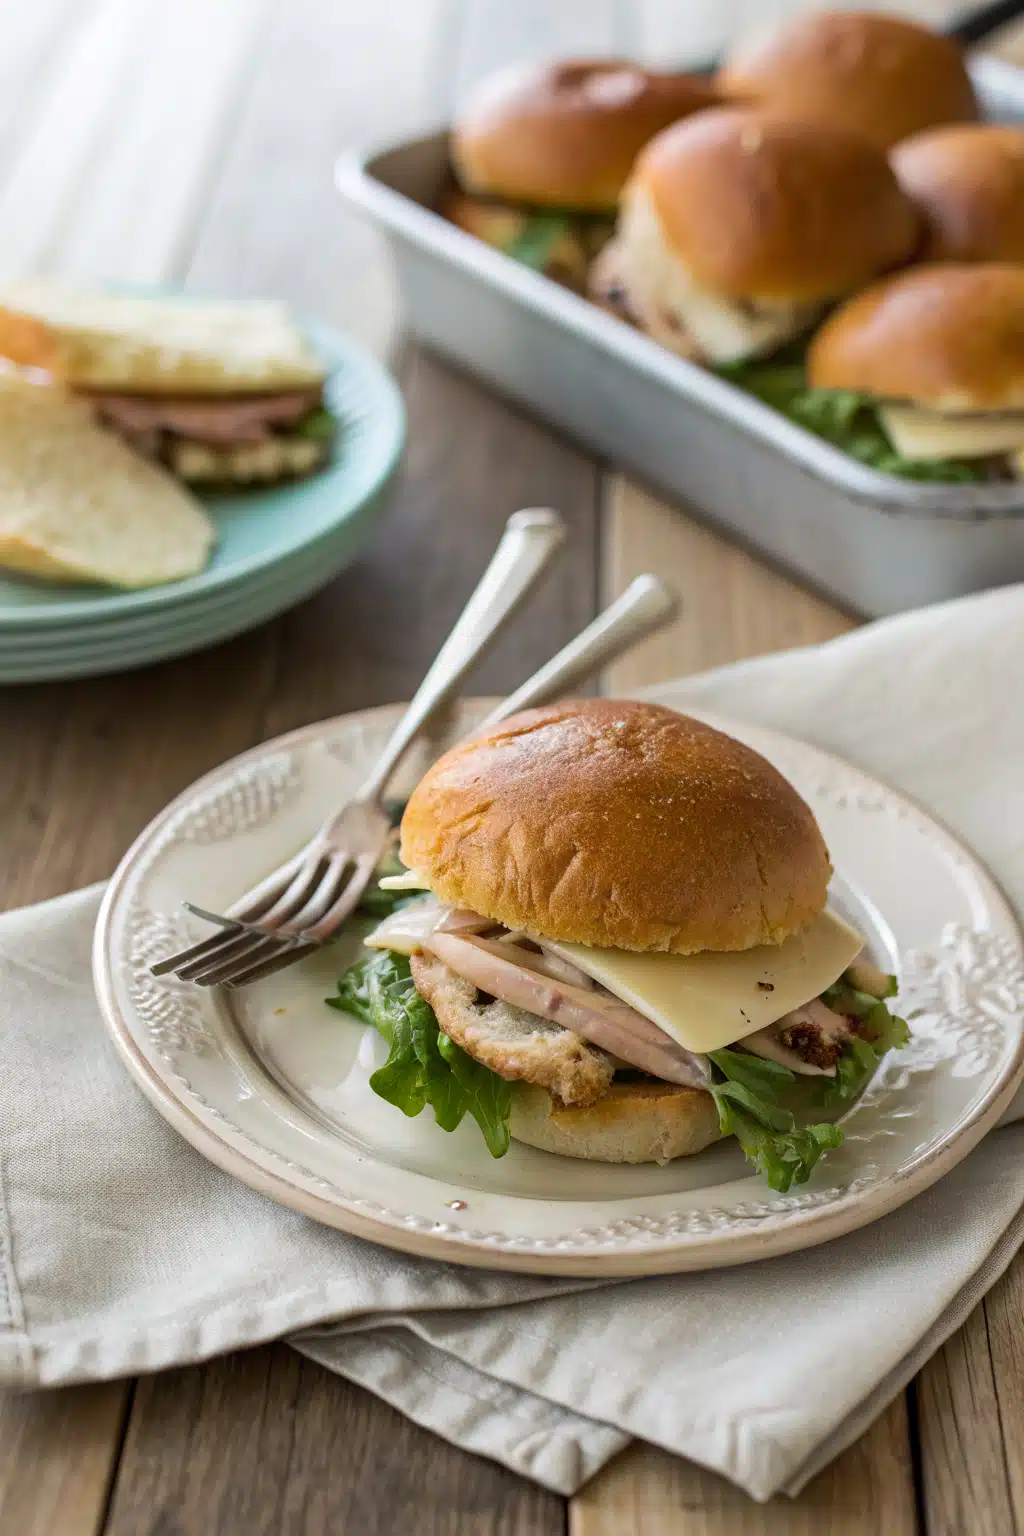
These little sandwiches are essentially glorified mini subs made with leftover or rotisserie turkey, softened Cream Cheese, tangy Dijon mustard, and plenty of sharp cheddar—all nestled into soft dinner rolls and baked until golden. The magic happens when the cheese melts and bubbles slightly at the edges, creating this irresistible crispy crust while keeping everything inside moist and flavorful. They’re perfect as an easy holiday appetizer, game-day bites, or even a quick family dinner when you want something hearty without spending hours in the kitchen.
Why You’ll Love This Recipe
First off—flavor overload, but in the best way possible. That combo of savory turkey, creamy cheese spread, and cheesy goodness? It’s like Thanksgiving leftovers got upgraded by a five-star chef. And here’s the real kicker: they’re ridiculously forgiving. Got ten minutes before guests arrive? No problem. Need to feed a crowd without breaking a sweat? These sliders have your back. Plus, they travel well, taste great at room temperature, and can be prepped ahead of time so you actually enjoy the party instead of being stuck on oven duty.
I also love how customizable they are. Want to jazz it up with some red onion or pickles? Go for it. Prefer pepper jack over cheddar? Your call. They’re one of those recipes that grows with your creativity—and honestly, that’s why I keep making them every chance I get.
How to Make Turkey Cheese Sliders
Quick Overview
In under 30 minutes, you’ll transform simple ingredients into warm, melty, delicious sliders. Just mix the turkey filling, layer it in a baking dish with cheese and buns, pop it in the oven, and voilà—appetizers ready to devour!
Ingredients
- 12 small dinner rolls (hollowed out slightly)
- 1 lb cooked turkey (shredded or chopped)
- 8 oz cream cheese, softened
- 2 tbsp Dijon mustard
- 1 cup shredded cheddar cheese
- 2 tbsp unsalted butter, melted
- ½ tsp garlic powder
- ¼ tsp black pepper
- Optional: red onion, pickles, or herbs for garnish
“Made the Turkey Cheese Sliders tonight and wow — perfect weeknight dinner. Will definitely make again!”
Step-by-Step Instructions
Step 1: Preheat & Prep Pan
Preheat your oven to 375°F (190°C). Lightly grease a 9×13-inch baking dish and set aside. If your dinner rolls are too large, slice them in half horizontally—just don’t discard the bottom halves! You’ll need those for holding all the deliciousness.
Step 2: Mix the Filling
In a large bowl, combine the turkey, softened cream cheese, Dijon mustard, garlic powder, and Black Pepper. Stir until everything is evenly blended and creamy. The mixture should look rich and slightly fluffy—not dry at all.
Step 3: Assemble the Sliders
Spread about 1 cup of the turkey mixture onto the bottom halves of the rolls. Top each generously with shredded cheddar cheese (trust me, extra cheese = happy crowd). Place the top roll halves back on or lay them aside—you’ll add them after baking so they stay crisp.
Step 4: Bake Until Golden
Pour melted butter over the assembled sliders. Bake for 15–20 minutes, or until the cheese is bubbly and starting to turn golden brown at the edges. For extra crispiness, broil for 1–2 minutes at the end—but watch closely so they don’t burn!
Step 5: Serve Warm
Let cool for 5 minutes, then cut into individual portions. Garnish with fresh parsley, red onion slices, or pickle spears if you like. Serve immediately while warm and melty—because honestly, who wants cold sliders?
What to Serve It With
These sliders shine brightest when paired with something light yet satisfying. Think classic potato chips, a crisp green salad with balsamic vinaigrette, or even roasted veggies for a more balanced spread. If you’re going full party mode, add some Deviled Eggs, fruit skewers, and a bowl of spicy pita chips nearby. And don’t forget drinks! A fruity sparkling mocktail or a cold beer always complements the richness of the cheese perfectly.
Top Tips for Perfecting Your Turkey Cheese Sliders
- Use quality bread: Stale rolls work wonders here—they absorb moisture without getting soggy. But if using fresh, toast them lightly before assembling.
- Don’t skimp on seasoning: A pinch of smoked paprika or a dash of hot sauce in the filling adds depth and surprises your taste buds.
- Layer smart: Always place cheese between the turkey and the roll to prevent sogginess. Also, avoid overfilling—each slider should hold together when lifted.
- Make it ahead: Assemble up to a day in advance, cover tightly, and refrigerate. Take out 20 minutes before baking so they come to room temp.
- Broil with care: That golden-brown top is tempting… but too long and your cheese turns bitter. Keep an eye on it!
Storing and Reheating Tips
Left over? Lucky you! Store any uneaten sliders in an airtight container in the fridge for up to 3 days. To reheat, wrap individual portions in foil and warm in a 350°F oven for 10–12 minutes, or microwave for 30 seconds per slider. Avoid microwaving uncovered—it makes the bottoms soggy. Pro tip: Reheated sliders taste almost as good as fresh ones, especially if you sprinkle a bit more cheese on top before warming.
Frequently Asked Questions
“I don’t know if I’ve ever eaten a better Turkey Cheese Sliders. The rub alone is wonderful, but the sauce??? Over the top!”
Final Thoughts
If there’s one recipe I’d make over and over again, it’s definitely these turkey cheese sliders. They’re comforting, easy, and somehow manage to feel both homemade and effortless at the same time. Whether you’re feeding a small family or hosting a big bash, they never fail to bring people together around the table. So next time you’ve got leftover turkey lying around—or even if you don’t, because rotisserie chicken works too—grab your favorite rolls and treat yourself. Your taste buds (and your guests) will thank you.

Turkey Cheese Sliders
Ingredients
Main Ingredients
- 12 slider buns small dinner rolls
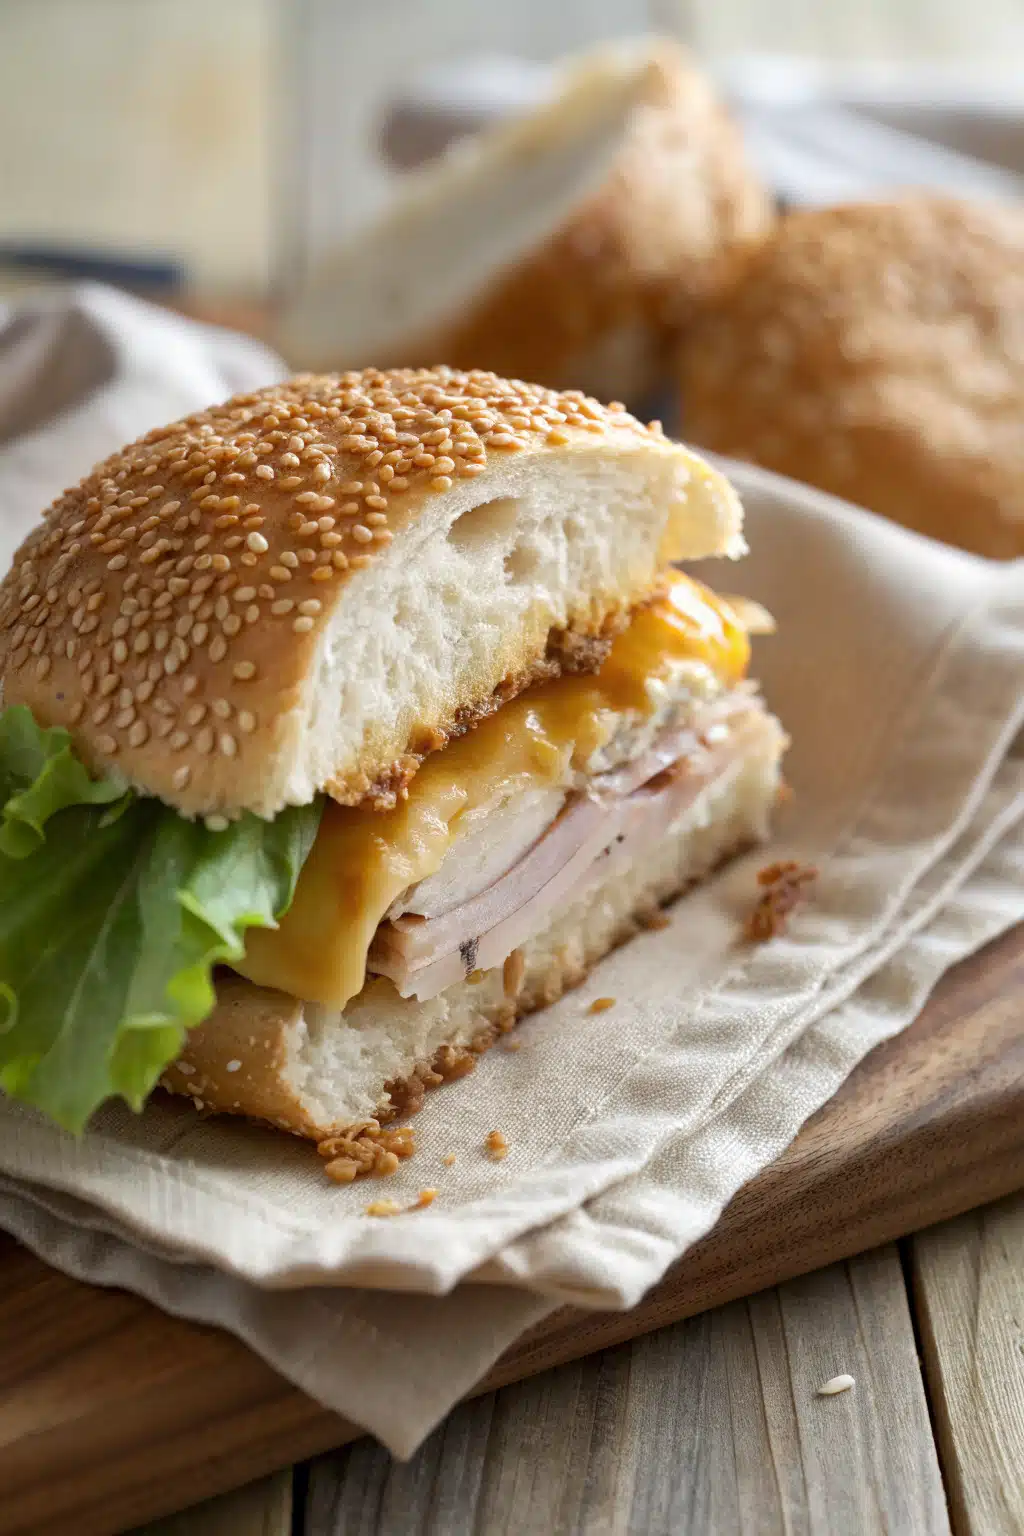
- 12 slices deli turkey breast
- 12 slices American cheese or cheddar cheese
- 2 tablespoons butter, softened
- 1 teaspoon garlic powder
- 1 teaspoon onion powder
- 0.5 teaspoon dried oregano
- 0.25 teaspoon black pepper
Instructions
Preparation Steps
- Preheat the oven to 375°F (190°C). Line a baking sheet with parchment paper or lightly grease it.
- Slice the slider buns in half horizontally. Place the bottom halves on the prepared baking sheet.
- Layer each bottom bun with one slice of turkey and one slice of cheese. Top with the remaining turkey and cheese slices if desired.
- In a small bowl, mix the softened butter, garlic powder, onion powder, oregano, and black pepper. Spread the seasoned butter evenly over the tops of the slider buns.
- Cover the baking sheet with aluminum foil and bake for 8 minutes. Remove the foil and bake for an additional 2–3 minutes, or until the cheese is melted and the tops are lightly golden.
- Remove from the oven, let cool slightly, then serve warm.


