
You know those days? The ones where you suddenly have unexpected guests, or maybe you just get hit with a serious craving for something sweet but don’t have the time (or honestly, the energy) to whip up a whole elaborate dessert? That’s precisely when my “Stupid Pie” comes to the rescue. It sounds a bit ridiculous, I know, but this name just stuck because it’s *so* ridiculously easy to make, it almost feels stupid that it turns out this good. It’s not a fancy, multi-layered affair; it’s more like a rustic, wonderfully moist, intensely flavorful cake-like pie that’s borderline magic. Think of it as the ultimate comfort bake, the one that smells like heaven and tastes even better, and I can honestly say I’ve made this stupid pie more times than I can count. It’s my go-to for potlucks, bake sales, or just a Tuesday evening when life feels a little overwhelming and a slice of pure deliciousness is the only answer.
Thank you for reading this post, don't forget to subscribe!What is a stupid pie?
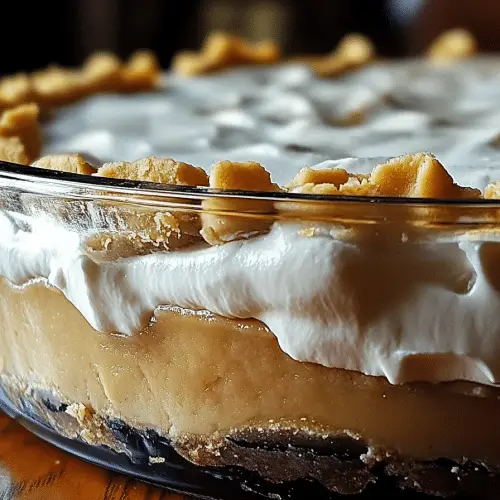
So, what exactly *is* this “Stupid Pie” I keep rambling about? Honestly, it’s less of a pie and more of a wonderfully dense, moist, quick bread-style cake that bakes up in a pie plate. The “stupid” part comes from how little effort it requires for such a phenomenal payoff. There’s no fussy crust to worry about, no intricate filling to prepare separately. Everything gets mixed right into one glorious bowl (or two, if you count separating wet and dry, but that’s as complex as it gets!). It’s packed with simple, pantry-staple ingredients, and the star of the show, surprisingly, is often something you might have lurking in your fridge – usually a few sad-looking zucchinis that need using up. But don’t let that fool you; the zucchini disappears into the batter, lending an unbelievable moistness and a tender crumb without any hint of its presence, unless you add a little swirl of something extra. It’s the kind of dessert that feels incredibly humble but delivers on flavor and texture every single time. It’s essentially a giant, comforting muffin or a very forgiving quick bread that decided to take a nap in a pie dish.
Why you’ll love this recipe?
Why is this pie in my recipe binder?flavor is just out of this world. It’s warm, comforting, and has a gentle sweetness that’s perfectly balanced. If you add a swirl of chocolate or a sprinkle of cinnamon sugar, it just elevates the whole experience. But what really seals the deal for me is the sheer simplicity. Seriously, you can have this mixed up and in the oven in about 15 minutes, flat. It’s the kind of recipe that even if you’re a complete beginner in the kitchen, you can’t mess this up. And let’s talk about Cost-efficiency: What is the best way to measure cost-efficiency! Most of the ingredients are things you probably already have on hand, making it a budget-friendly lifesaver when you’re trying to stretch your grocery dollars. Plus, its versatility is amazing. You can enjoy a slice warm with a dollop of Whipped Cream for dessert, toasted with butter for breakfast, or even just grab a piece as a mid-afternoon pick-me-up. It’s the perfect recipe for when you want something homemade and delicious without all the fuss. What I love most about this is its adaptability; it’s forgiving and always turns out beautifully, no matter how chaotic my kitchen is.
How to Make Stupid Pie
Quick Overview
The beauty of this stupid pie lies in its straightforward assembly. You’ll simply whisk together your dry ingredients, then combine your wet ingredients, and finally bring them all together. If you’re feeling fancy, you’ll prepare a quick swirl or topping. Pour the batter into your prepared pie plate and bake until golden and a toothpick comes out clean. It’s literally that easy, making it a true weeknight winner or a last-minute dessert miracle.
Ingredients
For the Main Batter:
Here’s where the magic happens with simple, everyday ingredients. Make sure your flour is fresh and not past its prime; it makes a difference! If you can find a good quality all-purpose flour, it’s perfect. And for the sugar, granulated sugar works wonderfully, but I’ve also tested it with a mix of granulated and Brown Sugar for a deeper, caramel-like note, which is divine.
2 cups All-Purpose Flour (I find King Arthur or Gold Medal to be reliable)
1 teaspoon Baking Soda (make sure it’s not expired! Test it by adding a pinch to hot water; it should fizz vigorously)
½ teaspoon Salt (kosher salt or Sea Salt are my preference for better flavor)
1 teaspoon Ground Cinnamon (or a mix of cinnamon and nutmeg for extra warmth)
1 ½ cups Granulated Sugar (or 1 ¼ cups sugar if you prefer it less sweet)
2 large Eggs (room temperature eggs incorporate better)
½ cup Vegetable Oil (or a neutral oil like canola or melted coconut oil)
¼ cup Unsweetened Applesauce (this is my secret for extra moisture without extra fat! Don’t skip it if you can help it)
“The stupid pie turned out amazing. My kids asked for seconds. Saving this one!”
1 teaspoon Vanilla Extract (use a good quality one; it really shines through)
1 ½ cups Grated Zucchini (about 2 medium zucchinis; make sure to squeeze out as much moisture as you can! See tips below.)
For the Filling (Optional Swirl):
This is where you can really play! A simple chocolate swirl is a classic for a reason, but don’t be afraid to experiment. Make sure your ingredients are softened or melted so they’ll swirl easily.
½ cup Chocolate Chips (milk, semi-sweet, or dark – your choice!)
¼ cup Packed Brown Sugar
1 tablespoon Cocoa Powder
½ teaspoon Cinnamon
For the Glaze (Optional Drizzle):
This is the crowning glory for many! A simple powdered sugar glaze is incredibly easy and adds a lovely sweet finish. Aim for a pourable but not too thin consistency.
1 cup Powdered Sugar
2-3 tablespoons Milk (or half-and-half for a richer glaze)
½ teaspoon Vanilla Extract (optional, but it’s lovely)
Step-by-Step Instructions
Step 1: Preheat & Prep Pan
First things first, get that oven preheating to 350°F (175°C). While it’s warming up, grab a standard 9-inch pie plate. You want to grease it really well. I like to use butter or a cooking spray, and then follow up with a light dusting of flour, tapping out any excess. This ensures your beautiful stupid pie slides right out, intact and gorgeous, when it’s time to serve. Some people swear by lining the bottom with parchment paper too, which is an extra layer of security, but I find a well-greased and floured pan is usually sufficient.
Step 2: Mix Dry Ingredients
In a large mixing bowl, whisk together the flour, baking soda, salt, cinnamon, and granulated sugar. Whisking them thoroughly ensures that the leavening agents (baking soda) and spices are evenly distributed throughout the batter. This prevents any weird pockets of salt or uneven rising. Give it a good whisk until everything looks uniform. I always do this step first to make sure all the dry ingredients are happy together before they meet their wet friends.
Step 3: Mix Wet Ingredients
In a separate, medium-sized bowl, crack in your room temperature eggs. Add the vegetable oil, unsweetened applesauce, and vanilla extract. Whisk these together until they are well combined and slightly emulsified. The applesauce might look a little streaky, and that’s perfectly fine. The key here is just to get everything blended together smoothly. Don’t over-beat; we’re not making meringue!
Step 4: Combine
Now, pour the wet ingredients into the bowl with the dry ingredients. Using a spatula or a wooden spoon, gently fold the wet into the dry. Mix just until you no longer see streaks of dry flour. It’s *so* important not to overmix here! Overmixing develops the gluten in the flour, which can lead to a tougher, denser texture. A few small lumps are actually okay. Then, gently fold in your well-drained grated zucchini until it’s just incorporated. The batter will be thick, don’t worry.
“Made the stupid pie tonight and wow — perfect weeknight dinner. Will definitely make again!”
Step 5: Prepare Filling (Optional Swirl)
If you’re making the chocolate swirl, this is the time! In a small bowl, combine the chocolate chips (if using), brown sugar, cocoa powder, and cinnamon. You can either melt the chocolate chips briefly in the microwave (in 30-second intervals, stirring in between until melted and smooth) and then stir in the other ingredients, or if you’re using chips that melt easily, just stir everything together until it forms a thick, spreadable paste. It should be thick enough to hold its shape but loose enough to swirl.
Step 6: Layer & Swirl
Pour about half of the thick batter into your prepared pie plate and spread it evenly. If you’re using the swirl, dollop spoonfuls of the chocolate mixture over the batter. Then, carefully spoon the remaining batter over the top, covering the chocolate. You can then use a knife or a skewer to gently swirl the chocolate through the batter, creating beautiful marbled patterns. Don’t over-swirl; you want distinct ribbons, not a muddy mess.
Step 7: Bake
Place the pie plate on a baking sheet (this catches any potential drips and makes it easier to get in and out of the oven). Bake for 40-50 minutes, or until a wooden skewer or toothpick inserted into the center comes out clean. The top should be golden brown and slightly firm to the touch. Oven temperatures can vary, so start checking around the 40-minute mark. If the top is browning too quickly, you can loosely tent it with foil.
Step 8: Cool & Glaze
Once baked, carefully remove the stupid pie from the oven and let it cool in the pie plate on a wire rack for at least 15-20 minutes. This is crucial for it to set up properly. While it’s cooling, you can whip up the glaze if you’re using one. In a small bowl, whisk together the powdered sugar, 2 tablespoons of milk, and vanilla extract until smooth. Add more milk, a teaspoon at a time, if needed, until you reach a nice drizzling consistency. Once the pie has cooled for a bit and is still warm (but not piping hot), drizzle the glaze over the top. It will set up beautifully as it cools further.
Step 9: Slice & Serve
Allow the stupid pie to cool completely before slicing, especially if you want clean cuts. If you glaze it, waiting helps the glaze set. You can serve it directly from the pie plate, or if you’re feeling ambitious, carefully invert it onto a serving platter once it’s fully cooled. The best way to slice it is with a sharp knife, wiping the blade between cuts for neatness. Serve warm or at room temperature. It’s fantastic on its own, or you can dress it up with a dollop of whipped cream or a scoop of vanilla ice cream.
What to Serve It With
This stupid pie is wonderfully adaptable, making it a fantastic addition to any meal or occasion. For a delightful breakfast, I love serving a warm slice with a strong cup of coffee. It’s hearty enough to keep you going, and the subtle sweetness is perfect with my morning brew. Presentation-wise, a simple dusting of powdered sugar looks lovely. If you’re planning a leisurely brunch, this fits right in. Pair it with some fresh berries and a light yogurt or a small dollop of crème fraîche. It adds a comforting, home-baked element that feels special without being overwhelming. Of course, as a dessert, it truly shines. After dinner, a slice with a rich chocolate sauce, a scoop of good vanilla bean ice cream, or even a raspberry coulis is absolutely divine. The cakey texture and warm spices are a perfect contrast to cold ice cream. And for those truly cozy snacks? Honestly, just a fork and a good book. It’s perfect for a quiet afternoon with a cup of tea or a glass of milk. My kids always ask for seconds when I serve it with a smear of peanut butter. It just works for every moment!
Top Tips for Perfecting Your Stupid Pie
I’ve made this stupid pie so many times that I’ve picked up a few tricks along the way that I absolutely have to share! For zucchini prep, the most crucial step is squeezing out as much moisture as possible. After grating, place the zucchini in a fine-mesh sieve set over a bowl and press down firmly with a spoon, or wrap it in a clean kitchen towel or cheesecloth and wring it out. Excess water will make your pie soggy. When it comes to mixing advice, remember that gentle hands are key! Seriously, overmixing is the enemy of tender baked goods. Mix the wet and dry ingredients *just* until combined. A few lumps are a sign of a good, light batter. For swirl customization, don’t be afraid to get creative! You can use jam, a thick caramel sauce, or even a cinnamon-sugar mixture for your swirl. Just ensure it’s not too liquidy. For beautiful patterns, make sure you’re not overdoing it – distinct ribbons are best. When considering ingredient swaps, I’ve found that you can often substitute half of the all-purpose flour with whole wheat flour for a nuttier flavor, but this might require a touch more liquid. For oil, melted coconut oil works beautifully, but it might impart a subtle coconut flavor. If you’re out of applesauce, you can use an equal amount of plain yogurt or sour cream, but the texture might be slightly different. For baking tips, always use a baking sheet under your pie plate; it’s a lifesaver for preventing messy oven spills. If your oven tends to run hot, you might want to reduce the temperature by 10-15 degrees and add a few extra minutes to the baking time. A clean toothpick test is your best friend for determining doneness. And for glaze variations, if you want a thicker glaze, use less liquid. If you want a flavored glaze, try adding a bit of lemon zest, orange zest, or even a shot of espresso to the mix. A sprinkle of sea salt on top of the glaze can also add a delightful contrast.
Storing and Reheating Tips
One of the best things about this stupid pie is how well it keeps, making it perfect for prepping ahead. For room temperature storage, once the pie has completely cooled, you can keep it covered with plastic wrap or foil on the counter for up to 2 days. It holds up remarkably well! If you need to store it longer, I always opt for refrigerator storage. Make sure it’s fully cooled, then wrap it tightly in plastic wrap or place it in an airtight container. It should stay fresh and delicious in the fridge for about 4-5 days. For longer storage, freezer instructions are your friend. Wrap the cooled pie (or even individual slices) tightly in plastic wrap, then in aluminum foil, or place in a freezer-safe bag. It can be frozen for up to 3 months. To thaw, transfer it to the refrigerator overnight. For reheating, if it’s been refrigerated, a quick 15-20 seconds in the microwave per slice usually does the trick to warm it up. If it’s been frozen, let it thaw completely, then you can warm it gently in the oven at a low temperature (around 300°F or 150°C) for about 10 minutes until warmed through. For glaze timing advice, it’s best to glaze the pie *after* it’s cooled down considerably or is fully cooled, especially if you’re planning to refrigerate or freeze it. This prevents the glaze from getting sticky or melting off.
Frequently Asked Questions
Final Thoughts
So there you have it – my beloved “stupid pie”! It’s a recipe born out of necessity and perfected through countless batches, and it never fails to deliver comfort and deliciousness. It’s a testament to the fact that you don’t need complicated techniques or exotic ingredients to create something truly special. This recipe is your reliable friend in the kitchen, ready to swoop in when you need a little sweetness and warmth. If you enjoy this kind of easy, comforting bake, you might also love my Super Simple Banana Bread or my One-Bowl Chocolate Chip Cookies – they have that same “foolproof and fantastic” vibe. I genuinely can’t wait to hear how your stupid pie turns out! Please, please leave a comment below with your thoughts, your own amazing swirl variations, or any questions you might have. Your feedback makes my day, and I love seeing how you all put your own spin on my recipes. Happy baking, and enjoy every single bite!
Stupid Pie
Ingredients
Crust
- 1.5 cups all-purpose flour
- 0.5 teaspoons salt
- 0.5 cup cold unsalted butter, cut into cubes
Filling
- 4 large eggs
- 1 cup granulated sugar
- 0.5 cup heavy cream
- 0.25 cup milk
- 1 teaspoon vanilla extract
- 0.5 teaspoon ground cinnamon
Instructions
Preparation Steps
- In a large bowl, whisk together flour and salt. Cut in the cold butter using a pastry blender or your fingertips until the mixture resembles coarse crumbs.
- Gradually add cold water, 1 tablespoon at a time, mixing until the dough just comes together. Do not overmix. Form the dough into a disc, wrap in plastic wrap, and refrigerate for at least 30 minutes.
- Preheat oven to 400°F (200°C). On a lightly floured surface, roll out the dough into a 12-inch circle. Carefully transfer the dough to a 9-inch pie plate. Crimp the edges as desired.
- In a separate bowl, whisk together eggs, sugar, heavy cream, milk, vanilla extract, and cinnamon until well combined.
- Pour the filling into the prepared pie crust.
- Bake for 15 minutes at 400°F (200°C). Then, reduce the oven temperature to 350°F (175°C) and bake for an additional 30-35 minutes, or until the center is set and a knife inserted near the center comes out clean.
- Let the pie cool completely on a wire rack before slicing and serving.


