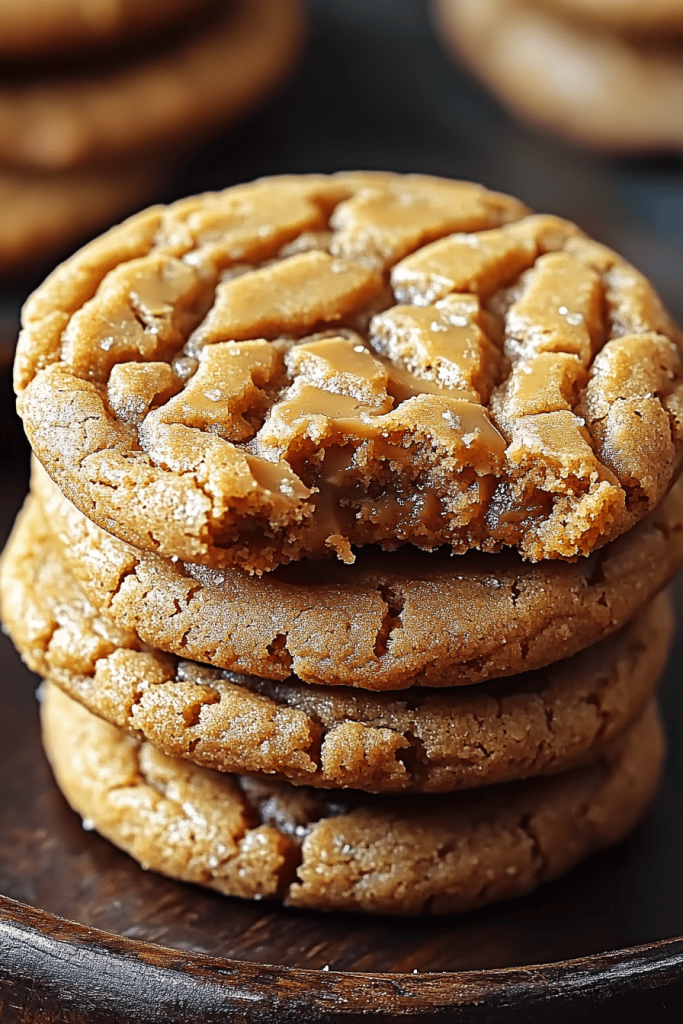
Oh, these snowball cookies! Just thinking about them takes me right back to my Nana’s kitchen, the air thick with the sweet, buttery scent of baking. It’s funny, isn’t it, how a simple cookie can unlock so many memories? Every year, without fail, as soon as the first hint of cooler weather rolls in, my mom would start asking, “Are we making the snowball cookies this year?” and the answer was always a resounding YES. They’re not fancy, not complicated, just pure, unadulterated comfort in every bite. They’re like a little cloud of happiness, perfect with a cup of tea or a glass of cold milk. Honestly, if you’ve ever tried those classic Thumbprint Cookies but wanted something a bit more… well, *snowball-y* and less fuss, these are absolutely your jam. They’re so incredibly tender and delicate, almost like a shortbread kissed by powdered sugar. My kids practically inhale them, and I have to hide a few for myself if I want any leftovers!
Thank you for reading this post, don't forget to subscribe!What are snowball cookies?
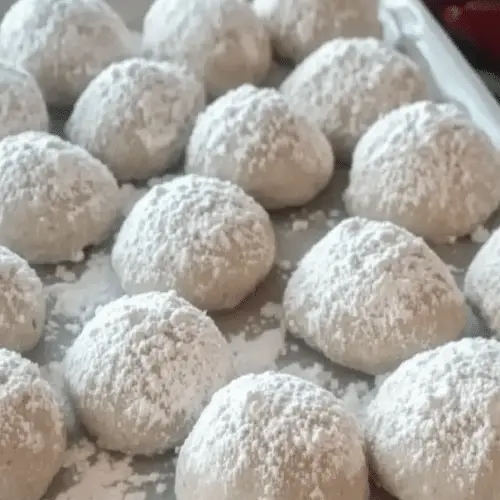
So, what exactly are these magical little snowballs? Think of them as the coziest, most tender shortbread-like cookie you can imagine, rolled in a generous dusting of powdered sugar that makes them look just like tiny snowballs. They’re typically made with simple ingredients you probably already have in your pantry – flour, butter, sugar, and a hint of vanilla. The magic really happens in the texture; they’re meant to be incredibly delicate, crumbling ever so slightly with each bite, giving you that “melt-in-your-mouth” sensation. The powdered sugar coating isn’t just for looks; it adds another layer of subtle sweetness and that signature snowy appearance. They’re not overly sweet on their own, which is one of the things I adore about them, making them the perfect canvas for that sweet, snowy embrace. It’s essentially a simple butter cookie elevated to something truly special just by its name, its texture, and its delightful, powdery finish.
Why you’ll love this recipe?
Honestly, there are so many reasons I keep coming back to this snowball cookie recipe, and I just know you’re going to fall in love with them too. First off, the **flavor**. It’s this incredible balance of rich, buttery goodness with a subtle sweetness that’s just *chef’s kiss*. It’s not overpowering, it’s just… perfect. Then there’s the **simplicity**. I’m not kidding when I say these are easy. Even if you’re new to baking, you can totally nail these. There’s no fancy piping or tricky techniques. You mix, you shape, you bake, you roll. That’s it! And if you’re watching your wallet, you’ll appreciate how **cost-efficient** they are. All the ingredients are pantry staples, so you don’t need to buy anything special. What I also love is their **versatility**. While they’re wonderful on their own, you can totally play around with them. Add a touch of almond extract for a different nutty flavor, or even dip them halfway in melted chocolate for an extra decadent treat. They’re like a blank canvas for your cookie creativity! When I compare these to other holiday cookies, these Snowball Cookies always stand out because they feel so homemade and comforting, like a warm hug. They’re the kind of cookie that makes everyone ask for the recipe, and you get to proudly say, “Oh, it’s just my Nana’s snowball cookies!”
How do you make snowball cookies?
Quick Overview
Making these Snowball Cookies is so straightforward, it’s almost embarrassing! We’re talking about creaming together butter and sugar until it’s light and fluffy, then gently folding in the flour and a touch of vanilla until a soft dough forms. You’ll then roll this dough into little balls, bake them until they’re just lightly golden around the edges, and then, the best part, roll them while they’re still warm in a cloud of powdered sugar. It’s a simple assembly line that yields incredibly delicious results without any fuss. The key is to not overwork the dough and to get them into that powdered sugar bath at just the right moment, ensuring they’re perfectly coated and melt-in-your-mouth tender. Seriously, you can have a batch of these ready to impress with minimal effort!
Ingredients
For the Main Batter:
Here’s what you’ll need to get started on that beautiful snowball Cookie Dough. I always try to use good quality, unsalted butter – it really makes a difference in flavor! Make sure your butter is softened, but not melted; it should give a little when you press it with your finger. That’s the sweet spot for creaming. The granulated sugar is standard, but if you happen to have super-fine baker’s sugar, that works beautifully too, dissolving even more easily into the butter.
* 1 cup (2 sticks) unsalted butter, softened
* 1/2 cup granulated sugar
* 1 teaspoon vanilla extract
* 2 1/2 cups all-purpose flour
* 1/4 teaspoon salt
For the Filling:
These cookies don’t have a separate “filling” in the traditional sense, but the secret to their incredible texture is in how the ingredients come together. The magic is in that delicate crumb that just dissolves on your tongue. No extra fillings needed here; the simplicity is what makes them so special!
For the Glaze:
This is more of a finishing dust than a glaze. We’re going for that iconic snowy look! Make sure your powdered sugar is fresh and lump-free. I usually sift it to ensure a super smooth coating. If you find it’s a bit clumpy from humidity, sifting is your best friend. Some people like to mix a tiny bit of milk or cream into the powdered sugar for a more “glaze-like” coating, but I personally love the dry, powdery finish for that classic snowball look. If you do want to experiment, just add a teaspoon or two of milk or cream at a time until you get a thick but pourable consistency.
* 1 1/2 cups powdered sugar, for rolling
“New family favorite! This snowball cookies was so flavorful and ridiculously easy. Crowd-pleaser for sure.”
Step-by-Step Instructions
Step 1: Preheat & Prep Pan
Alright, first things first! Go ahead and preheat your oven to 350°F (175°C). While that’s warming up, grab a couple of baking sheets and line them with parchment paper. This is a little trick I learned early on – parchment paper makes cleanup a breeze and ensures your cookies don’t stick, which is crucial for these delicate little guys. If you don’t have parchment, you can lightly grease the baking sheets, but I find parchment gives you the best results. Just make sure they’re ready to go before you start mixing!
Step 2: Mix Dry Ingredients
In a medium bowl, whisk together your flour and salt. Give it a good stir with a whisk or a fork to make sure everything is evenly distributed. This might seem like a small step, but it’s important for ensuring that every cookie has the same lovely texture. No one wants a bite that’s too salty or lacks that perfect crumb! Set this bowl aside for now. We’ll be bringing it into the main event soon.
Step 3: Mix Wet Ingredients
Now, grab your stand mixer fitted with the paddle attachment, or if you’re doing this by hand, a large bowl and a sturdy hand mixer or strong arm! Cream together the softened butter and granulated sugar. You want to beat them until the mixture is light, fluffy, and pale yellow. This usually takes about 3-5 minutes on medium speed. This creaming process incorporates air, which is what makes cookies tender. Once it’s nicely creamy, beat in the vanilla extract. Make sure to scrape down the sides of the bowl a couple of times to ensure everything is incorporated evenly. The aroma of vanilla at this stage is just heavenly!
Step 4: Combine
Now it’s time to bring the wet and dry ingredients together. Gradually add the flour mixture to the butter mixture, about a third at a time, mixing on low speed until just combined. Be careful not to overmix! Overmixing develops the gluten in the flour, which can lead to tough cookies. You want a soft, slightly crumbly dough that just starts to hold together. If it seems a little dry and isn’t quite coming together, don’t panic! You can add a tablespoon of milk or cream, but only if absolutely necessary. Sometimes, depending on the humidity, the flour might absorb more liquid. Just stop mixing as soon as it comes together into a soft dough. Gently form it into a ball with your hands if needed.
Step 5: Prepare Filling
As I mentioned before, these Snowball Cookies are all about their perfect texture, not a separate filling. The ‘filling’ is essentially the tender, buttery dough itself. So, there’s no extra step here! The simplicity of the dough is what makes these cookies so irresistible and so easy to make. Just focus on getting that dough perfectly mixed.
Step 6: Layer & Swirl
This is where the fun shaping happens! Take about a tablespoon of dough and roll it between your palms into a smooth ball, about 1 inch in diameter. Don’t pack them too tightly; you want them to be light and airy. Arrange the dough balls on your prepared baking sheets, leaving about 1-2 inches between them, as they will spread slightly. I usually get about 20-24 cookies per batch, depending on how large I roll them. You can make them all the same size for a uniform look, or make a few slightly larger ones for variety.
Step 7: Bake
Pop those baking sheets into your preheated oven. Bake for 10-12 minutes, or until the edges are just beginning to turn a very pale golden brown. You don’t want them to be deeply colored; they should still be quite pale. The centers should look set but still feel slightly soft to the touch. Overbaking is the enemy of tender snowball cookies, so keep a close eye on them, especially towards the end of the baking time. Ovens can vary, so get to know yours!
Step 8: Cool & Glaze
Once they’re done, carefully remove the baking sheets from the oven. Let the cookies cool on the baking sheets for about 5 minutes. They’ll still be delicate at this stage. While they’re cooling on the pan, pour your powdered sugar into a shallow bowl or onto a plate. Now, here’s the crucial part for that snowy look: gently transfer the warm cookies (they should still be warm but not scorching hot) into the powdered sugar. Roll them around until they are completely coated. The warmth of the cookie helps the powdered sugar adhere. Let them cool completely on a wire rack before rolling them again if you want an extra thick coat of “snow,” or just give them another quick roll once they’ve cooled down a bit.
“Packed with flavor and so simple. Exactly what I wanted from this snowball cookies!”
Step 9: Slice & Serve
These snowball cookies are best served at room temperature. They’re so tender that slicing isn’t really necessary for serving as individual cookies, but if you were to cut a larger batch into smaller pieces or present them on a platter, a gentle hand with a sharp knife would do the trick. They look absolutely stunning piled high on a festive platter. The visual appeal of that snowy white coating is just delightful, especially during the holidays. They’re perfect for a tea party, a holiday cookie exchange, or just as a sweet treat to brighten your day. Enjoy them with a cup of coffee, a glass of milk, or even a warm mug of cider!
What to Serve It With
These little snowball cookies are incredibly versatile, truly fitting in wherever you need a touch of sweetness and charm. For **breakfast**, they’re a delightful little morning treat alongside a strong cup of coffee or a creamy latte. They’re not overly sweet, so they won’t overpower your morning beverage. I sometimes even pop one in my mouth while I’m waiting for my toast to pop! For a more elegant **brunch** spread, arrange them artfully on a tiered cake stand with fresh berries and perhaps some mini quiches. They add a delicate, sweet note that balances savory dishes beautifully. For a sophisticated **dessert** setting, imagine them nestled alongside a slice of rich chocolate cake or a creamy panna cotta. They offer a delightful textural contrast and a lighter, buttery flavor. And, of course, for **cozy snacks**, they are simply unbeatable. Picture yourself curled up on the sofa with a good book, a mug of hot cocoa, and a plate of these snowball cookies. It’s pure bliss! My family has a tradition of making these when we have our first cozy movie night of the fall, and they always disappear first.
Top Tips for Perfecting Your Snowball Cookies
I’ve been making these snowball cookies for years, and along the way, I’ve picked up a few tricks that I think make all the difference in getting that perfect melt-in-your-mouth texture and beautiful snowy appearance. First, for the **Zucchini Prep**, well, there’s no zucchini in *this* recipe! You might be thinking of a different type of cookie, but my Nana’s snowball cookies are pure butter and sugar magic. My biggest tip here is about the butter itself – make sure it’s truly softened but not melted. If it’s too cold, it won’t cream properly, and if it’s too warm, your cookies will spread too much. For **Mixing Advice**, the absolute golden rule is: do not overmix the dough once the flour is added. Mix just until the flour streaks disappear. Overworking the flour develops gluten, which will make your cookies tough instead of tender. Stop as soon as it looks like it’s coming together; it will be a soft, slightly crumbly dough. Regarding **Swirl Customization**, since these are simple drop cookies, there aren’t really swirls to customize. However, for that beautiful snow-like effect, the key is the **Glaze**, which is actually the powdered sugar rolling. Roll them while they’re still warm from the oven – this helps the sugar stick. If you want them *extra* snowy, let them cool a bit, then give them a second roll in fresh powdered sugar. For **Ingredient Swaps**, I’ve found that using all-purpose flour is best for the classic texture. I haven’t experimented much with gluten-free flours for these because the delicate crumb is so important, and GF flours can behave differently. If you try it, I’d suggest a good quality 1:1 baking blend. You can certainly swap the vanilla extract for almond extract if you prefer a nuttier flavor – a little goes a long way! For **Baking Tips**, ovens are notoriously different, so pay attention to your cookies, not just the timer. They should be pale, with maybe the faintest hint of golden color on the very edges. If they start browning too quickly, your oven might be running hot. You can even try lowering the temperature by 10-15 degrees and baking a few minutes longer. And for **Glaze Variations**, while the classic powdered sugar coating is my favorite, you could also try dipping the cooled cookies halfway into melted white chocolate for an extra layer of sweetness and richness. Or, if you want a hint of color, add a tiny drop of food coloring to the powdered sugar before rolling for pastel snowballs!
Storing and Reheating Tips
Proper storage is key to keeping these delicate snowball cookies tasting their best. At **Room Temperature**, they’re good for about 3-4 days, as long as they are stored in an airtight container. Because they’re so tender and coated in powdered sugar, they can get a little soft or sticky if they’re not properly sealed. I usually layer them between sheets of parchment paper in a tin or plastic container to prevent them from sticking together. If you’re planning on keeping them for longer, **Refrigerator Storage** is your best bet. Pop them in an airtight container, and they should stay fresh for up to a week. They might become slightly firmer in the fridge, but they’ll soften up again at room temperature. For longer-term storage, definitely consider **Freezer Instructions**. These cookies freeze beautifully! Wrap them tightly in plastic wrap, then place them in a freezer-safe bag or airtight container. They can stay frozen for up to 2-3 months. To thaw, just bring them back to room temperature in their packaging for a few hours – this prevents condensation from making them soggy. The **Glaze Timing Advice** is simple: roll them in powdered sugar *after* they’ve baked and cooled slightly, but *before* you store them. If you’re freezing them, you can roll them before freezing, or re-roll them in fresh powdered sugar once thawed for the best snowy appearance. If you roll them before freezing, they might lose a little of their powdery coating, so a second roll after thawing is often a good idea!
Frequently Asked Questions
Final Thoughts
There you have it – my family’s beloved snowball cookies! I truly hope you give these a try. They’re more than just a cookie; they’re a little piece of comfort, a memory in every bite, and a guaranteed crowd-pleaser. The delicate texture, the subtle buttery flavor, and that sweet snowy coating just make them irresistible. They’re proof that sometimes, the simplest recipes are the most magical. If you adore these, you might also enjoy my recipes for [Link to another cookie recipe, e.g., classic chocolate chip cookies] or my [Link to a festive baked good, e.g., spiced gingerbread cake]. They share that same heartwarming, homemade quality. I can’t wait to hear how yours turn out and what memories they bring to your kitchen! Please leave a comment below and let me know your thoughts, or share your own snowball cookie traditions. Happy baking, everyone!
Snowball Cookies
Ingredients
Main Ingredients
- 1 cup unsalted butter softened
- 0.5 cup powdered sugar plus more for dusting
- 1 teaspoon vanilla extract
- 2 cups all-purpose flour
- 0.25 teaspoon salt
- 0.5 cup pecans finely chopped (optional)
Instructions
Preparation Steps
- Preheat oven to 350°F (175°C). Line baking sheets with parchment paper.
-
In a large bowl, cream together the softened butter and 0.5 cup powdered sugar until light and fluffy.1 cup unsalted butter
-
Beat in the vanilla extract.1 cup unsalted butter
-
In a separate bowl, whisk together the flour, salt, and chopped pecans (if using).1 cup unsalted butter
- Gradually add the dry ingredients to the wet ingredients, mixing until just combined.
- Roll the dough into 1-inch balls and place them on the prepared baking sheets.
- Bake for 10-12 minutes, or until the edges are lightly golden. The cookies will not spread much.
- Let the cookies cool on the baking sheets for a few minutes before transferring them to a wire rack to cool completely.
-
Once cooled, generously dust the cookies with additional powdered sugar.1 cup unsalted butter


