Snickerdoodle Cookies: The Ultimate Comfort Cookie Recipe
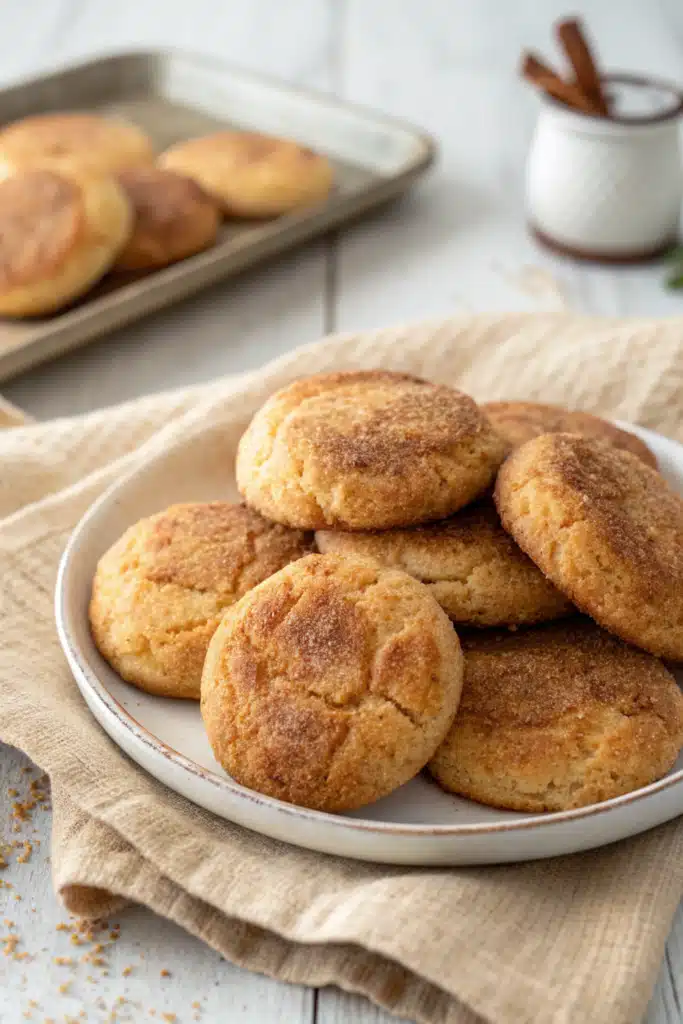
There’s something magical about the first bite of a freshly baked snickerdoodle cookie. That perfect balance of buttery softness, a subtle tang from Cream Cheese, and the irresistible cinnamon-sugar crunch on top—it’s pure childhood nostalgia wrapped in a warm, golden circle. I remember making these with my grandmother every holiday season; the kitchen would fill with that intoxicating aroma of cinnamon and vanilla, and we’d leave crumbs all over her flour-dusted counter. These cookies aren’t just sweet—they’re memories. And honestly? They deserve to be part of your baking rotation year-round.
Thank you for reading this post, don't forget to subscribe!What Is Snickerdoodle?
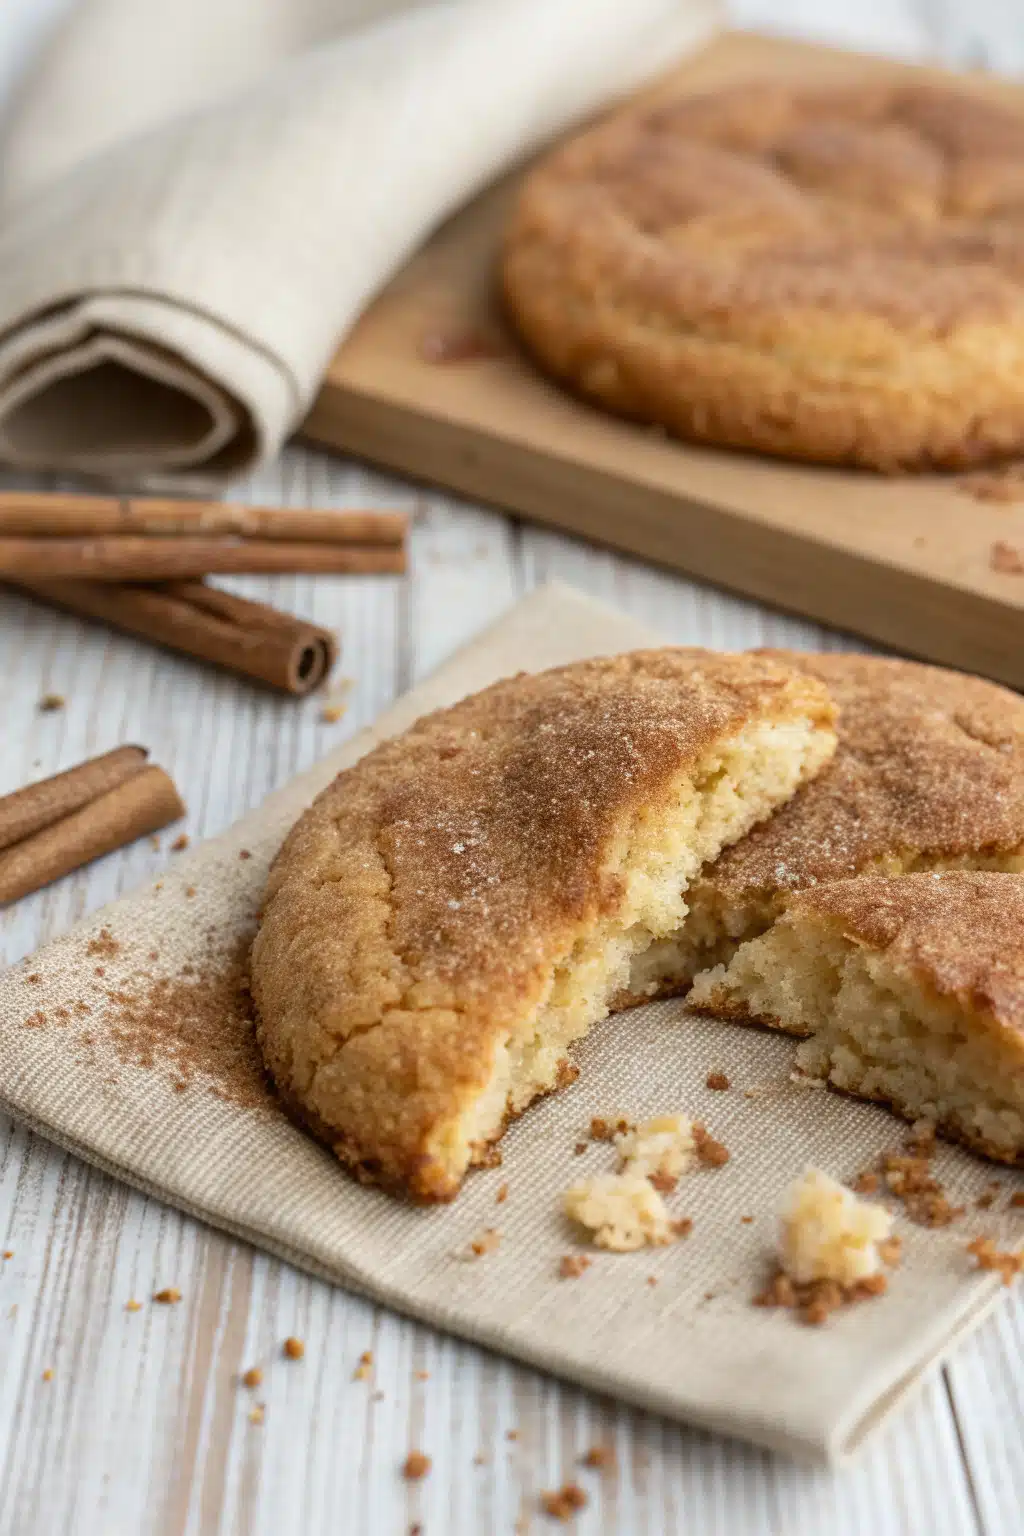
Snickerdoodles are soft, slightly chewy American cookies characterized by their distinctive swirled pattern and cinnamon-sugar coating. The name itself is a playful twist: “snicker” + “cookie.” Unlike most sugar cookies, snickerdoodles contain Cream Cheese (or cream of tartar), which gives them a unique tangy flavor and denser texture. Originating in the 1800s, they became especially popular during the holidays but have since become beloved any time of year. What sets them apart isn’t just taste—it’s that comforting chew combined with the cozy warmth of cinnamon that makes each bite feel like a hug.
Why You’ll Love This Recipe
This snickerdoodle recipe hits all the right notes: tender interior, crisp edges, and that signature cinnamon kick you can’t resist. I’ve tested dozens of versions before landing on this one—it uses full-fat Cream Cheese for richness, brown sugar for molasses depth, and just enough cream of tartar to create that delicate tang without being sour. The dough comes together quickly, no mixer required, and the cinnamon-sugar roll? Absolute game-changer. Plus, these freeze beautifully, so you can enjoy them long after the holidays are over. Whether you’re baking for family, gifting to neighbors, or treating yourself after a tough week, these cookies deliver joy in every bite.
How to Make Snickerdoodle Cookies
Quick Overview
Making snickerdoodle cookies is surprisingly simple! You’ll mix softened butter, sugars, eggs, vanilla, and cream of tartar until creamy, then chill the dough briefly. While it firms up, prepare your cinnamon-sugar blend. Once ready, roll small scoops into balls, coat generously in the Spice Mix, then bake until puffed and lightly golden. Total active time is under 20 minutes—the rest is chilling and baking. The result? Soft, cakelike centers with slightly crisp edges and an unforgettable cinnamon kiss.
Ingredients
- 1 cup (2 sticks) unsalted butter, softened
- ¾ cup granulated sugar
- ¼ cup packed light brown sugar
- 2 large eggs, at room temperature
- 2 teaspoons vanilla extract
- ½ teaspoon cream of tartar
- ¼ teaspoon baking soda
- ¼ teaspoon salt
- 2¼ cups all-purpose flour
- 2 tablespoons ground cinnamon
- 2 tablespoons granulated sugar (for rolling)
Step-by-Step Instructions
Step 1: Preheat & Prep Pan
Preheat your oven to 375°F (190°C). Line two baking sheets with parchment paper or silicone mats. This prevents sticking and ensures even browning. If you only have one sheet, bake in batches—don’t overcrowd!
Step 2: Cream Butter & Sugars
In a large bowl, beat softened butter, granulated sugar, and Brown Sugar together until light and fluffy—about 2–3 minutes with a hand mixer or stand mixer. Scrape down the sides as needed. This step incorporates air, giving your cookies a tender rise.
“I don’t know if I’ve ever eaten a better Snickerdoodles. The rub alone is wonderful, but the sauce??? Over the top!”
Step 3: Add Wet Ingredients
Beat in eggs one at a time, mixing well after each addition. Stir in vanilla extract. In a separate small bowl, whisk together cream of tartar, baking soda, and salt. Gradually add this dry mixture to the wet ingredients, blending until just combined. Then fold in flour until no streaks remain. The dough will be thick but manageable.
Step 4: Chill Dough (Optional but Recommended)
Cover the dough and refrigerate for at least 30 minutes. Chilling firms it up, making rolling easier and preventing cookies from spreading too much during baking. If short on time, you can skip this step, but results may vary.
Step 5: Roll & Coat
Scoop dough into tablespoon-sized balls (use a cookie scoop for consistency). In another bowl, combine 2 tablespoons cinnamon and 2 tablespoons sugar. Roll each ball through the cinnamon-sugar mixture until fully coated. Place 2 inches apart on prepared baking sheets.
Step 6: Bake & Cool
Bake for 9–11 minutes, rotating halfway through. Centers should look set but still slightly soft—they’ll firm up while cooling. Let sit on the sheet for 5 minutes before transferring to a wire rack. Enjoy warm or store once completely cooled.
What to Serve It With
These snickerdoodles shine alongside a tall glass of cold milk or a steaming mug of coffee or hot cocoa. Pair them with eggnog during winter holidays, or serve with lemonade on a summer afternoon—their sweetness balances citrus beautifully. For brunch, place them next to fruit tarts or yogurt parfaits. And don’t forget—they make incredible gifts! Wrap them in cellophane tied with ribbon or pack into tins labeled with a handwritten note. They’re also fantastic with a sprinkle of flaky sea salt on top for contrast.
Top Tips for Perfecting Your Snickerdoodle Cookies
- Room Temperature Matters: Ensure butter, eggs, and even cream cheese (if using) are at room temp for smooth mixing.
- Cream Properly: Take time to cream butter and sugars until pale—this builds structure and tenderness.
- Don’t Overmix After Adding Flour: Just combine until incorporated to avoid tough cookies.
- Chill for Best Texture: Even 15–30 minutes helps control spread and improves chewiness.
- Use Parchment Paper: Non-stick surfaces ensure easy removal and uniform baking.
- Watch Oven Hotspots: Rotate pans halfway through baking for even color.
- Fresh Spices = Better Flavor: Buy whole cinnamon sticks and grind your own for maximum potency.
Storing and Reheating Tips
Store snickerdoodles in an airtight container at room temperature for up to 5 days. Layer between parchment to prevent sticking. For longer storage, freeze unbaked dough balls for up to 3 months—bake straight from frozen, adding 1–2 extra minutes. To revive stale cookies, microwave for 10–15 seconds with a slice of bread to restore moisture. Or pop them in a low oven (300°F/150°C) for 5 minutes to refresh texture. Never refrigerate—cold ruins their softness!
Frequently Asked Questions
“New family favorite! This Snickerdoodles was so flavorful and ridiculously easy. Crowd-pleaser for sure.”
Final Thoughts
There’s nothing quite like homemade snickerdoodles—especially when they come out soft, chewy, and bursting with cinnamon goodness. This recipe honors tradition while staying simple enough for everyday baking. Whether you’re new to snickerdoodles or a seasoned pro, I hope this guide brings you as much joy as it brings me every time I pull a batch from the oven. So preheat that oven, gather your spices, and let the magic begin. Your taste buds (and your loved ones) will thank you!

Snickerdoodle cookies
Ingredients
Main Ingredients
- 2.75 cups all-purpose flour
- 2 teaspoons cream of tartar
- 1 teaspoon baking soda
- 0.25 teaspoon salt
- 1 cup unsalted butter, softened
- 1.5 cups granulated sugar
- 2 large eggs
- 2 teaspoons vanilla extract
- 2 tablespoons granulated sugar
- 2 teaspoons ground cinnamon
Instructions
Preparation Steps
- Preheat oven to 400°F (200°C). Line baking sheets with parchment paper.
- In a medium bowl, whisk together flour, cream of tartar, baking soda, and salt. Set aside.
- In a large bowl, beat softened butter and 1 1/2 cups sugar until light and fluffy, about 2–3 minutes.
- Beat in eggs one at a time, then add vanilla extract.
- Gradually mix in the dry ingredients until just combined.
- In a small bowl, combine 2 tablespoons sugar and cinnamon for rolling.
- Roll dough into 1-inch balls and coat each in the cinnamon-sugar mixture.
- Place balls 2 inches apart on prepared baking sheets.
- Bake for 8–10 minutes, or until edges are lightly golden but centers still look soft.
- Cool on baking sheet for 5 minutes before transferring to a wire rack.


