There’s just something magical about Peanut Butter Cookies, isn’t there? I remember my grandma baking her famous peanut butter cookies when I was a kid, the smell of warm butter and toasted peanuts filling the kitchen. Those cookies disappeared in minutes, and I swear, no matter how many I snuck away with, I always wished I could get that perfect, melt-in-your-mouth texture without feeling guilty about the gluten. Well, after lots of trials and errors, I’ve finally cracked a recipe that’s not just insanely tasty but also completely gluten free. It’s become my go-to treat for busy mornings, last-minute desserts, or simply when I need a little comforting bite. Plus, they’re so easy to make—mix, scoop, bake, and done! Honestly, what I love most is how simple ingredients come together to create something that tastes just like classic peanut butter cookies, but suitable for everyone. Trust me, these will become your new favorites—and I promise, no one will know they’re gluten free unless you tell them!
Thank you for reading this post, don't forget to subscribe!What is gluten free peanut butter cookies?
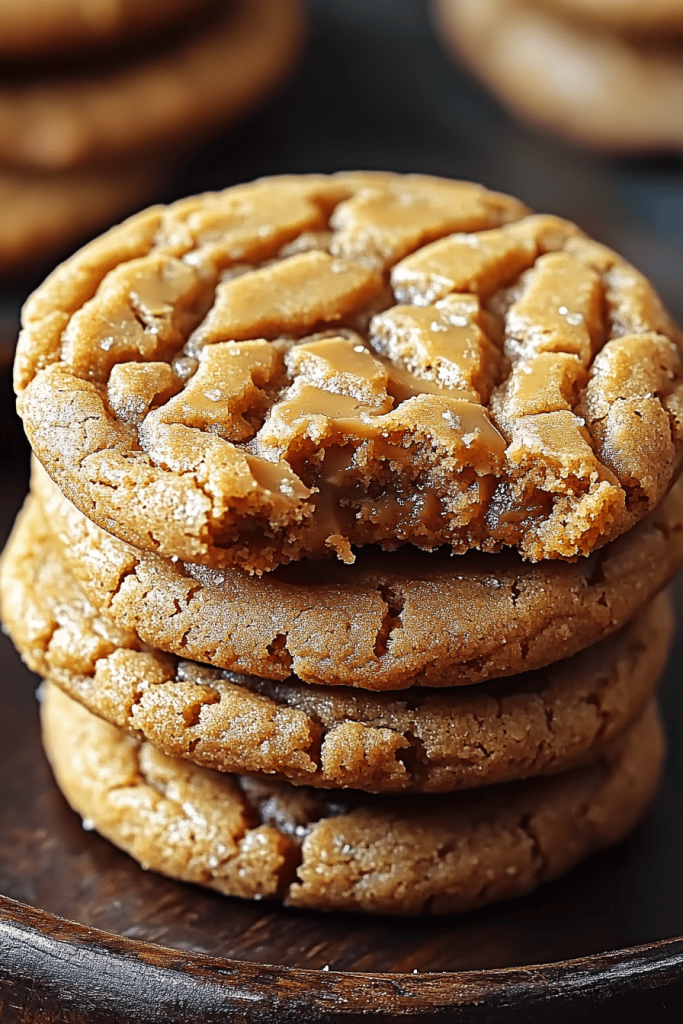
Think of gluten free Peanut butter cookies as the healthier, allergy-friendly sibling of your classic favorite. It’s essentially the same concept—rich, chewy, peanut buttery goodness—but made with gluten-free flour instead of traditional wheat flour. The name is pretty straightforward: they’re cookies that highlight that irresistible peanut butter flavor, and they’re totally safe if you’re avoiding gluten or trying to cut back on grains. What’s funny is, I used to think gluten-free baking meant compromise—like, less flavor or weird textures. But these cookies? They’re so good, they’ve actually made me love the gluten-free version more than the original! They’re soft yet slightly chewy, with a hint of salt and natural sweetness from the peanut butter. Plus, they’re super versatile. You can dress them up with chocolate chips, sprinkle sea salt on top, or keep them simple—the options are endless and always delicious.
Why you’ll love this recipe?
What I love most about these gluten free Peanut Butter cookies is how they combine comfort and simplicity in just a handful of ingredients. No fussy steps, no complicated techniques—just dump and stir, then bake. The smell alone will make your whole house smell like a cozy peanut butter den, and I swear, my kids ask for these all the time. The flavor? Out of this world. The toastiness of peanut butter, with just enough sweetness to satisfy your sweet tooth without feeling heavy. Plus, they’re budget-friendly! You can make a batch with pantry staples—peanut butter, sugar, eggs, and gluten-free flour—and instant gratification follows. These cookies are also incredibly versatile. Love chocolate? Stir in some chocolate chips or chunks. Trying to keep things a bit healthier? Swap maple syrup for some sugar or add chopped nuts. They’re a lifesaver on busy nights or when you’re craving something sweet but don’t want to turn on the oven for a big cheesecake or layered cake. Honestly, what I love most is how these cookies bring everyone together—friendly, satisfying, and just the right amount of decadent.
How do I make gluten free peanut butter cookies?
Quick Overview
This recipe is as straightforward as it gets. You’re mixing Peanut Butter, sugar, eggs, and gluten-free flour into a dough that’s sticky but manageable. Then, scoop, flatten, and bake. The secret is in using a good quality peanut butter—natural with minimal added sugar—and chilling the dough if your kitchen is warm. The whole process takes about 20 minutes from start to finish. You’ll love how effortlessly it comes together, and the best part? No fancy equipment required—just a spoon and your trusty baking sheet. These cookies are perfect for those moments you need a sweet fix fast, and trust me, once you try them, you’ll want to keep this recipe handy forever.
Ingredients
For the Main Batter:
– 1 cup natural Peanut Butter (creamy or chunky, your choice!)
– ¾ cup granulated sugar (or coconut sugar for a more caramel flavor)
– 1 large egg
– 1 teaspoon vanilla extract
– ½ teaspoon sea salt (optional but enhances flavor)
– ½ cup gluten-free all-purpose flour (I recommend one with xanthan gum included; Bob’s Red Mill is my favorite)
For the Filling:
– This recipe doesn’t need a filling, but if you’re feeling fancy, try a dollop of jelly or a mini Chocolate Chip in the center before baking. It’s a game-changer!
For the Glaze:
– Optional: melted dark chocolate or a sprinkle of flaky Sea Salt for finishing touches
“Made the Simple Peanut Butter Cookie Bliss tonight and wow — perfect weeknight dinner. Will definitely make again!”
Step-by-Step Instructions
Step 1: Preheat & Prep Pan
Heat your oven to 350°F (180°C). Line a baking sheet with parchment paper—I always do this to keep things easy when I’m managing a sticky dough. You don’t want the cookies sticking or breaking apart when you lift them out after baking. Set aside.
Step 2: Mix Dry Ingredients
In a small bowl, whisk together the Gluten-Free Flour and sea salt. This helps evenly distribute the flour, so each cookie bakes uniformly. Set aside.
Step 3: Mix Wet Ingredients
In a large mixing bowl, stir together the Peanut Butter and sugar until creamy. It’ll look a little grainy at first but keep mixing—trust me, it comes together nicely. Add the egg and vanilla, and beat until smooth. If your peanut butter is super thick, warming it slightly for a few seconds in the microwave helps it blend better. The mixture should be thick but pliable, like cookie dough.
Step 4: Combine
Gradually add the dry ingredients into the wet mixture, folding gently until just combined. Overmixing can make these cookies tough, so just stir until everything looks evenly combined. If your dough feels too sticky, sprinkle a little more flour on top and fold it in; if it’s too crumbly, a splash of water or a tiny bit more egg will help.
Step 5: Prepare Filling
If you’re adding a filling, now’s the time. A small spoonful of jelly or mini chocolate chips pressed into the center of each Cookie Dough ball works perfectly. I like to keep the cookies simple, but this little trick adds a fun surprise.
Step 6: Layer & Swirl
Using a tablespoon or cookie scoop, portion out dough onto your prepared baking sheet. Lightly press each ball down with the back of a fork or your fingers—this helps them bake evenly and gives that classic slightly flattened shape. For a marbled look, you can swirl a tiny bit of extra peanut butter or chocolate on top before baking.
Step 7: Bake
Place in the oven and bake for about 10-12 minutes. Keep an eye on them—these cookies go from perfect to overdone fast! They might look a little soft when they come out—that’s okay. They’ll firm up as they cool. If you prefer crunchier cookies, bake for an extra minute or two.
Step 8: Cool & Glaze
Let the cookies rest on the baking sheet for at least 5 minutes before transferring to a wire rack. This prevents them from breaking apart. If you want to dress them up, drizzle melted dark chocolate over the top while they’re still a bit warm, or sprinkle sea salt for that salty-sweet combo I adore.
Step 9: Slice & Serve
These cookies are best enjoyed once they’ve cooled slightly. They taste amazing warm, but honestly, they hold their flavor and texture perfectly once fully cooled. Serve with a glass of almond milk, a cup of coffee, or just by themselves. They’re such a comforting treat, I always keep a batch in the freezer for an instant sweet fix.
“The Simple Peanut Butter Cookie Bliss turned out amazing. My kids asked for seconds. Saving this one!”
What to Serve It With
Whether you’re enjoying these gluten free peanut butter cookies in the morning or as a little indulgence after dinner, they’re super versatile. For breakfast, pair with a strong cup of coffee or a glass of oat milk—trust me, it’s a cozy way to start the day. My family loves serving them on a pretty plate with a drizzle of caramel or a scattering of crushed peanuts to elevate the simple flavor. For brunch, I like adding a few fresh berries or dollops of whipped coconut cream alongside. They’re also a hit as a decadent dessert—try stacking them with a layer of fudge or mascarpone cream for a miniature peanut butter cheesecake. And honestly, these cookies are perfect for afternoon teatime, paired with a warm cup of herbal tea or a cold glass of milk. I’ve made these for picnics, movie nights, and even as a quick thank-you gift wrapped in a pretty box—they’re so adaptable and loved by everyone!
Top Tips for Perfecting Your Gluten Free Peanut Butter Cookies
After making these dozens of times, I’ve picked up a few tricks that make all the difference. Here are my top tips to get perfect cookies every time:
- Zucchini prep: Okay, not zucchini here, but I do recommend draining or patting down your natural peanut butter if it’s super oily—this prevents your cookies from spreading too much.
- Mixing advice: To avoid tough cookies, don’t overmix once you add the flour. Gentle folds are key. Keep an eye on the texture; it should be thick but manageable—add a spoon of water or a sprinkle of flour if needed.
- Swirl customization: Want to make these cookies prettier? Use a toothpick to swirl in some melted chocolate or peanut butter on top before baking. It creates a beautiful marbled effect.
- Ingredient swaps: If you’re out of vanilla, a pinch of cinnamon or honey adds a warm note. Coconut sugar really enhances the caramel undertone, and chopped walnuts also work great in the dough.
- Baking tips: For chewier cookies, take them out at the slightest hint of softness—they’ll firm up as they cool. If you love crunchier cookies, extend the baking time a minute or two or bake on a higher rack for extra crispness.
- Glaze variations: Instead of chocolate, you can use a honey drizzle, a dusting of powdered sugar, or even a sprinkle of shredded coconut. Just be mindful of moisture content so you don’t mess up the cookie texture.
Over the years, I’ve learned that patience and gentle handling are your best friends here. Trust your oven’s timing, and don’t be afraid to experiment with toppings and fillings. That’s where the magic really happens!
Storing and Reheating Tips
These cookies stay delicious even days after baking—if you store them right. Keep a stack of cookies in an airtight container at room temperature, layered with parchment paper to prevent sticking. They stay fresh for about 3-4 days (if they last that long!). For longer storage, pop them into a freezer-safe bag or container. They freeze beautifully—just wrap tightly, and they’ll keep for up to 2 months. When you’re ready for a treat, let them thaw at room temperature for 10-15 minutes or warm them in a low oven for a few minutes—nothing beats a warm, gooey cookie straight from the freezer! If you plan to add a glaze or toppings, do that just before serving to keep everything fresh and shiny. I’ve learned that properly stored cookies retain their chewy interior and crisp edges, making each bite just as delightful as the first day.
Frequently Asked Questions
Final Thoughts
If you’re craving that classic peanut butter cookie experience but need to keep things gluten free, trust me—this recipe is your new best friend. The ingredients are simple, the process easy to master, and the flavor? Out of this world. Every time I make these, I’m reminded how sometimes the best recipes are the ones that are approachable, feel like a warm hug, and bring a little joy to the table. I love experimenting with variations—adding chunks of dark chocolate, a sprinkle of sea salt, or even a smear of jam in the middle—but honestly, these simple cookies speak for themselves. Give them a try—I think you’ll find yourself reaching for the batch again and again. Drop a comment below and let me know how your cookies turn out or share your own twists. Happy baking and sweet moments to you!

gluten free peanut butter cookies
Ingredients
Main Ingredients
- 1 cup peanut butter
- 1 cup sugar
- 1 egg egg
- 1 tsp vanilla extract
Instructions
Preparation Steps
- Preheat oven to 350 degrees. Line a baking sheet with parchment paper or spray with nonstick spray.
- In a bowl, combine peanut butter, sugar, egg, and vanilla extract until well mixed.
- Refrigerate dough for 1-2 hours if desired for prettier cookies, or scoop directly for quicker baking.
- Shape dough into 1-inch balls and place on prepared baking sheet.
- Flatten each ball with a fork to create a criss-cross pattern.
- Bake for 10-12 minutes until edges are golden.
- Allow cookies to cool on the baking sheet for a few minutes before transferring to a wire rack to cool completely.


