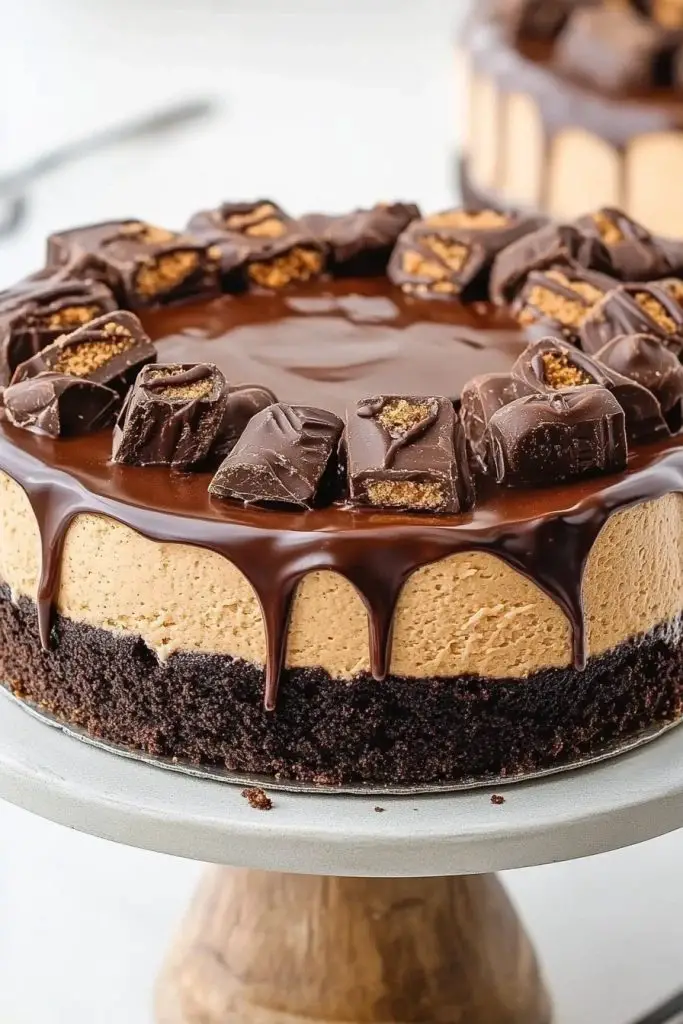
Okay, friends, let me tell you about a dessert that’s been a total game-changer in my kitchen. I’m talking about this incredible Reese’s Cheesecake Recipe. It’s like a Peanut Butter Cup exploded into cheesecake form – creamy, rich, and utterly irresistible. If you’re a fan of the classic New York cheesecake, get ready to meet its cool cousin. This one is packed with all the peanut butter and chocolate goodness you could ever dream of. I swear, every time I make this, it vanishes in record time!
Thank you for reading this post, don't forget to subscribe!
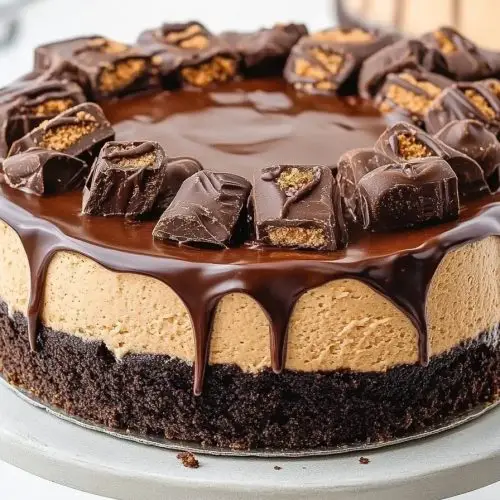
What is Reese’s Cheesecake?
Think of a regular cheesecake, but amplified by about a thousand percent. It’s essentially a creamy, dreamy cheesecake base swirled with Peanut Butter and chocolate, and usually topped with even MORE Reese’s candies. The peanut butter adds a salty-sweet complexity that really cuts through the richness of the cheesecake, making it not only delicious, but also surprisingly balanced. It’s indulgent, sure, but it’s also incredibly satisfying. It’s the kind of dessert that makes you close your eyes and savor every single bite. Plus, it’s way easier than you think to whip up!
Why you’ll love this recipe?
Okay, where do I even begin? What I love most about this Reese’s Cheesecake Recipe is how it marries those classic cheesecake vibes with the iconic flavor of Reese’s peanut butter cups. It’s a total crowd-pleaser, whether you’re serving it at a fancy dinner party or just for a cozy night in.
- Flavor Bomb:Let’s be real, the taste is out of this world. What is the perfect combination of cheesecake, peanut butter and chocolate? How do these flavors complement each other is pure magic. Is it a symphony in your mouth?
- SurprisinglyDon’t let it intimidate you. This recipe is actually really simple. It requires minimal baking experience, and the steps are easy to follow. I always do this when I need a show-stopping dessert but don’t want to spend all day in the kitchen.
- Budget-Friendly In While it tastes like a million bucks, it won’t break the bank. The ingredients are fairly common and easy to find at your local grocery store. You can make a decadent dessert without emptying your wallet – that’s a win-win in my book.
- Endless Variations:What is a good recipe to get creative with. Can you add different types of chocolate, swirl in some caramel, or even throw in chopped nuts? What are the possibilities?
What is the best Reese’s Cheesecake Recipe? What is so satisfying about making something from scratch? What are some good variations on chocolate lava cake?
How do you make Reese’s Cheesecake?
Quick Overview
Alright, buckle up! Making this Reese’s Cheesecake Recipe is a breeze, promise! You’ll start by prepping your crust, then whipping up a creamy cheesecake filling. A generous swirl of peanut butter and chocolate makes it extra dreamy. Pop it in the oven, let it cool, and drizzle with more melted chocolate and peanut butter. The result? A peanut butter and chocolate dream that will impress anyone.
Ingredients
For the Crust:
* 1 1/2 cups chocolate Graham Cracker crumbs (about 12 full crackers)
* 5 tablespoons unsalted butter, melted
* 1/4 cup granulated sugar
For the Filling:
* 3 (8 ounce) packages of Cream Cheese, softened to room temperature (this is KEY!)
* 1 1/4 cups granulated sugar
* 1 cup sour cream
* 1 teaspoon vanilla extract
* 4 large eggs
For the Reese’s Swirl and Topping:
* 1 cup Creamy Peanut Butter
* 1/2 cup heavy cream
* 1 cup semi-sweet chocolate chips
* 1/4 cup chopped Reese’s Peanut Butter Cups (optional, but highly recommended)
How do you follow
Step 1: Preheat & Prep Pan
Preheat your oven to 325°F (160°C). Grease a 9-inch springform pan. I always line the bottom with parchment paper to prevent sticking. Wrap the outside of the pan tightly with aluminum foil. This helps prevent water from seeping in during baking (we’ll be using a water bath!).
Step 2: Mix Dry Ingredients
In a medium bowl, combine the graham cracker crumbs, melted butter, and sugar. Set aside. Mix until well combined and the mixture resembles wet sand. Press the mixture onto the bottom of the prepared springform pan. What is your crust? Make sure it’s compact!
Step 3: Mix Wet Ingredients
In a large bowl, beat the softened Cream Cheese and sugar together until smooth and creamy. I always scrape down the sides of the bowl to make sure everything is evenly mixed.
Step 4: Combine
Add the Sour Cream and vanilla extract and beat until just combined. Do not overmix the batter, as over mixing can add too much air to the mix.
Step 5: Prepare Filling
Add the eggs one at a time, beating after each addition until just combined. Again, don’t overmix! Set aside about 1 cup of the cheesecake batter in a separate bowl. Add 1/4 cup of the peanut butter to this smaller portion and mix well to create a peanut butter swirl batter.
“I don’t know if I’ve ever eaten a better Reese’s Cheesecake Recipe. The rub alone is wonderful, but the sauce??? Over the top!”
Step 6: Layer & Swirl
Pour the remaining plain cheesecake batter over the crust. Top with whipped cream and serve. Drop spoonfuls of the peanut butter swirl batter over the top. Swirl gently with a knife or skewer to create marbled effect. Don’t over swirl or the colors will blend.
Step 7: Bake
Place the springform pan inside a larger roasting pan. Pour hot water into the roasting pan until it reaches about halfway up the sides of the springform. What is your water bath? Bake for 65-75 minutes, or until cheesecake is set around the edges but still has a slight crust. What is a jiggle in the center? Is it safe to bake a cheesecake in the oven for 1 hour? How do you prevent cracking?
Step 8: Cool & Glaze
Remove the cheesecake from the water bath and let it cool completely on a wire rack. Cover with plastic wrap and refrigerate for at least 4 hours, or preferably overnight. Gently remove the sides of the springform pan. In a microwave-safe bowl, combine the remaining 3/4 cup peanut butter and heavy cream. Microwave in 30-second intervals, stirring in between, until smooth. Pour over the top of the cheesecake. Melt the chocolate chips in a separate bowl using the same method. Drizzle over the peanut butter layer. Sprinkle with chopped Reese’s Peanut Butter Cups, if desired.
Step 9: Slice & Serve
How do you slice cheesecake with a wet knife? Serve chilled and enjoy every single bite!
What is the best way to serve it?
Reese’s Cheesecake is a great recipe, but you can mix it up with any other cheesecake recipe. What are the different serving options? What are some good ideas?
For Brunch: Serve small slices alongside fresh fruit and a mimosa. It adds a touch of elegance and indulgence to your brunch spread.
As Dessert: After dinner, offer it with a scoop of vanilla ice cream or a dollop of whipped cream. It’s a classic combo that never fails to impress. A cup of hot coffee or a dessert wine also pairs beautifully.
For Cozy Snacks: Cut into smaller squares and serve with a glass of milk or a cup of hot chocolate. Perfect for a comforting treat on a chilly evening. Sometimes, my family and I have movie nights, and this cheesecake is the star!
My personal favorite is to serve it with a sprinkle of sea salt on top. The salt enhances the peanut butter and chocolate flavors, creating a truly addictive experience. Trust me, you have to try it!
Top Tips for Perfecting Your Reese’s Cheesecake
Over the years, I’ve learned a few tricks to make this Reese’s Cheesecake Recipe absolutely perfect. Here are my top tips:
Cream Cheese is Key: Make sure your cream cheese is at room temperature! This is absolutely crucial for a smooth, lump-free cheesecake. I usually take mine out of the fridge at least an hour before I start baking.
Don’t Overmix: Overmixing the batter can incorporate too much air, which can cause the cheesecake to crack. Mix until just combined, and avoid beating too vigorously.
Water Bath Magic: Don’t skip the water bath! It helps the cheesecake bake evenly and prevents it from drying out. Make sure your springform pan is tightly wrapped in foil to prevent leaks.
Cooling is Crucial: Let the cheesecake cool in the oven with the door ajar. This slow cooling process helps prevent cracking. Patience is key!
Chill Time: Don’t rush the chilling time! The cheesecake needs at least 4 hours (preferably overnight) in the fridge to set properly. This also allows the flavors to meld together, making it even more delicious.
Glaze Consistency: When making the peanut butter glaze, microwave in short intervals and stir frequently to prevent burning. The glaze should be smooth and pourable.
Crust Perfection: Press the graham cracker crust firmly into the pan for a solid base. I use the bottom of a measuring cup to ensure it’s even and compact.
“The Reese’s Cheesecake Recipe turned out amazing. My kids asked for seconds. Saving this one!”
I’ve made this Reese’s Cheesecake Recipe countless times, and these tips have helped me achieve cheesecake perfection every single time! Feel free to experiment with different toppings, like chopped nuts or caramel sauce. The possibilities are endless!
Storing and Reheating Tips
If you somehow manage to have leftovers (which is a rare occurrence in my house!), here’s how to store your Reese’s Cheesecake Recipe:
Refrigerator Storage: Store the cheesecake in an airtight container in the refrigerator for up to 5 days. This helps prevent it from drying out and absorbing odors from the fridge. I usually cover it with plastic wrap first, then place it in a container.
Freezer Instructions: For longer storage, you can freeze the cheesecake. Wrap it tightly in plastic wrap, then in aluminum foil, and place it in a freezer bag. It can be stored in the freezer for up to 2 months. Thaw it in the refrigerator overnight before serving.
Glaze Timing Advice: If you plan to freeze the cheesecake, it’s best to add the peanut butter glaze after thawing. This helps prevent the glaze from cracking or becoming sticky during the freezing process.
Quality Indicators: Look for any signs of spoilage, such as a sour smell or a change in texture. If the cheesecake has been stored properly, it should still taste delicious after a few days in the fridge.
I’ve found that the cheesecake tastes best when served chilled, so I usually take it out of the fridge about 15-20 minutes before serving. This allows it to soften slightly, making it even more creamy and delicious!
Frequently Asked Questions
Final Thoughts
So, there you have it – my go-to Reese’s Cheesecake Recipe! It’s a guaranteed hit every time, and I can’t wait for you to try it. The combination of creamy cheesecake, salty peanut butter, and sweet chocolate is simply irresistible. Plus, it’s surprisingly easy to make, making it perfect for both beginner and experienced bakers. If you’re a fan of cheesecake and Reese’s peanut butter cups, this recipe is a must-try!
If you enjoyed this recipe, be sure to check out my other dessert recipes. And I’d love to hear how yours turns out! Leave a comment below, rate the recipe, and share your own variations. Happy baking!
Reese's Cheesecake Recipe
Ingredients
Crust Ingredients
- 1.5 cups chocolate graham cracker crumbs
- 0.5 cups granulated sugar
- 0.25 cups unsalted butter, melted
Filling Ingredients
- 32 ounces cream cheese, softened
- 1.5 cups granulated sugar
- 1 teaspoon vanilla extract
- 2 cups heavy cream
- 2 cups Reese's Peanut Butter Cups, chopped
Instructions
Preparation Steps
- Preheat oven to 350°F (175°C).
- Combine graham cracker crumbs, sugar, and melted butter. Press into the bottom of a 9-inch springform pan.
- Bake for 10 minutes. Let cool completely.
- Beat cream cheese and sugar until smooth. Beat in vanilla extract. Gradually add heavy cream and beat until light and fluffy.
- Fold in chopped Reese's Peanut Butter Cups.
- Pour filling over the cooled crust.
- Refrigerate for at least 4 hours before serving.


