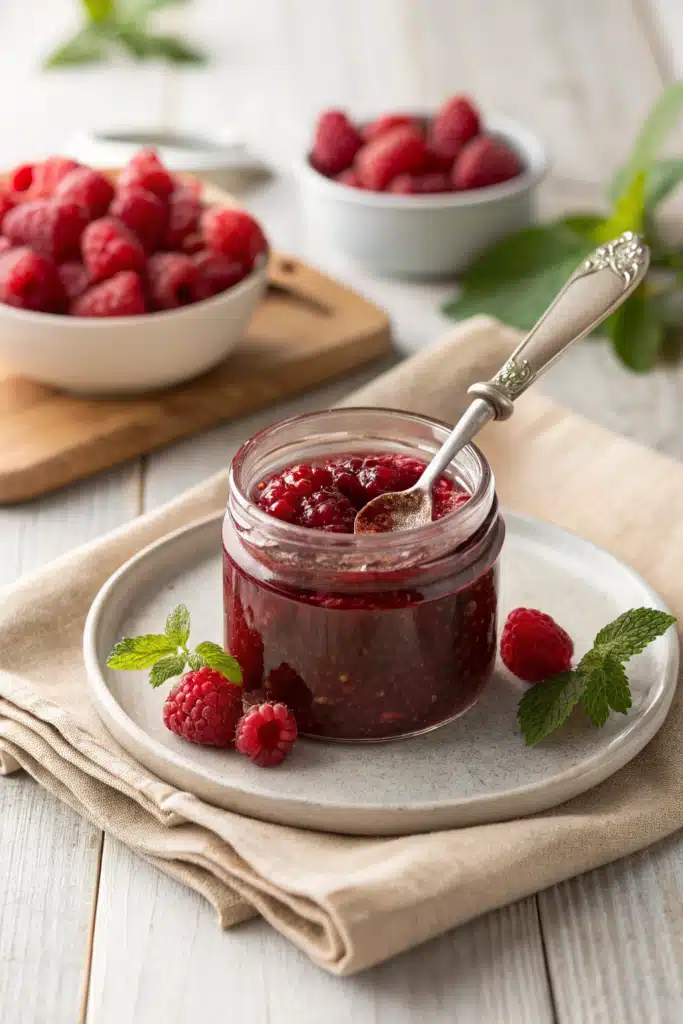
Homemade Raspberry Jam: A Burst of Summer in Every Jar
There’s something magical about opening a jar of homemade raspberry jam on a quiet morning. The deep crimson color, the sweet-tart aroma, and that first spoonful—pure, jewel-like fruit bursting with flavor. This isn’t just spread for toast; it’s a celebration of summer wrapped in glass, made with love and a little kitchen magic. Whether you’re preserving a bumper crop from your garden or simply craving that nostalgic taste of childhood breakfasts, this homemade Raspberry Jam Recipe delivers a result so vibrant and delicious, store-bought jars will never do.
Thank you for reading this post, don't forget to subscribe!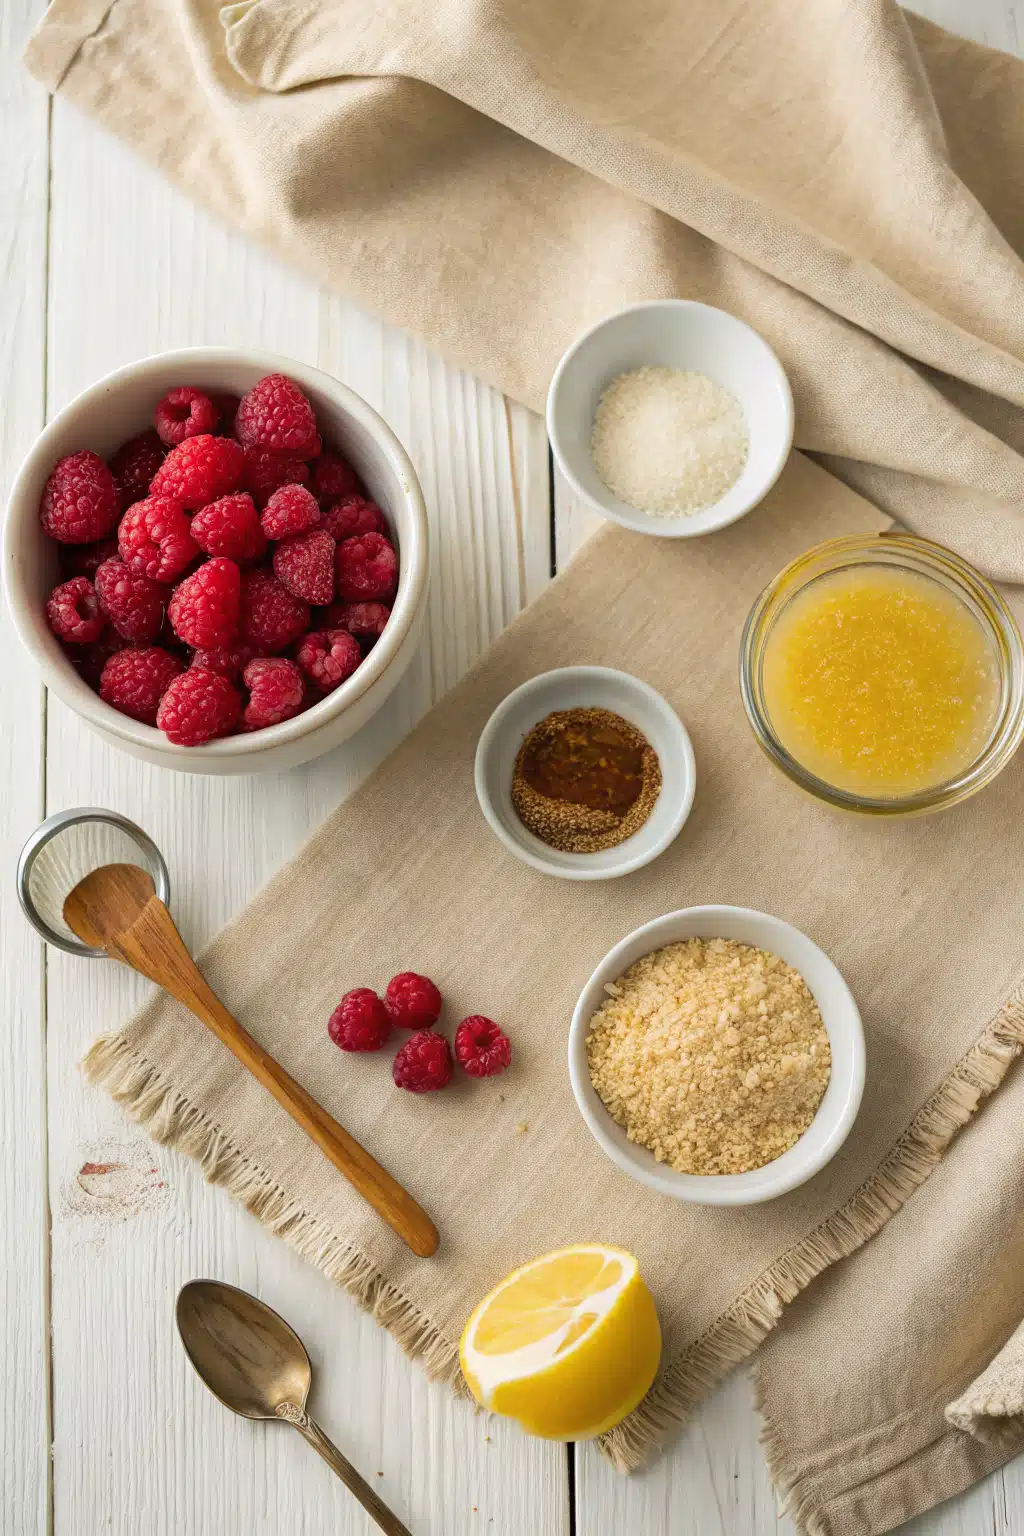
What Is Homemade Raspberry Jam?
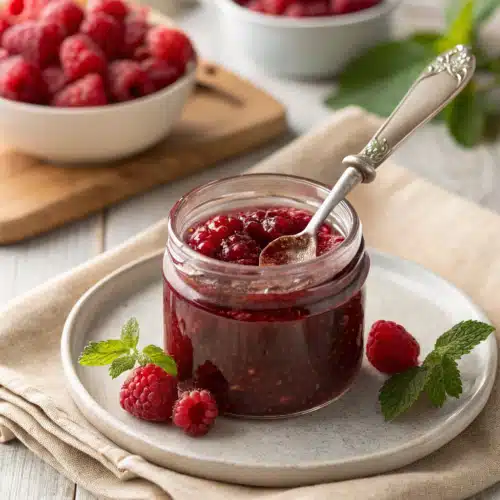
Raspberry Jam is a thick, fruity preserve made by cooking fresh raspberries with sugar until they break down and release their juices, then thickening them into a glossy, spreadable consistency. Unlike commercial jams that may contain pectin boosters or artificial flavors, this version uses only real fruit, natural pectin (if needed), and time-tested techniques to create a gel without shortcuts. It’s less about science and more about patience—letting the fruit do the work while gently coaxing out every last drop of flavor. The result? A jam that clings to your knife, holds its shape when stirred, and tastes unmistakably like sunshine.
Why You’ll Love This Recipe
This raspberry jam isn’t just another recipe—it’s a moment of joy in your kitchen. First, it’s incredibly forgiving; even if your stove isn’t perfectly calibrated, the jam finds its own rhythm through simple cues like foam rising or edges darkening. Second, it freezes beautifully and lasts for months, meaning you can enjoy peak-season berries long after harvest ends. Third, it makes a stunning gift—no wrapping required, just a ribbon and a handwritten note. And let’s not forget the sensory experience: watching plump berries transform into liquid gold, the way steam curls around the pot, the satisfying crackle as the mixture thickens… it’s meditative, rewarding, and deeply satisfying.
Plus, this recipe skips the fancy gadgets. No candy thermometers or immersion blenders needed. Just a sturdy pot, a wooden spoon, and maybe a splash of lemon juice to brighten the tartness. I’ve made it with overripe supermarket berries, wild-foraged raspberries, and everything in between—and each batch has carried the same honest sweetness. It’s also naturally low in added sugars compared to store brands, and you control exactly what goes in. No high-fructose corn syrup, no mystery additives. Just pure, unadulterated raspberry goodness.
How to Make Homemade Raspberry Jam
Quick Overview
In under an hour, you’ll have fragrant, ruby-red jam ready to bottle. The process involves cooking raspberries and sugar together until they soften, then adding lemon juice and pectin (if using) to help them set. Once it reaches a rolling boil—where bubbles burst steadily and don’t pop back down—you test for doneness by placing a small plate in the freezer earlier (this helps check if the jam jiggles instead of setting). Then, skim off foam, ladle hot jam into sterilized jars, seal, and either process for shelf-stable storage or refrigerate for quick use. It’s foolproof, joyful, and worth every minute.
Ingredients
- 4 cups fresh raspberries (about 2 lbs)
- 3 cups granulated sugar
- 1 tablespoon fresh lemon juice
- 1 package powdered pectin (optional, but ensures proper setting)
- Pinch of salt (enhances flavor subtly)
“I don’t know if I’ve ever eaten a better Raspberry Jam. The rub alone is wonderful, but the sauce??? Over the top!”
Step-by-Step Instructions
Step 1: Preheat & Prep Pan
Start by sterilizing your jars and lids—either by boiling them for 10 minutes or running through a dishwasher cycle. Place them Upside Down on a clean towel to keep warm. In a large heavy-bottomed saucepan, combine raspberries, sugar, lemon juice, and pinch of salt. Stir gently to dissolve sugar slightly, then let sit for 15 minutes. This maceration step softens the fruit and releases natural juices. If using powdered pectin, set it aside for now.
Step 2: Cook Until Thickened
Place saucepan over medium-high heat. Bring to a full rolling boil, stirring constantly to prevent scorching. Boil hard for 1 minute (or 1.5 minutes if not using pectin). The mixture should bubble vigorously and coat the back of your spoon. If you don’t see enough juice, simmer a bit longer—but avoid overcooking, or the jam will lose brightness.
Step 3: Test for Doneness
While boiling, chill a small metal plate in the freezer for at least 5 minutes. After removing from heat, drop a teaspoon of jam onto the cold plate. Let it sit for 1 minute. Push it gently with your finger—if it wrinkles and doesn’t immediately flatten, it’s done! If not, return to heat for another minute before testing again.
Step 4: Skim & Bottle Immediately
Remove from heat. Skim off any foam floating on top with a slotted spoon. Ladle hot jam into prepared jars, leaving ¼-inch headspace. Wipe rims clean, place lids on, and screw bands fingertip-tight (not too tight—they’ll seal during cooling). For shelf-stable storage, process sealed jars in a boiling water bath for 10 minutes. Otherwise, refrigerate within 2 weeks or freeze for up to a year.
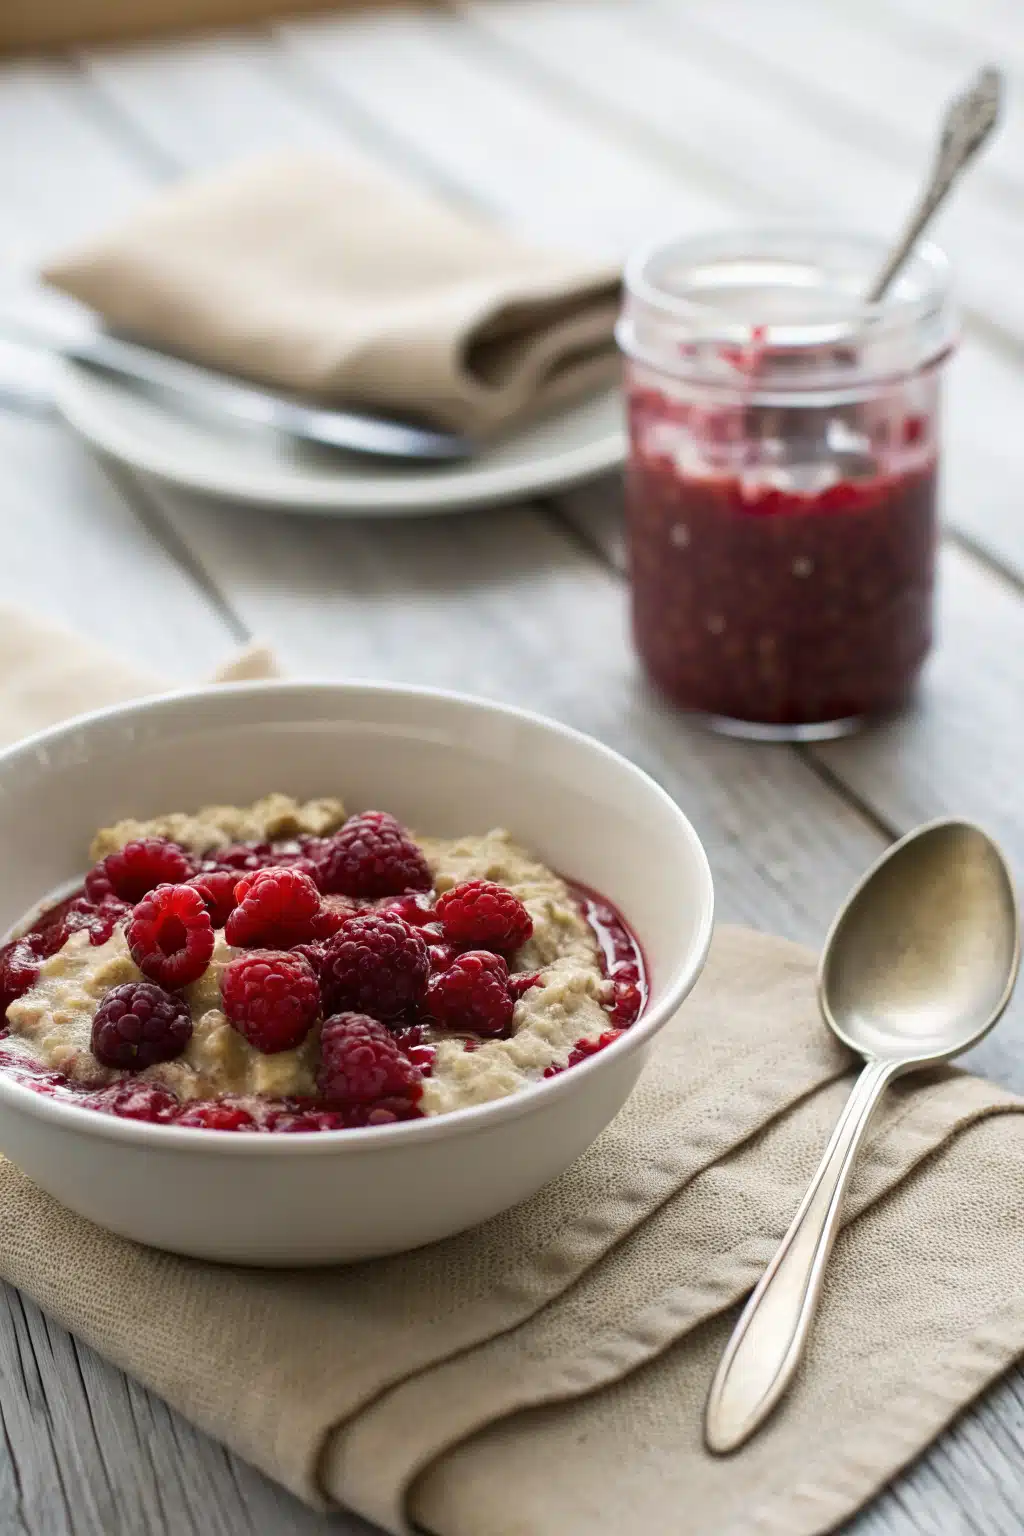
What to Serve It With
This raspberry jam transforms ordinary foods into extraordinary experiences. Slather it on buttery brioche, flaky croissants, or warm sourdough toast for breakfast that feels like a patisserie visit. Pair it with Cream Cheese for elegant brunch spreads or smear it on whole-grain English muffins alongside scrambled eggs. In savory dishes, swirl it into yogurt parfaits, glaze roasted chicken, or mix it into vinaigrettes for a fruity twist. Sandwiched between layers of pound cake, it becomes a show-stopping dessert. And honestly? Eating it straight from the spoon counts as a valid meal.
Top Tips for Perfecting Your Raspberry Jam
First, use ripe but firm berries—overripe ones turn mushy. Second, measure ingredients accurately; too much sugar weakens the gel, too little risks spoilage. Third, stir frequently during early cooking to avoid sticking. Fourth, don’t rush the boil—gentle simmering preserves color and flavor better than violent bubbling. Fifth, if your jam won’t set without pectin, add it at the start, not at the end. Lastly, trust your senses: aroma tells you when it’s close, and the plate test is your best friend. Remember, jam-making is part art, part intuition. Even mistakes become learning moments!
Storing and Reheating Tips
Properly canned jam lasts up to a year at room temperature. Once opened, store in the fridge for up to 3 weeks—the acidity prevents mold, but freshness fades fast. Freezing is even easier: pour into ice cube trays, then transfer cubes to freezer bags. Defrost overnight in the fridge before using. To reheat gently, warm small amounts in a saucepan over low heat, stirring constantly—never boil, or the texture breaks down. For microwave reheating, heat in 10-second bursts, stirring between, until smooth.
Frequently Asked Questions
“New family favorite! This Raspberry Jam was so flavorful and ridiculously easy. Crowd-pleaser for sure.”
Final Thoughts

Making raspberry jam isn’t just about preservation—it’s about connection. To the season when those bushes were full, to the hands that picked them, to the future you’ll share with family over shared jars. It slows down the frantic pace of modern life and invites us to savor sweetness one spoonful at a time. So next time you see raspberries at the market, grab a basket. Your kitchen deserves the burst of flavor, your taste buds crave the authenticity, and your heart will thank you for the effort. Because truly, nothing beats homemade.
Raspberry Jam
Ingredients
Main Ingredients
- 4 cups fresh raspberries
- 1 cup granulated sugar
- 1 tablespoon lemon juice
- 0.25 teaspoon vanilla extract optional
Instructions
Preparation Steps
- Wash the raspberries and remove any stems. Place them in a heavy-bottomed saucepan.
- Add the sugar, lemon juice, and vanilla extract (if using) to the saucepan. Stir gently to combine.
- Cook over medium heat, stirring frequently, until the mixture begins to simmer and the sugar dissolves.
- Reduce heat to low and continue cooking for about 25–30 minutes, stirring occasionally, until the jam thickens and coats the back of a spoon.
- Remove from heat and let cool slightly. Transfer to sterilized jars and seal. Store in the refrigerator for up to 3 weeks.


