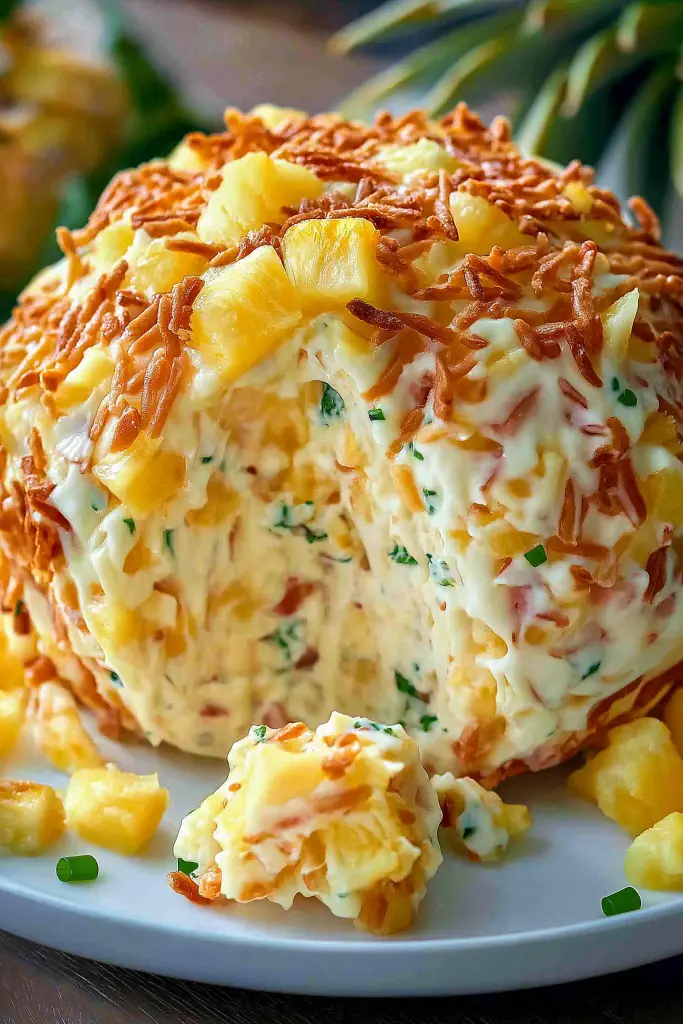
Oh, my goodness, where do I even begin with these Pineapple Christmas Balls? For me, the smell of them baking instantly transports me back to my childhood kitchen, the air thick with the scent of warm spices and sweet pineapple, and my mom humming carols as she rolled these little treasures. They’re not just a treat; they’re a whole vibe, you know? They’re that perfect little bite that says “holidays are here!” and they’re surprisingly simple to whip up, which is a total lifesaver when things get hectic. Honestly, if you’re looking for a festive bake that’s a bit different from the usual gingerbread or Sugar Cookies, but still screams holiday cheer, these are it. Think of them as little bursts of sunshine, wrapped up in a cozy, spiced hug. They’re like a shortcut to Christmas morning, minus all the early wake-up calls (unless you’re baking them at dawn, which is also totally acceptable!).
Thank you for reading this post, don't forget to subscribe!What are pineapple Christmas balls?
So, what exactly are these magical little things? Pineapple Christmas Balls are essentially a wonderfully moist, spiced cake-like bite, packed with the bright, sweet-tart flavor of pineapple. They’re not quite a cookie, not quite a cake, but something delightfully in-between. The name “Christmas Balls” just felt right because they’re often made around the holidays, and let’s be honest, they have this lovely, slightly rustic ball-like shape when you prepare them. They’re tender on the inside, with a subtle crumb, and that burst of pineapple keeps them from being too heavy or dry. They’re like a warm hug for your taste buds, with just the right amount of festive spice to make you feel all cozy and happy. It’s a simpler approach to festive baking, focusing on pure, delicious flavor without all the fuss of intricate decorating. They’re the kind of treat that disappears from the plate before you can even blink!
Why you’ll love this recipe?
There are so many reasons why I just adore this Pineapple Christmas Balls Recipe, and I have a feeling you will too! First off, the flavor is just out of this world. You get that lovely warmth from the cinnamon and nutmeg, which is perfectly balanced by the juicy tang of pineapple. It’s a flavor combination that just sings “holidays” to me. And let’s talk about simplicity! This recipe is a godsend on those days when you want to bake something special but are short on time. There’s no complicated creaming of butter and sugar, no chilling dough – just straightforward mixing and baking. Plus, the ingredients are usually things you already have in your pantry, making it super budget-friendly, which is always a win, especially during the festive season when expenses can add up. What I love most about this recipe, though, is its versatility. You can enjoy these warm right out of the oven with a cup of tea, or let them cool completely and drizzle them with a simple glaze. They’re fantastic for a quick breakfast treat, a delightful addition to a holiday brunch spread, or even as a sweet little dessert after dinner. My family devours them no matter how I serve them. They’re way more exciting than a plain old muffin, but just as easy to make. Honestly, if you’re anything like me and love that satisfying feeling of creating something delicious from scratch that brings a smile to everyone’s face, this recipe is a must-try.
How do I make Pineapple Christmas Balls?
Quick Overview
Making these delightful Pineapple Christmas Balls is surprisingly straightforward. You’ll basically be mixing up a simple batter, folding in that wonderful pineapple, and then baking them until they’re golden and fragrant. The beauty of this recipe lies in its minimal fuss. We’re talking one-bowl mixing for the most part, minimal cleanup, and a bake time that gets you to deliciousness relatively quickly. It’s the perfect bake for beginners, or for seasoned bakers who just want a reliable, crowd-pleasing recipe that tastes like pure comfort. The key is not to overmix, which we’ll get into, and to ensure your pineapple is well-drained to avoid a soggy outcome. Trust me, the payoff in terms of flavor and texture is enormous for the effort involved!
Ingredients
For the Main Batter:
You’ll need about 2 cups of all-purpose flour. Make sure it’s fresh! I always give my flour a little whisk before measuring to make sure it’s light and airy. A teaspoon of baking soda is crucial for that lift, and a teaspoon of baking powder helps too. Don’t skip these! For that warm, cozy flavor, I use about 1 teaspoon of ground cinnamon and a half teaspoon of ground nutmeg. If you like a little more spice, feel free to amp that up! A pinch of salt, about a quarter teaspoon, really brings out all the other flavors. Then, for sweetness and moisture, we’ll use 1 cup of granulated sugar. If you’re feeling adventurous, you can use a mix of granulated and Brown Sugar for a deeper flavor, but plain white sugar is perfect here. And for the richness and binding, 2 large eggs are standard. I always use room temperature eggs; they incorporate so much better! You’ll also need half a cup of melted unsalted butter. Unsalted is best so you can control the saltiness. And finally, the star ingredient: one 20-ounce can of crushed pineapple, well-drained. This is key! Make sure to drain it really, really well to avoid any excess moisture. I usually press it gently in a sieve with a spoon.
For the Filling:
This is where we really pack in that pineapple flavor! We’ll use the remaining half of that well-drained crushed pineapple (about 1 cup, give or take). I sometimes like to add a tablespoon or two of granulated sugar to this filling if the pineapple isn’t super sweet, just to really boost that flavor. A tiny pinch of cinnamon here too, maybe just a quarter teaspoon, to keep that warm spice theme going. This filling is super simple, it’s just about intensifying that delicious pineapple taste.
For the Glaze:
For the classic glaze, you’ll need about 1 cup of powdered sugar. Make sure it’s sifted if it’s lumpy! You’ll add just enough milk (or even pineapple juice for extra flavor!) to make it drizzling consistency. Start with about 1 to 2 tablespoons and add more, a teaspoon at a time, until it’s just right. A splash of vanilla extract, about half a teaspoon, adds a lovely depth. Sometimes, especially around the holidays, I’ll add a tiny drop of green or red food coloring for a festive touch, but that’s totally optional!
“New family favorite! This Pineapple Christmas Balls was so flavorful and ridiculously easy. Crowd-pleaser for sure.”
Step-by-Step Instructions
Step 1: Preheat & Prep Pan
First things first, get your oven preheated to 350 degrees Fahrenheit (175 degrees Celsius). This is a pretty standard temperature for most cakes and cookies, and it works beautifully for these. While the oven is heating up, grab your baking sheets. I like to line them with parchment paper. This is a lifesaver for cleanup, trust me! It prevents sticking and makes removing the finished balls so much easier. If you don’t have parchment paper, you can lightly grease and flour your baking sheets, but parchment paper is really the way to go for these.
Step 2: Mix Dry Ingredients
In a large mixing bowl, whisk together your 2 cups of all-purpose flour, 1 teaspoon of baking soda, 1 teaspoon of baking powder, 1 teaspoon of ground cinnamon, half a teaspoon of ground nutmeg, and a quarter teaspoon of salt. Whisking these dry ingredients together ensures that everything is evenly distributed. This means your baking soda and powder will work their magic uniformly, giving you a consistently lovely texture. Nobody wants a bite that’s too cakey in one spot and too dense in another, right?
Step 3: Mix Wet Ingredients
In a separate medium bowl, whisk together your 2 large eggs. Then, pour in your half cup of melted unsalted butter and 1 cup of granulated sugar. Whisk everything together until it’s well combined. It might look a little glossy, and that’s perfectly fine. The key here is to make sure the sugar is at least partially dissolved into the wet ingredients. Room temperature eggs really do make a difference here; they emulsify much better with the butter and sugar.
Step 4: Combine
Now, pour the wet ingredients into the bowl with your dry ingredients. Using a spatula or a wooden spoon, gently mix everything together until it’s *just* combined. Seriously, don’t overmix! Overmixing develops the gluten in the flour too much, which can lead to tough balls. You want to see just a few streaks of flour remaining. It’s better to have a few tiny flour bits than to overwork the batter. This is a mistake I definitely made when I was first learning, and it made such a difference when I stopped!
Step 5: Prepare Filling
While your batter is resting for a moment, let’s get that pineapple filling ready. In a small bowl, combine the well-drained crushed pineapple (about 1 cup), the optional tablespoon or two of granulated sugar (if you feel your pineapple needs it), and the quarter teaspoon of cinnamon. Give it a good stir. You want this to be a concentrated burst of pineapple flavor. Make sure that pineapple is as dry as possible – I can’t stress this enough!
Step 6: Layer & Swirl
Now for the fun part! You have two options here. You can either gently fold most of the pineapple filling into your batter, reserving a little for dolloping on top, or you can layer it. I love to spoon about half of the batter into your prepared baking sheets, then dollop spoonfuls of the pineapple filling over the top. Then, I carefully spoon the remaining batter over the filling, trying to cover it as much as possible. If you reserved some filling, you can add little dollops on top now. You can even use a toothpick to gently swirl the filling into the batter for a marbled effect, but honestly, it bakes up beautifully either way.
Step 7: Bake
Pop those baking sheets into your preheated oven. Bake for about 18-22 minutes. The exact time will depend on your oven, of course. You’ll know they’re done when they’re golden brown around the edges and a toothpick inserted into the center comes out clean, or with just a few moist crumbs attached. Remember, they will continue to bake slightly on the hot baking sheet after you take them out, so it’s better to err on the side of slightly under-baked than over-baked. They should feel firm but still have a little give.
Step 8: Cool & Glaze
Once they’re baked to perfection, carefully remove the baking sheets from the oven. Let the Pineapple Christmas Balls cool on the baking sheets for about 5-10 minutes. This helps them firm up a bit more. Then, carefully transfer them to a wire rack to cool completely. This is *crucial* if you plan to glaze them. If you try to glaze them while they’re still warm, the glaze will just melt off. While they’re cooling, whisk together your powdered sugar, a splash of vanilla extract, and just enough milk (or pineapple juice!) to reach a drizzly consistency. You want it thick enough to coat, but thin enough to pour. Once completely cool, drizzle the glaze over the top. Let the glaze set for about 15-20 minutes before serving or storing.
“I don’t know if I’ve ever eaten a better Pineapple Christmas Balls. The rub alone is wonderful, but the sauce??? Over the top!”
Step 9: Slice & Serve
Once the glaze is set, these Pineapple Christmas Balls are ready to be enjoyed! You can slice them into squares or rectangles, depending on how you distributed the batter and filling. They’re wonderful served slightly warm or at room temperature. For a truly festive presentation, you can dust them with a little extra powdered sugar, or even add a tiny sprinkle of edible glitter if you’re feeling fancy. They look so inviting on a holiday platter, and the aroma alone will have everyone reaching for one!
What to Serve It With
These Pineapple Christmas Balls are so versatile, they fit into almost any holiday occasion! For a leisurely weekend breakfast, I love serving them warm with a dollop of thick Greek yogurt and a drizzle of honey. The creaminess of the yogurt is such a lovely contrast to the spiced cake. If you’re planning a festive brunch, they are an absolute showstopper! Arrange them on a tiered stand with other pastries, fresh fruit, and maybe some mini quiches. They pair beautifully with a mimosa or a sparkling cider. For a more formal dessert setting, after a rich holiday meal, these offer a lighter, brighter finish. Serve them with a scoop of vanilla bean Ice Cream or a dollop of whipped cream. The contrast of the warm cake and cold ice cream is divine! And, of course, for those cozy evenings when you just need a little sweet treat with your favorite hot beverage, they’re perfect. A steaming mug of coffee, a warm cup of tea, or even hot chocolate makes these Pineapple Christmas Balls feel like pure comfort. My kids love them with a glass of cold milk – it’s a tradition that never fails!
Top Tips for Perfecting Your Pineapple Christmas Balls
Over the years of making these, I’ve picked up a few tricks that I think are worth sharing. When it comes to Zucchini Prep, the most important thing for the main cake is actually to ensure your crushed pineapple is as dry as possible. I can’t say this enough! Squeeze out every last drop of liquid. I usually use the back of a spoon to press it against the sieve. This prevents a soggy bottom and ensures a nice texture. For Mixing Advice, remember that gentle is key. Overmixing is the enemy of tender baked goods. Stop mixing as soon as you no longer see large streaks of dry flour. A few small ones are fine; they’ll disappear during baking. For Swirl Customization, if you like a more decorative look, use a toothpick or a butter knife to gently swirl the pineapple filling into the batter before baking. Don’t go too crazy, though, or you’ll end up with a uniformly colored bake. A little swirl is all you need for visual appeal. When it comes to Ingredient Swaps, I’ve experimented a bit! You can swap out some of the all-purpose flour for whole wheat for a nuttier flavor, but I wouldn’t do more than a quarter of it, or it can get a bit dense. For the butter, melted coconut oil works as a dairy-free alternative. And for the glaze, if you don’t have milk, a little orange juice or even some reserved pineapple juice can add a lovely citrusy note. My best Baking Tips are all about consistency. Make sure your oven is accurately preheated. If your oven tends to run hot, you might want to reduce the temperature by 10-15 degrees Fahrenheit. Also, rotating your baking sheets halfway through the baking time can help ensure even browning. For Glaze Variations, if you prefer a less sweet topping, try a simple dusting of powdered sugar. Or, for a tangier kick, mix in a tablespoon of lemon or lime juice. A CREAM CHEESE GLAZE is also divine if you’re feeling decadent!
Storing and Reheating Tips
Proper storage is key to keeping these Pineapple Christmas Balls tasting as fresh and delicious as possible. If you’re planning to enjoy them within a day or two, storing them at Room Temperature is perfectly fine. Just make sure they are completely cool, then cover them loosely with plastic wrap or store them in an airtight container. This is usually good for up to 2-3 days. For longer storage, I always opt for the Refrigerator Storage. Once they’re completely cooled and glazed, place them in an airtight container, perhaps with parchment paper between layers to prevent sticking. They’ll stay fresh and delicious in the fridge for about a week. When you want to enjoy them, you can eat them chilled or let them come to room temperature for about 30 minutes. If you want to get fancy and reheat them, a few minutes in a low oven (around 300°F or 150°C) can revive their warmth and freshness. For Freezer Instructions, these freeze surprisingly well! Let them cool completely and the glaze should be set. Wrap individual balls tightly in plastic wrap, then place them in a freezer-safe bag or container. They can be kept frozen for up to 2-3 months. To thaw, simply transfer them to the refrigerator overnight. The best advice for Glaze Timing Advice when it comes to storage is to glaze them *after* they have completely cooled. If you glaze them before refrigerating or freezing, the glaze can become sticky or brittle. For freezing, I sometimes like to freeze them *un-glazed* and then glaze them once they’ve thawed and come to room temperature. This ensures the glaze is always perfect.
Frequently Asked Questions
Final Thoughts
So there you have it – my beloved Pineapple Christmas Balls recipe! I truly hope you give these a try. They are more than just a sweet treat; they’re a little piece of holiday joy, a connection to tradition, and a guaranteed way to bring smiles to your loved ones’ faces. The way the warm spices mingle with the bright pineapple is just magic, and the fact that they’re so easy to make makes them even more special. They’re proof that you don’t need to be a master baker to create something truly memorable. If you’re a fan of flavorful, comforting bakes with a festive twist, I know these will become a favorite in your kitchen too. They’re the kind of thing that makes the whole house smell incredible and the kitchen feel like the heart of the home. I can’t wait to hear how yours turn out! Please feel free to leave a comment below with your thoughts, any variations you tried, or even just to share your own holiday baking memories. Your feedback always makes my day!
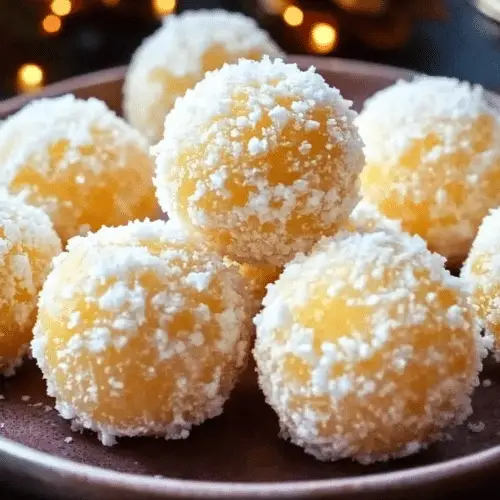
Pineapple Christmas Balls
Ingredients
Main Ingredients
- 453.59 grams crushed pineapple drained
- 100 grams cream cheese softened
- 50 grams butter softened
- 0.5 cup granulated sugar
- 0.5 teaspoon vanilla extract
- 1.5 cup sweetened shredded coconut
- 0.5 teaspoon ground cinnamon
- 0.25 teaspoon ground nutmeg
Instructions
Preparation Steps
- In a large bowl, beat together the softened cream cheese and butter until smooth.
- Add the granulated sugar, vanilla extract, cinnamon, and nutmeg. Beat until well combined.
- Stir in the drained crushed pineapple and shredded coconut until everything is evenly distributed.
- Cover the bowl and refrigerate for at least 1 hour to allow the mixture to firm up.
- Once firm, roll the mixture into small balls, about 1 inch in diameter.
- Roll the balls in extra shredded coconut (optional) for a festive look.
- Serve chilled.


