Oh, these Peanut Butter brownies! If there’s one treat that consistently makes my family sing, it’s this one. I can still remember the first time I pulled a batch out of the oven; the aroma alone was enough to get everyone hovering in the kitchen, noses twitching. It’s that perfect marriage of rich, fudgy chocolate and creamy, salty peanut butter that just hits all the right notes. Honestly, they’re better than any store-bought brownie I’ve ever tried, and dare I say, they give those fancy bakery versions a serious run for their money. If you’re a fan of classic chocolate brownies, but want to kick things up a notch with that irresistible peanut butter swirl, then you’ve landed in the right place. This isn’t just a recipe; it’s a hug in brownie form, and I can’t wait to share it with you.
Thank you for reading this post, don't forget to subscribe!What is peanut butter brownie?
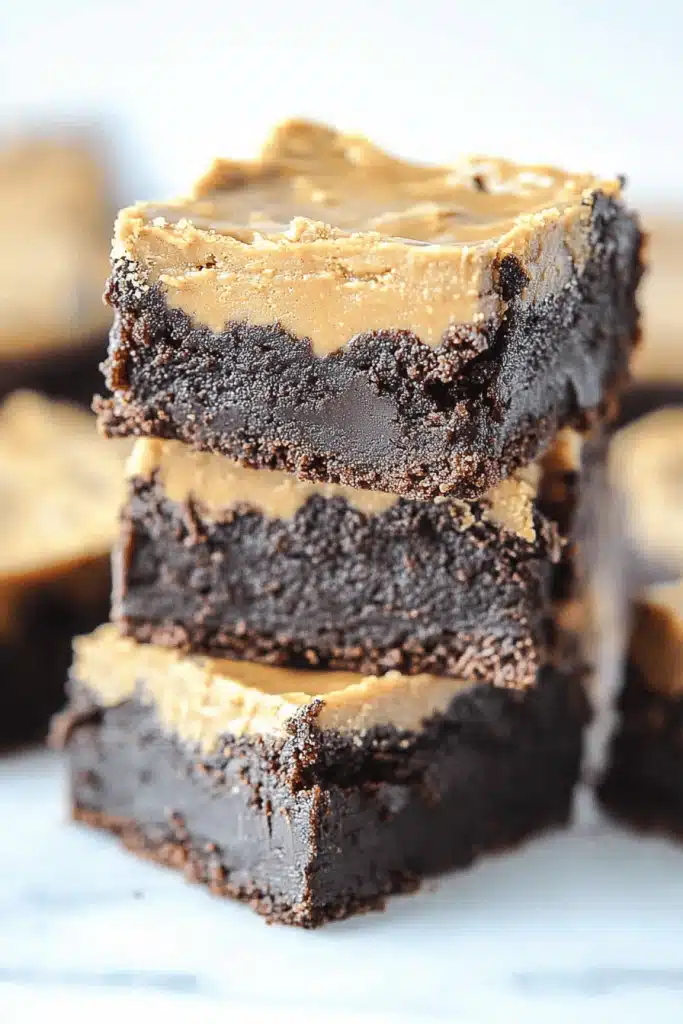
So, what exactly are peanut butter brownies? Think of them as the best of both worlds, combined into one glorious chocolatey, peanut buttery creation. At their heart, they’re classic fudgy brownies – dense, chewy, and deeply chocolatey. But here’s where the magic happens: we swirl in a generous amount of Creamy Peanut Butter into the batter before baking. This creates these incredible ribbons of peanut butter goodness throughout the brownie, making every single bite a delightful surprise. It’s not just peanut butter on top; it’s baked right into the brownie itself, infusing every morsel with that nutty, slightly salty flavor that complements the chocolate so perfectly. It’s a simple concept, really, but the result is just… spectacular. It’s the kind of treat that makes you close your eyes in pure bliss with the first bite.
Why you’ll love this recipe?
I know you will love this Peanut Butter Brownie recipe. I know you will too.flavor is out of this world. You get that intense, dark chocolate base that’s slightly bitter and incredibly rich, perfectly balanced by the sweet and salty peanut butter swirl. It’s a flavor combination that’s pure comfort. What I also adore is the simplicity of it all. Despite how decadent they taste, these brownies are surprisingly easy to whip up. You don’t need any fancy equipment or complicated techniques. It’s mostly just a matter of melting, mixing, and swirling. Even if you’re not a seasoned baker, you can nail these on the first try, I promise! Plus, they’re incredibly cost-effectiveWhat are some of the best ways to satisfy a sweet craving without breaking the bank?versatility! You can serve these warm, at room temperature, or even chilled. They’re fantastic on their own, but also incredible with a scoop of vanilla ice cream or a drizzle of extra chocolate sauce. Compared to my regular fudgy brownies, these have an extra layer of richness and complexity that my family just can’t get enough of. It’s the little extra something that makes a big difference.
How to Make Peanut Butter Brownies
Quick Overview
Making these Peanut Butter brownies is a straightforward process that feels more like assembling joy than actual baking. You’ll start by melting some chocolate and butter to form a glossy base, then whisk in sugar and eggs for richness and structure. Dry ingredients are folded in gently, followed by a luscious peanut butter mixture that gets swirled in artfully. A little time in the oven, and voilà! You’ll have a batch of fudgy, swirled perfection ready to be devoured. The key is not to overmix, ensuring that classic fudgy texture we all crave.
Ingredients
For the Main Batter:
Here’s what you’ll need to get that deeply chocolatey base going. I always opt for good quality unsalted butter; it really makes a difference in the final flavor. For the chocolate, I swear by using a mix of semi-sweet and unsweetened chocolate. It gives the brownies a more complex, less cloyingly sweet flavor. If you can only find one, semi-sweet is a good all-around choice, but adding a bit of unsweetened chocolate really deepens that chocolatey punch. Make sure your eggs are at room temperature – they emulsify better with the butter and sugar, leading to a smoother batter. A touch of vanilla extract rounds out all those flavors beautifully.
- 1 cup (2 sticks or 227g) unsalted butter, cut into cubes
- 6 ounces (170g) semi-sweet chocolate, chopped
- 2 ounces (57g) unsweetened chocolate, chopped
- 2 cups (400g) granulated sugar
- 4 large eggs, room temperature
- 1 teaspoon vanilla extract
- 1 1/4 cups (156g) all-purpose flour
- 1/2 teaspoon salt
For the Filling:
This is where the star of the show comes in! I prefer using creamy, smooth Peanut Butter, the kind that’s just peanuts and salt. It blends seamlessly into the batter without adding any weird textures. If you’re a fan of crunchy peanut butter, you can absolutely use that too – it just adds a little bit of textural contrast. Some people like to add a tablespoon or two of milk or cream to their peanut butter mixture to make it a little more pourable and easier to swirl, but I usually find it’s perfect as is. It’s thick enough to create those gorgeous swirls without disappearing into the brownie batter.
- 1 cup (250g) creamy peanut butter
For the Glaze:
This glaze is completely optional, but honestly, it takes these brownies to a whole new level of deliciousness. It’s a simple combination of melted chocolate and a touch of butter for that perfect sheen. You want just enough to drizzle over the top. If you want a slightly softer glaze, you can add a tiny splash of milk or cream. For an extra Peanut Butter kick, you could even stir a tablespoon of peanut butter into the melted chocolate glaze. It’s all about making it your own!
“Made the Peanut Butter Swirl Brownies Best Ever tonight and wow — perfect weeknight dinner. Will definitely make again!”
- 4 ounces (113g) semi-sweet chocolate, chopped
- 2 tablespoons unsalted butter
Step-by-Step Instructions
Step 1: Preheat & Prep Pan
First things first, let’s get our oven fired up to 350°F (175°C). This is the magic temperature for achieving that perfect fudgy texture. While the oven heats, grab an 8×8 inch (20×20 cm) baking pan. I always like to line mine with parchment paper, leaving a little overhang on the sides. This makes it a breeze to lift the brownies right out once they’re baked and cooled, and cleanup is an absolute dream. No stuck-on bits to scrub later!
Step 2: Mix Dry Ingredients
In a medium bowl, whisk together the all-purpose flour and salt. Just a quick whisk is all you need to make sure they’re well combined. We’re not trying to develop any gluten here; we just want everything evenly distributed. Setting this aside is important, as we’ll gently fold these into our wet ingredients later. This keeps the flour from clumping and ensures a more tender brownie.
Step 3: Mix Wet Ingredients
Now for the real flavor base. In a heatproof bowl set over a saucepan of simmering water (a double boiler, if you have one, or just a bowl that fits snugly over a pot of water, making sure the bottom of the bowl doesn’t touch the water), melt together the butter and both types of chopped chocolate. Stir occasionally until it’s completely smooth and glossy. Once melted, carefully remove the bowl from the heat. In a separate large bowl, whisk the granulated sugar and the room temperature eggs together until well combined and slightly lighter in color. Then, whisk in the vanilla extract. Gradually pour the melted chocolate mixture into the egg and sugar mixture, whisking continuously until everything is beautifully incorporated and you have a smooth, rich batter.
Step 4: Combine
This is where we bring it all together. Gently fold the dry ingredients (flour and salt) into the chocolate mixture using a spatula. Fold just until you no longer see any streaks of dry flour. It’s super important not to overmix here! Overmixing can develop the gluten in the flour, leading to tougher brownies. We’re aiming for that signature fudgy, dense texture, so a light hand is key. The batter will be thick and luscious.
Step 5: Prepare Filling
If your peanut butter is very stiff, give it a good stir. For these brownies, we want that lovely Creamy Peanut Butter. I usually just take it straight from the jar. If it feels incredibly thick, you can warm it up for about 10-15 seconds in the microwave, but be careful not to make it too runny. We want it to hold its shape somewhat when we swirl it.
Step 6: Layer & Swirl
Pour about two-thirds of the brownie batter into your prepared baking pan and spread it out evenly. Now, dollop spoonfuls of the Peanut Butter all over the batter in the pan. Then, pour the remaining one-third of the brownie batter over the dollops of peanut butter. Grab a knife or a skewer and gently swirl the peanut butter into the batter. You don’t want to mix it completely; you’re looking for beautiful ribbons and pockets of peanut butter throughout the chocolate. Don’t over-swirl, or you’ll lose those distinct peanut butter layers!
Step 7: Bake
Place the pan in your preheated oven and bake for 25-30 minutes. The edges should look set, and a toothpick inserted into the center should come out with moist crumbs attached, but not wet batter. It’s better to slightly underbake these than overbake, as they’ll continue to cook a bit as they cool in the pan. Trust me on this one – a slightly gooey brownie is pure bliss!
Step 8: Cool & Glaze
Once baked, remove the pan from the oven and let the brownies cool completely in the pan on a wire rack. This step is crucial for Fudgy Brownies! Resist the urge to cut into them when they’re hot, or they’ll fall apart. Once cooled, prepare the glaze: melt the chopped semi-sweet chocolate and butter together in a heatproof bowl over simmering water or in the microwave in short bursts, stirring until smooth. Drizzle the glaze over the cooled brownies. Letting the glaze set for about 15-20 minutes before cutting is ideal.
“Packed with flavor and so simple. Exactly what I wanted from this Peanut Butter Swirl Brownies Best Ever!”
Step 9: Slice & Serve
Once the glaze has set, use the parchment paper overhangs to lift the entire brownie slab out of the pan onto a cutting board. Use a sharp knife to slice them into squares. For the cleanest cuts, wipe your knife clean between each slice, especially if the brownies are still a little warm or gooey. These are divine served at room temperature, but I also love them slightly chilled straight from the fridge. Enjoy every single bite!
What to Serve It With
These Peanut Butter Brownies are so versatile, they fit into almost any occasion. For a quick and easy breakfast treat (because who says brownies are only for dessert?), I love pairing a small square with a hot cup of black coffee. The boldness of the coffee really cuts through the richness of the brownie. If you’re hosting a weekend brunch, these are a guaranteed hit. You can present them more elegantly on a tiered stand, perhaps with a few fresh raspberries scattered around for a pop of color and tartness. A chilled glass of milk or a mimosa would be a lovely beverage pairing. As a decadent dessert, they are simply perfection. Serve them warm, perhaps with a scoop of good quality vanilla bean ice cream melting on top, or a sprinkle of flaky sea salt to enhance the chocolate and peanut butter flavors. And for those cozy, late-night snack moments when you just need something comforting? A brownie and a glass of cold milk is my go-to. My family also loves them alongside a hot chocolate on a chilly evening. It’s just pure comfort food.
Top Tips for Perfecting Your Peanut Butter Brownies
Over the years of making these brownies countless times, I’ve picked up a few tricks that I think are worth sharing. For the best texture, pay attention to the zucchini prep, although this recipe doesn’t actually use zucchini, it’s a common variation, so good to keep in mind for general baking! For these specific brownies, the key is in the mixing advice. Don’t, I repeat, DO NOT overmix the batter once you add the flour. This is the number one reason people end up with tough, cakey brownies instead of fudgy ones. Mix *just* until the flour streaks disappear. For the swirl customization, be creative! You don’t need to be an artist. Just dollop and swirl gently. If you want more distinct peanut butter pockets, use slightly larger dollops. If you want a more marbled effect, swirl a bit more. Experiment! For ingredient swaps, if you don’t have both semi-sweet and unsweetened chocolate, you can use all semi-sweet, but you might want to slightly reduce the sugar in the batter (by about 1/4 cup) to compensate for the added sweetness. If you’re out of all-purpose flour, a good quality gluten-free blend often works, but results can vary. For baking tips, always trust your eyes and a toothpick test over strict timing. Ovens can be finicky! If your oven tends to run hot, consider lowering the temperature by 10-15 degrees. For the glaze variations, if you want a thicker glaze, use less butter. For a thinner, more drizzly glaze, add a tiny bit of milk or cream. You can even add a touch of peanut butter to the glaze itself for an extra nutty punch!
Storing and Reheating Tips
These peanut butter brownies are pretty forgiving when it comes to storage, which is a huge plus! For room temperature storage, I usually keep them in an airtight container for up to 3 days. They tend to stay wonderfully fudgy this way. Make sure they’re completely cooled before sealing them up, or you might get some condensation. If you’re planning on keeping them longer than a few days, or if your kitchen is particularly warm, refrigerator storage is your best bet. They’ll last for about a week in the fridge, tightly wrapped or in an airtight container. I actually prefer them chilled sometimes, as the texture gets even denser and chewier! For long-term storage, these freeze beautifully. I like to wrap individual brownies or cut squares tightly in plastic wrap, then place them in a freezer-safe bag or container. They’ll keep well in the freezer for up to 2-3 months. When you’re ready to enjoy them, you can thaw them at room temperature or in the refrigerator. For glaze timing advice, I always recommend applying the glaze only once the brownies have completely cooled. If you glaze warm brownies, the glaze will melt and likely slide right off, creating a mess. If you’re freezing them, I often wait to glaze them until *after* they’ve thawed, or just dust them with a bit of powdered sugar if you want a touch of sweetness on top without the fully set glaze.
Frequently Asked Questions
Final Thoughts
So there you have it – my absolute favorite peanut butter brownies! They’re the perfect balance of rich chocolate and creamy peanut butter, incredibly fudgy, and surprisingly simple to make. I really hope you give these a try. They’re the kind of recipe that makes you feel like a baking superstar, and the delicious results are always worth it. If you love these, you might also enjoy my classic fudgy brownie recipe or my chocolate chip cookie bars for more comforting baked goods. Let me know in the comments how yours turn out, or if you discover any new favorite variations! I’m always eager to hear from you. Happy baking, and enjoy every decadent bite!
Peanut Butter Brownies
Ingredients
For the Brownie Base
- 4 ounces unsweetened baking chocolate coarsely chopped
- 0.75 cup unsalted butter
- 1.5 cups granulated sugar
- 0.5 teaspoon salt
- 3 large eggs
- 1 teaspoon vanilla extract
- 2 tablespoons Dutch-process cocoa powder or regular unsweetened
- 1 cup all-purpose flour
For the Peanut Butter Swirl
- 0.5 cup creamy peanut butter
- 2 tablespoons unsalted butter melted
- 0.33 cup powdered sugar
- 1 teaspoon vanilla extract
Instructions
Preparation Steps
- Preheat your oven to 350°F (175°C). Line a 9x9-inch baking pan with aluminum foil, leaving an overhang on the sides for easy removal, and lightly spray with cooking spray.
- In a large, microwave-safe bowl, combine the unsweetened baking chocolate and 0.75 cup unsalted butter. Heat on HIGH power for 2-3 minutes, stirring every 30 seconds, until the chocolate is completely smooth and melted.
- Stir the granulated sugar into the melted chocolate mixture until well combined. Add the eggs, 1 teaspoon vanilla extract, and Dutch-process cocoa powder, stirring well until smooth.
- Gently fold in the all-purpose flour with a spatula until just combined. Do not overmix. Spread the brownie batter evenly into the prepared baking pan.
- In a separate small bowl, combine the creamy peanut butter, 2 tablespoons melted unsalted butter, powdered sugar, and 1 teaspoon vanilla extract. Stir until the mixture is smooth and well combined.
- Drop spoonfuls of the peanut butter mixture on top of the brownie batter. Using a butter knife or the back of a wooden spoon, gently swirl the peanut butter through the brownie batter to create a marbled effect.
- Bake for 28-35 minutes, or until the edges are set and a toothpick inserted into the center comes out with moist crumbs, but not wet batter.
- Let the brownies cool completely in the pan before lifting them out by the foil overhang and cutting them into squares. This ensures clean cuts and a fudgy texture.


