You know those recipes that just make your heart sing? The ones that bring back a flood of memories, fill your home with the most incredible aroma, and disappear in a flash? Well, these Patriotic Sugar Cookie Bars are absolutely one of those for me. Honestly, they’re my go-to when I want something sweet and festive without the fuss of rolling and cutting individual sugar cookies. If you’ve ever loved those classic sugar cookies, these bars are like their easier, more convenient, and equally delicious cousin. They’re perfect for a summer barbecue, a holiday gathering, or honestly, just because you need a little bit of happy in your day. I swear, the moment the oven timer dings and that sweet, buttery scent wafts through the house, everyone gravitates to the kitchen. These patriotic sugar cookie bars are a real crowd-pleaser, and the best part? They’re surprisingly simple to whip up!
Thank you for reading this post, don't forget to subscribe!What Are Patriotic Sugar Cookie Bars?
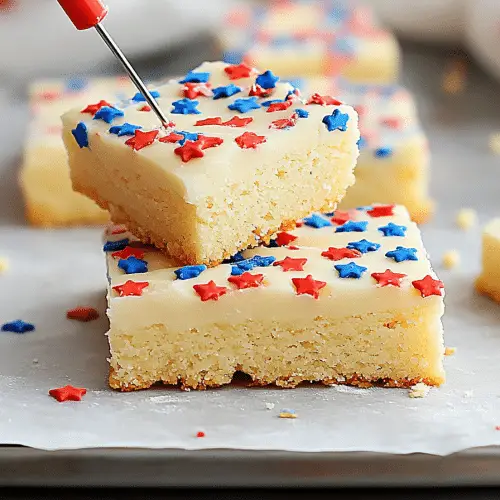
So, what exactly are these delightful little squares? Think of them as a soft, chewy, buttery Sugar Cookie, but instead of being cut into shapes, they’re baked in a pan and then topped with a luscious glaze and festive sprinkles. It’s essentially all the flavor and joy of a traditional sugar cookie, but in a much more manageable, bar form. The name “Patriotic” just comes from how we usually decorate them – with red, white, and blue sprinkles, making them absolutely perfect for the Fourth of July, Memorial Day, or any time you’re feeling a burst of national pride. They’re not fancy, they’re not complicated, but they are wonderfully comforting and incredibly tasty. It’s the kind of dessert that makes everyone feel a little bit special, no matter the occasion.
Why you’ll love this recipe?
Oh, where do I even begin with why I adore these patriotic sugar Cookie Bars so much? Let’s start with the flavor, of course. They have that unmistakable, pure sugar cookie taste – buttery, sweet, with just a hint of vanilla that makes you close your eyes in delight. The texture is just heavenly; they’re soft and slightly chewy in the center, with just the faintest crisp edge. It’s that perfect balance that makes you want another bite before you’ve even finished the first!
And the simplicity? It’s a lifesaver, truly. Forget the endless rolling, cutting, and re-rolling of dough that can sometimes feel like a marathon. With these bars, you mix, press into a pan, bake, and frost. That’s it! It means less time in the kitchen and more time enjoying your guests (or just enjoying them yourself!). They’re also surprisingly budget-friendly. The ingredients are all pantry staples, which is always a win in my book. Plus, they are incredibly versatile. While I call them “patriotic” because of the sprinkles, you can easily switch up the colors and decorations for any holiday or birthday. Think pink and red for Valentine’s Day, orange and black for Halloween, or pastel colors for Easter. They’re a blank canvas for festive fun!
What I love most, though, is the pure, unadulterated joy they bring. They’re simple, they’re delicious, and they always bring smiles. They’re what I make when I need a quick dessert for a potluck or when the kids suddenly announce a school bake sale the next day. They’re that reliable, feel-good recipe that never lets me down.
How to Make Patriotic Sugar Cookie Bars
Quick Overview
The process for these bars is straightforward: cream butter and sugar, add eggs and vanilla, then mix in your dry ingredients to form a soft dough. Press this dough evenly into a baking pan, bake until lightly golden, let it cool, and then whip up a simple glaze to spread over the top. Finish with a generous dusting of festive sprinkles, and you’ve got yourself a stunning and delicious treat. It’s designed to be as fuss-free as possible while still delivering incredible flavor and that perfect Sugar Cookie taste.
Ingredients
For the Main Batter:
2 ½ cups all-purpose flour (I always use unbleached for a better texture)
1 teaspoon baking powder (make sure it’s fresh!)
½ teaspoon salt
1 cup (2 sticks) unsalted butter, softened (this is crucial for creaming properly)
1 ½ cups granulated sugar
2 large eggs
1 ½ teaspoons pure vanilla extract (don’t skimp on quality here, it makes a difference!)
For the Filling:
This recipe doesn’t technically have a “filling” in the traditional sense, as it’s a bar cookie. The deliciousness comes from the perfectly balanced batter and the sweet glaze on top!
For the Glaze:
2 cups powdered sugar (also called confectioners’ sugar)
¼ cup milk (or half-and-half for a richer glaze)
1 teaspoon pure vanilla extract
Red, white, and blue sprinkles (or any colors you fancy!)
Step-by-Step Instructions
Step 1: Preheat & Prep Pan
First things first, get your oven preheated to 350°F (175°C). This ensures an even bake from the moment the bars go in. Next, grab a 9×13 inch baking pan. I like to line mine with parchment paper, leaving a little overhang on the sides. This makes lifting the baked bars out so much easier, and cleanup is an absolute breeze! Just grease the pan lightly before laying in the parchment, or grease the parchment itself. This simple step prevents sticking and makes the whole process much smoother.
“I don’t know if I’ve ever eaten a better Patriotic Sugar Cookie Bars. The rub alone is wonderful, but the sauce??? Over the top!”
Step 2: Mix Dry Ingredients
In a medium bowl, whisk together the flour, baking powder, and salt. Whisking them together ensures that the leavening agent (baking powder) and salt are evenly distributed throughout the flour. This is important for a consistent texture in your bars. Set this bowl aside for now.
Step 3: Mix Wet Ingredients
In a large bowl, using an electric mixer (a stand mixer with a paddle attachment or a hand mixer), cream together the softened butter and granulated sugar. Beat them until the mixture is light and fluffy, about 2-3 minutes. This creaming process incorporates air, which contributes to the tender texture of the bars. Scrape down the sides of the bowl occasionally. Then, add the eggs, one at a time, beating well after each addition. Stir in the vanilla extract. You want this mixture to be smooth and well combined.
Step 4: Combine
Gradually add the dry ingredients to the wet ingredients, mixing on low speed until just combined. Be careful not to overmix here! Overmixing can develop the gluten in the flour too much, leading to tough bars. Stop mixing as soon as you no longer see streaks of dry flour. The dough will be thick and soft, almost like a very thick Cookie Dough.
Step 5: Prepare Filling
As mentioned, there’s no separate “filling” here. The magic is in the batter and the glaze!
Step 6: Layer & Swirl
Spoon the dough into your prepared 9×13 inch baking pan. Using your hands (lightly floured or greased) or a spatula, press the dough evenly into the bottom of the pan. Make sure it’s spread out to the edges so you get those nice, uniform bars. You want a relatively even layer for consistent baking.
Step 7: Bake
Bake for 20-25 minutes, or until the edges are lightly golden brown and the center looks set. You can do the toothpick test: insert a toothpick into the center, and if it comes out with a few moist crumbs attached (not wet batter), they’re ready. Be careful not to overbake, as this will make them dry. Every oven is a little different, so keep an eye on them during the last 5-10 minutes.
Step 8: Cool & Glaze
Let the bars cool in the pan on a wire rack for at least 30 minutes, or until completely cool. This is super important! If you try to glaze them while they’re warm, the glaze will just melt off and make a mess. While the bars are cooling, whisk together the powdered sugar, milk, and vanilla extract for the glaze in a medium bowl. Start with ¼ cup of milk and add more, a teaspoon at a time, until you reach your desired drizzling consistency. It should be thick but pourable. Once the bars are completely cool, spread the glaze evenly over the top.
Step 9: Slice & Serve
Immediately after spreading the glaze, sprinkle the red, white, and blue sprinkles all over the top. The sprinkles will stick best while the glaze is still wet. Let the glaze set for about 15-20 minutes before slicing. This helps ensure clean cuts. Use a sharp knife to cut the bars into squares or rectangles. I usually get about 24 bars out of a 9×13 pan. Enjoy your beautiful, homemade patriotic sugar cookie bars!
What to Serve It With
These patriotic sugar cookie bars are so versatile, they truly fit in anywhere! For breakfast or brunch, I love serving them with a big pot of freshly brewed coffee or a refreshing glass of iced tea. Their sweetness is a lovely counterpoint to a savory breakfast spread. For a more elegant brunch, I’ll cut them into smaller, bite-sized squares and arrange them on a tiered stand. They look so pretty!
As a dessert, they’re fantastic on their own, of course, but they also pair beautifully with a scoop of vanilla bean ice cream or some fresh berries. For a truly indulgent treat, you can even serve them alongside a decadent chocolate cake or brownies for a dessert buffet that’s sure to impress. And for those cozy, lazy afternoons? These bars are the ultimate comfort food snack. They’re perfect with a tall glass of cold milk or even a warm mug of hot chocolate on a chilly evening. My kids always grab one (or two!) after school, and they’re always gone before dinner. It’s one of those simple pleasures that just makes life a little sweeter.
Top Tips for Perfecting Your Patriotic Sugar Cookie Bars
I’ve made these bars more times than I can count, and over the years, I’ve picked up a few tricks that I think really make a difference. First, when it comes to the butter and sugar, make sure your butter is truly softened, not melted. It should give slightly when you press it, but not be greasy. Creaming them together until light and fluffy is key to getting that tender texture. Don’t rush this step!
When you’re mixing the dry ingredients into the wet, remember my golden rule: do not overmix! As soon as you don’t see any dry flour streaks, stop. Seriously. A little bit of imperfection in the mixing stage is far better than tough bars. For the pan, using parchment paper is my absolute favorite hack. It makes getting the bars out so easy and prevents any sticking, which can be a nightmare if you’re not careful. Make sure you press the dough evenly into the pan; this is really important for baking uniformly.
“Packed with flavor and so simple. Exactly what I wanted from this Patriotic Sugar Cookie Bars!”
For the glaze, consistency is everything. Start with the recommended amount of milk and add more only if needed, a teaspoon at a time. You want it thick enough to coat the bars without running off, but thin enough to spread easily. If it gets too thin, you can always whisk in a little more powdered sugar. And for the sprinkles, do it immediately after you spread the glaze! They won’t stick as well if the glaze starts to set.
If you’re looking for ingredient swaps, I’ve successfully tested this with a good quality gluten-free all-purpose flour blend, and it turned out wonderfully! You might notice a slight texture difference, but it’s definitely a great option for those with gluten sensitivities. I haven’t experimented with dairy-free alternatives extensively, but I imagine using a good vegan butter substitute and a plant-based milk for the glaze would work. I’d suggest using a milk alternative that’s not too sweet to avoid altering the glaze’s flavor profile too much. Baking time might also need a slight adjustment depending on the substitutes you use, so keep an eye on them!
Storing and Reheating Tips
These patriotic sugar cookie bars are pretty forgiving when it comes to storage, which is another reason I love them. If you’ve glazed them and they’re fully set, you can store them right in the baking pan, covered tightly with plastic wrap, at room temperature for up to 3 days. I find they’re best within the first couple of days. The glaze helps seal in some moisture, keeping them nice and soft.
If you need them to last a bit longer, or if your kitchen is particularly warm, the refrigerator is your friend. Store them in an airtight container in the fridge for up to a week. Just be aware that refrigeration can sometimes slightly stiffen the cookie base, but they’ll still be delicious. To bring them back to that lovely soft texture, you can let them sit at room temperature for about 30 minutes before serving, or even give them a very short (10-15 second) zap in the microwave – though be careful not to overheat them, or the glaze might get too melty.
Freezing is also a great option if you want to make them ahead of time for a future event. I like to cut them into individual bars first, then wrap each bar tightly in plastic wrap, followed by a layer of aluminum foil. You can also place wrapped bars in a freezer-safe container or bag. They’ll keep well in the freezer for up to 2-3 months. When you’re ready to enjoy them, thaw them overnight in the refrigerator, then let them come to room temperature for about an hour before serving. For the glaze timing, it’s always best to add the glaze and sprinkles *after* baking and cooling, right before serving or storing, to keep them looking their best. If freezing, I often glaze them after thawing, as the glaze can sometimes get a little sticky in the freezer.
Frequently Asked Questions
Final Thoughts
There you have it – my beloved Patriotic Sugar Cookie Bars! They’re the perfect blend of nostalgia and simplicity, delivering that classic sugar cookie taste in a format that’s incredibly easy to make and serve. Whether you’re celebrating a national holiday, a birthday, or just need a sweet pick-me-up, these bars are guaranteed to bring a smile to your face and delight your taste buds. They’re proof that sometimes, the simplest recipes are the most rewarding. They’re a little bit of sweet joy, baked right into a pan.
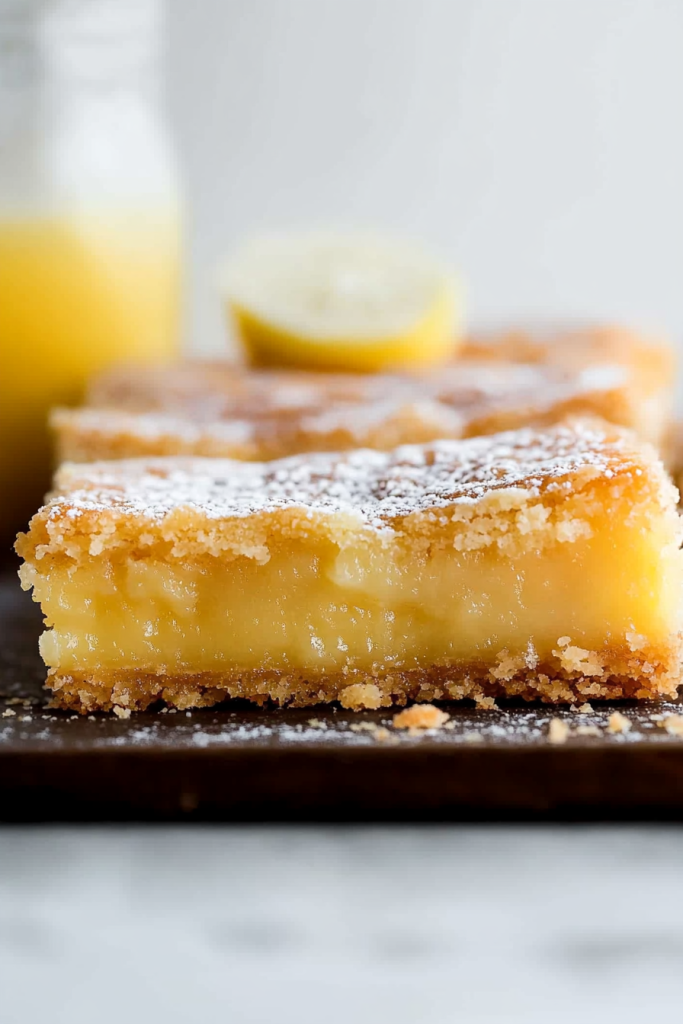
If you enjoy these, I think you might also love my Classic Frosted Sugar Cookies for a more traditional approach, or my Lemon Sugar Cookie Bars for a bright, zesty twist! Give these patriotic bars a try, and I can’t wait to hear how they turn out for you. Don’t forget to share your own variations and experiences in the comments below – I always love hearing from you!
Patriotic Sugar Cookie Bars
Ingredients
Cookie Bars
- 2 cups all-purpose flour
- 1 teaspoon baking powder
- 0.5 teaspoon salt
- 1 cup unsalted butter, softened
- 1.5 cups granulated sugar
- 2 large eggs
- 1 teaspoon vanilla extract
Cream Cheese Frosting
- 8 ounces cream cheese, softened
- 0.5 cup unsalted butter, softened
- 3 cups powdered sugar
- 2 tablespoons milk
- 1 teaspoon vanilla extract
Decoration
- 1 cup red sprinkles
- 1 cup blue sprinkles
- 0.5 cup white sprinkles
Instructions
Cookie Bars
- Preheat oven to 350°F (175°C). Grease and flour a 9x13 inch baking pan.
- In a medium bowl, whisk together flour, baking powder, and salt. Set aside.
- In a large bowl, cream together softened butter and granulated sugar until light and fluffy.
- Beat in eggs one at a time, then stir in vanilla extract.
- Gradually add the dry ingredients to the wet ingredients, mixing until just combined.
- Spread the dough evenly into the prepared baking pan.
- Bake for 20-22 minutes, or until the edges are lightly golden brown and a toothpick inserted into the center comes out clean.
- Let the bars cool completely in the pan on a wire rack.
Cream Cheese Frosting
- In a large bowl, beat together softened cream cheese and softened butter until smooth and creamy.
- Gradually beat in powdered sugar until well combined and smooth.
- Stir in milk and vanilla extract until the frosting reaches your desired consistency.
Assembly and Decoration
- Once the cookie bars are completely cooled, spread the cream cheese frosting evenly over the top.
- Immediately sprinkle with red, blue, and white sprinkles to create a patriotic design.
- Cut into bars and serve.


