Oh, this Oreo poke cake. Where do I even begin? It’s the kind of dessert that brings me right back to my childhood kitchen, the air thick with the scent of baking chocolate, my mom humming a little tune as she stirred something magical. It’s not just a cake; it’s a hug in dessert form. Honestly, if you’ve ever found yourself staring longingly at a box of Oreos, wondering how you can possibly elevate them beyond just dunking them in milk (which, don’t get me wrong, is a perfectly valid activity!), then this recipe is your holy grail. It’s ridiculously easy, surprisingly decadent, and the ultimate crowd-pleaser. Forget fancy layered cakes that take hours; this Oreo poke cake is the real deal for those moments you need something incredibly satisfying without the fuss. It’s like the best parts of a Chocolate Cake and a no-bake cheesecake had a delicious baby.
Thank you for reading this post, don't forget to subscribe!What is an Oreo Poke Cake?
So, what exactly *is* an Oreo poke cake? At its heart, it’s a wonderfully moist Chocolate Cake that’s been ‘poked’ with holes, and then a luscious, creamy filling is poured over it. The magic happens as that filling seeps down through those little holes, infusing every single bite with irresistible flavor and moisture. And the ‘Oreo’ part? That comes from crushing up those iconic chocolate cookies and weaving them into the cake itself, and often as a delightful topping. Think of it as a chocolate lover’s dream come true, with that distinct, addictive Oreo flavor woven throughout. It’s essentially a shortcut to pure dessert heaven, a way to get all the rich, satisfying flavors of a more complex dessert with a fraction of the effort. It’s simple, brilliant, and utterly delicious.
Why you’ll love this recipe?
Why do I love Oreo Poke Cake?flavor is just out of this world. It’s deeply chocolatey from the cake mix, but then you get that creamy, slightly tangy sweetness from the filling, all punctuated by those delightful crumbles of Oreo. It’s a symphony of textures and tastes that dance on your tongue. And the simplicity… oh, the simplicity! You can whip this up with minimal effort, making it perfect for last-minute gatherings or even just a weeknight treat when you’re craving something sweet but don’t want to spend hours baking. Seriously, this is a lifesaver on busy nights. Plus, it’s incredibly cost-efficientWhat are some of the best ways to make a delicious dessert without spending a lot of money?versatility! While this recipe is fantastic as is, you can totally play around with it. Add some chocolate chips, use different cookie flavors, or even experiment with different toppings. It’s a base for so many delicious variations! What I love most about this Oreo poke cake is that it feels special enough for a party but is so forgiving and easy that you can whip it up anytime. It’s truly the best of all worlds.
How to Make Oreo Poke Cake
Quick Overview
This Oreo poke cake comes together in a flash, and the process is wonderfully straightforward. You’ll bake a simple chocolate cake, poke it all over with a fork, then pour a luscious mixture of Sweetened Condensed Milk and pudding over the top. After a chilling period to let all those glorious flavors meld, it’s finished off with whipped topping and more crushed Oreos. It’s almost fool-proof, and the resulting dessert is incredibly moist and packed with flavor. It’s the kind of recipe you’ll find yourself making again and again, especially when you need a guaranteed hit.
Ingredients
For the Main Batter:
1 box (15.25 oz) devil’s food Chocolate Cake mix
3 large eggs
1/2 cup vegetable oil
1 cup water
1 cup finely crushed Oreo cookies (about 12-15 cookies, depending on size)
For the Filling:
1 can (14 oz) Sweetened Condensed Milk
1/2 cup milk (whole milk is best for creaminess, but I’ve tested this with almond milk and it actually made it even creamier!)
1 small box (3.4 oz) instant vanilla pudding mix
1 teaspoon vanilla extract
For the Topping:
1 container (8 oz) frozen whipped topping, thawed (like Cool Whip)
1 cup coarsely crushed Oreo cookies (about 10-12 cookies)
“New family favorite! This Oreo Delight Poke Cake How To was so flavorful and ridiculously easy. Crowd-pleaser for sure.”
Step-by-Step Instructions
Step 1: Preheat & Prep Pan
First things first, let’s get your oven preheated to 350 degrees Fahrenheit (175 degrees Celsius). Grab a 9×13 inch baking pan. I like to lightly grease and flour mine, or even better, line it with parchment paper, leaving a little overhang on the sides to make lifting it out later a breeze. This prevents any sticking and makes cleanup so much easier, which is always a win in my book!
Step 2: Mix Dry Ingredients
In a large mixing bowl, combine your Chocolate Cake mix. Add in the 1 cup of finely crushed Oreo cookies. Give them a good whisk together. This step is crucial for ensuring those chocolate cookie bits are evenly distributed throughout the cake batter, so you get little pockets of Oreo goodness in every bite. Don’t worry if there are some slightly larger pieces; they add a nice texture!
Step 3: Mix Wet Ingredients
In a separate bowl, whisk together the eggs, vegetable oil, and 1 cup of water until they’re well combined. This creates the liquid base for our cake. It’s important that the oil is fully incorporated so it helps create a tender crumb.
Step 4: Combine
Now, pour the wet ingredients into the dry ingredients. Mix on low speed with an electric mixer (or vigorously by hand) until just combined. Be careful not to overmix! Overmixing can lead to a tough cake, and we want this one to be super tender. A few lumps are perfectly fine. The batter should be thick but pourable, with those dark cookie crumbles looking like little chocolate gems.
Step 5: Prepare Filling
While the cake is baking, let’s whip up that irresistible filling. In a medium bowl, whisk together the sweetened condensed milk, 1/2 cup of milk, and the instant vanilla pudding mix. Whisk until the pudding starts to thicken – it happens pretty fast with instant pudding! Then, stir in the vanilla extract. Set this aside; it’ll get poured over the hot cake.
Step 6: Layer & Swirl
This is where the “poke” in Poke Cake comes to life! Once the cake is out of the oven, immediately grab a fork or a skewer and poke holes all over the surface of the cake. Don’t be shy; you want lots of holes so that glorious filling can seep down into every nook and cranny. While the cake is still warm, pour the prepared pudding mixture evenly over the entire top, letting it flow into all those poked holes. You’ll see it start to soak in almost immediately.
Step 7: Bake
Bake the cake according to the box directions, usually around 30-35 minutes, or until a toothpick inserted into the center comes out clean. You want a moist crumb, but no wet batter. Keep an eye on it, as ovens can vary!
Step 8: Cool & Glaze
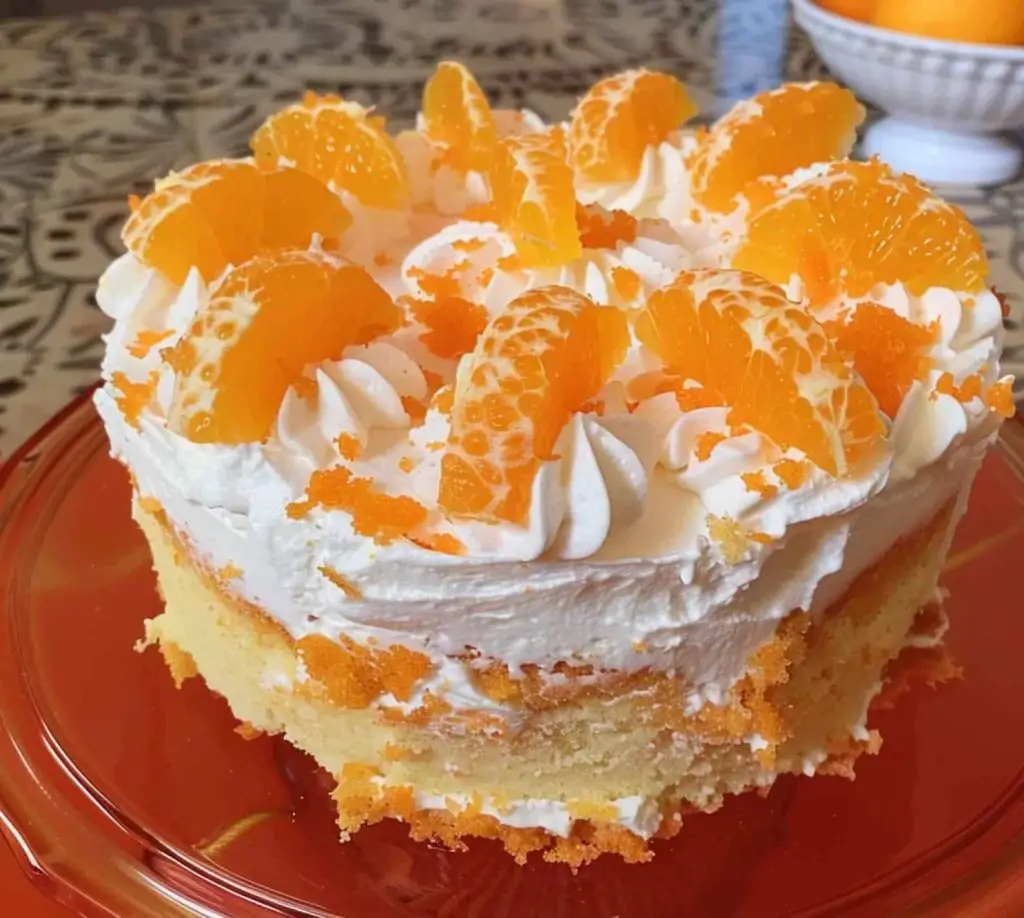
Let the cake cool in the pan for about 15-20 minutes. This gives it a chance to set slightly before we add the topping. Then, spread the thawed whipped topping evenly over the cake, right over the pudding mixture. Finally, sprinkle the 1 cup of coarsely crushed Oreo cookies all over the whipped topping. This creates that signature Oreo Poke Cake look and adds a fantastic crunch. Pop it in the refrigerator for at least 2-4 hours, or ideally overnight. This chilling time is super important for the flavors to meld and the cake to become wonderfully moist.
“The Oreo Delight Poke Cake How To turned out amazing. My kids asked for seconds. Saving this one!”
Step 9: Slice & Serve
When it’s time to serve, just slice it up right from the pan. The chilling time makes it slice beautifully. I love serving it slightly cold, right from the fridge. It’s perfect just as it is, but a little extra whipped cream or a dusting of cocoa powder never hurt anyone!
What to Serve It With
This Oreo poke cake is pretty much a meal in itself, but it also plays wonderfully with a few other things, depending on the occasion. For a casual breakfast (yes, I’ve totally eaten leftover cake for breakfast!), it’s fantastic with a strong cup of coffee that cuts through the sweetness. The coffee’s bitterness is the perfect counterpoint. For brunch, I like to serve it alongside some fresh fruit like berries or a simple fruit salad. It adds a touch of color and freshness. If you’re serving it as dessert, it’s a winner on its own, but you could certainly elevate it with a scoop of vanilla bean ice cream or a drizzle of raspberry sauce. For cozy snacks, especially on a chilly evening, it’s just perfect with a tall glass of cold milk. My kids always go wild for it with milk! We also have a family tradition of making this for movie nights; it’s the ultimate movie snack because you can just dig in right from the container. No forks required if you’re feeling really casual!
Top Tips for Perfecting Your Oreo Poke Cake
I’ve made this Oreo poke cake more times than I can count, and I’ve picked up a few tricks along the way that I think will help you get that perfect, decadent result every time. For the crushed Oreos in the batter, I like to use a food processor for a finer crumble, which distributes more evenly. However, if you don’t have one, a Ziploc bag and a rolling pin work just as well – just don’t make them powder; some little chunks are good! When it comes to mixing the cake batter, my biggest piece of advice is to really, truly, don’t overmix. As soon as you don’t see any dry streaks of flour, stop mixing. Overmixing gluten develops it, and we want a tender, melt-in-your-mouth cake here. For the poke holes, don’t be afraid to go deep and make them numerous! The more holes, the more of that creamy filling can soak in, making the cake incredibly moist. If you like a really intense Oreo flavor, you can use the whole Oreo, cream and all, for crushing. For the filling, using whole milk really does make a difference in creaminess, but I’ve found that even dairy-free milks like almond or oat milk work surprisingly well if you need to adapt it. The key to the filling is letting it sit for a few minutes after whisking so the instant pudding can do its magic and thicken properly. When it comes to baking, every oven is a little different. I always recommend the toothpick test for doneness, but look for a cake that springs back gently when touched. For the whipped topping, make sure it’s fully thawed but still cold. If it’s too warm, it can become watery. And for the final sprinkle of crushed Oreos, I like to reserve a few and crush them really finely to sprinkle on top for a more uniform look, or keep them chunkier for more texture. It’s all about personal preference! I also learned after my first few attempts that chilling the cake for at least 4 hours, preferably overnight, is non-negotiable for the best texture and flavor infusion. Patience really is rewarded here!
Storing and Reheating Tips
One of the best things about this Oreo poke cake is how well it stores. If you have any leftovers (which, let’s be honest, is rare in my house!), you can keep it covered at room temperature for up to 2 days. Just make sure it’s well-covered with plastic wrap or in an airtight container to keep it from drying out. However, for the best quality and to maintain that lovely creamy texture, I highly recommend refrigerator storage. Place it in an airtight container or cover the pan tightly with plastic wrap. It will keep well in the fridge for about 4-5 days. The flavors actually get even better on the second and third day as everything melds together beautifully! I haven’t really needed to freeze this cake because it disappears so quickly, but if you wanted to, I’d suggest freezing it *before* adding the whipped topping and crushed Oreos. Wrap the unfrosted cake tightly in plastic wrap, then in a layer of aluminum foil. It should keep well for about 1-2 months. Thaw it overnight in the refrigerator, then add the whipped topping and Oreos before serving. For the glaze, it’s best to apply the whipped topping and crushed Oreos right before you plan to serve it, especially if you’re storing it for more than a day or two, as the whipped topping can sometimes soften or the Oreos can lose their crispiness.
Frequently Asked Questions
Final Thoughts
So there you have it – my absolute favorite Oreo poke cake! It’s a recipe that’s close to my heart, not just because it tastes incredible, but because it’s so reliably delicious and brings so much joy to everyone who tries it. It’s the perfect blend of convenience and decadence, proving that you don’t need hours in the kitchen to create something truly special. Whether you’re looking for an easy dessert for a party, a treat to brighten up a weeknight, or a trip down memory lane, this Oreo poke cake delivers. I hope you give it a try and that it becomes a beloved recipe in your home too. If you do make it, please let me know how it turns out in the comments below – I always love hearing your baking adventures! And feel free to share your own variations; I’m always looking for new ways to make this already-perfect cake even more amazing. Happy baking!

Oreo poke cake
Ingredients
Main Ingredients
- 15.25 ounce chocolate fudge cake mix prepared as directed on box
- 4.2 ounce Oreo cookies 'n creme instant pudding mix
- 2.25 cups cold whole milk
- 14 ounce whipped fluffy white frosting
- 10 cookies Oreo cookies for topping
Instructions
Preparation Steps
- Bake the chocolate fudge cake according to package directions in a 9x13 inch baking dish. Once baked, allow it to cool for 15 minutes.
- Using the rounded handle of a wooden spoon (or a fork for smaller holes), poke holes evenly into the cake, spacing them about 1 inch apart.
- In a medium-sized mixing bowl, add the Oreo cookies 'n creme instant pudding mix. Whisk in the cold whole milk and continue to mix just until the pudding begins to thicken.
- Quickly spoon the prepared pudding into the individual holes until they are filled. Once the holes are full, spread any remaining pudding evenly on top of the cake. Chill the cake in the refrigerator for at least 2 hours to set.
- Transfer the whipped fluffy white frosting to a heat-safe bowl. Heat in the microwave for 10 seconds until slightly softened. Stir the frosting, then using a silicone or offset spatula, spread it evenly over the pudding layer.
- Just before serving, coarsely break the 10 Oreo cookies. Sprinkle the broken cookies over the frosted cake. Slice into squares and serve chilled.


