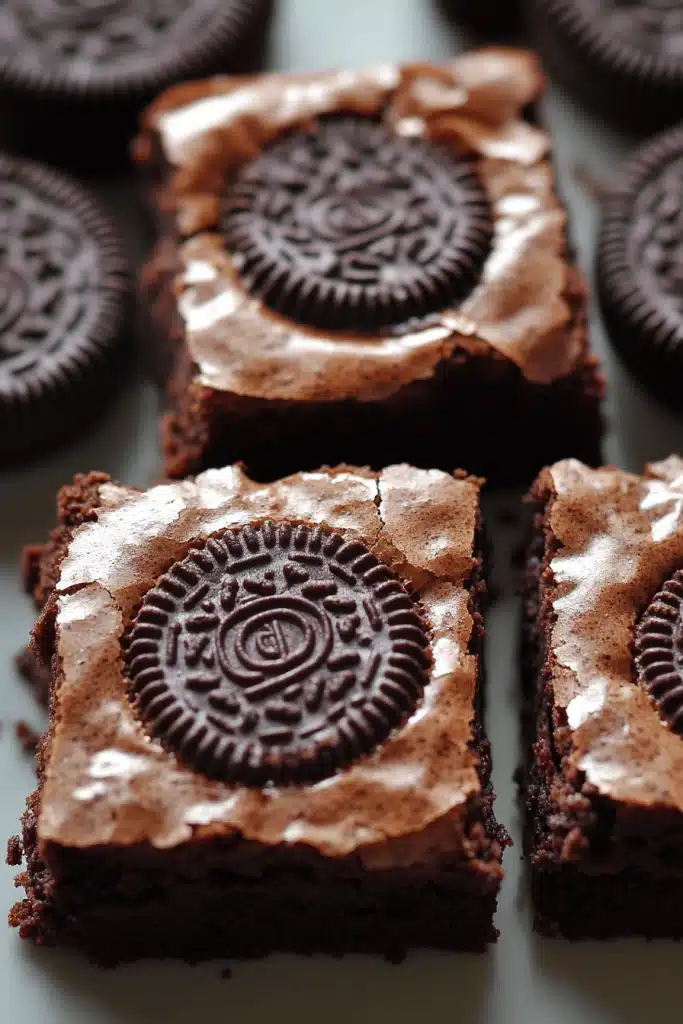
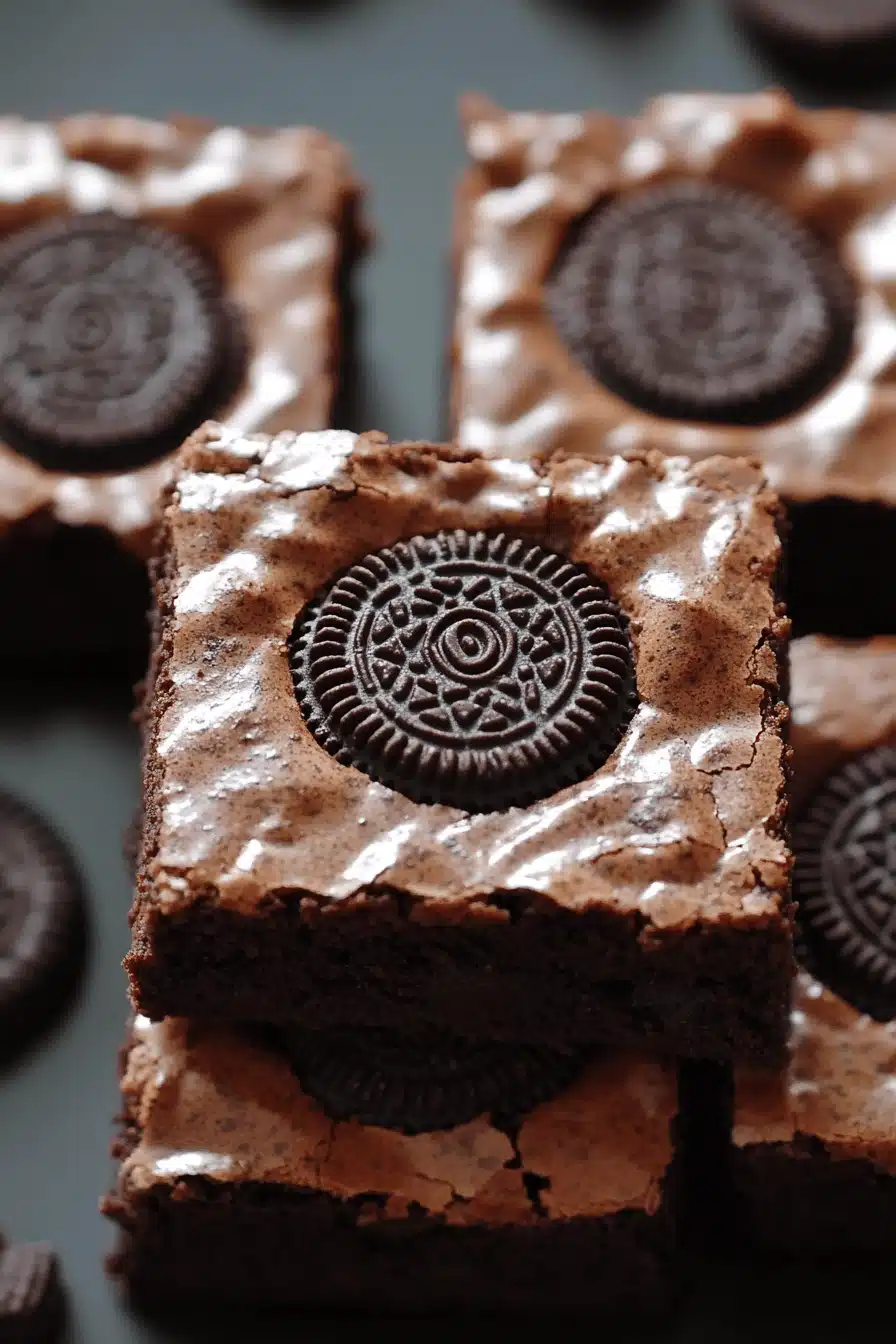
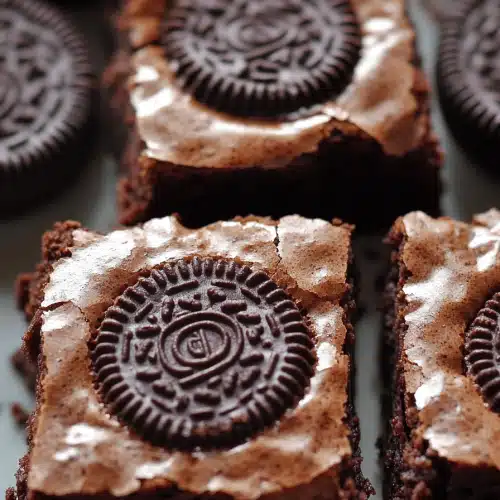
Okay, friends, let’s talk brownies. Not just any brownies, but the kind that make you close your eyes and savor every single bite. These Oreo Brownies are exactly that! Think of your favorite Fudgy Brownie, then imagine it swirled with creamy, crunchy bits of Oreo cookies. It’s kinda like the love child of a classic chocolate brownie and an Oreo cheesecake, but way simpler to make! Seriously, if you’re looking for a recipe that’s guaranteed to disappear faster than you can say “dessert,” this is it. I remember making these for my daughter’s birthday last year, and they were gone before I even had a chance to grab one for myself. She still asks for them every week!
Thank you for reading this post, don't forget to subscribe!
What is the recipe for Oreo Brownies?
This Oreo Brownies Recipe is essentially a decadent, fudgy brownie base studded with chunks of everyone’s favorite sandwich cookie. It’s all about layering textures and flavors: the soft, rich brownie contrasting with the crisp, sweet Oreo cookies. I mean, who doesn’t love Oreos? The beauty of this recipe is in its simplicity. We’re not talking about complicated techniques or hard-to-find ingredients. It’s a straight-forward brownie recipe elevated to new heights with the addition of those delightful cookies. You can even use different Oreo flavors for a twist! I once made it with Golden Oreos, and it was a total hit!
Why you’ll love this recipe?
Oh, where do I even begin? This Oreo Brownies Recipe is a guaranteed crowd-pleaser! What I love most about it is the flavor. The fudgy, chocolatey brownie is perfectly balanced by the sweet, creamy crunch of the Oreos. It’s like a party in your mouth!
But beyond the incredible flavor, it’s the simplicity that really seals the deal. You can whip this up in under an hour, start to finish. No fancy equipment needed, just a bowl, a whisk, and a baking pan. Seriously, even if you’re not a seasoned baker, you can totally nail this.
And let’s not forget about the cost-efficiency. Brownies are already a relatively budget-friendly dessert, and adding Oreos doesn’t break the bank. You probably have most of the ingredients in your pantry already! I always have a stash of Oreos on hand, just in case a brownie craving strikes.
Finally, this recipe is incredibly versatile. You can serve these Oreo Brownies warm with a scoop of ice cream, pack them in lunchboxes, or bring them to a potluck. They’re always a hit! Sometimes, I’ll even drizzle them with melted chocolate or sprinkle them with Sea Salt for an extra touch of indulgence. Honestly, I prefer these to plain chocolate brownies any day!
How to Make This Oreo Brownies Recipe
Quick Overview
Making these Oreo Brownies is surprisingly easy! You’ll start by prepping your pan and getting your oven preheated. Then, you’ll whip up a simple Brownie Batter, stir in some crushed Oreos, and pour it into the pan. After that, you’ll sprinkle more Oreos on top and bake until gooey and delicious. Once cooled, slice ’em up and prepare for some serious brownie bliss. The best part is that this recipe uses simple ingredients and methods, so you won’t get overwhelmed. Trust me, you’ve got this!
Ingredients
For the Main Batter: ”For the
* 1/2 cup (1 stick) unsalted butter, melted
* 1 cup granulated sugar
* 1/2 cup unsweetened cocoa powder
* 1/4 teaspoon salt
* 1 teaspoon vanilla extract
* 2 large eggs
* 1/2 cup all-purpose flour
* 1/2 teaspoon baking powder
For the Filling:
* 1 1/2 cups coarsely chopped Oreo cookies (about 15 cookies) – Don’t be afraid to experiment with different flavors. What are the different flavors of Ore
For the Glaze (optional, but highly recommended):
* 1/2 cup powdered sugar
* 2-3 tablespoons milk, or enough to reach desired consistency
* 1/4 teaspoon vanilla extract
What are the steps to
Step 1: Preheat & Prep Pan
First things first, preheat your oven to 350°F (175°C). While the oven’s heating up, grease and flour an 8×8 inch baking pan. This is crucial to prevent the brownies from sticking. I always use parchment paper for extra insurance – makes cleanup a breeze! Make sure the parchment hangs over the edges so you can easily lift the brownies out after baking.
Step 2: Mix Dry Ingredients
In a medium bowl, whisk together the cocoa powder, flour, baking powder, and salt. This ensures that the cocoa powder is evenly distributed, preventing any clumps in your batter. Trust me, you don’t want pockets of cocoa powder in your brownies!
“Made the Oreo Brownies Recipe tonight and wow — perfect weeknight dinner. Will definitely make again!”
Step 3: Mix Wet Ingredients
In a separate, larger bowl, combine the melted butter and sugar. Make sure your butter isn’t too hot, or it might cook the eggs later. Whisk until smooth and well combined. Then, add the eggs one at a time, mixing well after each addition. Stir in the vanilla extract. The vanilla enhances the chocolate flavor, so don’t skip it!
Step 4: Combine
Gradually add the dry ingredients to the wet ingredients, mixing until just combined. Be careful not to overmix, or your brownies will be tough. A few streaks of flour are okay! Remember, we’re aiming for fudgy, not cakey brownies here.
Step 5: Prepare Filling
Gently fold in 1 cup of the coarsely chopped Oreo cookies. Save the remaining 1/2 cup for sprinkling on top later. I like to break the Oreos into different sized pieces for varying textures in the final product. Some like them crushed really fine, but I prefer the bigger chunks!
Step 6: Layer & Swirl
How do you spread brownie batter in a baking pan? Sprinkle remaining 1/2 cup chopped Oreos on top. If you want to get fancy, you can even swirl a little Cream Cheese batter into the top for marbled effect. Just dollop small spoonfuls of softened cream cheese over the batter and swirl it with a knife or fork.
Step 7: Bake
Bake for 25-30 minutes, or until a toothpick inserted into the center comes out with moist crumbs attached. Keep a close eye on them, as baking times can vary depending on your oven. Don’t overbake, or your brownies will be dry! I always start checking at 25 minutes.
Step 8: Cool & Glaze
Let the brownies cool completely in the pan before frosting. If the frosting is still warm, the brownies will melt. This is important. While the brownies are cooling, prepare the glaze by whisking together the powdered sugar, milk, and salt. How do you make vanilla extract smooth? How much milk should I add to my diet?
Step 9: Slice & Serve
When the brownies are completely cooled, drizzle the glaze over the top. Cut into squares and serve. What are some good Side Dishes to serve with vanilla ice cream?
What to Serve It With
These Oreo Brownies are delicious any time of day!
For Breakfast:I know brownies are a bit indulgent, but hey, it’s your life! What are some of the best coffees to serve in the morning? I sometimes crumble a brownie over my yogurt for an indulgent start to the day.For Brunch:What are some of the best oreo brownies? Serve them alongside fresh fruit, yogurt parfaits, and mimosas for a truly special occasion. I like to arrange them artfully on a cake stand for an elegant presentation.As Dessert:What are some great after-dinner brownies? Serve warm with vanilla Ice Cream or a drizzle of melted chocolate. For a grown-up twist, pair them with ice cream or red wine.For Cozy Snacks: Sometimes, you just need a little something sweet to cozy up with on the couch. These Oreo Brownies are perfect for that! Enjoy them with a glass of milk, a cup of tea, or a bowl of popcorn. I often bake a batch on a rainy day and enjoy them while watching a movie with my family.
How do I make Oreo Brownies?
How do I take my Oreo Brownies to the next level?Ingredient Swaps: Feel free to experiment with different types of Oreos. Golden Oreos, mint Oreos, or even the limited-edition flavors would all be delicious in this recipe. You can also substitute the all-purpose flour with Gluten-Free Flour for a gluten-free version. I tested this with almond flour and it actually made them even chewier!
Mixing Advice: Be careful not to overmix the batter. Overmixing can lead to tough brownies. Mix until just combined, and don’t worry about a few streaks of flour.
Swirl Customization: Get creative with your swirl patterns! Use a toothpick, knife, or even a chopstick to create different designs. You can also add a few drops of food coloring to your Cream Cheese batter for a more colorful swirl.
Baking Tips: Keep a close eye on your brownies while they’re baking. Baking times can vary depending on your oven. Start checking for doneness at 25 minutes, and bake until a toothpick inserted into the center comes out with moist crumbs attached.
Glaze Variations: Experiment with different flavors for your glaze. Add a teaspoon of instant coffee for a mocha glaze, or a few drops of peppermint extract for a mint glaze. You can also use chocolate ganache instead of glaze.
Oreo Distribution: For the best Oreo distribution, reserve some chopped Oreos to press into the top of the batter just before baking. This ensures that there are Oreos in every bite!
“The Oreo Brownies Recipe turned out amazing. My kids asked for seconds. Saving this one!”
Storing and Reheating Tips
These Oreo Brownies are best enjoyed fresh, but they can also be stored for later.
Room Temperature: Store the brownies in an airtight container at room temperature for up to 3 days. They might dry out a bit, so consider wrapping them individually in plastic wrap to maintain freshness.
Refrigerator Storage: For longer storage, store the brownies in an airtight container in the refrigerator for up to a week. They will be firmer when cold, but still delicious.
Freezer Instructions: These brownies freeze well! Wrap them individually in plastic wrap and then place them in a freezer-safe bag or container. They can be stored in the freezer for up to 2 months.
Glaze Timing Advice: If you plan to store the brownies, wait to glaze them until just before serving. This will prevent the glaze from becoming sticky or dissolving.
Frequently Asked Questions
Final Thoughts
So, there you have it! My go-to Oreo Brownies Recipe that never fails to impress. These brownies are fudgy, chocolatey, and loaded with everyone’s favorite sandwich cookie. They’re easy to make, perfect for any occasion, and guaranteed to disappear in minutes. If you’re looking for a recipe that will become a family favorite, look no further! And if you’re in a brownie mood, maybe give my peanut butter brownie recipe a try.
I truly hope you enjoy making these Oreo Brownies as much as I do. They’re a little slice of happiness in every bite! Let me know in the comments below how yours turn out. And don’t forget to rate the recipe if you loved it! Happy baking!
How to Make Oreo Brownies: 5 Easy Steps to Indulge!
Ingredients
Main Ingredients
- 2.25 cups butter melted
- 14 oz chocolate chips semi-sweet
- 1.25 cups cocoa powder unsweetened
- 3.5 cups granulated sugar
- 1.5 cups brown sugar packed
- 6 large eggs room temperature
- 2 teaspoons vanilla extract
- 2.5 cups all-purpose flour
- 1 teaspoon salt
- 50 Oreo cookies crushed
Instructions
Preparation Steps
- Preheat your oven to 350°F (175°C). Line a 9x13-inch baking pan with parchment paper and set aside.
- Melt the butter in a large microwave-safe bowl. Add 8 oz of chocolate chips and gently melt together in 30-second intervals.
- In a separate bowl, beat the eggs, granulated sugar, and brown sugar until well-mixed and slightly fluffy.
- Mix the melted chocolate into the egg and sugar mixture. Gradually fold in the dry ingredients, including cocoa, flour, and salt.
- Pour half of the batter into the pan, sprinkle with crushed Oreos, and cover with the remaining batter. Bake for 40-45 minutes.


