You know, there are some recipes that just stick with you, the ones you find yourself craving on a rainy afternoon or needing for that last-minute potluck. For me, that recipe, hands down, is my Oooey Gooey Butter Bars. Seriously, if I had a nickel for every time someone asked me for this recipe after trying it, I’d be retired already! They’re not just a dessert; they’re a little slice of pure happiness. They’re like a cross between a rich brownie and a decadent blondie, but somehow even better. The texture is what gets you – that perfect chewy, dense bottom with a slightly crisp edge, all topped with a sweet, melt-in-your-mouth layer. It’s the kind of treat that makes you close your eyes and sigh with pure bliss. If you’ve ever loved a classic Texas Sheet Cake for its fudgy goodness, get ready, because these Oooey Gooey Butter Bars are going to steal your heart.
Thank you for reading this post, don't forget to subscribe!What are Oooey Gooey Butter
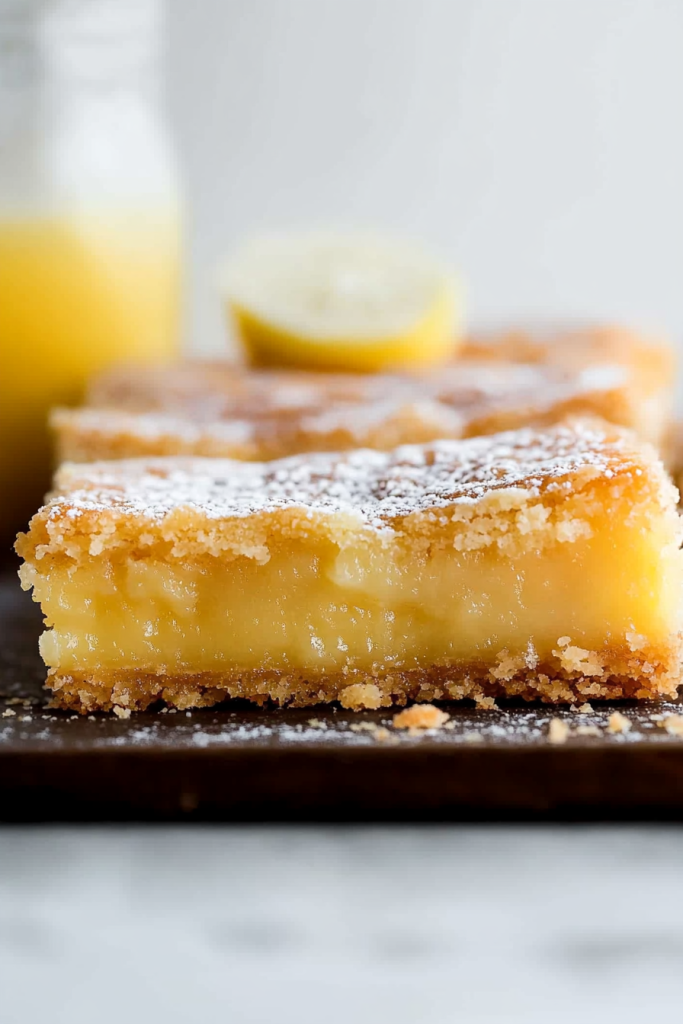
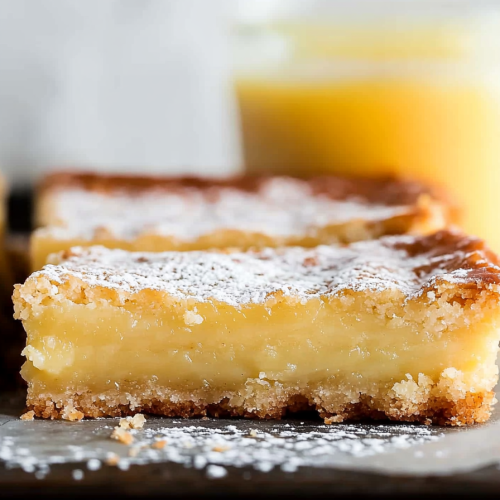
So, what exactly are these magical things we call Oooey Gooey Butter Bars? Think of them as a St. Louis-inspired confection that’s become a national treasure for good reason. They’re essentially a two-layered bar cookie. The base is a dense, buttery, almost cookie-like dough that gets baked until it’s perfectly golden and chewy. Then, the real magic happens with the topping: a creamy, sweet, custard-like layer made primarily from Cream Cheese, butter, and powdered sugar, often flavored with vanilla. This layer bakes up into a fudgy, gooey delight that truly lives up to its name. It’s not quite frosting, not quite custard, but something wonderfully in between. The name itself just tells you everything you need to know – they are incredibly, wonderfully, ooey gooey!
Why you’ll love this recipe?
Honestly, where do I even begin with why you’ll absolutely adore these Oooey Gooey Butter Bars? First and foremost, the FLAVOR. It’s an explosion of buttery sweetness with that subtle tang from the Cream Cheese that cuts through the richness just perfectly. The texture is unparalleled – a soft, chewy base giving way to that lusciously smooth, melty topping. It’s pure comfort food in bar form. And the SIMPLICITY? You won’t believe how easy these are to whip up, especially considering how impressive they look and taste. You don’t need any fancy equipment or complicated techniques. I’ve made these on weeknights when I’m totally exhausted and they’re still ready before you know it. Plus, they are incredibly COST-EFFECTIVE. The ingredients are all pantry staples that you probably already have on hand, making it a budget-friendly way to create a show-stopping dessert. What I love most about this recipe, though, is its VERSATILITY. While they are amazing on their own, they are fantastic for any occasion. They’re perfect for a bake sale, a holiday cookie platter, a birthday party, or even just a quiet afternoon with a cup of tea. They’re a guaranteed crowd-pleaser, and I can tell you from experience, they disappear in minutes at my house. They’re just one of those reliably delicious treats that always hits the spot.
How do I make Oooey Gooey Butter Bars?
Quick Overview
Making these Oooey Gooey Butter Bars is a straightforward process that yields incredibly rewarding results. You’ll start by creating a simple, buttery base, then whip up a decadent Cream Cheese topping. The two layers are combined and baked to perfection, resulting in a bar that’s both wonderfully chewy and incredibly soft. It’s a two-step process that guarantees a show-stopping dessert with minimal fuss. The beauty of this recipe lies in its simplicity and the incredible texture and flavor it delivers. It’s a lifesaver when you need something sweet and satisfying without spending hours in the kitchen.
Ingredients
For the Main Batter:
1 cup (2 sticks) unsalted butter, softened – Make sure it’s truly softened, not melted! This makes all the difference in getting that perfect chewy base.
1 ½ cups all-purpose flour – Just your standard all-purpose flour works beautifully here.
½ teaspoon baking powder – For a little lift, but we don’t want these to puff up too much.
¼ teaspoon salt – Balances out all that sweetness.
1 cup granulated sugar – For sweetness and structure in the base.
1 large egg – Helps bind everything together.
1 teaspoon vanilla extract – Always use good quality vanilla for the Best Flavor!
“The Oooey gooey butter bars turned out amazing. My kids asked for seconds. Saving this one!”
For the Filling:
1 (8-ounce) package Cream Cheese, softened – Again, make sure it’s nice and soft. This is crucial for a smooth, lump-free filling.
½ cup (1 stick) unsalted butter, softened – Yes, more butter! It’s key to that gooey factor.
2 cups powdered sugar (confectioners’ sugar) – Sifted if you want to be extra fancy, but usually fine as is for this recipe.
1 large egg – For richness and helping the filling set up.
1 teaspoon vanilla extract – To enhance that lovely creamy flavor.
For the Glaze (Optional but highly recommended!):
1 cup powdered sugar – Sifted for a smooth finish.
2-3 tablespoons milk or heavy cream – Just enough to reach your desired drizzling consistency.
½ teaspoon vanilla extract – For a hint of extra flavor.
Step-by-Step Instructions
Step 1: Preheat & Prep Pan
First things first, preheat your oven to 350°F (175°C). Now, grab a 9×13 inch baking pan. I like to grease mine really well with butter or cooking spray, and then I often line it with parchment paper, leaving an overhang on the sides. This makes it ridiculously easy to lift the whole thing out once it’s cooled. Just press the parchment into the pan, leaving a couple of inches hanging over each long side. This overhang acts like little handles for you later. Make sure the parchment is nice and flat in the bottom of the pan.
Step 2: Mix Dry Ingredients
In a medium bowl, whisk together the flour, baking powder, and salt. Just a quick whisk to combine them evenly. This ensures that your baking powder is distributed well, which helps give the base just the right amount of lift without making it cakey. Set this bowl aside for now; we’ll come back to it.
Step 3: Mix Wet Ingredients
In a separate large bowl, cream together the softened butter and granulated sugar until the mixture is light and fluffy. This is where your electric mixer really comes in handy! You want to beat them together for a good few minutes until you don’t see any streaks of butter or sugar. Then, beat in the egg until well combined, followed by the vanilla extract. This creates the rich, sweet foundation for our bars.
Step 4: Combine
Now, gradually add the dry ingredients (from Step 2) to the wet ingredients (from Step 3). Mix on low speed, or by hand with a spatula, until just combined. Be careful not to overmix here! Overmixing can develop the gluten in the flour too much, making your bars tough. You want a soft, slightly crumbly dough. Press this dough evenly into the bottom of your prepared baking pan. Use your hands or the bottom of a glass to get it as flat and even as possible. This base is going to get wonderfully chewy as it bakes.
Step 5: Prepare Filling
In another clean bowl, beat together the softened Cream Cheese and softened butter until smooth and creamy. Again, an electric mixer is your friend here! Make sure there are no lumps. Then, gradually beat in the powdered sugar until it’s fully incorporated and the mixture is smooth. It might seem like a lot of powdered sugar, but trust me, it creates that signature gooey topping. Finally, beat in the egg and the vanilla extract until everything is well combined and has a beautiful, smooth, pourable consistency. It should look like a thick, luscious sauce.
“Made the Oooey gooey butter bars tonight and wow — perfect weeknight dinner. Will definitely make again!”
Step 6: Layer & Swirl
Pour the Cream Cheese filling evenly over the dough base in the pan. Try to get it as level as possible. Now, here’s the fun part! If you want to get fancy, you can take a knife or a skewer and gently swirl the topping into the base a little bit. Don’t overdo it; just a few gentle swirls will create a pretty marbled effect as it bakes. But honestly, just pouring it evenly is perfectly fine too – it’s going to be delicious either way. The goal is a nice, thick layer of that creamy goodness over the chewy base.
Step 7: Bake
Pop the pan into your preheated oven. Bake for 30-35 minutes, or until the edges are golden brown and the center is set but still looks a little gooey. It shouldn’t be liquidy, but it should have a slight jiggle. Be careful not to overbake, or you’ll lose that wonderful gooey texture! The smell in your kitchen at this point will be absolutely incredible. It’s that sweet, buttery aroma that just makes you feel good.
Step 8: Cool & Glaze
Once they’re done baking, take them out of the oven and let them cool *completely* in the pan on a wire rack. This is super important! If you try to cut them while they’re hot, they will fall apart. Patience is key here. While they’re cooling, you can make the glaze. In a small bowl, whisk together the sifted powdered sugar, vanilla extract, and just enough milk or cream to make a drizzly consistency. You want it thin enough to pour but not so thin that it runs everywhere. Once the bars are completely cool, drizzle the glaze all over the top. Let the glaze set for about 15-20 minutes before slicing.
Step 9: Slice & Serve
Once the glaze has set, use those parchment paper overhangs to lift the entire slab out of the pan onto a cutting board. Now, using a sharp knife, cut them into squares. I usually aim for about 24 bars from a 9×13 pan. The texture will be perfectly soft and chewy. These are absolutely divine served at room temperature. If you have any leftovers (which I doubt!), store them according to the tips below. Enjoy every single bite of this deliciousness!
What to Serve It With
These Oooey Gooey Butter Bars are so incredibly versatile; they fit right in wherever you need a sweet treat. For BREAKFAST, they’re an absolute revelation. Imagine a warm cup of coffee paired with one of these bars – the sweetness and richness are just the perfect way to start the day, almost like a fancy pastry. They elevate any morning! For BRUNCH, they add a touch of elegance to the spread. I love cutting them into smaller, more delicate squares and arranging them on a tiered stand. They pair wonderfully with mimosas or a fresh fruit salad. As DESSERT, they are simply divine. Serve them after dinner with a scoop of vanilla Ice Cream or a dollop of whipped cream. The contrast of the warm (or room temp) bar with cold ice cream is pure heaven. The rich flavor also pairs beautifully with a cup of coffee or even a dessert wine. And for COZY SNACKS, they are the ultimate comfort food. They’re perfect for a movie night or just a quiet afternoon when you need a little pick-me-up. I often have one with a glass of cold milk, and it’s pure bliss. My kids love them after school with milk, and they disappear so fast!
Top Tips for Perfecting Your Oooey Gooey Butter Bars
Over the years of making these bars countless times, I’ve picked up a few tricks that I swear by. For the BASE, make sure your butter is truly softened, not just slightly melty. This helps create that wonderfully chewy texture without making the dough greasy. When you’re mixing the dry ingredients into the wet, stop as soon as they’re just combined. Overmixing is the enemy of tender baked goods, and we want these to be soft and chewy, not tough! For the CREAMY FILLING, creaming the softened Cream Cheese and butter together until completely smooth is non-negotiable. Any lumps here will carry through to your finished bar, and nobody wants a lumpy gooey topping! I’ve found that sifting the powdered sugar for the filling can help ensure extra smoothness, though it’s not strictly necessary. When you’re layering the filling over the base, spread it as evenly as you can. This helps ensure consistent texture and flavor in every bite. For the SWIRLING, a light hand is best. You’re not trying to fully combine them, just create pretty patterns. A gentle tug with a knife or skewer is all you need. Don’t go too deep, or you’ll just mix the layers completely. As for BAKING, ovens can be tricky! Keep an eye on them after the 30-minute mark. The edges should be golden, and the center should be *set* but still have a slight wobble. It will continue to cook as it cools. If you overbake them, they lose that signature gooeyness. For the GLAZE, consistency is everything. Start with the smaller amount of liquid and add more only if needed. You want it to drizzle, not run off the bars. If it gets too thin, you can always whisk in a little more powdered sugar. I’ve experimented with adding a tiny pinch of salt to the glaze sometimes, which really enhances the sweetness. My personal favorite variation is adding a little bit of almond extract to the filling along with the vanilla for a subtle nutty flavor. It’s a small change, but it really takes them up another notch for me. And trust me on this one, letting them cool completely before cutting is the hardest but most important step for beautiful bars.
Storing and Reheating Tips
Keeping these Oooey Gooey Butter Bars tasting amazing is pretty simple, though they usually don’t last long enough to need much storing! At ROOM TEMPERATURE, they’ll stay fresh for about 2-3 days. Just make sure to cover them tightly with plastic wrap or store them in an airtight container. This helps keep them from drying out and preserves that lovely gooey texture. If you’re not going to eat them within a couple of days, REFRIGERATOR STORAGE is your best bet. Pop them into an airtight container or wrap them well. They’ll keep nicely in the fridge for up to a week. Honestly, though, I find they are best enjoyed within the first 3-4 days. For FREEZER INSTRUCTIONS, these bars freeze surprisingly well. Cut them into individual squares, wrap each one tightly in plastic wrap, then place them in a freezer-safe bag or container. They can be frozen for up to 2-3 months. To thaw, just unwrap them and let them come to room temperature on a plate for an hour or two. If you plan on freezing them, I actually recommend waiting to add the glaze until after they’ve thawed. Glaze them once they are completely defrosted and at room temperature for the best appearance. If you decide to glaze them before freezing, the glaze might sweat a bit upon thawing, but they’ll still taste delicious!
Frequently Asked Questions
Final Thoughts
So there you have it – my absolute favorite Oooey Gooey Butter Bars! I really hope you give this recipe a try. It’s more than just a dessert; it’s a little piece of baking joy that’s perfect for sharing (or not, I won’t tell!). The combination of that chewy, buttery base and the impossibly smooth, rich topping is just pure magic. It’s the kind of recipe that makes you feel like a baking rockstar, even if you’re a beginner. If you love rich, decadent, and incredibly satisfying treats, these bars are for you. They’re a testament to how simple ingredients can create something truly spectacular. If you enjoyed these, you might also love my Fudgy Brownies Recipe or my Classic Blondies for more chewy, gooey goodness. I can’t wait to hear how yours turn out! Please leave a comment below and let me know what you think, or share any variations you tried. Happy baking!
Oooey Gooey Butter Bars
Ingredients
For the Crust
- 1 cup unsalted butter softened
- 2 cups granulated sugar
- 2 large eggs
- 1 teaspoon vanilla extract
- 1.5 cups all-purpose flour
For the Topping
- 1 package cream cheese softened (8 ounces)
- 1 cup powdered sugar
- 1 large egg
- 0.5 teaspoon vanilla extract
Instructions
Preparation Steps
- Preheat oven to 350°F (175°C). Grease and flour a 9x13 inch baking pan.
-
In a large bowl, cream together the softened butter and granulated sugar until light and fluffy.1 cup unsalted butter
-
Beat in the eggs one at a time, then stir in the vanilla extract.1 cup unsalted butter
-
Gradually mix in the flour until just combined.1 cup unsalted butter
- Spread the crust mixture evenly into the prepared baking pan.
-
In a separate bowl, beat together the cream cheese and powdered sugar until smooth.1 cup unsalted butter
-
Beat in the egg and vanilla extract until well combined.1 cup unsalted butter
- Pour the topping mixture evenly over the crust.
- Bake for 30-35 minutes, or until the topping is set and lightly golden.
- Let cool completely in the pan before cutting into bars. For best results, chill before serving.


