Every October, I find myself craving those special treats that bring a little magic to the kitchen — and honestly, nothing does it quite like making a batch of easy Halloween cookies. It’s the kind of baking that feels festive but doesn’t require a full day’s effort, which is perfect when I’ve got decorations to hang or little costumed pirates and princesses running around. I’ve tested a bunch of cookie recipes over the years, and these are the ones I always come back to — because they’re simple, tasty, and look adorable enough to make even the grumpiest kid smile. Plus, the smell alone of baking these cookies is enough to turn a regular Tuesday into a mini celebration. Trust me, these cookies are a lifesaver on busy nights when the kids ask for a sweet treat, or when I want to add that little extra Halloween pizzazz to my party table without pulling out my hair. Grab your mixing bowls, because we’re about to make some truly wonderful, easy Halloween cookies together!
Thank you for reading this post, don't forget to subscribe!What are easy Halloween cookies?
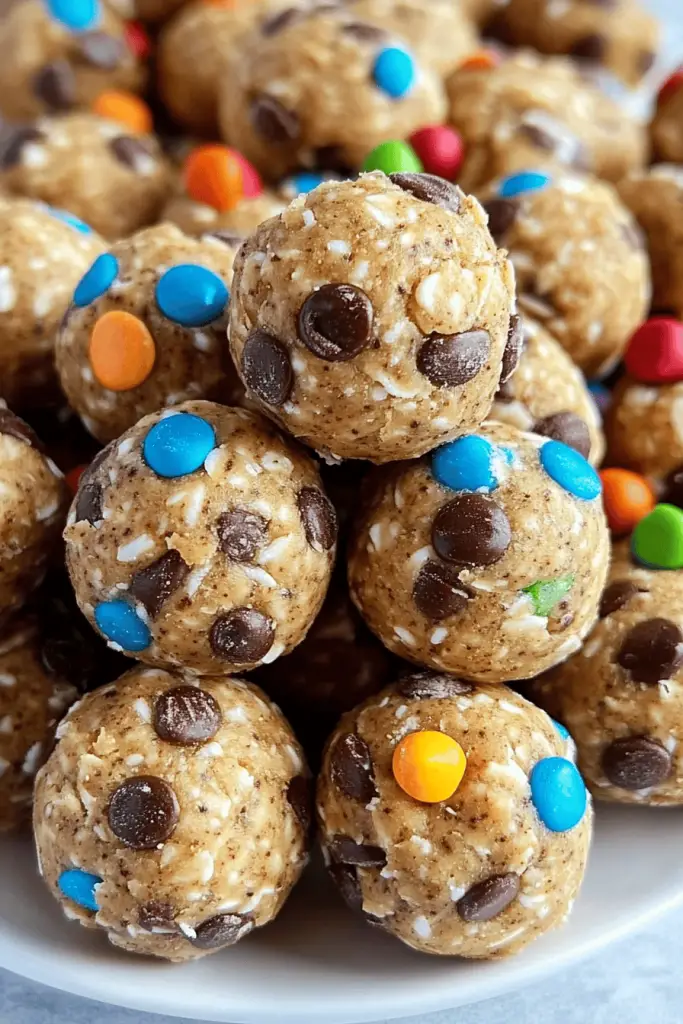
Think of these cookies as your go-to little project when you want something fun, festive, and delicious — but don’t want to spend hours in the kitchen. They’re essentially a basic Cookie Dough, but with a Halloween twist. The “easy” part? It’s all in the ingredients and simple techniques. I like to keep things super straightforward, so whether you’re a baking newbie or a seasoned pro, you’ll have these whipped up in no time. Once baked, they’re perfect for decorating with icing, sprinkles, or whatever spooky toppings you fancy — and my kids always ask for these during October because they’re just as fun to make as they are to eat. They’re versatile too: you can shape them into little pumpkins, ghosts, bats, or even just keep them classic round. It’s a recipe that feels cozy and creative, and trust me — they disappear in minutes at my house.
Why you’ll love this recipe?
What I love most about these easy Halloween cookies is how they strike that perfect balance between simplicity and charm. First, the flavor — buttery, just a little bit sweet, with a hint of vanilla that makes your house smell incredible. They’re not overly fussy; you won’t need fancy ingredients or special tools, just some pantry staples and a little bit of time. This makes them budget-friendly and stress-free, which is exactly what I need during the busy fall season. Plus, they’re super versatile — you can decorate them to match your vibe, whether spooky or silly. I’ve made these countless times, and they never fail to bring joy, especially when I see my kids gleefully icing tiny bats or pumpkin faces on each one. What really sets them apart, though, is how adaptable they are: you can customize the flavor, shape, and decoration, making it a fun project for the whole family. Honestly, they’re just the kind of treat that makes October feel extra special.
How do I make easy Halloween cookies?
Quick Overview
This recipe is all about keeping things simple. We start with a basic Sugar Cookie dough, flavored lightly with vanilla. After chilling it briefly — because nobody wants sticky dough — you roll it out, cut into fun Halloween shapes, and bake until just golden. Once cooled, the real fun begins: decorating! You can use royal icing, colored sugars, or even melted chocolate to bring your spooky designs to life. The best part? The whole process is flexible and forgiving, so don’t worry if your pumpkins end up more irregular or if your ghosts are a little wonky — they’ll taste just as fantastic. Trust me on this, once you get the hang of it, you’ll be whipping these up every October without a second thought.
Ingredients
For the Main Batter:
- 2 ¾ cups all-purpose flour — I prefer unbleached for a richer flavor
- 1 teaspoon baking powder
- ½ teaspoon salt
- ¾ cup unsalted butter, softened — real butter makes all the difference
- 1 cup granulated sugar
- 1 large egg
- 1 teaspoon pure vanilla extract
For the Filling (Optional if you want filled or decorated cookies):
- Royal icing or colored frosting — I keep a stash of premade icing for quick decorating
- Colored sugar or sprinkles — choose festive hues like orange, black, purple, and green
For the Glaze (or finishing touch):
“New family favorite! This Monster Cookie Magic Easy Halloween Treats was so flavorful and ridiculously easy. Crowd-pleaser for sure.”
- Powdered sugar mixed with a splash of milk and a drop of vanilla — for a shiny, sweet finish
- Food coloring — to tint the glaze for extra fun
Step-by-Step Instructions
Step 1: Preheat & Prep Pan
Set your oven to 350°F (175°C). Line baking sheets with parchment paper or silicone mats — easier cleanup and prevents sticking. It’s best to roll your dough on a lightly floured surface so it doesn’t stick when you’re cutting out all those spooky shapes.
Step 2: Mix Dry Ingredients
In a small bowl, whisk together the flour, baking powder, and salt. This step ensures your dry ingredients are evenly distributed and helps prevent clumping in the dough. It’s satisfying to see everything get mixed up so uniformly — kind of like magic, I think.
Step 3: Mix Wet Ingredients
In your mixer or with a sturdy spoon, beat the softened butter and sugar until it’s light and fluffy — about 2-3 minutes. Then, mix in the egg and vanilla until well combined. The mixture should be creamy and inviting; I always love the smell of vanilla here.
Step 4: Combine
Gradually add the flour mixture into the wet ingredients, mixing on low speed until a dough forms. It’s tempting to overmix at this stage, but trust me — just mix until everything’s just combined. Overmixing can make the cookies tough, and nobody wants that.
Step 5: Prepare Filling
If you’re decorating with icing or sprinkles, prepare your colors ahead of time. For the icing, I like to keep it in small bowls, adding food coloring little by little until I get just the right shade. If you’re feeling fancy, mix some edible glitter or black cocoa powder into your icing for extra dimension.
Step 6: Layer & Swirl
Roll out your dough to about ¼-inch thickness. Use cookie cutters in Halloween shapes — pumpkins, ghosts, bats, or witches hats. Transfer shapes to your baking sheet, leaving some space between each. If you want a layered or marbled look, you can do a quick swirl of different colored dough before baking.
Step 7: Bake
Place the trays in the oven and bake for 8-10 minutes. Keep an eye on them; you want a light golden edge rather than a dark brown, so they stay soft and chewy. Every oven is different, so I recommend setting a timer for 9 minutes and checking from there. They firm up as they cool, so don’t overbake.
Step 8: Cool & Glaze
Once out of the oven, let the cookies cool on a wire rack for at least 10 minutes. This step is crucial — I’ve learned the hard way that trying to decorate hot cookies ends in smudges. After they’re cooled, drizzle or spread the icing/glaze on top. The glaze gives a lovely shiny finish, and it sets pretty quickly.
“The Monster Cookie Magic Easy Halloween Treats turned out amazing. My kids asked for seconds. Saving this one!”
Step 9: Slice & Serve
If you’ve made filled cookies or layered designs, wait for the icing to dry completely — usually an hour or two. Then, serve your adorable Halloween treats on a platter with a spooky-themed napkin. These cookies are best enjoyed at room temperature, and I promise, they taste even better than they look!
What to Serve It With
When you’re feeling festive, I love to pair these cookies with a warm cup of APPLE CIDER or a hot chocolate topped with whipped cream and sprinkles. For a quick brunch surprise, serve some alongside pumpkin muffins, garnished with a drizzle of caramel. If you’re making a little Halloween dessert table, these cookies look adorable on a tiered cake stand, surrounded by mini popcorn handfuls or candy corn. My family’s favorite way to enjoy them is just on a cozy evening, when the house smells like fall and everyone gathers around the table. Sometimes I set up a decorating station with icing pens and sprinkles, and we turn cookie decorating into a mini family party. They’re also great as a themed afterschool snack — I hide a few in a jar on the counter, and they disappear before I know it. No matter how you serve them, they add a touch of sweetness and fun to any occasion.
Top Tips for Perfecting Your Easy Halloween Cookies
Over the years, I’ve picked up a few tricks that make all the difference in these cookies. First, when preparing your dough, don’t rush the chilling step — I usually refrigerate mine for at least an hour. It keeps the dough firm and easier to handle, plus prevents spreading in the oven. When rolling out, I use a quarter-cup measure or a rolling pin with guides to keep the thickness consistent, so that every cookie bakes evenly. If your shapes are sticking, a quick dip in flour or a spritz of baking spray on your cutter helps. For the decorating, a little patience goes a long way — I always let the icing dry thoroughly before stacking or storing. I love experimenting with flavors too; swapping some of the vanilla for orange or peppermint extract adds a fun twist. If you want fluffier cookies, a tiny extra pinch of baking soda can help, but be careful not to overdo it. And if I want a richer cookie, I’ve tested using Brown Sugar instead of all white — it gives a deeper flavor with a touch of molasses. Lastly, don’t skip the cooling period; it’s essential for neat decorating and avoiding finger smudges. Practice makes perfect, but honestly, even my “imperfect” cookies always get compliments because they’re *so* cute.
Storing and Reheating Tips
These cookies stay fresh surprisingly well. At room temperature, store in an airtight container for up to 3 days — just be sure they’re completely cooled before sealing. If you want to keep them longer, pop them into a zip-top bag or airtight container in the fridge for up to a week. Just allow them to come to room temperature before serving again to keep their softness. For freezer storage, layer the cookies with parchment paper to prevent sticking and wrap tightly in plastic wrap or store in a freezer-safe container. They’ll last up to 3 months — perfect for making ahead of family gatherings or for stash-packing during the holiday season. When you’re ready to enjoy, thaw at room temperature for about 30 minutes, or warm them gently in a low oven for a few minutes if you like a slightly crisp edge. If you’ve added a glaze or icing, keep in mind that some toppings may soften or slightly melt during storage, so I suggest decorating when serving if you want that perfect shiny finish.
Frequently Asked Questions
Final Thoughts
As you can probably tell, these easy Halloween cookies hold a special place in my heart. They’re one of those recipes I turn to when I want something homemade and adorable without the fuss. Over the years, I’ve made so many batches — sometimes experimenting with different flavorings or decorations — but honestly, their charm never gets old. They turn a plain Sugar Cookie into a little piece of Halloween magic, and I love the joy they bring to my family. Plus, they’re a wonderful way to get everyone involved; my kids fight over who gets to make the ghost faces or orange stripes. If you’re looking for a sweet, simple, and festive project, give these a try. You might just find yourself baking them every October too! I’d love to hear how yours turn out, so don’t forget to leave a comment or share a photo. Happy baking, friends — and have a spooky fun Halloween!
easy halloween cookies
Ingredients
Main Ingredients
- 2.5 cups all-purpose flour
- 0.5 teaspoons baking soda
- 0.25 teaspoons baking powder
- 0.25 teaspoons salt
- 1 cups unsalted butter, softened
- 1.25 cups granulated sugar
- 2 tablespoons light brown sugar
- 1 large egg
- 2 teaspoons vanilla extract
- 3 drops green gel icing color
- 3 drops orange gel icing color
- 3 drops purple gel icing color
- 1 cup sanded sugar (optional)
- 24 pieces eyeballs
- 1 cup M&Ms
Instructions
Preparation Steps
- Preheat oven to 350°F. Line baking sheets with parchment paper.
- In a medium bowl, whisk together flour, baking soda, baking powder, and salt.
- In a large bowl, beat the butter and sugars until light and fluffy, about 2-3 minutes.
- Add egg and vanilla extract; beat until well combined.
- Gradually add dry ingredients to wet ingredients, mixing just until combined. The dough will be thick.
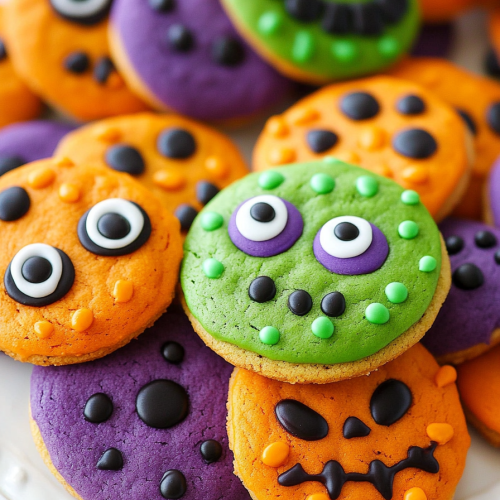
- Divide the dough into three bowls. Color each with the gel icing colors as desired.
- Shape 1.5 tablespoon of dough into balls, roll in sanding sugar if using, then place on baking sheets.
- Bake for 8-10 minutes until edges are golden. Remove from oven.
- Immediately press eyeballs and M&Ms into the cookies while warm.
- Allow cookies to cool on sheets for 4-5 minutes, then transfer to wire racks to cool completely.


