Oh, friends, gather ‘round because I’m about to share something truly magical with you today. It’s a recipe that’s etched into my memory, a sweet whisper from my childhood kitchen, and frankly, it’s the benchmark against which all other Sweet Treats are judged in my house. I’m talking about Mom’s fudge. Not just any fudge, mind you. This is the kind of fudge that melts in your mouth, has just the right amount of creamy sweetness, and carries a subtle depth of flavor that makes you close your eyes and savor every single bite. You know how some recipes sound complicated, like they belong in a fancy bakery? Well, Mom’s fudge is the complete opposite. It’s surprisingly simple, and the results are consistently, unbelievably divine. It’s the kind of thing I whip up when I need a serious comfort food fix, or when unexpected guests pop by and I want to impress them with minimal fuss. Honestly, it’s my go-to when that 10 pm craving hits and I want something truly special without firing up the oven for a whole cake. If you’ve ever tried those boxed brownie mixes and thought, “There has to be more to life,” then you are going to *adore* this Moms Fudge. It’s in a league of its own.
Thank you for reading this post, don't forget to subscribe!What is Mom’s Fudge?
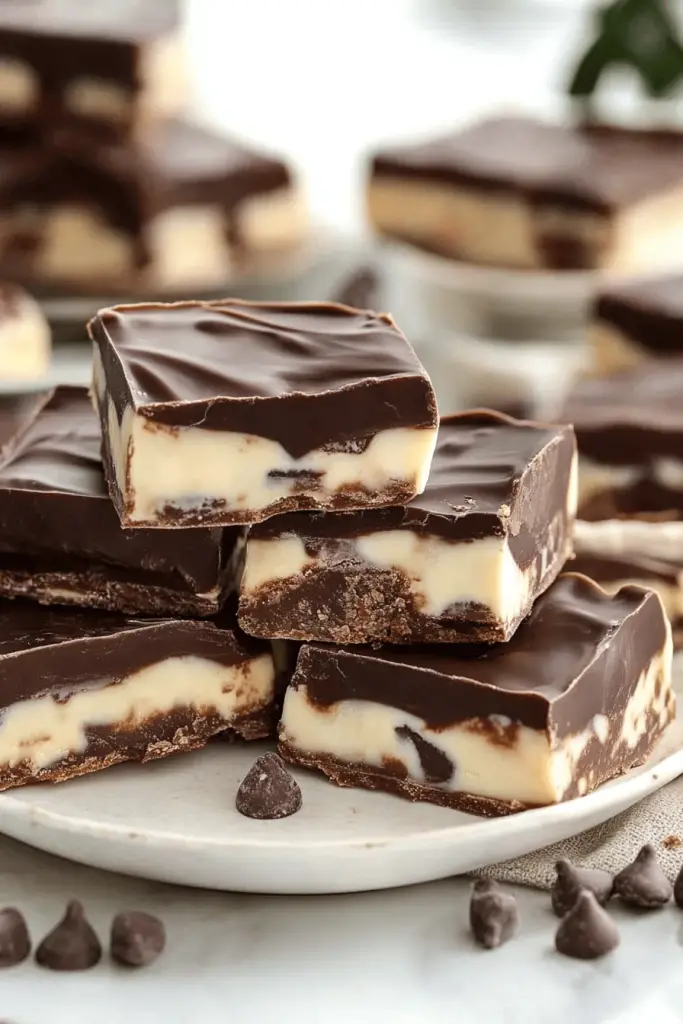
So, what exactly *is* this glorious confection? Think of Mom’s fudge as pure, unadulterated joy in edible form. It’s a rich, dense, incredibly smooth chocolate confection that’s made with simple pantry staples. The name, “Mom’s Fudge,” isn’t just a label; it’s a testament to the love and care that goes into it, and the fact that my mom perfected this recipe over years of trial and delicious error. It’s essentially a classic Chocolate Fudge, but there’s a little secret ingredient (or maybe a technique!) that elevates it beyond the ordinary. It’s the kind of thing that makes you feel like you’re being hugged from the inside. It’s not brittle, it’s not grainy, and it’s definitely not overly sweet. It’s just… perfect. The texture is so wonderfully creamy, almost like a decadent ganache that holds its shape. It’s that perfect balance of deep chocolate flavor and velvety smoothness that makes you wonder how something so simple can be so incredibly good.
Why you’ll love this recipe
What are some of the best ways to fall head over heels for this Moms Fudge Recipe?flavor. It’s a deep, rich chocolate experience that isn’t cloyingly sweet. It has this wonderful complexity that I can’t quite put my finger on sometimes – maybe it’s the quality of the cocoa, or maybe it’s just the magic of Mom’s touch. It’s wonderfully satisfying without being heavy. Then there’s the simplicity. Seriously, if you can stir a pot, you can make this fudge. There are no complicated steps, no fancy equipment needed, and the ingredients are all things you probably already have in your pantry. It’s a lifesaver on busy weekends when you want to whip up a treat without spending hours in the kitchen. Plus, it’s incredibly cost-efficientWhat are some of the best ways to create a unique dessert without breaking the bank?versatility! While it’s absolutely divine on its own, you can easily add nuts, a swirl of caramel, or even a pinch of chili powder for a bit of a kick. What I love most about this recipe, though, is the sheer emotional connection. Every time I make it, I’m transported back to my childhood kitchen, the scent of chocolate filling the air, and my mom humming as she stirred. It’s more than just a recipe; it’s a warm, comforting hug. It’s the perfect sweet treat for any occasion, from holidays to just a Tuesday afternoon pick-me-up. It truly stands out because it delivers on taste, ease, and that undeniable feeling of home.
How to Make Mom’s Fudge
Quick Overview
This is a straightforward, stovetop fudge that comes together in less than 30 minutes of active cooking time. You’ll simply melt, stir, and set to create a smooth, decadent chocolate masterpiece. The beauty of this method is its reliability; it’s designed to be foolproof, ensuring a creamy, never-grainy texture every single time. It’s the kind of recipe that builds confidence in the kitchen.
Ingredients
Here’s what you’ll need to create this chocolatey magic:
For the Main Fudge:
* 2 cups granulated sugar: This is the foundation of our fudge, providing sweetness and structure. Make sure it’s standard granulated sugar, nothing fancy!
* 3/4 cup unsalted butter: Don’t skimp on the butter! It adds richness and helps create that unbelievably smooth texture. If you only have salted, you can use it, but you might want to hold back a tiny pinch of salt later.
* 1/2 cup evaporated milk: This is key! Evaporated milk has a higher concentration of milk solids and less water than regular milk, which helps prevent crystallization and makes the fudge extra creamy. I’ve tested it with regular milk and it just doesn’t have the same smooth consistency.
* 1 teaspoon vanilla extract: Pure vanilla extract is best for the purest flavor. It adds a lovely warmth that complements the chocolate perfectly.
* 1 cup (about 6 ounces) good quality semi-sweet chocolate chips: Use your favorite brand! The better the chocolate chips, the better your fudge will taste. I personally love using a mix of semi-sweet and Dark Chocolate chips for a deeper flavor profile.
* 1/2 cup chopped walnuts or pecans (optional): If you’re a fan of nuts in your fudge, now’s the time to add them! Toasting them lightly first really brings out their flavor, but it’s totally optional.
* A pinch of salt: Even if you use unsalted butter, a tiny pinch of salt balances the sweetness and really makes the chocolate flavor pop. It’s a little trick that makes a big difference.
Step-by-Step Instructions
Step 1: Prepare Your Pan
Before you even think about turning on the stove, grab an 8×8 inch baking pan. Line it with parchment paper, leaving an overhang on the sides. This makes lifting the fudge out so much easier later. You can also grease the pan lightly with butter or non-stick spray before lining it, just for extra insurance. This step is crucial – you don’t want your beautiful fudge sticking!
“I don’t know if I’ve ever eaten a better Moms Fudge. The rub alone is wonderful, but the sauce??? Over the top!”
Step 2: Combine Sugar, Butter, and Milk
In a medium, heavy-bottomed saucepan (this is important to prevent scorching!), combine the granulated sugar, unsalted butter, evaporated milk, and the pinch of salt. Stir it all together over medium heat until the butter is completely melted and the sugar has dissolved. Don’t rush this part; make sure everything is nicely combined and smooth.
Step 3: Boil to the Right Temperature
Once the mixture is smooth, stop stirring and bring it to a rolling boil. This is where a candy thermometer comes in super handy! Let it boil gently, without stirring, until it reaches 238°F (114°C) on your thermometer. This is the “firm ball” stage and is critical for the fudge’s texture. It usually takes about 7-10 minutes, but ovens and stovetops vary, so trust your thermometer. If you don’t have a thermometer, you can test it by dropping a tiny bit into a glass of ice water. It should form a soft, pliable ball that flattens when you remove it from the water.
Step 4: Add Chocolate and Vanilla
Remove the saucepan from the heat immediately once it reaches 238°F. Now, add the semi-sweet chocolate chips and the vanilla extract. Let the mixture sit undisturbed for about 5 minutes. This allows the heat to gently melt the chocolate chips. Resist the urge to stir right away!
Step 5: Beat Until Smooth and Creamy
After those 5 minutes, start stirring the mixture gently with a wooden spoon or a heatproof spatula. Continue stirring and beating the fudge. As you beat it, you’ll notice the mixture starts to lose its glossy sheen and becomes thicker, with a duller finish. Keep beating vigorously until it starts to set up and you can see streaks of chocolate. This is where the magic happens, transforming it from a liquid to that perfect fudge consistency. If you’re adding nuts, stir them in during the last minute or so of beating.
Step 6: Pour and Smooth
Quickly pour the fudge into your prepared baking pan. It will be thick, so spread it evenly using your spatula. Don’t worry about making it perfectly smooth on top; a slightly rustic look is part of its charm! If you want to get fancy, you can even swirl in some caramel sauce at this point for a caramel fudge variation.
Step 7: Let It Set
This is the hardest part – waiting! Let the fudge cool completely at room temperature for at least 2-3 hours. Don’t try to speed this up by putting it in the fridge, as it can sometimes make it too hard or affect the texture. Patience is key for perfect fudge!
Step 8: Cut and Enjoy!
Once the fudge is completely set and firm, use the parchment paper overhang to lift it out of the pan. Place it on a cutting board and use a sharp knife to cut it into squares. You can make them as big or as small as you like! The smell alone will be heavenly.
Step 9: Serve and Share
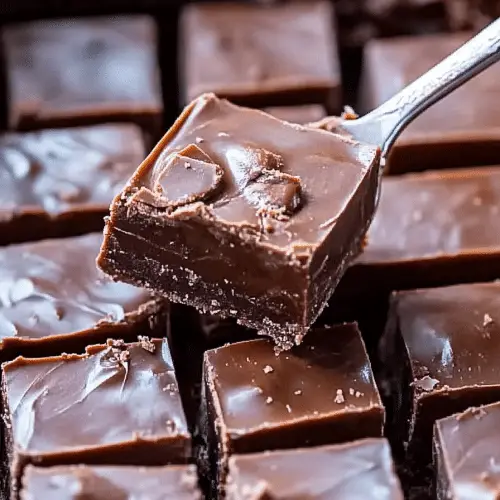
Your delicious Moms Fudge is ready to be devoured! Arrange it on a pretty platter and watch it disappear. This recipe is guaranteed to be a crowd-pleaser.
“Packed with flavor and so simple. Exactly what I wanted from this Moms Fudge!”
What to Serve It With
While Mom’s fudge is a star all on its own, it’s also wonderful paired with other treats and beverages, depending on the occasion. For breakfast, I love cutting it into smaller, bite-sized pieces and serving it alongside a steaming mug of strong coffee or a glass of cold milk. It’s like a little sweet punctuation mark to start the day. For brunch, it’s a fantastic addition to a dessert board or a small, elegant offering after a savory meal. Imagine it nestled amongst fresh berries and a dollop of whipped cream – divine! As a decadent dessert, it’s wonderful served with a scoop of vanilla bean ice cream or a rich espresso. My family also loves having it as a cozy snack with a glass of milk during a movie night. It’s the ultimate comfort food. My kids especially love it when I pair it with my homemade Sugar Cookies; it’s their absolute favorite dessert combination. Another tested pairing that’s always a hit is a slightly tart raspberry coulis on the side – the fruitiness cuts through the richness beautifully.
Top Tips for Perfecting Your Mom’s Fudge
I’ve made this Moms Fudge more times than I can count, and over the years, I’ve picked up a few little tricks that make it even better. First, for the sugar, always make sure it’s fully dissolved before you start boiling. If you feel any grittiness when you rub a little between your fingers (carefully, it’s hot!), keep heating and stirring gently until it’s smooth. For the evaporated milk, I can’t stress enough how important it is to use this specific type of milk. Regular milk just has too much water content and can lead to grainy fudge. When it comes to beating the fudge (Step 5), this is where the texture is really born. You want to beat it until it’s noticeably thicker and has lost its shine. If you under-beat it, it might stay a bit too soft and gooey. If you over-beat it, it can become crumbly. It’s a feel thing, and you’ll get a sense of it the more you make it. For nut additions, I often toast my walnuts or pecans lightly in a dry skillet for about 5 minutes until they’re fragrant. It really elevates their flavor and adds a lovely crunch. Just make sure they’re cooled before adding them to the fudge. If you’re experimenting with flavor variations, a teaspoon of instant espresso powder added with the chocolate chips can deepen the chocolate flavor significantly without making it taste like coffee. A pinch of cayenne pepper or chili powder can give it a wonderful warmth and subtle kick. For glaze variations, if you’re not a fan of plain fudge, you can drizzle a little melted White Chocolate or a simple powdered sugar glaze over the top after it’s partially set for a different look and taste. And remember, the key to smooth, creamy fudge is not stirring after it reaches temperature and beating it correctly at the end. Trust me on this one; it makes all the difference!
Storing and Reheating Tips
Properly storing your Moms Fudge is essential for keeping it tasting as amazing as the day you made it. At room temperature, it will keep beautifully for about 3-4 days if stored in an airtight container. Just make sure it’s completely cooled before covering. I usually place a piece of parchment paper over the top of the fudge before putting the lid on, just to prevent any condensation from making it sticky. For longer storage, the refrigerator is your best friend. Tightly wrap the fudge in plastic wrap, then place it in an airtight container. It can stay fresh and delicious in the fridge for up to 2 weeks, though I rarely find it lasts that long! When you want to enjoy it from the fridge, I find it’s best to let it sit at room temperature for about 15-20 minutes to soften up a bit, as it can be quite firm when cold. If you want to store it even longer, the freezer is a great option. Wrap individual pieces or small blocks tightly in plastic wrap, then place them in a freezer-safe bag or container. It can stay frozen for up to 2-3 months. To thaw, simply transfer the frozen fudge to the refrigerator overnight, and then let it come to room temperature before serving. The key is good wrapping to prevent freezer burn. I’ve found that for both refrigerator and freezer storage, adding the glaze *after* it’s cooled and set, but before storing, is best for maintaining its texture.
Frequently Asked Questions
Final Thoughts
There you have it, my friends – the secret to Mom’s incredibly delicious fudge! This recipe is more than just a list of ingredients and steps; it’s a little piece of my heart, shared with you. It’s a reminder that the most amazing treats often come from the simplest methods and the most familiar ingredients. I truly believe this Moms Fudge is a recipe that will become a cherished favorite in your own home, just like it has in mine. The rich chocolate flavor, the melt-in-your-mouth texture, and the sheer joy it brings make it absolutely worth trying. If you love this recipe, you might also enjoy my [link to another chocolate recipe, e.g., Easy Chocolate Chip Cookies] or my [link to another comforting recipe, e.g., No-Bake Peanut Butter Bars]. Give this fudge a try, and I promise you won’t be disappointed. I can’t wait to hear how yours turns out in the comments below! Don’t forget to rate it and share your own family twists. Happy baking!
Moms Fudge
Ingredients
Main Ingredients
- 3 cups granulated sugar
- 0.5 cup unsalted butter cut into pieces
- 0.5 cup milk
- 2 teaspoon vanilla extract
- 0.5 cup unsweetened cocoa powder
- 0.5 cup chopped nuts optional
Instructions
Preparation Steps
- Grease an 8x8 inch baking pan.
- In a large saucepan, combine sugar, butter, and milk. Cook over medium heat, stirring constantly, until butter is melted and sugar is dissolved. Bring to a boil.
- Boil without stirring for 5 minutes.
- Remove from heat. Stir in cocoa powder and vanilla extract. Beat until thick.
- Stir in chopped nuts, if using.
- Pour into prepared pan and spread evenly. Let cool completely before cutting into squares.


