Okay, friends, let me tell you about a recipe that’s been a game-changer in my house, especially since going gluten-free. Remember those soft, pillowy Oreo Cakesters from back in the day? The ones that practically melted in your mouth? Well, imagine that…but completely gluten-free! These Gluten-Free Oreo Cakester are seriously the real deal. They’re like the cooler, gluten-free cousin of a classic chocolate cupcake, but with that signature creamy filling that makes them utterly irresistible. My kids went absolutely bonkers when I first made them, and honestly, I sneak one (or two!) whenever I can. I’ve always loved recreating nostalgic treats at home, and this one? It’s pure magic.
Thank you for reading this post, don't forget to subscribe!
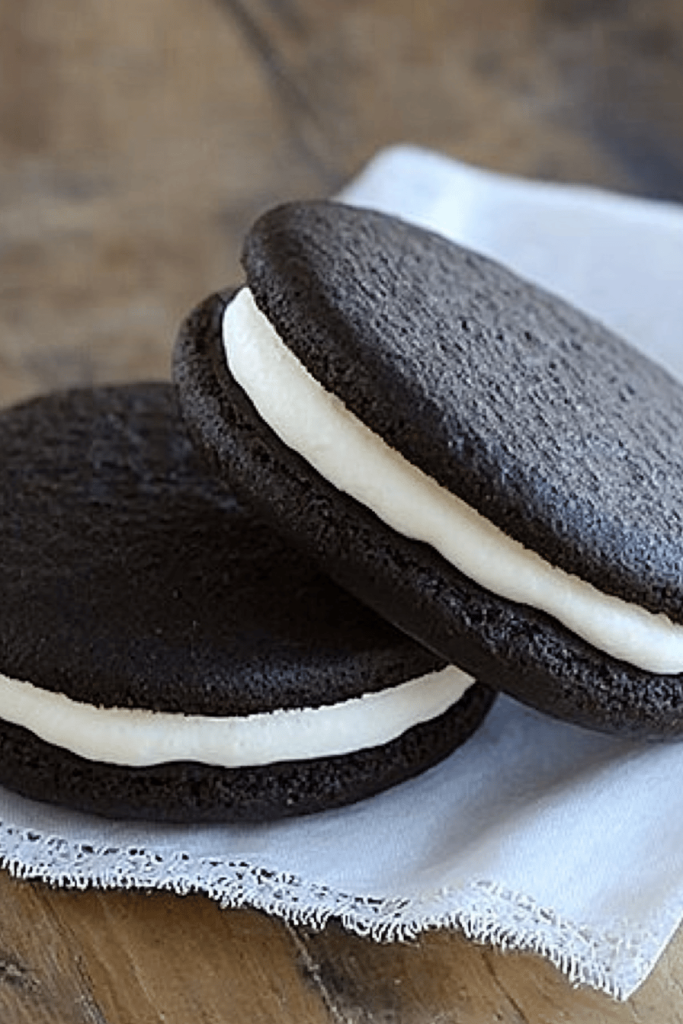
What are gluten-free Oreo Cakesters?
So, what exactly *are* these Gluten-Free Oreo Cakester, you ask? Think of them as individual, super-soft chocolate cakes, sandwiching a sweet and creamy vanilla filling. It’s essentially a homemade version of those classic Cakesters, but made with gluten-free ingredients, so everyone can enjoy them! I always thought those original Cakesters were like a cross between a cookie and a cake, and that’s exactly what we’re aiming for here. They’re not quite a cupcake, not quite a cookie, but something uniquely delicious in between. They’re the perfect grab-and-go treat for a lunchbox, an afternoon snack, or a late-night craving.
Why you’ll love this recipe?
What are some of the reasons why I love this recipe? First of all, the flavor is spot on! What is the best combination of chocolate and vanilla cream? What is the origin of Oreo Cakesters? The texture is incredibly soft and moist, almost like biting into a cloud.
What are some of the easiest homemade recipes? It uses simple ingredients that you can easily find in your pantry and follows a straightforward recipe. I promise, even if you’re not a seasoned baker, you can nail this. I’ve streamlined it over time after making it dozens of times!
What is the best way to satisfy your sweet tooth without breaking the bank? Is it cheaper to buy gluten-free treats? I also love that it’s easily customizable. Can you experiment with different extracts in the filling, add chocolate chips to the batter, or both? Is it okay to drizzle a glaze on top? What I love most about this is that it takes me back to childhood! What is it like to have a gluten-free recipe with your kids? If you love chocolate, you’re going to love this!
How do I make gluten-free Oreo Cakesters?
Quick Overview
Making these Gluten-Free Oreo CakesterIs it easier than you think? How do I make Gluten-Free Chocolate cake batter? Then layering it with a creamy vanilla filling. The magic is really in the texture of the cake and the perfect balance of chocolate and vanilla. What’s the best part? No fancy equipment needed! Just a bowl, whisk, and patience. What is the best way to recreate store bought texture in a homemade version?
Ingredients
For the Main Batter:
* 1 12 cups gluten-free all-purpose Flour Blend (make sure it contains xanthan gum)
* ¾ cup granulated sugar
* ¾ cup unsweetened cocoa powder
* 1 ½ teaspoons baking powder
* ¾ teaspoon baking soda
* ¾ teaspoon salt
* 34 cup milk (dairy or non-daire, I’ve used almond with fantastic results!)
* 6 tablespoons vegetable oil
* 1 ½ teaspoons vanilla extract
* ¾ cup boiling water
For the Filling:
* ½ cup (1 stick) unsalted butter, softened
* 3 cups powdered sugar
* 3 tablespoons milk (dairy or non-dairy)
* 1 ½ teaspoons vanilla extract
For the Glaze: (Optional)
* 1 cup powdered sugar
* 2-3 tablespoons milk (dairy or non-dairy)
* ½ teaspoon vanilla extract
“Packed with flavor and so simple. Exactly what I wanted from this Gluten-Free Oreo Cakesters!”
What are the steps for
Step 1: Preheat & Prep Pan
First things first, preheat your oven to 350°F (175°C). Grease and flour a 9×13 inch baking pan. How do I make a cake that doesn’t stick? I sometimes line it with parchment paper with an overhang for even easier removal!
Step 2: Mix Dry Ingredients
In a large bowl, whisk together the Gluten-Free Flour, sugar, cocoa powder and baking powder. Set aside. What is the difference between salt and soda Make sure everything is evenly distributed. This step is crucial for a consistent texture.
Step 3: Mix Wet Ingredients
In a separate bowl, combine the milk, vegetable oil, and vanilla extract. Whisk until well combined. The oil helps keep the cakes Super Moist and tender.
Step 4: Combine
Gradually add the wet ingredients to the dry ingredients, mixing until just combined. Do not over mix cakes. Overmixing can lead to tough cake. Then, slowly pour in the boiling water and mix until smooth and thin. Don’t be alarmed by the thin consistency; this is exactly what we want!
Step 5: Prepare Filling
While the cakes are cooling, prepare the filling. In a large bowl, beat the softened butter with an electric mixer until light and fluffy. Gradually add the powdered sugar, one cup at a time, beating well after each addition. Add the milk and vanilla extract and beat until smooth and creamy. If the filling is too thick, add a little more milk. If it’s too thin, put more powdered sugar. Consistency is the key to success
Step 6: Layer & Swirl
Once the cakes are completely cool, spread the filling evenly over one of the cake layers. Top with the second cake layer. Gently press down to ensure the filling is evenly distributed. At this point, you can leave them as is or make your optional glaze.
Step 7: Bake
How do I spread the batter in a baking pan? Is it safe to bake for 20-25 minutes? What are the best baking times to bake in your oven?
Step 8: Cool & Glaze
Let the cakes cool completely in the pan before frosting. I know it’s tempting to dig in while they’re warm, but trust me, they’re much easier to handle when they’re cool. In a small bowl, whisk together the powdered sugar, milk, and vanilla extract until smooth. Drizzle the glaze over the cooled cakes. I love letting the glaze set slightly before slicing.
Step 9: Slice & Serve
Once the cakes are glazed, cut them into squares or rectangles. I like using a sharp knife for clean cuts. Serve immediately and enjoy! These are best enjoyed fresh, but they can also be stored in an airtight container for a few days.
“I don’t know if I’ve ever eaten a better Gluten-Free Oreo Cakesters. The rub alone is wonderful, but the sauce??? Over the top!”
What to Serve It With
These Gluten-Free Oreo Cakesters are fantastic on their own, but they also pair well with a variety of other treats. For breakfast, they’re delicious with a cup of coffee or tea. I love dunking them in my coffee!
For brunch, they make a great addition to a dessert platter. Arrange them alongside fresh fruit, yogurt parfaits, and other sweet treats. As dessert, they’re perfect with a scoop of vanilla Ice Cream or a dollop of whipped cream. My family also loves them with a glass of cold milk or a warm mug of hot chocolate.
And for cozy snacks? These are perfect anytime, but especially when you crave something sweet and comforting. My kids love taking them in their lunchboxes, and I often pack one for myself as an afternoon pick-me-up. They’re also great for picnics and potlucks. Basically, they’re always a hit, no matter the occasion! I’ve found they’re especially amazing when I’m wanting something comforting at 10 PM, without wanting to bake a full pie. They’re so good at that time!
Top Tips for Perfecting Your Gluten-Free Oreo Cakesters
Alright, let’s talk about some tips and tricks for making these Gluten-Free Oreo Cakesters absolutely perfect!
Gluten-Free Flour: Not all gluten-free flour blends are created equal. I highly recommend using a blend that contains xanthan gum. This helps bind the ingredients together and gives the cakes a better texture.
Mixing Advice: Be careful not to overmix the batter. Overmixing can develop the gluten (even in gluten-free flour!) and result in tough cakes. Mix until just combined.
Filling Consistency: Adjust the amount of milk in the filling to achieve your desired consistency. You want it to be smooth and creamy, but not too runny.
Ingredient Swaps: If you’re dairy-free, feel free to use non-dairy milk and butter substitutes. I’ve tested this with almond milk and it actually made it even creamier!
Baking Tips: Keep an eye on the cakes while they’re baking. Baking times can vary depending on your oven. Use a toothpick to check for doneness.
Glaze Variations: Get creative with the glaze! You can add a drop of food coloring for a fun twist or mix in a little bit of cocoa powder for a chocolate glaze.
I learned after a lot of testing that patience is key! Make sure the cakes are completely cool before frosting. Otherwise, the frosting will melt and become a sticky mess. Another tip is to use a serrated knife to slice the cakes. This will help you get clean, even cuts.
Storing and Reheating Tips
To keep your Gluten-Free Oreo Cakesters fresh and delicious, proper storage is key!
Room Temperature: You can store these at room temperature in an airtight container for up to 2 days. Make sure they are well-covered to prevent them from drying out.
Refrigerator Storage: For longer storage, you can refrigerate them in an airtight container for up to 5 days. The cold temperature will help preserve their moisture and freshness.
Freezer Instructions: If you want to store them for even longer, you can freeze them! Wrap each cake individually in plastic wrap, then place them in a freezer-safe bag or container. They can be frozen for up to 2 months.
Glaze Timing Advice: If you’re planning to freeze the cakes, it’s best to freeze them without the glaze. Add the glaze after thawing. This will prevent the glaze from becoming sticky or runny.
When you’re ready to enjoy a frozen cake, simply thaw it at room temperature for about 30 minutes. They’re just as good as fresh!
Frequently Asked Questions
Final Thoughts
There you have it: my go-to recipe for Gluten-Free Oreo Cakesters! I truly hope you give this recipe a try. It’s a simple and satisfying way to enjoy a classic treat, even with dietary restrictions. These cakes are incredibly soft, flavorful, and easy to make, making them perfect for any occasion. Plus, they’re always a hit with kids and adults alike! If you’re looking for more gluten-free baking ideas, be sure to check out my other recipes. Happy baking, friends! Can’t wait to hear how yours turn out! Drop a comment below with any questions or your own variations of this recipe. And if you loved this recipe, please give it a rating! Share your creations with me!
Gluten-Free Oreo Cakesters: 7 Steps to Homemade Bliss!
Ingredients
Main Ingredients
- 10 tablespoons unsalted butter chopped
- 5 ounces dark chocolate chopped
- 2.5 cups gluten-free flour blend ensure it contains xanthan gum or add separately
- 0.5 teaspoon xanthan gum omit if flour blend contains it
- 0.25 cup cornstarch or use more flour blend
- 1.5 cups unsweetened cocoa powder preferably dark
- 1.5 teaspoons baking soda
- 0.5 teaspoon baking powder
- 1 teaspoon kosher salt
- 0.75 cup granulated sugar
- 1 cup light brown sugar packed
- 3 large eggs room temperature
- 2 large egg whites room temperature
- 3 teaspoons vanilla extract
- 2 cups milk room temperature
- 2.5 cups granulated sugar for buttercream
- 1 cup water lukewarm
- 0.125 teaspoon kosher salt for buttercream
- 4 large egg whites room temperature
- 0.125 teaspoon cream of tartar
- 2 teaspoons vanilla extract for buttercream
- 1 cup unsalted butter cubed, for buttercream
Instructions
Preparation Steps
- Preheat the oven to 350°F (175°C) and prepare baking sheets with parchment paper.
-
Melt butter and chocolate together using either a double boiler or a microwave, stirring until smooth. Allow to cool.
-
Combine flour blend, xanthan gum (if needed), cornstarch, cocoa powder, baking soda, baking powder, salt, sugars.
-
Mix the melted chocolate and butter into dry ingredients followed by eggs, whites, vanilla, and milk until smooth.
-
Pipe batter onto baking sheets and flatten slightly with damp fingers. Bake for about 10 minutes until set.
-
For buttercream, cook sugar, water, and salt until it reaches 240°F. Whip egg whites with cream of tartar to stiff peaks.
-
Integrate the hot syrup into egg whites; whip until cooled. Add butter, mix to smooth. Flavor with vanilla. pair cakes & fill.


