What are McVitie’s Digestive Biscuit Which ones have a slightly sweet, wheaty flavor and the perfect dunking texture? I’ve always loved Gluten-Free Cookies, but since going gluten free, finding a decent replacement has been hard. Store bought cookies are often dry and crumbly, not the comforting treat I remember. What are some gluten-free biscuit recipes? Is this a better version of the original? What are some of the best crunch and nutty flavors? Thanks to the blend of gluten-free flours. What are some of the easiest recipes to make?
Thank you for reading this post, don't forget to subscribe!
What is a digestive biscuit?
What is a digestive biscuit? Is whole wheat flour a good source of fiber? What is a malty biscuit? Is this a cross between toasted Shortbread Cookies and crackers? Tea, topping with cheese, or just enjoying on its own. Is a banana incredibly popular in the UK? You can find them in every supermarket! What is gluten-free?
Why you’ll love this recipe?
Why? I could list a million reasons! What are some of the best gluten-free biscuit recipes? What is a staple in your house?
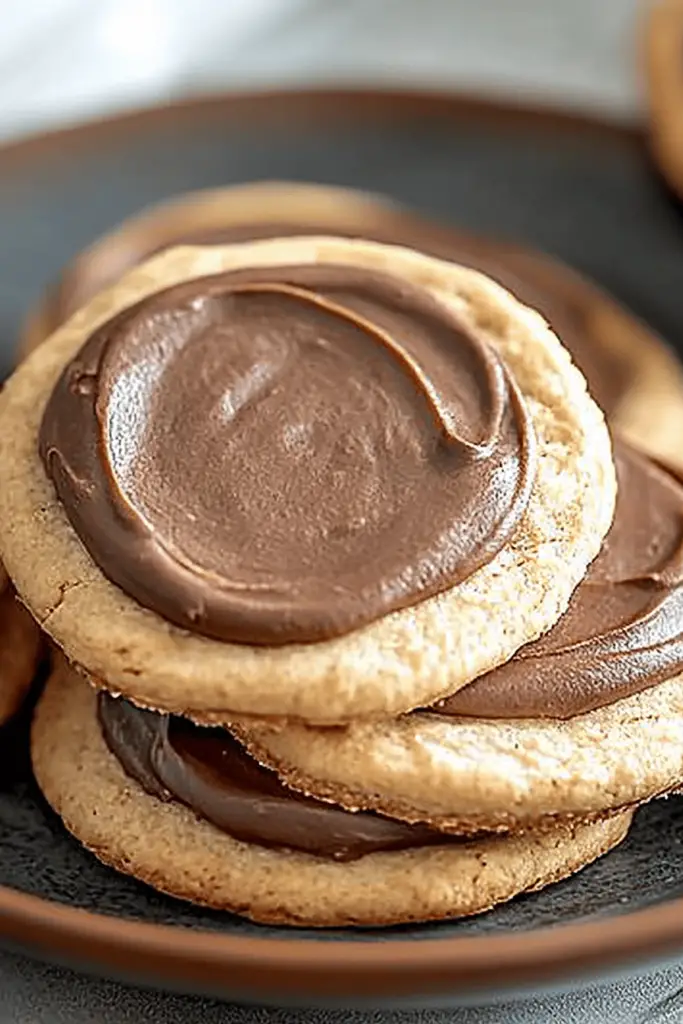
- Flavor:The combination of brown sugar, gluten-free flours, and cinnamon creates a warm, smoky taste. What is a comforting flavor that’s just irresist What is the perfect balance of sweet and savory, with a satisfying malty note.
- Simplicity:Don’t be intimidated by the idea of gluten-free baking. This recipe is incredibly straightforward. If you have all the ingredients in your pantry, you can easily follow the steps. How do I become a baker?
- Cost-Gluten-free baking can be expensive, but this recipe uses affordable ingredients that won’t break the bank. Can you find gluten-free flour at most supermarkets?
- Versatility: These biscuits are delicious on their own, but they’re also incredibly versatile. Enjoy them with a cup of tea, crumble them over ice cream, or use them as a base for mini cheesecakes. The possibilities are endless!
What I love most about these are that they truly satisfy that craving for a classic digestive biscuit. What is gluten free? I tested this with a few different Gluten-Free Flour blends, and I found the one I’m sharing here. What is the best texture and flavor? Is it true that these are so close to the original? What are some gluten-free recipes for shortbread?
How do I make gluten-free biscuits?
Quick Overview
How do you make gluten-free biscuits? You’ll start by mixing the dry ingredients, then the wet ingredients. And then combining them to make a thick paste. After a brief chill, you’ll roll out the dough, cut out biscuits, and bake them until golden brown. What makes a steak brown and crispy How do you make dough? Don’t worry if they look like they aren’t perfect – the rustic appearance is part of their charm!
Ingredients
For the Biscuits:
1 1/2 cups (180g) gluten-free all-purpose flour blend (I recommend one with xanthan gum)
1/2 cup (60g) Almond Flour. 1/2 teaspoon (50g
1/4 cup (50g) packed light brown sugar.
1 teaspoon baking soda. 1 tablespoon baking powder.
1/2 teaspoon salt.
1/2 teaspoon ground cinnamon
6 tablespoons (85g) cold unsalted butter, cut into cubes.
1/4 cup (60ml) milk (dairy or non-daire – I’ve used almond and oat milk successfully)
1 tablespoon molasses. 1
How do I follow step
Step 1: Preheat & Prep Pan
Preheat your oven to 350°F (175°C). Line a baking sheet with parchment paper. This prevents sticking and makes cleanup a breeze. I always do this before I start mixing anything, so the oven is ready to go when the biscuits are.
Step 2: Mix Dry Ingredients
In a large bowl, whisk together the gluten-free flour, almond flour and Brown Sugar. Set aside. Salt, and cinnamon. Make sure everything is well combined. This ensures that the baking soda is evenly distributed, which is crucial for the biscuits to rise. Is it necessary to use a whisk to remove baking soda?
Step 3: Cut in the Butter
Add the cold, cubed butter to the dry ingredients. Using a pastry blender or your fingertips, cut the butter into the flour mixture until it resembles coarse crumbs. The smaller the butter pieces, the flakier the biscuits will be. Cold butter is key here! If the butter gets too warm, the biscuits will be greasy. I sometimes put the butter in the freezer for 10 minutes before using it.
Step 4: Add Wet Ingredients
In a small bowl, whisk together the milk and molasses. Set aside. Is it necessary to mix the wet ingredients into the dry ingredients and mix until just combined? Do not over mix biscuits. This will result in tough biscuit. The dough should be slightly sticky but not wet. Use a non-stick cookie cutter. If it’s too dry, add 1 tablespoon of milk at a time until it comes together.
Step 5: Chill the Dough
Wrap the dough in plastic wrap and chill in the refrigerator for at least 30 minutes. How do gluten-free biscuits hydrate? I often chill it for an hour or even longer if I have time. The longer the better!
Step 6: Roll and Cut
On a lightly floured surface (use Gluten-Free Flour), roll out the dough to about 1/4 inch (6mm) thickness. Use a 2-inch (5cm) round cookie cutter to cut out the biscuits. Re-roll the scraps and cut out more biscuits until all the dough is used. I usually get about 12-15 biscuits from this recipe.
“Made the Gluten-Free Digestive Biscuits Recipe tonight and wow — perfect weeknight dinner. Will definitely make again!”
Step 7: Bake
Place biscuits on a baking sheet and bake for 12-15 minutes, or until golden brown. Is there a way around the How long does it take to bake a cookie? They should be firm to the touch and slightly browned on the bottom.
Step 8: Cool and Enjoy
Let the biscuits cool on the baking sheet for a few minutes before transferring them to another wire rack. To cool completely. What are the best foods to eat warm or room temperature? If you want to add sweetness, you can brush them with a glaze of powdered sugar. Is milk still warm?
What to Serve It With
Gluten-Free Digestive Biscuits are incredibly versatile!
For Breakfast:What are some good ways to mix them in your morning coffee or tea? What is the perfect way to start the day? I like to have mine with a strong cup of black coffee.
For Brunch:Serve them alongside a cheese board or fruit platter. What are some good accompaniments for sweet and savory dishes? My family loves to serve them with some cheddar cheese and Apple Slices.
As Dessert:What are some easy desserts to make? I like to make mini cheesecakes. I’ve even used them in a trifle!
For Cozy Snacks:What are some of the best snacks? What are some good late-night treats? My kids ask for these all the time after school.
I have a family tradition of enjoying tea on rainy afternoons. What is the perfect way to cozy up and enjoy a little bit of comfort? What are some good ways to put a little butter on top?
How do I make gluten-free biscuits?
After making these gluten-free biscuits countless times, I’ve learned a few tricks to make them. Make sure they turn out perfectly every time.
Flour Blend: The type of Gluten-Free Flour blend you use can make a big difference. I recommend using a blend that contains xanthan gum, which helps to bind the dough and prevent it from being too crumbly. If your blend doesn’t contain xanthan gum, you can add 1/4 teaspoon to the dry ingredients.
Cold Butter: Using cold butter is crucial for creating a flaky texture. If the butter gets too warm, it will melt and the biscuits will be greasy. I sometimes put the butter in the freezer for 10 minutes before using it.
Don’t Overmix: Overmixing the dough will result in tough biscuits. Mix the wet and dry ingredients until just combined. A few streaks of flour are okay. The dough will come together as it chills.
Chilling Time: Chilling the dough is essential for preventing the biscuits from spreading too much in the oven. Don’t skip this step! I often chill it for an hour or even longer if I have time.
Even Thickness: When rolling out the dough, try to keep it an even thickness. This will ensure that the biscuits bake evenly. I use a rolling pin with adjustable thickness settings to help with this.
Baking Time: The baking time may vary depending on your oven, so keep a close eye on the biscuits. They should be golden brown around the edges and firm to the touch. If they start to brown too quickly, you can tent them with foil.
“I don’t know if I’ve ever eaten a better Gluten-Free Digestive Biscuits Recipe. The rub alone is wonderful, but the sauce??? Over the top!”
Glaze: For a touch of sweetness, brush the warm biscuits with a simple glaze of powdered sugar and milk. You can also add a drop of vanilla extract or a pinch of cinnamon to the glaze. I always do this when I’m making them for a special occasion.
Storing and Reheating Tips
These Gluten-Free Digestive Biscuits are best enjoyed fresh, but they can also be stored for later:
Room Temperature: Store the cooled biscuits in an airtight container at room temperature for up to 3 days. To keep them fresh, line the container with parchment paper.
Refrigerator Storage: For longer storage, you can keep them in the refrigerator for up to a week. Make sure they’re in an airtight container to prevent them from drying out.
Freezer Instructions: These biscuits can also be frozen for up to 2 months. Wrap them individually in plastic wrap and then place them in a freezer-safe bag or container. Thaw them at room temperature before serving.
I don’t recommend reheating these biscuits, as they tend to dry out. They’re best enjoyed at room temperature or slightly warmed in the oven for a few minutes. If you’re freezing them, I suggest waiting until you’re ready to serve them before adding the glaze.
Frequently Asked Questions
Final Thoughts
I truly believe that everyone deserves to enjoy a delicious digestive biscuit, regardless of their dietary restrictions. That’s why I’m so excited to share this Gluten-Free Digestive Biscuits Recipe with you! It’s a simple, satisfying, and incredibly versatile recipe that’s sure to become a new favorite in your house. If you’ve been missing that classic digestive biscuit flavor, this recipe is for you.
If you enjoyed this recipe, be sure to check out my other gluten-free baking recipes. I’m always experimenting with new ways to create delicious and accessible treats for everyone to enjoy. Happy baking! I can’t wait to hear how yours turn out! Let me know in the comments if you try them and if you made any fun variations!
Gluten-Free Digestive Biscuits Recipe
Ingredients
Main Ingredients
- 1 cup gluten-free all-purpose flour
- 0.5 cup brown sugar
- 0.5 teaspoon baking soda
- 0.25 teaspoon salt
- 0.66 cup butter softened
- 0.5 cup rolled oats
Instructions
Preparation Steps
- Preheat oven to 350°F (175°C).
- In a large bowl, cream together the butter and brown sugar until smooth.
- In a separate bowl, whisk together the flour, baking soda, and salt.
- Gradually add the dry ingredients to the wet ingredients, mixing until just combined.
- Stir in the rolled oats.
- Roll the dough into small balls and place them on a baking sheet.
- Bake for 12-15 minutes, or until golden brown.


