Garlic Shrimp Recipe
You know that moment when you’re craving something bold, flavorful, and ready in under 20 minutes? That’s this Garlic Shrimp recipe—my go-to for busy weeknights, impromptu dinner parties, or when I just want to treat myself without spending hours in the kitchen. It’s one of those dishes that feels fancy but comes together so easily, thanks to a golden sear on plump shrimp and a garlicky, buttery sauce that makes everything taste better. I’ve made this countless times for family, friends, and even date nights, and it’s always a hit. The best part? It’s versatile, quick, and uses ingredients you probably already have. So if you love seafood with big flavor and zero fuss, you’re going to adore this.
Thank you for reading this post, don't forget to subscribe!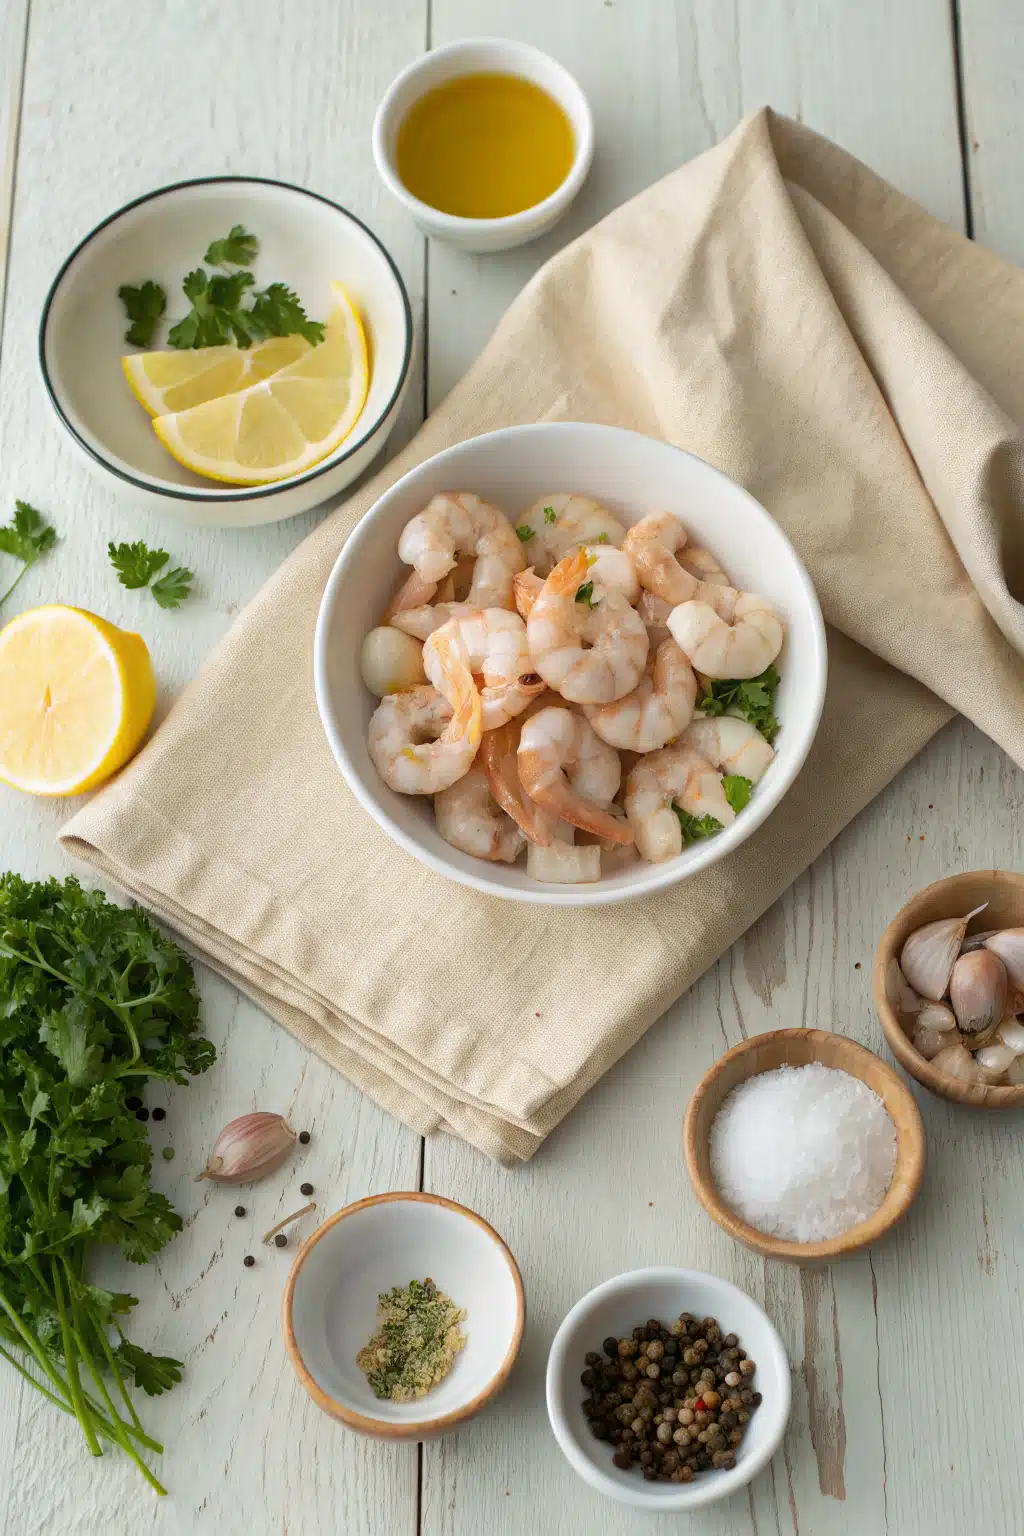
What Is Garlic Shrimp Recipe?
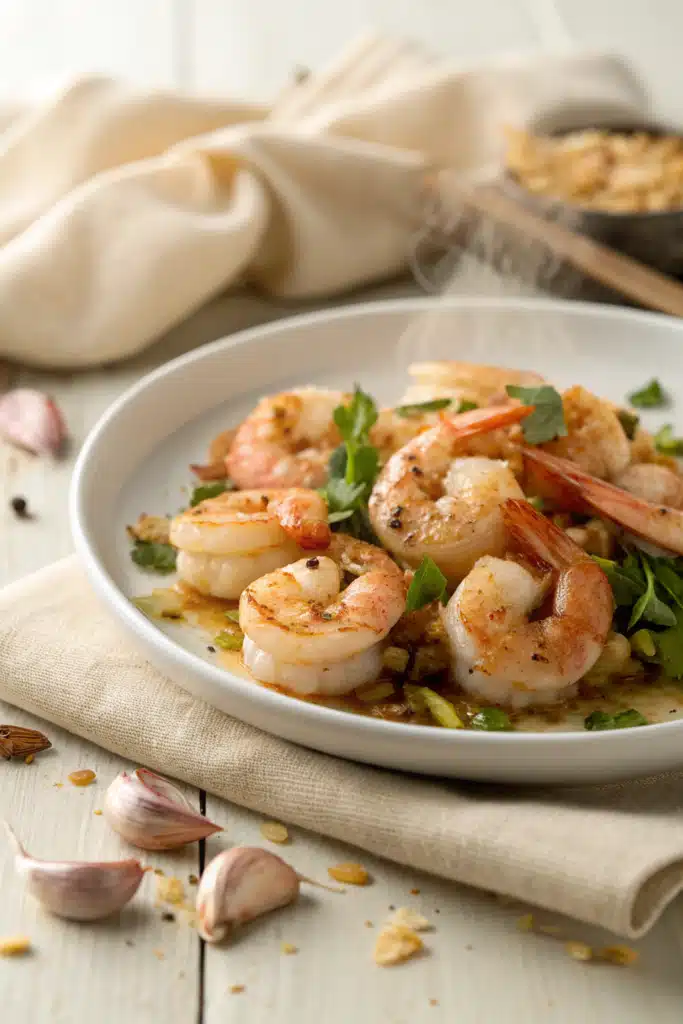
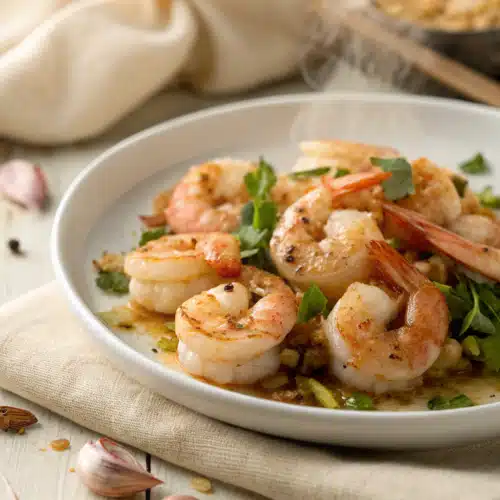
Garlic Shrimp is a simple yet incredibly flavorful dish where fresh shrimp are quickly sautéed in a rich, aromatic blend of butter, olive oil, and plenty of minced garlic. The result is tender, juicy shrimp coated in a savory, slightly caramelized sauce that’s perfect for spooning over rice, tossing with pasta, or dipping crusty bread into. This recipe draws inspiration from classic coastal cooking—think Spanish gambas al ajillo or Southern-style shrimp scampi—but keeps things approachable for home cooks. It’s not overly complicated, but the magic lies in the timing: cook the shrimp just enough to stay succulent, and let the garlic infuse the oil without burning. Done right, it’s a dish that tastes like it came from a seaside bistro, not your stovetop.
Why You’ll Love This Recipe
This garlic shrimp recipe is the kind of dish you’ll want to memorize because it’s fast, foolproof, and seriously delicious. First, it’s ready in under 20 minutes—perfect when you’re short on time but still want something homemade and satisfying. Second, it uses simple pantry staples: shrimp, garlic, butter, olive oil, and a few seasonings. No fancy ingredients or hard-to-find spices required. Third, it’s incredibly versatile. Serve it over creamy Mashed Potatoes, toss it with linguine, or pile it onto a toasted baguette—it pairs beautifully with almost anything. Plus, it’s naturally gluten-free and can easily be made dairy-free by swapping butter for extra olive oil. Whether you’re cooking for one or feeding a crowd, this dish feels special without being fussy. And honestly? That garlicky, buttery sauce is so good, you’ll want to drink it (but please don’t—just grab more bread instead!).
How to Make Garlic Shrimp Recipe
Quick Overview
This recipe comes together in three simple steps: prep your ingredients, cook the shrimp until just pink and opaque, then build a rich garlic-infused sauce right in the same pan. The key is high heat and constant stirring so the garlic doesn’t burn—just a minute or two makes all the difference. Serve immediately while hot and fragrant!
Ingredients
You’ll need: 1 pound large shrimp (peeled and deveined), 4 tablespoons unsalted butter, 3 tablespoons olive oil, 6 cloves garlic (finely minced), ½ teaspoon red pepper flakes (optional, for heat), salt and freshly ground Black Pepper to taste, 2 tablespoons fresh lemon juice, and chopped parsley for garnish.
“New family favorite! This garlic shrimp recipe was so flavorful and ridiculously easy. Crowd-pleaser for sure.”
Step-by-Step Instructions
Step 1: Preheat & Prep Pan
Heat a large skillet over medium-high heat. Add 2 tablespoons of butter and 2 tablespoons of Olive oil—this combo prevents burning and adds richness. While the pan heats, pat your shrimp dry with paper towels (this ensures a good sear) and season lightly with salt and pepper.
Step 2: Cook the Shrimp
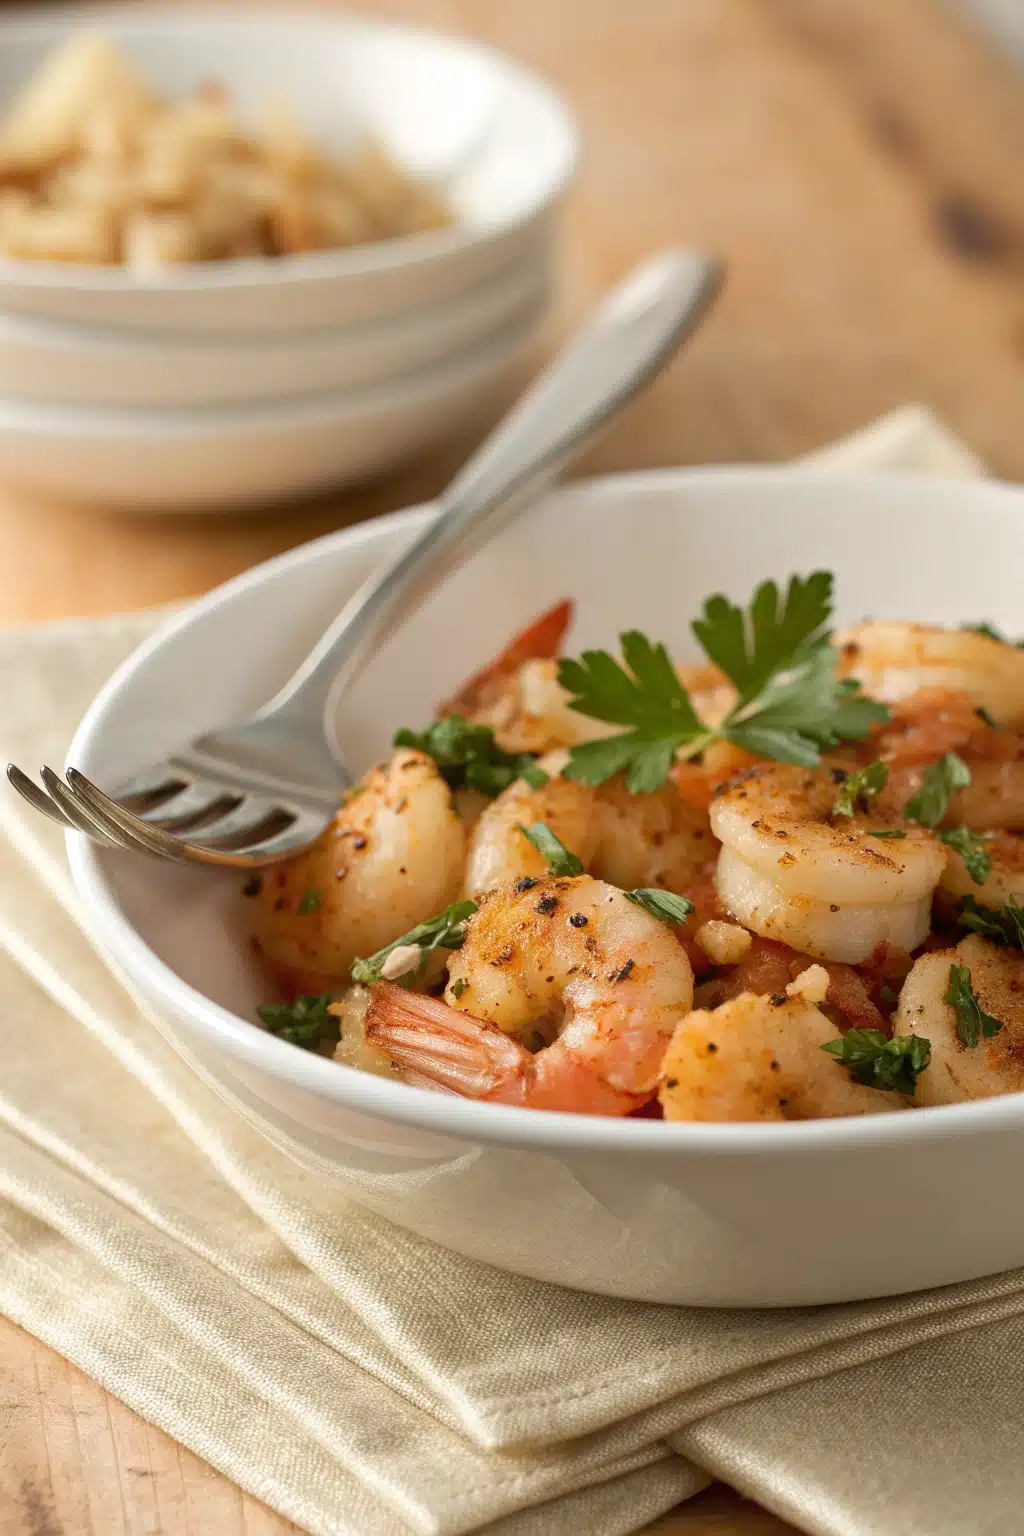
Add the shrimp in a single layer—don’t overcrowd the pan! Cook for 1½ to 2 minutes per side, until they turn pink and curl into a “C” shape. Remove them immediately and set aside; they’ll finish cooking from residual heat.
Step 3: Make the Garlic Sauce
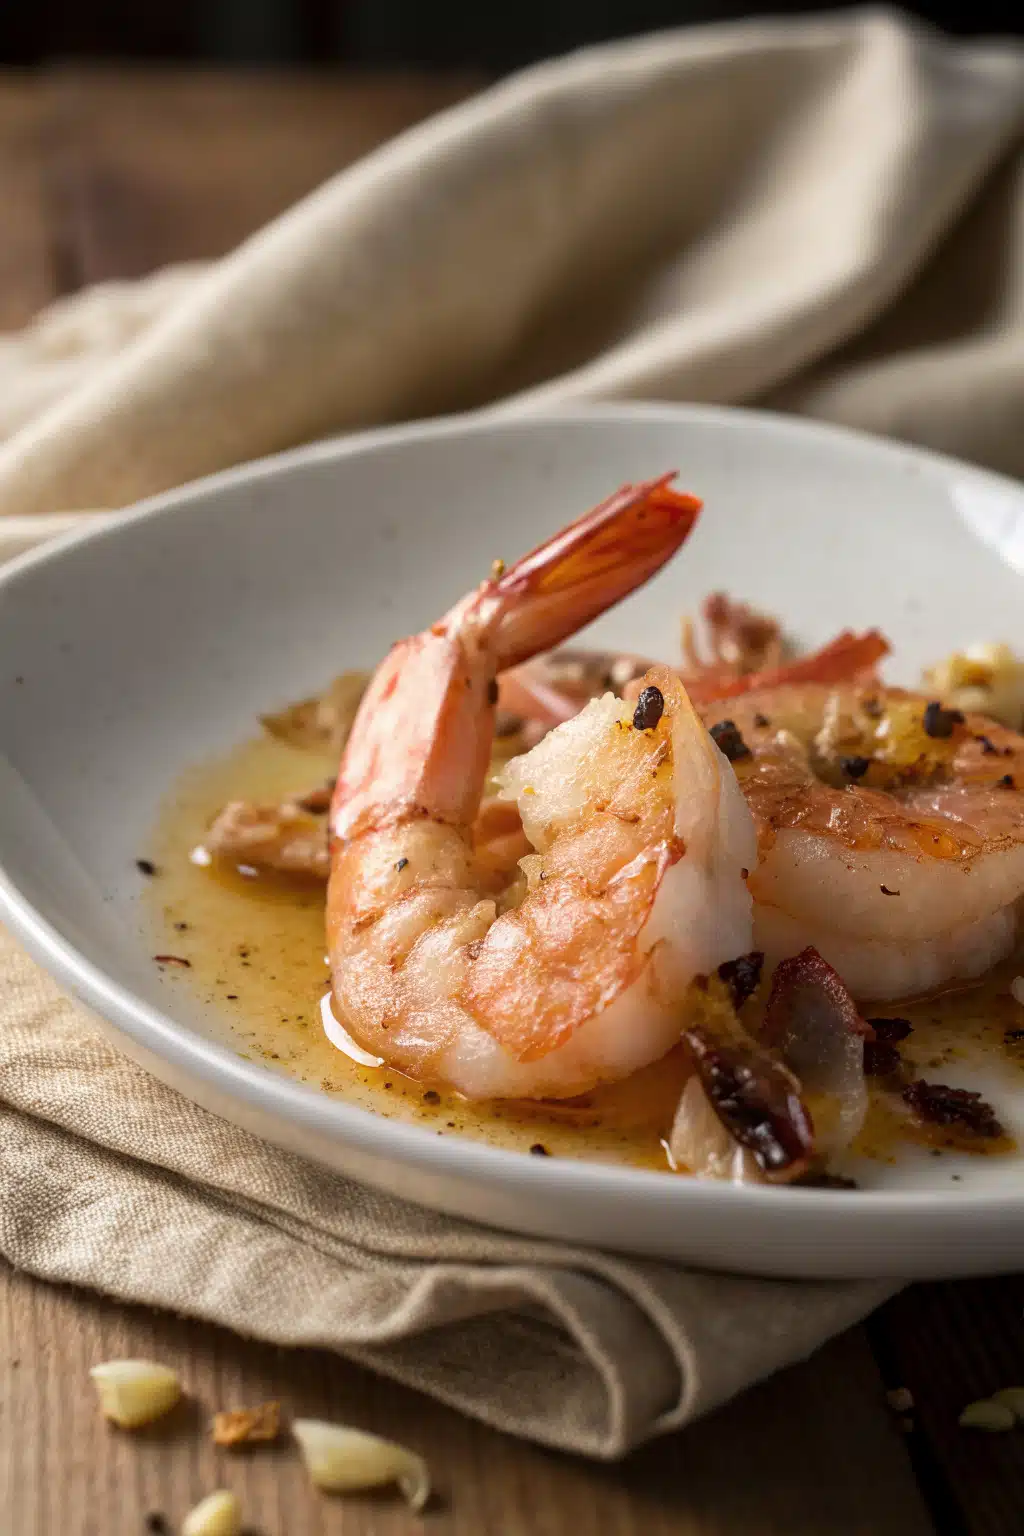
Lower the heat to medium. Add the remaining butter and olive oil, then stir in the minced garlic and red pepper flakes. Sauté for 30–60 seconds—just until fragrant, but not browned. Return the shrimp to the pan, toss with lemon juice, and sprinkle with parsley. Serve right away.
What to Serve It With
This garlic shrimp shines alongside simple sides that soak up its delicious sauce. Try it over steamed jasmine rice, creamy risotto, or angel hair pasta. A crisp green salad with lemon vinaigrette balances the richness, while crusty sourdough or garlic bread is a must for mopping up every last drop. For a lighter option, serve over zucchini noodles or cauliflower rice. And don’t forget a glass of crisp white wine—Sauvignon Blanc or Pinot Grigio pairs beautifully!
Top Tips for Perfecting Your Garlic Shrimp Recipe
First, always use fresh shrimp if possible—they have better texture and flavor than frozen. If using frozen, thaw them completely in cold water and pat very dry. Second, don’t skip drying the shrimp; moisture prevents proper browning. Third, mince your garlic finely and watch it closely—burnt garlic turns bitter fast. Fourth, cook the shrimp just until opaque; overcooking makes them rubbery. Finally, serve immediately—this dish is best enjoyed hot off the pan when the sauce is glossy and the shrimp are tender.
Storing and Reheating Tips
Store leftovers in an airtight container in the fridge for up to 2 days. Reheat gently in a skillet over low heat with a splash of broth or water to revive the sauce—avoid the microwave if possible, as it can make the shrimp tough. This dish isn’t ideal for freezing, as shrimp tend to get mushy when thawed.
Frequently Asked Questions
“Made the garlic shrimp recipe tonight and wow — perfect weeknight dinner. Will definitely make again!”
Final Thoughts
This garlic shrimp recipe has been a staple in my kitchen for years—it’s quick, reliable, and always impresses. Whether I’m cooking for myself after a long day or hosting friends for a casual dinner, it never fails to deliver big flavor with minimal effort. I hope it becomes one of your favorites too. Make it once, and I promise you’ll be coming back to it again and again. Enjoy every garlicky, buttery bite!
Garlic Shrimp Recipe
Ingredients
Main Ingredients
- 1 lb large shrimp, peeled and deveined
- 4 tablespoons unsalted butter
- 3 tablespoons olive oil
- 6 cloves garlic, minced
- 0.25 teaspoon red pepper flakes optional
- 0.25 cup fresh parsley, chopped
- 1 tablespoon fresh lemon juice
- Salt to taste
- Black pepper to taste
- Lemon wedges for serving
Instructions
Preparation Steps
- Pat the shrimp dry with paper towels and season lightly with salt and pepper.
- In a large skillet, heat olive oil and 2 tablespoons of butter over medium-high heat until the butter is melted and slightly foamy.
- Add the shrimp in a single layer and cook for 1–2 minutes per side, until pink and opaque. Remove shrimp and set aside.
- Reduce heat to medium. Add remaining 2 tablespoons of butter to the skillet. Once melted, add minced garlic and red pepper flakes. Sauté for 1–2 minutes until fragrant, being careful not to burn.
- Return the shrimp to the skillet. Add lemon juice and chopped parsley. Toss to combine and heat through for 1 minute.
- Taste and adjust seasoning with salt and pepper if needed. Serve immediately with lemon wedges.


