
Garlic Cheese Rolls That Will Make Your Kitchen Famous
There’s something truly magical about the first bite of a warm, buttery Garlic Cheese roll. The moment that golden crust gives way to a soft, pillowy interior infused with rich garlic and melty cheese, it feels like pure comfort. I still remember the first time my grandmother handed me one—still steaming hot from the oven—and told me, “Honey, this is love baked.” And she wasn’t wrong. These rolls aren’t just food; they’re memories wrapped in dough, nostalgia on a plate.
Thank you for reading this post, don't forget to subscribe!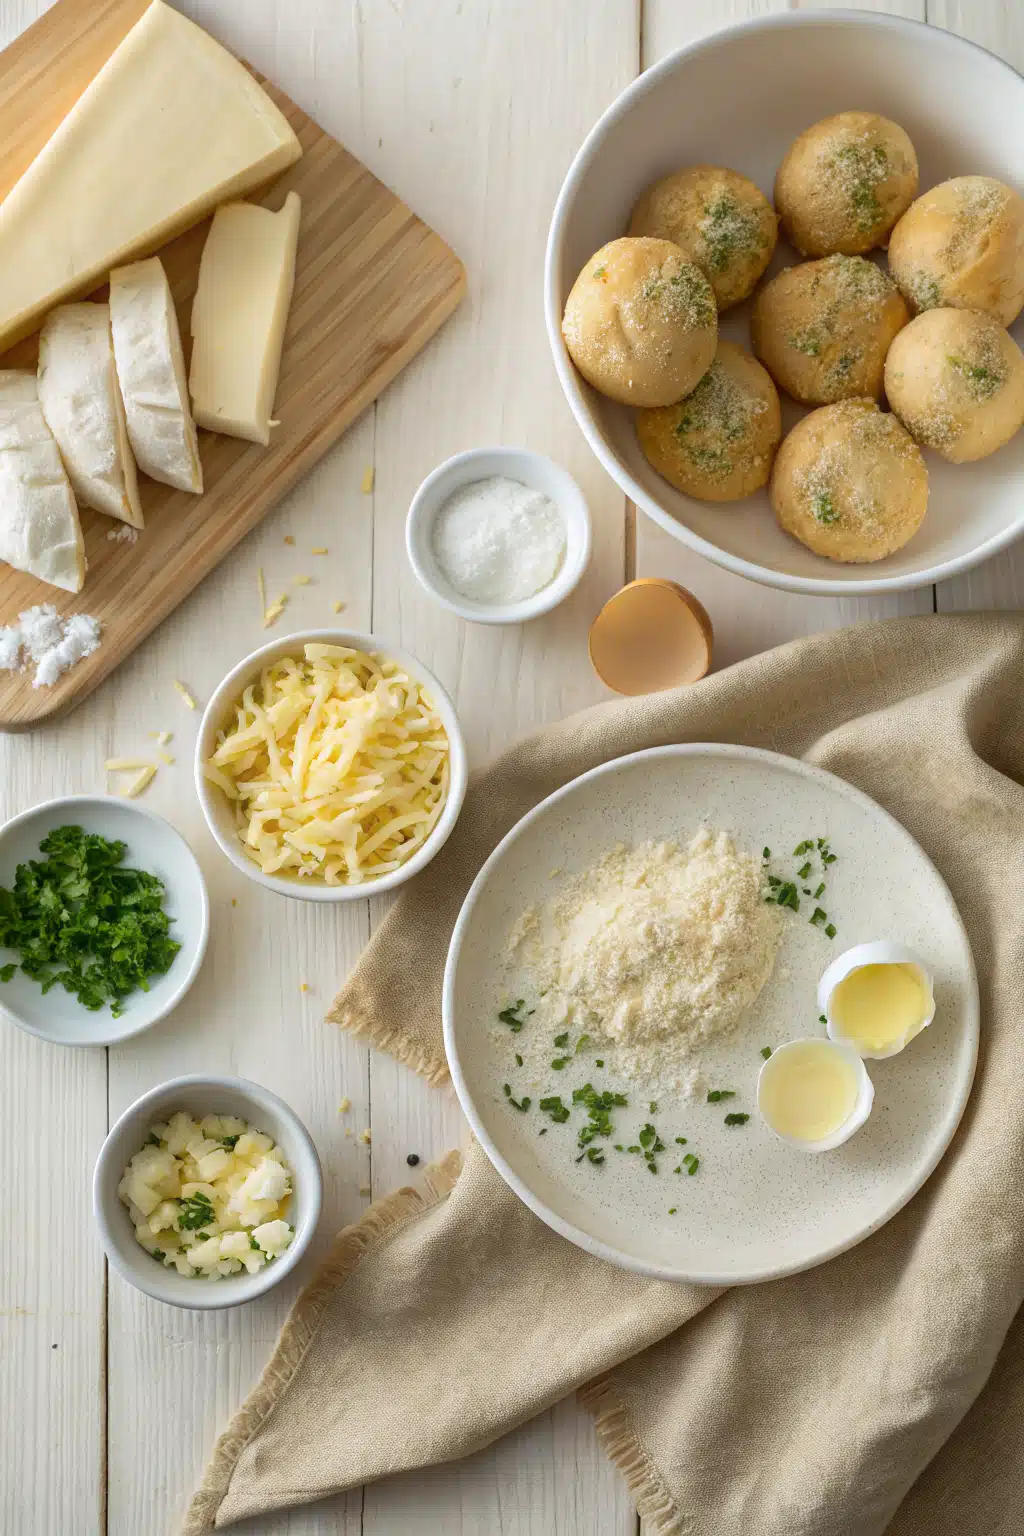
What Is Garlic Cheese Roll?
A garlic cheese roll is a classic bread-based appetizer or side dish known for its irresistible aroma and flavor. At its heart, it’s made from simple ingredients—flour, yeast, butter, garlic, cheese, and herbs—but combined in just the right way, they create something extraordinary. The dough is rolled thin, layered with a savory filling of softened butter mixed generously with garlic, fresh parsley, and shredded cheese (often cheddar or mozzarella), then twisted or coiled before baking until golden and puffed. When sliced open, you get a beautiful spiral pattern with gooey, aromatic pockets throughout.
Why You’ll Love This Recipe
These rolls are more than delicious—they’re conversation starters. Imagine hosting dinner and pulling a tray out of the oven. The scent alone—garlic, herbs, melted cheese—fills your home and makes guests stop what they’re doing to ask, “What are you making?!” They’re perfect for game days, holiday spreads, potlucks, or even as a surprise breakfast treat served alongside eggs and coffee.
What sets this recipe apart is how forgiving it is. Whether you’re a seasoned baker or someone who’s only ever kneaded Play-Doh, these rolls deliver consistent results every time. And let’s be real: there’s nothing quite like biting into something so warm, so buttery, so full of flavor that it instantly lifts your mood. Plus, they travel well, reheat beautifully, and can be made ahead—making them ideal for busy weekends or last-minute gatherings.
I’ve made these with friends during lazy Sunday mornings, and we always end up eating them straight from the pan while laughing about old times. They bring people together, just like my grandmother’s did. So yes, I’m a little biased—but once you taste one, you’ll understand why this recipe has been passed down for generations in so many families.
How to Make Garlic Cheese Rolls
Quick Overview
Making garlic cheese rolls might seem intimidating, but trust me—it’s simpler than you think! We start by letting basic dough rise until light and fluffy. While it rests, we mix up a fragrant garlic-herb butter and fold in plenty of sharp cheddar. Then comes the fun part: rolling, layering, twisting, and slicing the dough into individual rolls. After a second gentle rise, they go into a hot pan (no need for a fancy baking sheet!) where they bake until golden and bubbly. Total hands-on time? About 30 minutes. Rise time? Around 1 hour. Worth every minute, I promise.
“New family favorite! This Garlic Cheese Rolls was so flavorful and ridiculously easy. Crowd-pleaser for sure.”
Ingredients
- 2¼ teaspoons active dry yeast (one packet)
- ¾ cup warm milk (not hot—about 110°F)
- ¼ cup granulated sugar
- 1 large egg
- ½ cup unsalted butter, melted and cooled slightly
- 1 teaspoon salt
- 4 cups all-purpose flour (plus extra for dusting)
- ½ cup cold butter, cubed
- 1 cup shredded sharp cheddar cheese
- 4 cloves garlic, minced (or 1 teaspoon garlic powder if pressed for time)
- 2 tablespoons chopped fresh parsley (dried works too, but fresh is better!)
- Extra butter for brushing tops
Step-by-Step Instructions
Step 1: Preheat & Prep Pan
Preheat your oven to 375°F (190°C). Lightly grease a cast-iron skillet or 9×13-inch baking dish with softened butter or non-stick spray. If using a skillet, this creates those gorgeous, crispy edges that everyone loves.
Step 2: Activate Yeast & Mix Dough
In a large bowl, combine warm milk, sugar, and yeast. Let sit for 5–10 minutes until foamy. Add egg, melted butter, and salt. Gradually stir in flour, mixing until a shaggy dough forms. Turn onto floured surface and knead 8–10 minutes until smooth and elastic. Place in greased bowl, cover with towel, and let rise in warm spot for 45–60 minutes, or until doubled.
Step 3: Prepare Filling
While dough rises, mix softened butter, minced garlic, parsley, and shredded cheese in a small bowl. Stir until fully combined. This mixture should be spreadable but not runny—if too soft, chill for 10 minutes.
Step 4: Roll Out & Fill
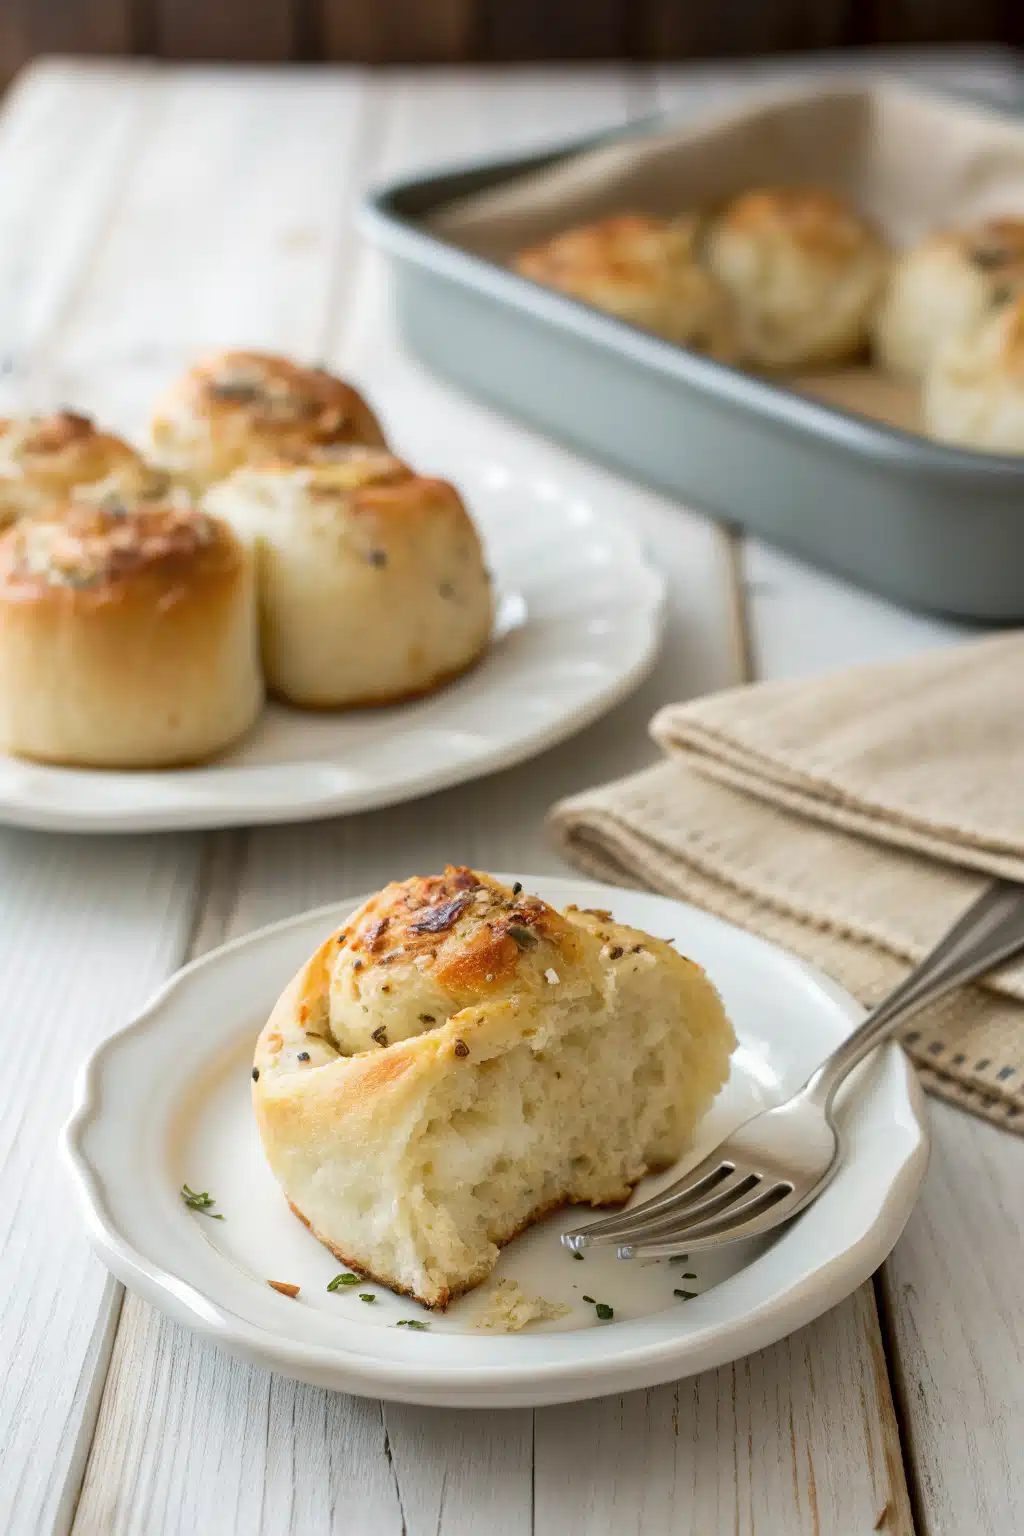
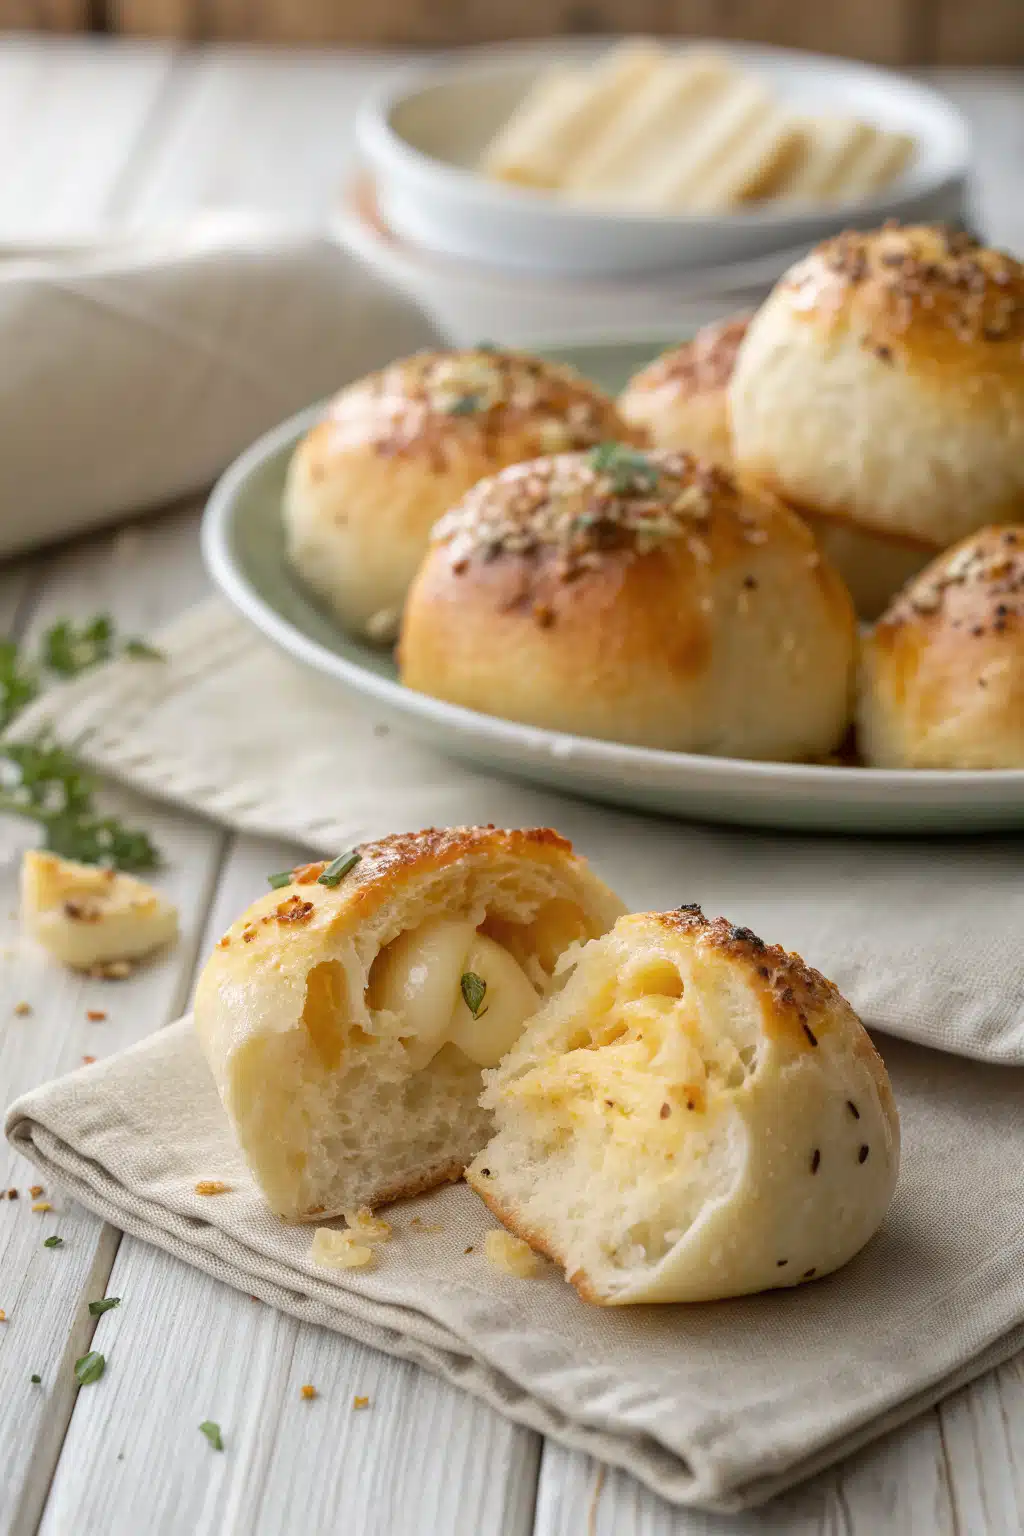
Punch down risen dough and roll into a large rectangle (about 16×12 inches) on floured surface. Spread garlic-cheese butter evenly over the dough, leaving 1-inch border at top. Starting from long edge, tightly roll jelly-roll style. Cut into 12 equal slices using dental floss or sharp knife.
Step 5: Assemble & Bake
Arrange rolls seam-side down in prepared pan, spacing slightly apart. Cover lightly and let rise another 20–30 minutes until puffy. Brush tops with melted butter. Bake 20–25 minutes until deep golden brown and cooked through. For extra crispness, broil 1–2 minutes at end (watch closely!).
What to Serve It With
These rolls shine brightest when paired with hearty meals. Think roasted chicken, herb-crusted salmon, or a big bowl of Creamy Tomato Soup. They’re also fantastic with pasta dishes—especially carbonara or alfredo—where their garlicky richness balances tangy sauces. For brunch, serve them with scrambled eggs, bacon, and fresh fruit. And honestly? Sometimes they don’t need anything else. Just grab one straight from the pan while it’s still warm and savor the magic.
Top Tips for Perfecting Your Garlic Cheese Rolls
- Don’t Skip the Second Rise: Skipping the final rise means dense, flat rolls. Patience here = fluffy reward.
- Use Sharp Cheddar: Mild cheeses won’t melt properly or deliver bold flavor. Go sharp!
- Chill the Butter Mixture: If your filling gets too soft, pop it in fridge for 10 mins. Easier to spread and prevents sinking during baking.
- Roll Tightly: The tighter the roll, the prettier the spiral when sliced. No judgment if it unravels a bit—still tastes amazing.
- Broil with Care: Broiling adds color and crunch, but watch closely. One minute can mean perfect vs. burnt.
Storing and Reheating Tips
Store leftover rolls in an airtight container at room temperature for up to 2 days. For longer storage, freeze unbaked rolls in single layers separated by parchment paper. Bake directly from frozen (add 5–10 minutes to cooking time). To reheat, wrap in foil and warm in 350°F oven for 10 minutes, or microwave for 20–30 seconds until warm. Avoid microwaving whole batch—it dries them out. Best reheated with a pat of butter on top!
Frequently Asked Questions
“The Garlic Cheese Rolls turned out amazing. My kids asked for seconds. Saving this one!”
Final Thoughts
There’s a reason garlic cheese rolls have stood the test of time. They’re humble yet powerful—simple ingredients transformed into pure joy with every bite. Whether you’re feeding a crowd or treating yourself after a long week, these rolls deliver warmth, flavor, and a little bit of magic. So preheat that oven, gather your favorite cheeses and herbs, and remember: the best recipes aren’t just about technique—they’re about sharing love, one buttery twist at a time.

Garlic Cheese Rolls
Ingredients
Main Ingredients
- 3 cups all-purpose flour
- 0.25 cup granulated sugar
- 1 packet active dry yeast
- 1 cup warm milk (about 110°F)
- 1 large egg
- 0.25 cup unsalted butter, softened
- 0.5 teaspoon salt
- 0.25 cup unsalted butter, melted
- 2 cloves garlic, minced
- 1 teaspoon garlic powder
- 1 teaspoon dried parsley
- 0.5 teaspoon onion powder
- 1 cup shredded cheddar cheese
- 0.25 cup grated Parmesan cheese
Instructions
Preparation Steps
- In a small bowl, combine warm milk and yeast. Let sit for 5–10 minutes until frothy.
- In a large mixing bowl, whisk together flour, sugar, and salt. Add the yeast mixture, egg, and softened butter. Mix until a dough forms.
- Knead the dough on a floured surface for 5–7 minutes until smooth and elastic. Place in a greased bowl, cover with a towel, and let rise in a warm place for 1 hour or until doubled in size.
- Punch down the dough and roll it out into a 9x13-inch rectangle. Brush with melted butter, then sprinkle evenly with minced garlic, garlic powder, parsley, onion powder, cheddar, and Parmesan.
- Roll the dough tightly from the long side into a log. Cut into 12 equal slices and place seam-side up in a greased baking pan. Cover and let rise for 30 minutes.
- Preheat oven to 375°F (190°C). Bake rolls for 20–25 minutes until golden brown and cooked through.
- Brush tops with remaining melted butter immediately after baking. Serve warm.


