
Okay, picture this: It’s a lazy Sunday morning, the smell of freshly brewed coffee is wafting through the air, and you’re craving something sweet, but not *too* sweet. Something a little fancy, but also incredibly easy to whip up. That’s where this French Pinwheels Recipe comes in. They’re like a cross between Cinnamon Rolls and sugar cookies, but with a beautiful, eye-catching swirl of flavor that just screams “special occasion.” Honestly, they’re way easier than making croissants, but they give off the same effortlessly chic vibe. They are seriously the best sweet treat to have with your morning coffee.
Thank you for reading this post, don't forget to subscribe!
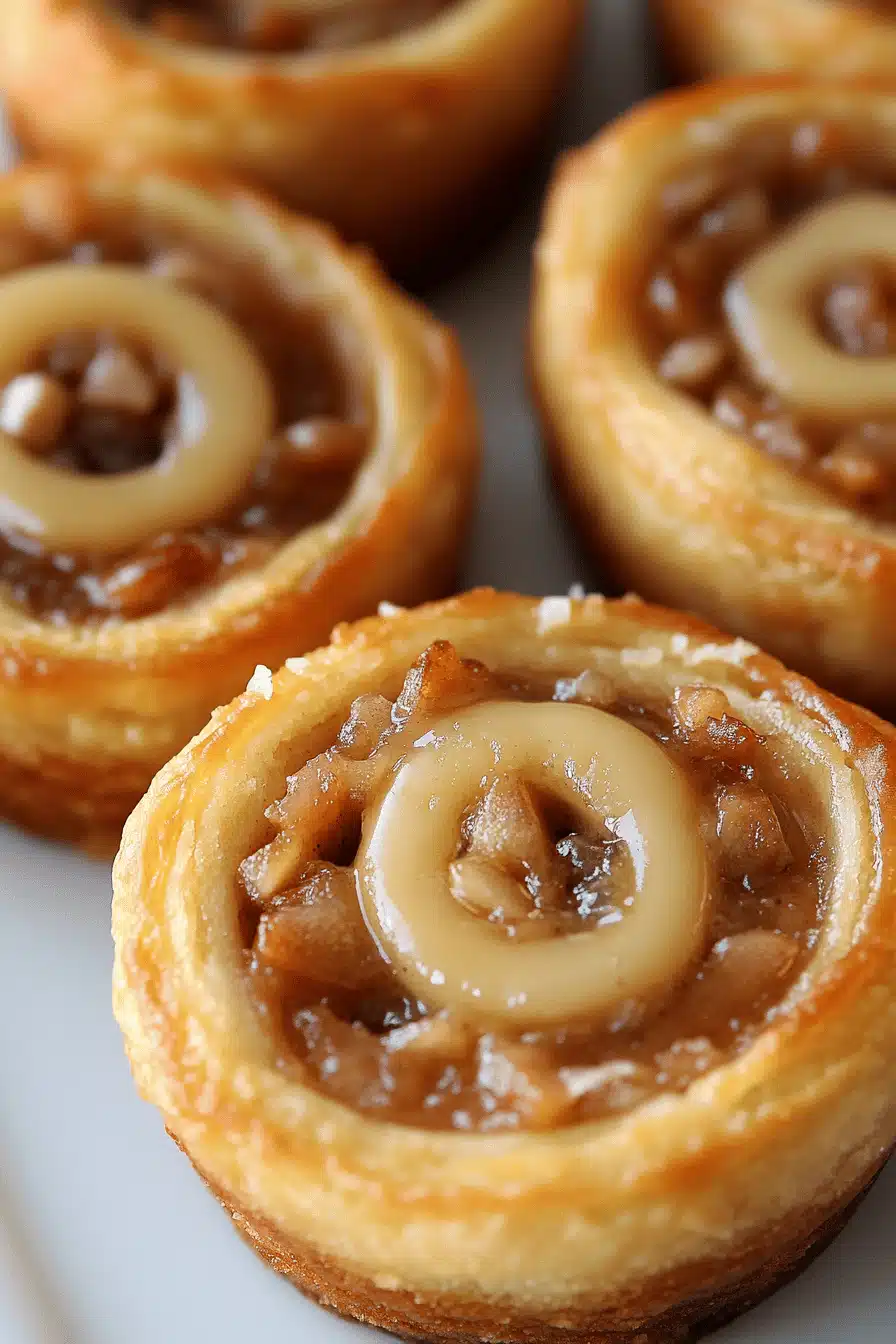
What is a French pinwheel?
A French Pinwheel is basically a rolled-up cookie dough filled with a delicious, sweet filling, then sliced into adorable little spirals. Think of it as a flattened, more elegant version of a Cinnamon Roll, but instead of cinnamon, you can fill it with anything your heart desires! It’s essentially a cookie dough log that gets sliced and baked. The beauty of these pinwheels lies in their versatility – you can use different fillings to create a variety of flavors and colors. It’s a simple concept but the result is always impressive and delicious.
Why do you like this recipe?
There are so many reasons to fall head-over-heels for this recipe, but let me give you my top ones. First, the flavor is just incredible. The slight tang from the cream cheese in the dough paired with whatever sweet filling you choose makes for the perfect balance. Second, and this is a big one for me, it’s surprisingly easy to make! Don’t let the fancy swirls fool you; the dough comes together quickly, and the rolling and slicing are actually quite therapeutic. What I love most about this French Pinwheels Recipe is that it’s so budget-friendly. The ingredients are pretty standard pantry staples, so you probably have most of them on hand already. And if you are looking for something like this then you should also try my Sugar Cookie Recipe., or my Cinnamon Rolls Recipe.They are just as good!
It’s also endlessly versatile. You can customize the filling to your liking – from classic Cinnamon Sugar to chocolate hazelnut spread or even a tangy fruit jam. I’ve even seen people make savory versions with pesto and cheese! I’m always looking for ways to get my kids involved in the kitchen, and these pinwheels are perfect for that. They love helping with the rolling, spreading, and especially the slicing (with a little supervision, of course!). It’s a fun way to spend an afternoon and create something delicious together. Trust me, once you try this recipe, you’ll be making it again and again. It’s a crowd-pleaser, a boredom buster, and a guaranteed way to brighten any day.
How do you make French pinwheels?
Quick Overview
How do you make French pinwheels? How do I make Cream Cheese dough? What is your favorite fill Next, you’ll carefully roll the dough into a log, slice it into individual pinwheels, and bake until golden brown. What’s the best part? You can customize the filling to suit your taste. Is it a fun baking project that’s perfect for beginners? What is so great about the process, is that it is a winner every time.
Ingredients
For the Main Batter: How does it work?
* 1 cup (2 sticks) unsalted butter, softened
* 4 ounces Cream Cheese, softened
* 1 ½ cups granulated sugar
* 2 large eggs
* 1 teaspoon vanilla extract
* 3 cups all-purpose flour
* ½ teaspoon baking powder
* ¼ teaspoon salt
For the Filling:
* ½ cup unsalted butter, softened
* 1 cup packed Brown Sugar
* 2 tablespoons ground cinnamon
* Optional: ½ cup chopped pecans or walnuts
For the Glaze:
* 2 cups powdered sugar
* ¼ cup milk (or more, as needed)
* 1 teaspoon vanilla extract
What are the step-
Step 1: Preheat & Prep Pan
First things first, preheat your oven to 375°F (190°C). While the oven is heating up, grease a baking sheet or line it with parchment paper. How do you clean pinwheels? I always do this before I even start mixing ingredients. It just sets me up for success and prevents any last minute scrambling. How do I make sure my baking sheet is ready?
Step 2: Mix Dry Ingredients
In a medium bowl, whisk together the flour, baking powder, and salt. Set aside. Is baking powder evenly distributed throughout the flour? How do pinwheels rise? I always give it a good whisk for at least 30 seconds to make sure everything is well combined. You want to see that everything is perfectly mixed.
Step 3: Mix Wet Ingredients
In a large bowl, cream together the butter and Cream Cheese until light and fluffy. Set aside. What are hand mixers? Beat in the granulated sugar until well combined, then add the eggs one at a time, mixing well after. Stir in the vanilla extract. Make sure your butter and cream cheese are nice and soft, otherwise you’ll end up with lumps in your cheese. I usually leave mine out for about an hour before starting.
Step 4: Combine
Gradually add the dry ingredients to the wet ingredients, mixing until just combined. Do not overmix pinwheels, as this can result in tough pin wheels. What is the best dough to make? I usually stop mixing when there are still a few streaks of flour visible and then finish combining. How do you use a spatul How do you prevent overmixing? When you do that you should have a great combination of ingredients.
“New family favorite! This French Pinwheels Recipe was so flavorful and ridiculously easy. Crowd-pleaser for sure.”
Step 5: Prepare Filling
In a separate bowl, cream together the softened butter and Brown Sugar until smooth. Set aside. Stir in the cinnamon and, if desired, the chopped walnuts. The filling should be thick and spreadable. If it’s too stiff, you can add a tablespoon of milk or cream to loosen it up. What is the best thing when everything is mixed and you have the perfect combination.
Step 6: Layer & Swirl
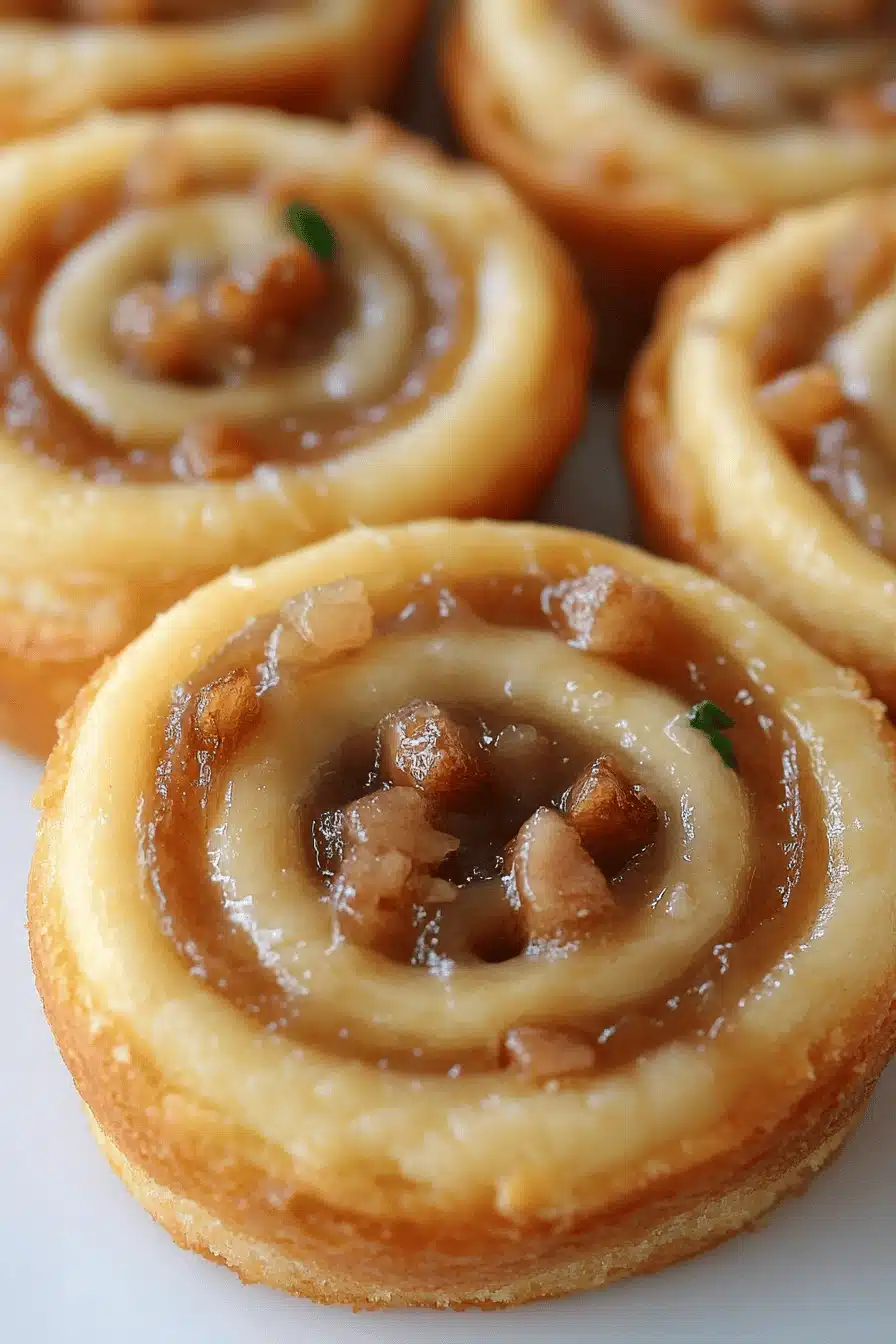
On a lightly floured surface, roll the dough into a large rectangle, about 12×18 inches. Spread the filling evenly over the dough, leaving a small border along one long edge. Starting from the opposite long edge, carefully roll the dough into a tight log. Pinch the seam to seal. Using a sharp knife or dental floss, slice the log into ½-inch thick pinwheels. Place the pinwheels on the prepared baking sheet, spacing them about 1 inch apart. Now be very careful when you roll the dough. It is a very easy point to ruin everything.
Step 7: Bake
Bake for 12-15 minutes, or until the pinwheels are golden brown around the edges. Keep a close eye on them, as they can burn easily. I always set a timer for 12 minutes and then check them every minute after that. Every oven is different, so it’s important to adjust the baking time accordingly. The toothpick test will help you know when to remove them.
Step 8: Cool & Glaze
Let the pinwheels cool on the baking sheet for a few minutes before transferring them to tasten rack. To cool completely. While pinwheels are cooling, prepare the glaze by whisking together the powdered sugar, milk, and salt. Is it safe to use vanilla extract in a smoothie? Add more milk if needed to reach desired consistency. Once the pinwheels are completely cool, drizzle them with the glaze. Let the glaze set before serving. Make sure that they are cool, you don t want them to melt!
Step 9: Slice & Serve
Once the glaze is set, pinwheels are ready to serve! Arrange them on a platter or basket and watch them disappear. Can be stored in an airtight container at room temperature. Fresh figs are best, but can also be eaten raw. For up to 3 days. And you can have them with whatever you want, the options are endless.
What should I serve it with?
French Pinwheels are incredibly versatile and can be enjoyed in so many ways. What are some of my favorite serving suggestions?
For Breakfast:What are some good ways to start your day with a cup of coffee? The warmth of coffee perfectly complements the sweetness of pinwheels. I love serving these with a side of fresh fruit, like berries or sliced peaches, for nutrient dense and healthy eating. What a good breakfast
For Brunch:What are some great pinwheels to serve with your brunch spread? What are some good appetizers to serve on a platter? Serve them alongside other brunch staples like quiche, Fruit Salad, and mimosas for a truly special brunch experience.
As Dessert: These pinwheels make a delightful after-dinner treat. Serve them with a scoop of vanilla Ice Cream or a dollop of whipped cream for an extra touch of indulgence. A glass of dessert wine or a cup of herbal tea is the perfect accompaniment.
For Cozy Snacks: Enjoy them warm from the oven with a glass of milk or a cup of Hot Chocolate on a chilly evening. They’re the ultimate comfort food and are guaranteed to warm you from the inside out. I also love packing them in lunchboxes or taking them on picnics for a sweet and portable snack.
My family has a tradition of making these pinwheels every Christmas morning. The smell of cinnamon and sugar baking in the oven fills the house with warmth and happiness, and it’s a tradition I cherish dearly. I hope you create your own special memories with this recipe!
Top Tips for Perfecting Your French Pinwheels
Over the years, I’ve learned a few tricks that will help you achieve pinwheel perfection. Here are my top tips:
Butter & Cream Cheese Prep: Make sure your butter and cream cheese are softened to room temperature before mixing. This will ensure that they cream together smoothly and evenly, resulting in a light and fluffy dough. If you forget to take them out of the fridge in advance, you can microwave them for a few seconds, but be careful not to melt them.
Mixing Advice: Be careful not to overmix the dough. Overmixing can develop the gluten in the flour, resulting in tough pinwheels. Mix until just combined, and then finish combining with a spatula.
Swirl Customization: Get creative with your filling! You can use different flavors of jam, Nutella, Peanut Butter, or even savory fillings like pesto and cheese. Experiment with different combinations to find your favorites. I love using a mix of raspberry jam and white chocolate chips for a sweet and tangy twist.
Ingredient Swaps: If you don’t have Cream Cheese on hand, you can substitute it with sour cream or Greek yogurt. The texture will be slightly different, but the flavor will still be delicious. I’ve tested this with almond milk and it actually made it even creamier!
Baking Tips: Keep a close eye on the pinwheels while they’re baking. They can burn easily, so it’s important to check them frequently. If they start to brown too quickly, you can tent them with foil.
“I don’t know if I’ve ever eaten a better French Pinwheels Recipe. The rub alone is wonderful, but the sauce??? Over the top!”
Glaze Variations: For a richer glaze, you can substitute the milk with cream. You can also add a pinch of salt or a squeeze of lemon juice to balance the sweetness. I love adding a splash of bourbon or rum for a boozy twist.
One time, I accidentally added too much flour to the dough and the pinwheels turned out dry and crumbly. I learned my lesson and now I always measure my ingredients carefully! It’s details like this that you learn when you are a dedicated baker. Another time, I forgot to grease the baking sheet and the pinwheels stuck to the bottom and were impossible to remove without breaking. Don’t make the same mistakes I did!
Storing and Reheating Tips
These French Pinwheels are best enjoyed fresh, but they can also be stored for later. Here’s how:
Room Temperature: Store them in an airtight container at room temperature for up to 3 days. They’ll stay soft and delicious. I usually place a sheet of parchment paper between layers to prevent them from sticking together.
Refrigerator Storage: For longer storage, you can keep them in the refrigerator for up to a week. Just be sure to bring them to room temperature before serving for the Best Flavor and texture.
Freezer Instructions: To freeze, wrap them individually in plastic wrap and then place them in a freezer-safe bag or container. They can be frozen for up to 2 months. Thaw them overnight in the refrigerator before serving.
Glaze Timing Advice: If you’re planning to store the pinwheels, it’s best to wait to glaze them until just before serving. This will prevent the glaze from becoming sticky or dissolving during storage. You should follow my lead here!
I’ve found that the key to keeping these pinwheels fresh is to store them properly. Whether you’re enjoying them right away or saving them for later, these tips will help you keep them tasting their best. That will allow you to share with your family or enjoy for more time!
Frequently Asked Questions
Final Thoughts
This French Pinwheels Recipe is more than just a recipe; it’s a way to create sweet memories with your loved ones. The incredible flavor, the surprising ease, and the endless versatility make it a recipe you’ll turn to again and again. Whether you’re baking for a special occasion or just want to treat yourself, these pinwheels are guaranteed to brighten your day. So what are you waiting for? Get in the kitchen and start swirling! And if you enjoyed this recipe, be sure to check out my other delicious baking recipes, like my Chocolate Chip Cookies or my Banana Bread. They’re just as easy and delicious, and are sure to become family favorites. Happy baking! Can’t wait to hear how yours turn out! Let me know what variations you try in the comments and leave a rating below.

Savory Spinach and Cheese Swirls: A Quick & Easy Recipe!
Ingredients
Main Ingredients
- 2 sheets puff pastry thawed according to package instructions
- 1 cup ricotta cheese
- 2 cups fresh spinach chopped
- 0.5 teaspoon nutmeg ground
- 2 large eggs beaten
- 1 cup Parmesan cheese grated
Instructions
Preparation Steps
- Preheat the oven to 425°F (220°C) and line a baking sheet with parchment paper.
- Roll out the thawed puff pastry sheets on a lightly floured surface to smoothen and enlarge them slightly.
- Spread half of the ricotta cheese evenly over the first sheet, followed by half of the chopped spinach and a sprinkle of nutmeg.
- Sprinkle half of the grated Parmesan cheese over the spinach.
- Roll the puff pastry into a tight log starting from one end. Seal the edge with beaten egg.
- Repeat with the second sheet of puff pastry.
- Cut each log into 1/2-inch slices and place on the prepared baking sheet. Brush with egg wash.
- Bake for 15-20 minutes, or until the swirls are golden brown.
- Allow to cool for a few minutes before serving warm.


