There’s something about that perfect combo of peanut butter and chocolate that instantly takes me back to my childhood — lazy weekends spent in the kitchen, licking spoonfuls straight from the jar, and the sweet smell of cocoa wafting through the house. But honestly, one of my all-time favorite ways to indulge this irresistible pairing is with a luscious Peanut Butter Chocolate Pie. It’s the kind of dessert that feels fancy enough for company but is so easy I’ve whipped it up on busy weeknights after a long day. My kids ask for this all the time, especially when I want to skip the baking and still deliver something totally satisfying. It’s creamy, rich, and secretly simple — just the recipe I reach for when I crave a decadent treat without all the fuss. Trust me, once you try it, it’s going to be your new go-to for everything from birthdays to a casual weekend dessert. Plus, it’s a no-bake wonder that you can make ahead, which is a lifesaver on hectic nights!
Thank you for reading this post, don't forget to subscribe!What is peanut butter chocolate pie?
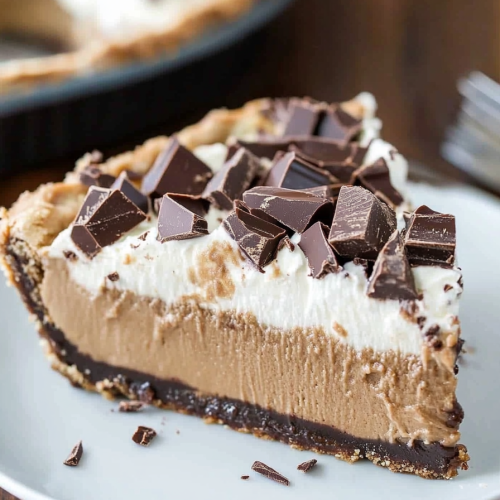
Think of Peanut Butter Chocolate Pie as a dreamy, creamy dessert that loves to sit in the fridge and be enjoyed cool. It’s essentially a pie that combines velvety smooth peanut butter filling with a rich, chocolatey topping, all nestled into a buttery crust. The name pretty much says it all — this pie is a harmonious dance between salty, nutty peanut butter and dark, luscious chocolate. It’s kind of like a grown-up Reese’s Peanut Butter Cup in pie form, but way more elegant and perfect for sharing. The beauty of it is that it’s versatile — you can add a splash of vanilla, sprinkle some chopped peanuts on top, or even swirl in some caramel if you’re feeling fancy. This isn’t just a dessert for special occasions; it’s a treat I make whenever I want something satisfying, cool, and indulgent. And the best part? Almost everything is no-bake, making it a total breeze to whip up in no time.
Why you’ll love this recipe?
Honestly, what I love most about this peanut butter chocolate pie is how accessible it is while tasting like it’s straight out of a bakery case. The flavor is what dreams are made of — rich, creamy chocolate with that incredible salty-sweet peanut undertone. It’s the perfect way to satisfy that sweet tooth, especially on those nights when I just don’t want to turn on the oven. Plus, it’s incredibly simple; I’ve made this in a rush, with ingredients I always have on hand, and it still comes out phenomenal. Budget-wise, it’s a win — most of the ingredients are pantry staples like peanut butter, chocolate chips, and a premade crust. And because there’s no baking involved, I can prep it in under 30 minutes and forget about it until it’s time to serve. What truly makes this special is how versatile it is. Sometimes I swirl in some marshmallow fluff for extra gooeyness, or sprinkle chopped peanuts on top for crunch. It’s one of those recipes that just feels like a hug in dessert form, perfect for sneaking into family dinners or making someone’s day special. And of course, my kids are obsessed — they ask for seconds every single time!
How do I make a peanut butter chocolate pie?
Quick Overview
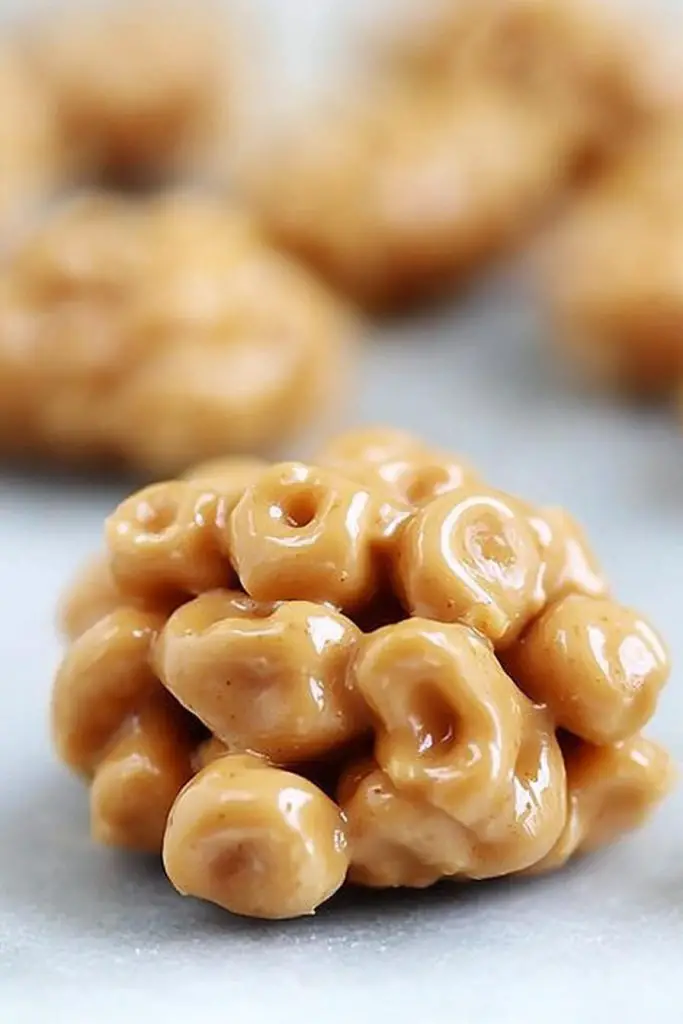
This Peanut Butter chocolate pie is surprisingly easy — the crust is just a matter of pressing a mixture into your pie dish, the filling comes together with a quick mix of peanut butter, cream cheese, and whipped topping, and the chocolate topping takes minutes to melt and swirl. The beauty here is the no-bake approach, which means less mess and total flexibility. You’ll layer the creamy filling over the crust, then swirl melted chocolate on top for that beautiful marbled look. Chill it for a few hours, and you’re rewarded with a rich, luscious pie that’s ready to wow at your next gathering or cozy night in. It’s an absolute crowd-pleaser that’s foolproof — I’ve made it with almond butter too, just to switch things up, and trust me, it’s equally delicious!
Ingredients
For the Main Batter:
- 1 ½ cups graham cracker crumbs or chocolate cookie crumbs — I like using chocolate cookies for extra richness
- ⅓ cup melted butter — a good quality butter makes all the difference
- 2 tablespoons sugar — optional if you prefer a less sweet crust
For the Filling:
- ½ cup creamy peanut butter — smooth and salty, the star of the show
- 8 oz cream cheese, softened — helps keep the filling creamy and stable
- 1 cup powdered sugar — balances the saltiness and sweetness
- 1 teaspoon vanilla extract — for depth of flavor
- 1 ½ cups heavy whipping cream — whipped to fluffy perfection
For the Glaze:
“The Easy Peanut Butter Chocolate Cream Pie turned out amazing. My kids asked for seconds. Saving this one!”
- ½ cup semi-sweet chocolate chips — use good quality for shiny, melty goodness
- 1 tablespoon coconut oil or butter — to help the chocolate melt smoothly
- Optional: a sprinkle of sea salt or chopped peanuts for garnish
Step-by-Step Instructions
Step 1: Preheat & Prep Pan
Since this is a no-bake pie, the only “preheat” you need is to get your crust ready. Grab a 9-inch pie dish and lightly spray or butter it. Press the Graham Cracker crumbs mixed with melted butter into the bottom and up the sides evenly. Pop it into the fridge while you make the filling. Trust me, this helps it firm up and stay crispy once the filling is added.
Step 2: Mix Dry Ingredients
Not much dry stuff here — just keep your crumbs and sugar ready. The breadcrumb mixture is the foundation of your crust, so don’t rush this step.
Step 3: Mix Wet Ingredients
In a large bowl, beat your softened cream cheese with the Peanut Butter until smooth and fluffy. I always do this with a hand mixer; it saves time and gets rid of lumps. Then, mix in the powdered sugar and vanilla, tasting as you go — I love a slightly more peanutty flavor, so I sometimes add an extra spoonful of peanut butter here.
Step 4: Combine
Gently fold in the Whipped Cream until everything looks uniform — creamy, airy, and tempting. Be careful not to overmix; you want lightness, not deflation.
Step 5: Prepare Filling
Spread the Peanut Butter filling into your chilled crust, smoothing the top with a spatula. Once that’s done, pour your melted chocolate over the top in a zigzag or big dollops. Using a toothpick or skewer, swirl the chocolate into the filling for a marbled effect. Don’t overthink this — the pattern will look beautiful even if it’s imperfect!
Step 6: Layer & Swirl
After swirling the chocolate, give it a gentle tap on the counter to settle everything in place. Now, pop the pie into the fridge for at least 4 hours, or overnight if you can wait — it really makes the flavors meld and the texture set perfectly.
Step 7: Bake
No baking, remember? Just chilling. If you’re impatient, you can cut into it after a few hours, but I swear, patience pays off for that firm, sliceable texture.
Step 8: Cool & Glaze
Once chilled, if you want an extra shiny top, re-melt a few more chocolate chips with a splash of coconut oil and drizzle on right before serving. It’s a lovely finishing touch that makes it look sophisticated and delicious.
“Made the Easy Peanut Butter Chocolate Cream Pie tonight and wow — perfect weeknight dinner. Will definitely make again!”
Step 9: Slice & Serve
Use a sharp, warm knife to cut clean slices — dip in hot water and wipe dry between cuts for the best presentation. Serve chilled, with a dollop of Whipped Cream or a sprinkle of crushed peanuts if you’re feeling extra. My family usually just grabs seconds before I can blink!
What to Serve It With
This pie is pure dessert magic, but serving it with some coffee or a glass of cold milk is a must. For brunch, think about pairing it with a light fruit salad or a drizzle of caramel for extra richness. I’ve also served slices alongside vanilla Ice Cream — double the chocolatey goodness! When I make this for a casual get-together, I sometimes sprinkle a few chopped peanuts or sea salt on top to highlight the salty-sweet vibe. For a more decadent twist, dust it with cocoa powder or a sprinkle of powdered sugar. Honestly, this pie disappears in minutes at my house, especially when I don’t tell anyone I made it — I just cut a slice and watch it vanish!
Top Tips for Perfecting Your Peanut Butter Chocolate Pie
Over the years, I’ve learned a few tricks to make sure this pie turns out just right every time. First, always use softened cream cheese — it mixes in smoothly and prevents lumps. When making the filling, don’t overwhip the cream; just until stiff peaks form so it stays fluffy without turning into butter. Swirling the melted chocolate is my favorite part — I love making pretty patterns, but even if it’s a little messy, it still tastes incredible. When choosing your chocolate, go for the good stuff; that shiny glaze comes from quality ingredients. I’ve tested this with natural peanut butter, and it’s just as good, but I find the sweeter varieties work best for that perfect balance. For toppings, chopped salted peanuts add crunch, but a dusting of cocoa powder or even a touch of sea salt can elevate the flavors. Be patient with the chilling time — it’s the secret to a firm slice that holds together well. Also, if you want a thicker filling, just add a spoonful of Greek yogurt — it’s a trick I learned after a few trials and errors. Oh, and don’t skip the refrigerating step; it’s what really makes this pie shine!
Storing and Reheating Tips
This pie is best enjoyed within 2-3 days, although it stays fresh for up to 5 in the fridge. Cover it tightly with plastic wrap or store in an airtight container — I find that the crust stays crispy longer if you keep the glaze from touching the wrap directly. If you have leftovers, it’s totally fine to pop slices back into the fridge for later, but I’d recommend adding any extra chocolate drizzle fresh when serving to keep that glossy, tempting look. You can also freeze individual slices for a quick treat later — just wrap tightly in plastic wrap and foil and enjoy within a month. To reheat, I prefer letting a slice sit at room temperature for about 10 minutes or popping it in the microwave in short bursts (10 seconds at a time), but honestly, I think this pie is best chilled and served cold. The coldness really enhances that silky texture and indulgent flavor balance. When it’s time to serve again, just add a quick drizzle of warm chocolate or a dollop of whipped cream for that extra special touch. It’s a forgiving dessert, and as long as it’s kept covered, it will stay delicious!
Frequently Asked Questions
Final Thoughts
This peanut butter chocolate pie has become a staple in my dessert lineup — it’s just that good. Every time I make it, I’m reminded of how easy it is to create something truly indulgent without spending hours in the kitchen. It’s perfect for a family dinner, a casual get-together, or even when you’re craving something sweet at midnight — because let’s be honest, sometimes those are the best moments to indulge. The combination of creamy peanut butter, smooth chocolate, and a crunchy crust hits every note I love in a dessert. Plus, it’s endlessly customizable — you can add a splash of peppermint extract, sprinkle mini marshmallows, or swap the chocolate for white chocolate chips if you’re feeling adventurous. I’d love to hear how yours turns out, so don’t forget to leave a comment or share your tweaks! Happy baking — and more importantly, happy eating!
Peanut Butter Chocolate Pie
Ingredients
Main Ingredients
- 25 Cookies Oreo Cookies
- 6 tablespoons Butter (melted)
- 14 ounces Sweetened condensed milk divided
- 4 ounces Semi-sweet baking chocolate
- 3 teaspoons Vanilla extract divided
- 0.5 cup Peanut butter Skippy Naturals recommended
- 2 cups Heavy whipping cream cold
- 3 tablespoons Powdered sugar
Instructions
Preparation Steps
- Crush your Oreo cookies in a plastic bag with a rolling pin or in a food processor. Mix the crumbs and melted butter with a fork in a medium-sized bowl. Press into a 9-inch pie plate and chill until ready to fill.
- Melt the baking chocolate in a medium-sized bowl according to the package directions for melting. Typically, chocolate takes about 1-2 minutes on high power; stir every 30 seconds.
- Stir half of the can of sweetened condensed milk into the melted chocolate. Add 1 teaspoon of vanilla extract. Let sit for a few minutes, stirring occasionally.
- In another bowl, mix remaining condensed milk, peanut butter, and vanilla until smooth.
- Whip the heavy cream with powdered sugar and remaining vanilla on high speed until stiff peaks form.
- Fold 1 cup of whipped cream into the peanut butter mixture gently. Spread this in the prepared crust.
- Carefully fold the remaining whipped cream into the chocolate mixture. Spread over the peanut butter layer.
- Top with remaining whipped cream and chocolate shavings. Refrigerate for at least 4 hours before serving.


