There’s just something about that irresistible crunch and sweet chocolate flavor of puppy chow that always takes me back. I’ve been making it since I was a kid—and honestly, it’s one of those recipes that’s so simple but totally addictive. Every time I whip up a batch, I remember sitting on my grandma’s kitchen floor, sneaking pieces from the bowl while she looked the other way. It’s like a little piece of my childhood wrapped in that shiny, messy, delicious coating. Plus, it’s one of those snacks that’s perfect for when you’re craving something sweet but don’t want to spend hours in the kitchen. Trust me, my kids ask for this all the time—they call it “puppy chow,” and I think everyone who’s tasted it agrees that it’s kinda like a magic, flavor-packed treat. And the best part? You can make it in no time at all. It’s the ultimate “pantry raid and snack” recipe that everyone loves—so I knew I had to share it with you. Let’s get wagging with this chocolatey, peanut buttery, crunchy goodness!
Thank you for reading this post, don't forget to subscribe!What is a puppy chow?
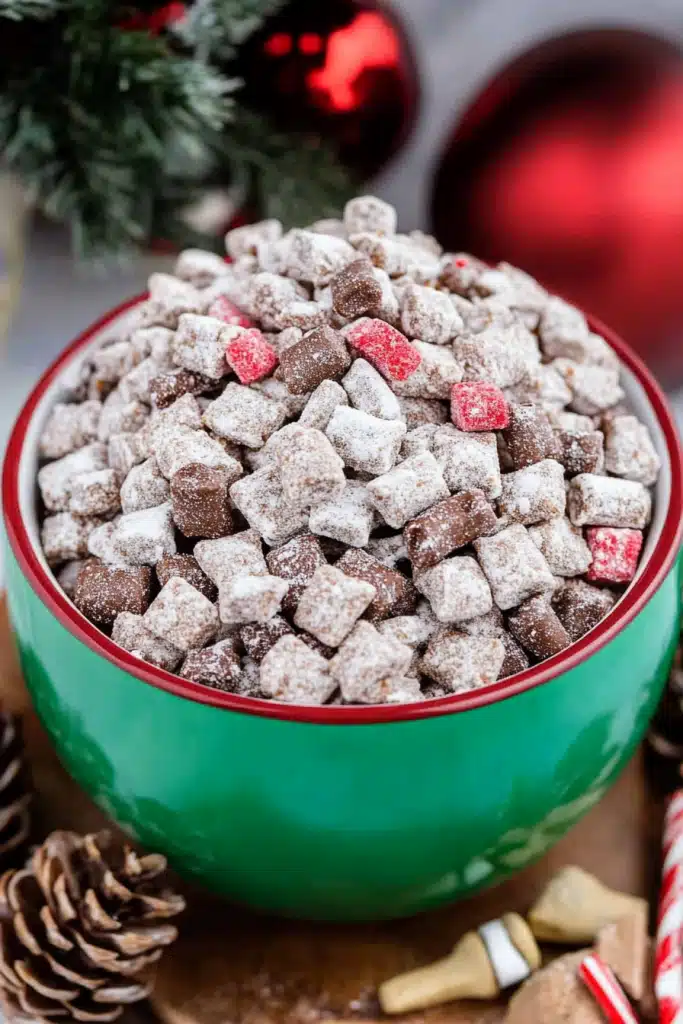
Puppy chow, also known as “muddy buddies” in some circles, is essentially a sweet, crunchy snack made from crispy cereal (usually Chex), coated in a luscious mix of melted chocolate, Peanut Butter, and a sprinkle of powdered sugar. Think of it as a trail mix, but way better—like a chocolatey, peanut buttery cloud that you can’t stop munching on. The name “puppy chow” is kind of funny, right? It comes from the way the coated cereal pieces look when they’re tossed in that snowy cloud of powdered sugar—like little puppy paw prints, if you ask me. This treat is perfect for movie nights, potlucks, or just those moments when you need a quick sweet fix. It’s essentially a no-bake concoction that’s so easy to prepare, you’ll find yourself making it over and over. Think of it as a grown-up twist on childhood snacks, with that nostalgic vibe and modern-day charm. It’s simple, fun, and just downright addictive.
Why you’ll love this recipe?
What I love most about puppy chow is how ridiculously versatile and foolproof it is. It’s a classic comfort food that hits all the right notes—rich chocolate, salty Peanut Butter, and that irresistible crunch from the cereal. Honestly, the smell alone when you’re melting the chocolate and peanut butter together? Pure heaven. Plus, it’s a total budget-friendly win; the ingredients are staples in most kitchens, and you probably already have everything in your pantry. And the fun part? There’s no oven required! It’s a “throw it all together and wait” situation, which makes it perfect for last-minute gatherings or a quick afternoon snack. I’ve tested so many variations—from adding a sprinkle of sea salt on top to tossing in some mini M&Ms or even crushed pretzels for an extra salty-sweet punch—and trust me, each twist creates a new favorite. Mainly, I love how this treat brings people together—I’ve yet to meet anyone who can resist its inviting aroma and satisfying crunch. It’s definitely a family favorite around my house, and I bet it’ll become one in yours too.
How do I make a Puppy Chow?
Quick Overview
Making puppy chow is one of those “grab your ingredients, melt what you need, toss, shake, and voilà” recipes that’s almost too easy. First, you’ll melt the chocolate, Peanut Butter, and a little butter or milk if you like it extra creamy. Once melted and smooth, you pour this luscious mixture over your cereal, toss to coat, and then carefully sprinkle a generous amount of powdered sugar all over, giving it a good shake until evenly coated. The trick is in the gentle tossing—so everything stays crispy and coated perfectly. Then, just spread it out to cool and set, and in about 30 minutes, you’ll have a big bowl of goodness ready to snack on or serve at your next gathering. The best part? Cleanup is a breeze, and you can customize it however you like. Honestly, it’s so quick and addictive, I always do this when I need a foolproof sweet treat on busy nights or when friends drop by unannounced. Just be prepared—once people taste it, they’ll be asking for the recipe!
Ingredients
For the Main Batter:
- 3 cups of crispy cereal (Chex, Crispix, or any snackable puffed cereal works great)
- 1 cup semi-sweet chocolate chips or chopped chocolate
- 1/2 cup creamy peanut butter (smooth, natural prefered, but creamy Jif works too)
- 2 tablespoons unsalted butter (or coconut oil for a dairy-free version)
- 1 teaspoon vanilla extract (for that extra flavor boost)
For the Coating:
- 1 cup powdered sugar (sifted for smoothness)
Optional Extras:
- Mini M&Ms or sprinkles for color
- Crushed pretzels or cookies for extra crunch
- Sea salt for a sweet-salty combo
Step-by-Step Instructions
Step 1: Preheat & Prep Pan
There’s no oven heating needed for this one—just grab a large mixing bowl and a baking sheet lined with parchment or wax paper. Preparing your workspace beforehand makes the process so much easier, especially when you’re ready to spread everything out to cool. If you’re adding extras like sprinkles or M&Ms, gather those now too—it’s all about having everything ready so you can work quickly after melting.
“The Easy Minty Puppy Chow Recipe turned out amazing. My kids asked for seconds. Saving this one!”
Step 2: Mix Dry Ingredients
Set your cereal aside in a large bowl. I like to give it a gentle toss to make sure it’s evenly distributed and not clumped together, but the main focus is keeping it crispy, so handle it carefully.
Step 3: Mix Wet Ingredients
In a microwave-safe bowl, combine the chocolate chips, Peanut Butter, and butter. Microwave in 30-second bursts, stirring in between, until everything’s melted and silky smooth. Once you do this, add in the vanilla extract—trust me, it takes it from good to wow.
Step 4: Combine
Pour the warm, velvety chocolate mixture over your cereal. Gently fold with a spatula or spoon—don’t stir too vigorously, or you risk crushing the cereal. The goal is to coat everything evenly without making it mushy.
Step 5: Prepare Filling
Transfer the coated cereal to a large zip-top bag or bowl. Drop in the powdered sugar and carefully toss or shake to coat each piece. This is where the magic happens—the powdered sugar sticks to the chocolate, giving it that signature snowy look and irresistible sweetness.
Step 6: Layer & Swirl
If you’re feeling fancy, you can layer different colors or add sprinkles as you go. But honestly, just mixing everything well is enough to give you that beautiful, balanced look. I love swirling the mixture a bit with a spatula to create little marbled patches of chocolate and Peanut Butter.
Step 7: Bake
No baking, remember—the magic is in the fridge or countertop to set. Just spread your puppy chow out on the prepared sheet, and let it sit at room temperature or pop it in the fridge for about 20-30 minutes to firm up. It’s ready when it’s dry to the touch—perfect for packing in a jar or serving in a big bowl.
Step 8: Cool & Glaze
If you want a glossy, extra-decadent finish, you can melt some additional chocolate and drizzle it over the cooled puppy chow. Or simply sprinkle a little extra powdered sugar if you prefer a lighter look. Either way, patience is key here—let it set for a few minutes before diving in.
Step 9: Slice & Serve
Because this isn’t a sliceable dessert per se, I recommend breaking it into chunks or clusters to serve. It’s perfect in a big bowl or cute little jars for gift-giving. Oh! And really, don’t forget to store any leftovers in an airtight container—this snack keeps well for several days (if it lasts that long!).
What to Serve It With
This snacking superstar is so versatile, you’ll find yourself serving it in a bunch of different ways. For breakfast, I love pairing it with a big mug of coffee or a glass of cold milk—can’t beat that combo. It’s also perfect for brunch tables, sprinkled into a yogurt bowl, or alongside some fresh fruit for a colorful twist.
“Packed with flavor and so simple. Exactly what I wanted from this Easy Minty Puppy Chow Recipe!”
As a dessert, puppy chow is a showstopper—enjoy it on a pretty platter, maybe with some fresh berries on the side. My family loves it after dinner, especially when we curl up with a good movie or game night. And for casual snacks, it’s great to stash in a jar in the pantry for when those sweet cravings hit unexpectedly. Honestly, this stuff disappears in minutes at my house; I’ve turned a batch into a memory, and I bet you will too.
Top Tips for Perfecting Your Puppy Chow
Over the years, I’ve learned a few tricks that make this snack even better. First, if you’re worried about sogginess, don’t overcoat the cereal with too much chocolate—less is more. Also, when melting the chocolate and Peanut Butter, take your time and do it in short bursts—microwaving too long can cause it to seize up or burn. A little tip? I always add a splash of milk or cream when melting, which makes the mixture super smooth and easy to toss.
It’s fun to get creative with the mix-ins—mini marshmallows, crushed cookies, pretzels, or even a sprinkle of cinnamon for warmth. When you’re layering and swirling, try to create a marbled effect with a toothpick or skewer—makes it look extra festive. Regarding ingredient swaps, I tested almond butter and almond milk, and honestly, it made the coating even creamier and less sticky. Temp-wise, I like to keep my fridge nearby to speed up the setting process—cold air helps everything firm up faster, especially if it’s hot in your kitchen. And for the glaze, you can melt White Chocolate or even add a dash of peppermint extract for a holiday twist. Just remember: the more love you put into it, the tastier it becomes.
Storing and Reheating Tips
Once you’ve made your puppy chow, proper storage is key to keeping its crunch and freshness. Keep it in an airtight container at room temperature—preferably in a cool, dry spot—where it’ll stay crisp for about a week. If you want to keep it longer, pop it in the fridge for up to two weeks, but be aware that the coating might soften slightly. For longer storage, I recommend freezing it—just get it into a sealed bag or container, and it’ll hold for up to three months. When you’re ready to enjoy it, let it thaw slightly at room temperature—no microwave needed, or the chocolate might melt unevenly. And if you’ve added a glaze or drizzle, I suggest waiting until just before serving to ensure it stays glossy and beautiful. This way, you get the best crunch and flavor every single time.
Frequently Asked Questions
Final Thoughts
Honestly, puppy chow has been a beloved part of my snack repertoire for years. It’s the perfect combination of richness, crunch, and that nostalgic “can’t stop at just one” factor. Whether I’m making it for casual family movie nights, giving it as a gift, or just sneaking a handful when I need a quick pick-me-up, it always hits the spot. I love how customizable it is—adding different mix-ins, switching up the chocolate types, or even trying dairy-free options. Plus, it’s one of those recipes that kind of feels like a warm hug—simple, familiar, and joyfully satisfying. I hope you give it a try and give yourself permission to indulge a little! Let me know how yours turns out—my kitchen is always open for sharing stories, variations, and tips. Happy baking, and here’s to many more crackers of this crunchy, chocolatey goodness in your future!

Puppy Chow
Ingredients
Main Ingredients
- 16 oz chocolate chips
- 0.5 cup peanut butter
- 1 cup powdered sugar
- 10 cups rice cereal
- 1 bag mini chocolate chips
Instructions
Preparation Steps
- In microwave-safe bowl, melt chocolate chips and peanut butter together in 1-minute intervals, stirring until smooth.
- Pour melted mixture over rice cereal in a large bowl. Gently stir until evenly coated.
- Transfer cereal mixture to a large resealable bag. Add powdered sugar and shake until well coated.
- Spread the mixture onto a parchment-lined baking sheet to cool. Once set, enjoy!


