Let me tell you, there’s nothing quite like biting into a slice of warm Coffee Cake that’s bursting with cinnamon, tender zucchini, and a crumbly topping — and knowing that it’s completely gluten-free. I made this recipe when my sister visited last summer, desperate for a sweet treat that I could enjoy without feeling guilty or bloated afterward, and let me just say — it disappeared in minutes at my house. The aroma alone, with hints of vanilla and cinnamon filling the kitchen, draws everyone in. I always do this when I want a cozy weekend breakfast or an afternoon pick-me-up to share with friends. Honestly, it’s one of those recipes I keep in my back pocket because it’s so versatile, forgiving, and, most importantly, so delicious. Plus, it’s a total lifesaver on busy nights when I need a quick dessert that tastes homemade but doesn’t require a complicated bake. Whether you have a stash of zucchini from summer’s bounty or just want a comforting treat that’s secretly healthy, this gluten-free zucchini coffee cake hits the spot — trust me on this one.
Thank you for reading this post, don't forget to subscribe!What is gluten free Zucchini Coffee Cake?
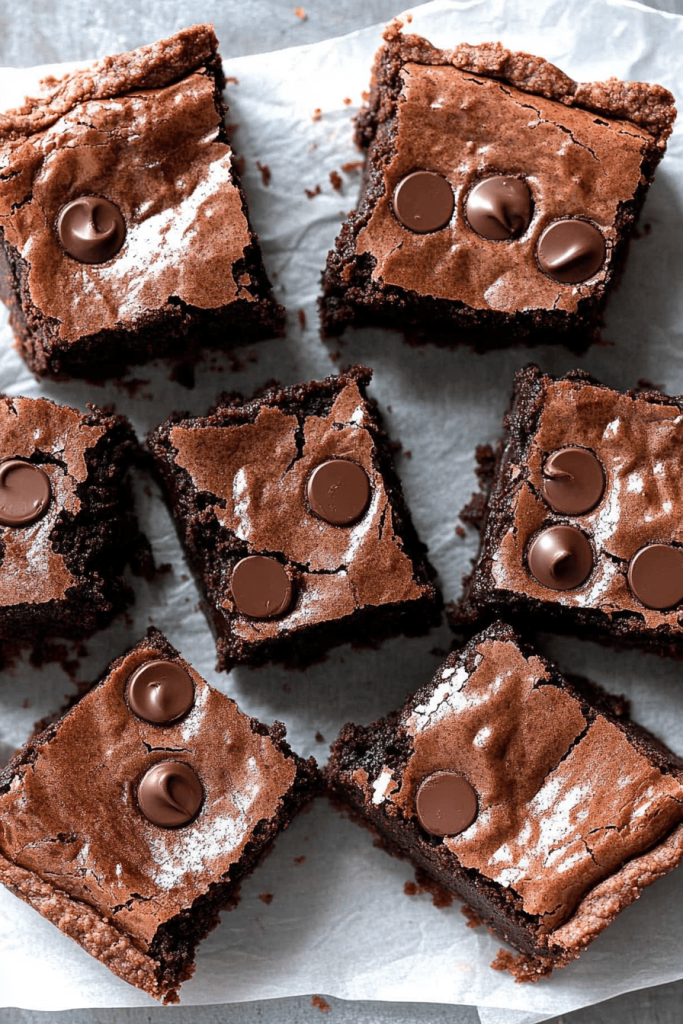
This gluten-free zucchini coffee cake is essentially a tender, moist cake with a fragrant cinnamon swirl, topped with a buttery crumb topping. Think of it as a cross between your favorite crumb cake and a luscious Zucchini Bread. The magic comes from using a blend of gluten-free flours—usually almond flour and a bit of tapioca starch—that give it a light, airy crumb without sacrificing moisture. The zucchini keeps everything super tender, almost like a secret ingredient that makes the cake extra lush. It’s a no-fuss recipe that’s perfect for breakfast, brunch, or whenever you’re craving something sweet but wholesome. The name “coffee cake” comes from its cozy, bakery-style vibe — it’s just the kind of thing you want to slice into on a lazy Sunday morning or to serve at a brunch gathering. Think of it as a warm hug in cake form, with a texture and flavor that anyone — gluten-eater or not — will love.
Why you’ll love this recipe?
Honestly, what I love most about this gluten-free zucchini coffee cake is how incredibly adaptable it is. The flavor is out of this world, with rich cinnamon swirls paired with the slight nutty undertone from the Almond Flour. It’s sweet enough to satisfy that afternoon craving but not overly sugary — I’ve tested this with a little less sugar, and it’s still divine. Plus, it’s surprisingly simple to make. I always do the dry mix first, then the wet ingredients, and somehow that’s enough to create this perfectly moist, almost melt-in-your-mouth cake. The cost of ingredients is pretty budget-friendly, especially since zucchinis are so cheap and abundant in summer. My kids ask for this all the time, and it’s also a big hit with the brunch crowd or as a cozy snack. What really sets this apart, though, is how forgiving it is. Maybe you forget to add an egg or want to swap honey for sugar? No problem—this cake still comes out gorgeous, and I’ve learned little tricks over the years to enhance or tweak it. It’s become my go-to recipe when I want to share a homemade treat with friends who are avoiding gluten but still craving something satisfying and sweet. It’s like a warm, edible hug you can grab anytime.
How do I make gluten free Zucchini Coffee Cake?
Quick Overview
This cake comes together surprisingly fast, especially once you get the hang of it. You start by prepping your zucchini — I always squeeze out the excess moisture after grating, which keeps the cake from getting soggy. The batter comes together in one bowl — no fancy mixer needed — just a few gentle folds to keep it airy. The Cinnamon Swirl is simply mixing cinnamon and sugar, then swirling it into the batter for that beautiful marbled look. The crumb topping is like a buttery streusel that adds crunch and richness. Once baked, it’s best to let it cool just enough for the flavors to settle, then drizzle with a glaze if you’re feeling fancy. The best part? It’s not overly sweet, so it pairs beautifully with a cup of coffee or tea. This recipe is so forgiving — I’ve made it with different flour ratios, added some chopped nuts, and still loved the results. Trust me, once you try it, it’ll be in your regular baking rotation.
Ingredients
For the Main Batter:
- 1 ½ cups almond flour (or a mix of your favorite gluten-free flours — I like to blend almond and tapioca for best texture)
- ½ cup tapioca starch (or arrowroot powder — works beautifully)
- 1 teaspoon baking powder (gluten-free, aluminum-free if possible)
- ½ teaspoon baking soda
- ½ teaspoon salt
- 1 teaspoon ground cinnamon (plus some for the swirl)
- ½ cup coconut sugar or brown sugar
- 3 large eggs (or flax eggs for vegan option)
- ⅓ cup coconut oil or melted butter
- 1 teaspoon vanilla extract
- 1 cup grated zucchini, excess moisture squeezed out
For the Filling:
- ¼ cup brown sugar (or coconut sugar)
- 1 teaspoon cinnamon
For the Glaze (Optional but recommended):
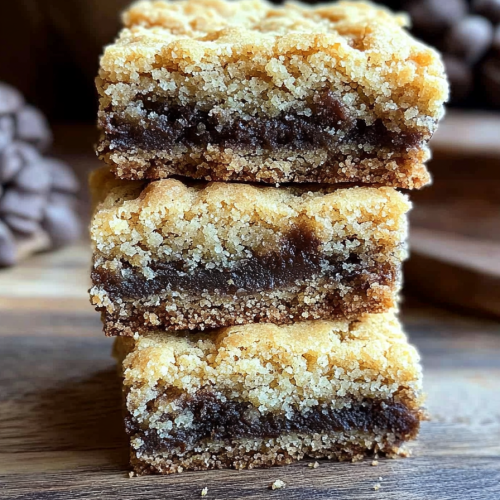
“I don’t know if I’ve ever eaten a better Easy Gluten-Free Brownie Cookie Bars. The rub alone is wonderful, but the sauce??? Over the top!”
- ½ cup powdered sugar
- 1-2 teaspoons milk, almond milk, or cream
- ¼ teaspoon vanilla extract
Step-by-Step Instructions
Step 1: Preheat & Prep Pan
Set your oven to 350°F (175°C) and grease a square or round baking pan. I like to line mine with parchment paper — makes cleanup a breeze and keeps the cake from sticking. Remember to squeeze out all that excess moisture from your grated zucchini; it’s a simple trick that keeps the cake tender without becoming soggy. I always do this with a clean kitchen towel or some paper towels — it’s so underrated but makes all the difference.
Step 2: Mix Dry Ingredients
In a large bowl, whisk together the Almond Flour, tapioca starch, baking powder, baking soda, salt, and cinnamon. Mixing the dry ingredients first ensures everything’s evenly distributed. The smell of cinnamon and nuts just makes the kitchen feel cozy already!
Step 3: Mix Wet Ingredients
In a separate bowl, beat the eggs until frothy, then stir in the coconut oil (or melted butter), vanilla, and sugar. I like to do this with a fork or a whisk — it’s quick and gives a nice airy texture. Add the grated zucchini and mix until everything’s just combined. Trust me — good eggs and fresh zucchini really shine in this step.
Step 4: Combine
Pour the wet ingredients into the dry and fold gently — don’t overmix! If you overdo it, you’ll get a dense cake, and nobody wants that. Just a few strokes until the batter is combined, maybe a few streaks of flour still visible, is perfect. The batter will be thick but still pourable.
Step 5: Prepare Filling
Mix the Brown Sugar and cinnamon for the swirl. If you want a more intense cinnamon flavor, sprinkle a little extra cinnamon in there. Set aside – you’ll layer this in a moment.
Step 6: Layer & Swirl
Pour half of the batter into your prepared pan. Sprinkle half of the cinnamon-sugar mixture over it. Add the rest of the batter on top, then sprinkle with the remaining Cinnamon Sugar. Use a knife or skewer to swirl gently through the batter — this creates those beautiful marbled swirls that make this cake such a delight to look at and eat.
Step 7: Bake
Pop it into the oven and bake for about 35-40 minutes. You’ll know it’s done when a toothpick inserted in the center comes out clean — it’s so satisfying! If your oven runs hot, start checking at 33 minutes; every oven is a little different. The smell of cinnamon wafting through your house? That’s my signal that I can’t wait any longer to try it.
Step 8: Cool & Glaze
Let the cake cool for a good 15-20 minutes before slicing; it helps it set and prevents crumbling. If you’re fancy, mix up that glaze and drizzle it over the top while the cake’s still warm. The glaze adds just enough sweetness and makes the whole thing look irresistible.
“The Easy Gluten-Free Brownie Cookie Bars turned out amazing. My kids asked for seconds. Saving this one!”
Step 9: Slice & Serve
Use a serrated knife to get nice, clean slices. I like serving mine slightly warm with a dollop of mascarpone or a scoop of vanilla Ice Cream — heaven! For an everyday treat, a simple dusting of powdered sugar works wonders. Trust me, it’s a showstopper and so easy to make — I’ve made this countless times, and it never fails to impress.
What to Serve It With
This gluten-free zucchini coffee cake is so versatile. For breakfast, pair it with a strong coffee or a cup of tea — I love a mug of hazelnut latte to balance the cinnamon sweetness. On a lazy Sunday, I serve slices with a side of Greek yogurt and fresh berries — my kids ask for this all the time. It’s perfect for brunch too, layered on a platter with fresh fruit and some whipped cream or creme fraiche. When I want to dress it up as a dessert, I go all out with vanilla Ice Cream or a little splash of caramel sauce. And for cozy afternoons, it’s just as delightful with a cup of hot chocolate or even a glass of cold milk. My family’s favorite part? That buttery crumb topping — it’s like the best crispy layer you’ll ever have in a cake. Honestly, I always keep a batch of zucchini in the fridge during summer just for making this. It’s become a family staple, and I hope you’ll love it just as much as we do!
Top Tips for Perfecting Your Gluten-Free Zucchini Coffee Cake
After making this recipe so many times, I’ve picked up a few tips that make all the difference. First, dry out your zucchini properly — I squeeze it with a clean towel until there’s no more water coming out. Seems simple, but it keeps the batter from being too wet and ruining the texture. Second, don’t overmix once you combine the wet and dry — the batter should be just combined, with a few streaks of flour still visible; overmixing leads to dense cake. When swirling the Cinnamon Sugar, I find that a gentle figure-eight motion creates a beautiful marbled effect and distributes the cinnamon evenly. For ingredient swaps, I often replace almond flour with oat flour for a more neutral flavor, but the texture stays soft and moist. If you want to make it a little healthier, swapping in coconut sugar or honey works well — just reduce the liquid slightly. When baking, I always position the rack in the middle to promote even heat, and I check the cake’s doneness early if I’ve added extra moisture from zucchini. The glaze can be customized with lemon zest or a splash of bourbon vanilla extract for a fun twist. Oh, and a little chopped nuts in the crumb topping? Absolutely delicious. I’ve learned that patience is key — let it cool completely before slicing so it doesn’t fall apart, and enjoy the process because it’s totally worth it. The first time you make it, you might think you missed something — but trust me, with a few tweaks, it becomes a staple in your gluten-free baking list.
Storing and Reheating Tips
This cake keeps well for a couple of days at room temperature under a cake dome or covered loosely with foil — but honestly, it’s so good, it’s gone pretty fast! If you want to keep it longer, store it in an airtight container in the fridge for up to 3 days. Just let it come to room temperature or warm it slightly in the microwave before slicing. For freezing, wrap individual slices tightly in plastic wrap and then place in a freezer-safe bag. It stays fresh for up to 2 months, and to reheat, I just microwave a slice for about 20 seconds, or until warm. If adding glaze later, do that when you serve, not before freezing — it tends to get a little gloopy when reheated. Keep an eye on the moisture; if you find the cake is drying out after a few days, a quick microwave or a smear of butter can revive it. I’ve tested all these methods, and honestly, leftovers are just as tasty — especially warmed up with a cup of coffee. It’s one of those recipes that actually gets better the next day because the flavors meld. Just remember: store it properly, reheat gently, and enjoy every bite!
gluten-free
Ingredients
Main Ingredients
- 1 egg egg
- 0.5 cup maple syrup
- 1 cup peanut butter
- 1 tsp vanilla extract
- 0.25 cup cacao powder
- 0.5 tsp baking soda
- 0.25 tsp salt
- 0.333 cup olive oil (or any neutral oil)
- 1 tsp vanilla extract
- 2 cups almond flour
- 0.5 cup coconut sugar
- 0.5 tsp baking soda
- 0.25 tsp salt
- 0.5 cup chocolate chips
Instructions
Preparation Steps
- Preheat oven to 350°F. Line an 8x8 inch square pan with parchment paper.
- In a large bowl, whisk together the egg, maple syrup, vanilla, and peanut butter until smooth. Mix in cacao powder, baking soda, and salt until combined. Transfer the mixture to your prepared pan and spread evenly.
- In another bowl, whisk together the egg, olive oil, vanilla. Add almond flour, coconut sugar, baking soda, and salt, then fold in chocolate chips. Spread this mixture over the brownie layer and bake for 25 minutes.
- Allow to cool in the pan for 10 minutes, then transfer to a wire rack to cool completely before slicing.


