I’ll admit, when I first heard about black bean brownies, I was a bit skeptical. Beans in dessert? That sounds weird, right? But, oh my gosh, this is one of those recipes that totally changed my perspective on healthy treats. The smell alone — rich chocolatey and a little earthy — pulls everyone into the kitchen. These brownies disappear in minutes at my house, and my kids ask for them all the time. Plus, they’re honestly a lifesaver on busy nights when I want something sweet, but don’t want to spend hours baking. What I love most about this recipe is how sneaky nutritious it is — packed with fiber and protein — yet it tastes like a decadent, fudgy delight. Is it a healthier thing? Maybe. Is it the best brownie I’ve ever had? Absolutely. I’ve made these countless times and it never fails to impress friends, family, or even my own sweet tooth. Trust me on this one — once you try these black bean brownies, you’ll wonder why you ever doubted the magic of beans in desserts. Plus, they’re super easy to whip up with ingredients I always have on hand.
Thank you for reading this post, don't forget to subscribe!What is black bean brownie?
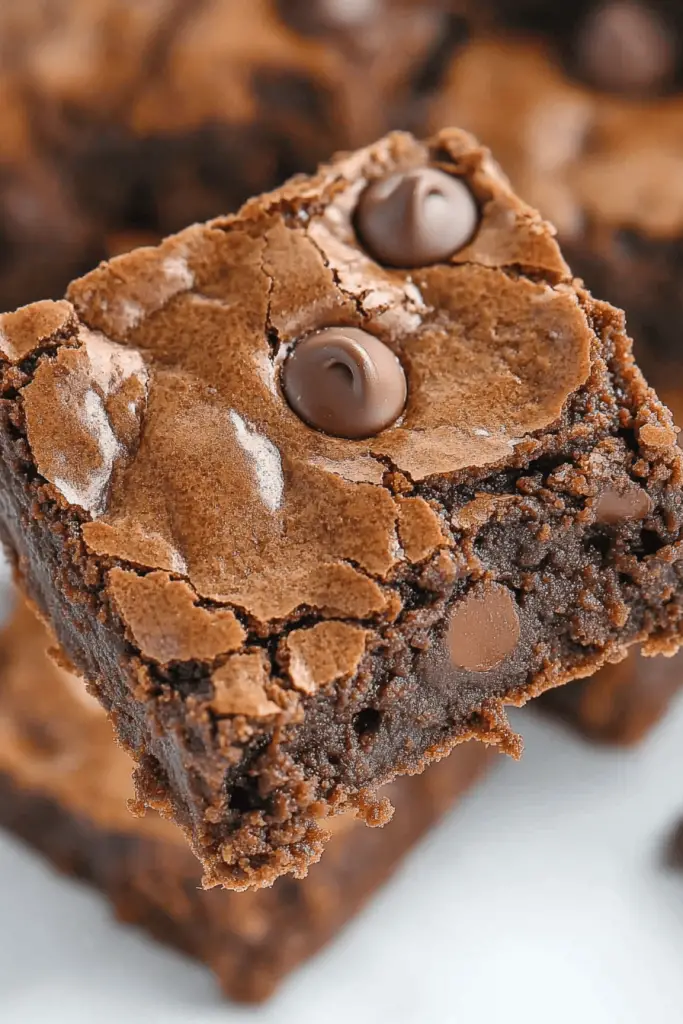
Think of black bean brownies as the secret superstar of desserts. They’re essentially fudgy, chocolatey brownies made with pureed black beans rather than flour or butter. The beans act as a natural binder, keeping the brownies rich and moist, without all the guilt. ‘Black bean brownies’ is a pretty straightforward name — it just means these brownies are made with black beans, but that doesn’t mean they taste like beans. Nope. The cocoa and chocolate chips shine through, giving you that classic brownie flavor, with an added nutritional boost. The idea originated from the desire to create a dessert that satisfies sweet cravings without all the processed sugar or heavy fats. And honestly, once I started making them, I couldn’t keep this little secret to myself. It’s part of my go-to recipe collection now, perfect for when I want an indulgence that feels good to eat, even first thing in the morning.
Why you’ll love this recipe?
What I love most about these black bean brownies is how effortless they are to make. No fancy equipment needed—just a blender or Food Processor, and regular pantry staples. This recipe is budget-friendly, too. Canned black beans are cheap and healthy, and cocoa powder is a pantry hero that I always keep stocked. Plus, they’re incredibly versatile: serve them warm with a dollop of whipped cream or Ice Cream for dessert, or enjoy them as a quick, satisfying snack. The flavor? Rich, chocolatey, with just a hint of earthiness from the beans — but trust me, it works. They’re fudgy, dense, and chewy, just like the kind my grandmother used to make, but with a modern health-conscious twist. My kids ask for these all the time, and I’ve actually started experimenting with add-ins like walnuts or a sprinkle of sea salt on top for extra flair. Honestly, what I love most is how foolproof this recipe is. Over the years, I’ve learned a few tricks (like draining the beans well and not overmixing) that make all the difference. These brownies are my ‘secret weapon’ for that perfect balance of indulgence and nutrition.
How do I make black bean brownies?
Quick Overview
This recipe is all about blending the simple and wholesome with the decadent. You start by pureeing the black beans until smooth, then mixing that with melted chocolate, eggs, and a handful of pantry staples. Layer the batter with a gooey chocolate filling, swirl it for that marbled look, pop it in the oven, and voila — you’re minutes away from brownies that taste like the real deal. The best part? It takes hardly any time, and I promise, once you get the hang of it, you’ll want to make these all the time. They’re perfect for those moments when you crave something rich and chocolatey but don’t want to feel bloated afterward. Honestly, I’ve tested this with different cocoa brands and even almond milk — and I’ve learned that using good-quality cocoa makes all the difference. So, don’t skimp on that. Let’s get baking!
Ingredients
For the Main Batter:
– 1 can (15 oz) of black beans, drained and rinsed (trust me, don’t skip this step!)
– 1/2 cup of unsweetened cocoa powder (preferably Dutched for richness)
– 1/4 cup of maple syrup or honey (or your favorite sweetener)
– 2 large eggs, at room temperature
– 1/4 cup of melted coconut oil or vegetable oil
– 1 teaspoon vanilla extract
– 1/2 teaspoon baking powder
– 1/4 teaspoon salt
– 1/2 cup of Mini Chocolate chips (plus extra for topping, if desired)
For the Filling:
– 1/4 cup of cream cheese or Coconut Cream, softened (optional for extra gooeyness)
– 2 tablespoons of powdered sugar or maple syrup
– 1 teaspoon vanilla
– 2 tablespoons of mini chocolate chips
For the Glaze:
– 1/4 cup of melted chocolate (dark or milk, your call!)
– 1 tablespoon coconut oil or butter
– A pinch of Sea Salt or a sprinkle of flaky sea salt for contrast
– Optional toppings: chopped nuts, sprinkles, or sea salt flakes
Step-by-Step Instructions
Step 1: Preheat & Prep Pan
Start by preheating your oven to 350°F (175°C). Line an 8×8-inch baking dish with parchment paper or lightly grease it. This will make slicing much easier later. Trust me, I’ve made the mistake of forgetting this step — the brownies stick so fiercely when they’re warm that I almost lost my patience. So, get that ready first!
Step 2: Mix Dry Ingredients
In a small bowl, whisk together the cocoa powder, baking powder, and salt. Doing this first ensures the cocoa is evenly distributed, so you don’t end up with cocoa clumps in your batter. It’s like seasoning your main dish — a little prep goes a long way.
Step 3: Mix Wet Ingredients
In a blender or food processor, combine the rinsed black beans, eggs, coconut oil, vanilla, and sweetener. Blend until super smooth — this is key for a fudgy texture. If the mixture looks a little thick, add a splash of milk or water to help it blend. The texture should be silky and thick, almost like softened fudge.
Step 4: Combine
Pour the bean mixture into your dry ingredients and fold gently until just combined. Don’t overmix — overworking the batter can make the brownies dense instead of fudgy. Stir in half of the chocolate chips, and reserve the rest for topping or swirling.
Step 5: Prepare Filling
If you’re adding the Cream Cheese filling, mix it with powdered sugar and vanilla until smooth. Drop spoonfuls over the brownie batter — you can swirl it around with a knife to create beautiful marbling. For a simpler finish, just skip this step or add chopped nuts to the batter itself.
“The Easy Dark Chocolate Bean Brownies turned out amazing. My kids asked for seconds. Saving this one!”
Step 6: Layer & Swirl
Pour the batter into your prepared pan. If you’re using the cream cheese filling, dollop spoonfuls over the top, then swirl with a skewer or toothpick. For a marble effect, alternate spooning in the brownie batter and the filling, then gently swirl them together for a pretty, swirled look.
Step 7: Bake
Pop the pan in your oven and bake for 20-25 minutes. Keep an eye on it — the edges should be set, and a toothpick inserted in the center comes out with moist crumbs. Every oven is different, so start checking around 20 minutes. Remember, the brownies will continue to set as they cool!
Step 8: Cool & Glaze
Let the brownies cool in the pan for at least 15 minutes. Then, transfer to a wire rack and pour the melted chocolate glaze over the top. Spread it evenly using a spatula or the back of a spoon. Sprinkle with sea salt or chopped nuts if you like. Trust me, adding a glossy glaze elevates the whole experience!
Step 9: Slice & Serve
Once fully cooled, slice into squares — I like to use a sharp serrated knife for perfect cuts. Serve at room temperature or slightly warmed with a scoop of vanilla ice cream or a dollop of whipped cream. These are even better the next day — if they last that long. I usually sneak one when no one’s looking, and honestly, I love that they stay moist and fudgy for days.
What to Serve It With
These black bean brownies are pretty flexible, so here are some of my favorite ways to enjoy them:
For Breakfast: Warmed slightly and topped with a spoonful of Greek yogurt or a drizzle of honey. It sounds wild, but these brownies are honestly satisfying enough to start the day with!
For Brunch: Serve alongside fresh fruit like strawberries or sliced bananas, and a steaming cup of coffee or chai latte. It’s a fancy, weekend treat that feels indulgent but isn’t loaded with processed sugars.
As Dessert: Top with whipped cream, extra chocolate drizzle, or a sprinkle of sea salt. A scoop of vanilla or coffee ice cream pairs beautifully with the fudginess of these brownies.
For Cozy Snacks: Warm slices with a cup of tea or milk on a rainy afternoon — so comforting. I’ve also dunked chunks in hot cocoa for a double chocolate fix, and it works perfectly.
Honestly, these brownies are so adaptable. My family likes them plain, but I love playing around with toppings. Sometimes I add a handful of chopped walnuts or shredded coconut to the batter. They taste great any way you serve them, and they’re a hit whether I make a big batch for a party or just a quick treat for myself.
Top Tips for Perfecting Your Black Bean Brownies
Now, after making these dozens of times, I’ve learned a few tricks to get that perfect fudgy texture every single time:
Zucchini Prep: Actually, I’ve tested this with zucchini, too, but to stay true to my original recipe, I always drain my beans really well. Moisture is the enemy when you want fudge rather than a cakey brownie, so pat the beans dry with paper towels before blending.
Mixing Advice: Overmixing can make the batter dense, so fold gently once the wet and dry are combined. Use a spatula for that last gentle mix rather than an electric mixer, which can whip too much air into it.
Swirl Customization: I love to add dollops of peanut butter or caramel between the layers and swirl it in — creates a dreamy flavor combo. For color variation, toss in some white chocolate chips while swirling for a beautiful marbled effect.
“New family favorite! This Easy Dark Chocolate Bean Brownies was so flavorful and ridiculously easy. Crowd-pleaser for sure.”
Ingredient Swaps: Want to make these gluten-free? Swap regular flour for almond or oat flour. Looking for vegan? Use flax eggs or chia seeds instead of eggs, and dairy-free chocolate chips. The texture stays pretty close, but expect a tiny bit less density.
Baking Tips: Oven temps can vary, so start checking your brownies at 20 minutes. If they seem underdone, give them a few more minutes, but don’t overbake — they’re best when slightly fudgy in the center.
Glaze Variations: Instead of chocolate glaze, dust them with powdered sugar or sprinkle with cacao nibs. For a fruitier twist, add some raspberry or strawberry preserves on top before glazing.
Over the years, I’ve tinkered, tested, and adjusted, and I swear, these brownies always turn out fabulous. The secret? Patience and quality ingredients. Plus, a little love goes a long way. My biggest lesson? Don’t stress if they aren’t perfect on your first try. Practice makes perfect, and once you nail the batter consistency, you’re golden. They’re honestly such a crowd-pleaser, and I always get requests to bring them to gatherings.
Storing and Reheating Tips
Your brownies will stay fresh for about 3 days at room temperature if stored in an airtight container. I usually cover them with a clean cloth or foil on a plate to keep the crust intact. For longer storage, pop them in an airtight container in the fridge — they’ll last up to a week, but I find they’re best when eaten within 4-5 days because they’ll stay ultra fudgy and moist.
If you want to keep them for even longer, freeze the brownies in an airtight container or wrapped tightly with plastic wrap and foil. I do this all the time for those nights I crave a sweet treat. Thaw at room temperature or warm up in the microwave for about 10 seconds. The richer, just-baked flavor comes back when they’re warm, and the glaze re-melts beautifully.
Reheating also softens the brownies nicely and boosts that melt-in-your-mouth appeal. Just don’t overdo it — a quick 15-20 second blast usually does the trick. Meanwhile, if you’ve added glaze or frosting, add that just before serving to prevent sogginess.
Frequently Asked Questions
Final Thoughts
Honestly, these black bean brownies have become my go-to for those nights when I crave something sweet but want to keep it semi-healthy. They’re easy enough to whip up on a weeknight, yet impressive enough to serve to guests or bring to gatherings. I love the fact that they’re packed with fiber and protein, which makes me feel a little better about indulging. Every time I bake a batch, I get that nostalgic warmth — the smell of chocolate filling the house, the dessert that reminds me of my childhood, but with a modern, wholesome twist. If you’re new to baking with beans, don’t be discouraged — the flavor is all about balance, and with a good-quality cocoa and a bit of patience, these brownies will blow your mind. I hope you have as much fun making them as I do. Feel free to tweak and experiment, and let me know your favorites—I’d love to hear how yours turn out! Happy baking, and here’s to many more sweet, satisfying moments in the kitchen.
black bean brownies
Ingredients
Main Ingredients
- 15 oz canned black beans
- 19.5 oz chocolate brownie mix
Instructions
Preparation Steps
- Open the can of black beans, drain and rinse well.
- Put the drained beans back in the can and fill the can with water.
- Transfer the beans and water into a blender and blend until smooth.
- Mix the pureed beans with the brownie mix until well combined.
- Avoid adding eggs or oil to the mixture.
- Spray a baking dish with non-stick spray or lightly grease it.
- Pour the batter into the prepared baking dish and smooth the surface.
- Bake in a preheated oven at 350°F for approximately 25 minutes or until a toothpick inserted in the center comes out clean.
- Cool the brownies in the pan for a few minutes before transferring to a wire rack to cool completely. Slice and serve.


