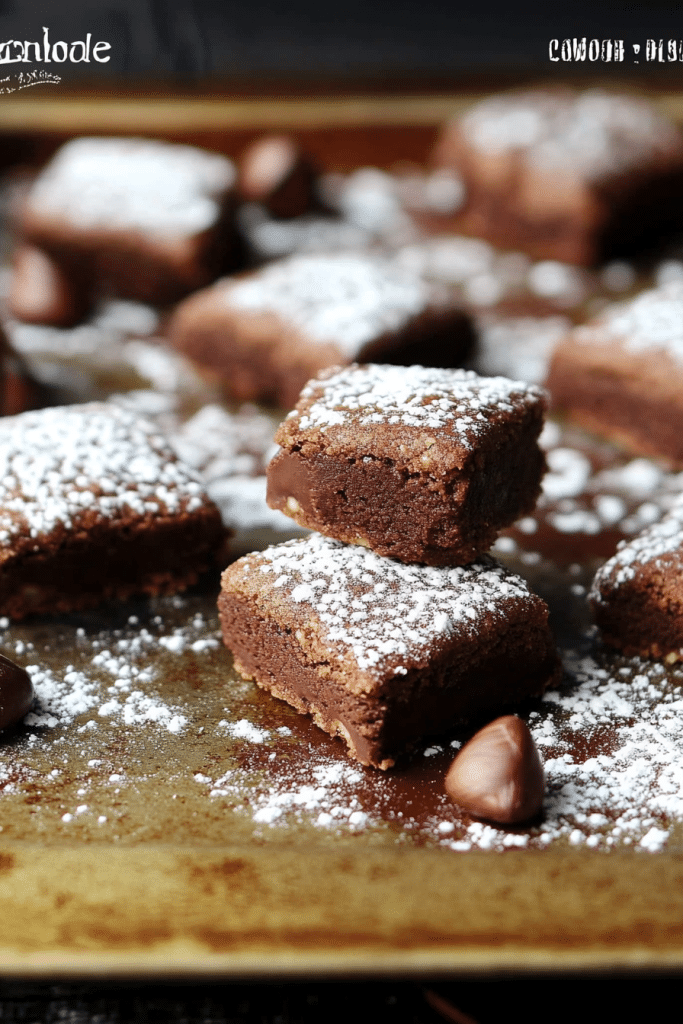
Oh, these chocolate hazelnut cookies! They’re the kind of cookie that makes your whole kitchen smell like a cozy hug, the kind that disappears from the cooling rack faster than you can say “second batch.” If you’re anything like me, you probably have a favorite Chocolate Chip Cookie recipe tucked away somewhere, maybe one you’ve been using for years. But let me tell you, these chocolate hazelnut cookies are about to give it a serious run for its money. They’re rich, they’re nutty, and that hint of hazelnut just elevates them to a whole new level of deliciousness. Honestly, the first time I made these, my husband just stood there, mouth full, with this look of pure bliss on his face. That’s when I knew I’d stumbled onto something truly special. They’re like a decadent dessert disguised as a simple cookie, and believe me, they’re a lifesaver when that sweet craving hits hard but you don’t want to commit to a whole cake.
Thank you for reading this post, don't forget to subscribe!What is chocolate hazelnut cookie?
So, what exactly are these magical little treats? At their heart, they’re a delightful variation on the classic Chocolate Chip Cookie, but with the incredible addition of toasted hazelnuts. Think of them as a sophisticated cousin to your go-to chocolate chip cookie. The “chocolate hazelnut” part comes from the combination of rich, melty chocolate chips – I’m partial to a mix of dark and semi-sweet for the best flavor balance – and finely chopped or ground toasted hazelnuts. These nuts add this amazing, slightly earthy, nutty depth that just complements the sweetness of the chocolate perfectly. It’s like a grown-up version of a childhood favorite, bringing together two beloved flavors in one perfectly chewy, slightly crisp-edged cookie. They’re essentially the ultimate comfort food, elevated.
Why you’ll love this recipe?
There are so many reasons why this chocolate hazelnut Cookie Recipe has become an absolute staple in my kitchen, and I just know you’re going to feel the same way. First off, the flavor is just out of this world. That combination of deep chocolate and warm, toasty hazelnuts is pure magic. It’s not overly sweet, which I really appreciate, and the texture is spot on – chewy in the middle with those delightful little crispy edges. What I love most about this recipe is its surprising simplicity. You don’t need any fancy equipment or complicated techniques. Seriously, if you can stir a bowl, you can make these cookies! And let’s talk about cost-effectiveness. While hazelnuts might seem a bit fancy, they’re actually quite affordable when you buy them in bulk or on sale, and a little goes a long way. Plus, the rest of the ingredients are pantry staples. These cookies are also surprisingly versatile. They’re perfect for a quick afternoon pick-me-up, elegant enough for a cookie exchange, and an absolute hit at any party. They’re my secret weapon when I need to whip up something impressive on short notice, and they’re always a guaranteed crowd-pleaser, especially with the kiddos. I’ve even found that a little swirl of Nutella in the batter before baking takes them to an even more decadent place, though that’s a special occasion indulgence!
How do I make chocolate hazelnut cookies?
Quick Overview
Making these chocolate hazelnut cookies is surprisingly straightforward. We’ll start by toasting our hazelnuts to really bring out their flavor, then cream together butter and sugars, add in eggs and vanilla, mix in the dry ingredients, and finally fold in the glorious chocolate chips and those fragrant toasted hazelnuts. A quick chill time helps them keep their shape, and then it’s just a matter of scooping and baking until they’re golden brown and irresistible. It’s a simple process that yields incredibly delicious results, proving that you don’t need to be a pastry chef to create something truly special.
Ingredients
For the Main Batter:
Here’s what you’ll need for the cookie base. I always try to use good quality butter for the best flavor and texture – it really makes a difference! Unsalted is my preference so I can control the saltiness myself. For the sugar, a mix of granulated and Brown Sugar gives us that perfect chewy texture and a lovely caramel note. And don’t skimp on the vanilla extract; a good quality one makes the flavors sing.
- 1 cup (2 sticks or 227g) unsalted butter, softened
- ¾ cup (150g) granulated sugar
- ¾ cup (165g) packed light brown sugar
- 2 large eggs
- 2 teaspoons pure vanilla extract
- 2 ½ cups (315g) all-purpose flour
- 1 teaspoon baking soda
- ½ teaspoon salt
- 1 cup (170g) semi-sweet chocolate chips
- 1 cup (170g) dark chocolate chips
- 1 cup (120g) toasted hazelnuts, roughly chopped
For the Filling:
This isn’t a separate filling in the traditional sense, but the star here is definitely the chocolate and hazelnut blend that gets incorporated right into the batter. To make sure your hazelnuts really shine, toasting them is key. You can do this in a dry skillet over medium heat, stirring constantly until fragrant and lightly browned, or spread them on a baking sheet and toast them in a 350°F (175°C) oven for about 8-10 minutes. Let them cool completely, then rub them between your hands or in a clean kitchen towel to remove most of the skins before chopping.
For the Glaze:
While these cookies are absolutely divine on their own, a simple chocolate glaze takes them to another level of indulgence. It’s totally optional, but highly recommended for that extra “wow” factor. Make sure your chocolate chips are good quality for a smooth, glossy finish.
“New family favorite! This Easy Chocolate Hazelnut Cookie Bites was so flavorful and ridiculously easy. Crowd-pleaser for sure.”
- ½ cup (85g) semi-sweet chocolate chips
- 2 tablespoons unsalted butter
- 1 tablespoon milk or heavy cream (for a richer glaze)
Step-by-Step Instructions
Step 1: Preheat & Prep Pan
Alright, first things first, let’s get our oven preheated to 375°F (190°C). This is a pretty standard temperature for most cookies, and it ensures they bake evenly. While the oven is heating up, grab a couple of baking sheets and line them with parchment paper. Parchment paper is a lifesaver, trust me! It prevents sticking and makes cleanup a breeze. If you don’t have parchment, you can lightly grease your baking sheets, but parchment is definitely my preferred method for these.
Step 2: Mix Dry Ingredients
In a medium bowl, whisk together your all-purpose flour, baking soda, and salt. Give it a good whisk to ensure everything is evenly distributed. This step is important because it ensures that the leavening agent (baking soda) and salt are spread throughout the flour, which will help your cookies rise evenly and have consistent flavor. Nobody wants a cookie with a salty surprise in one bite!
Step 3: Mix Wet Ingredients
Now, in a large bowl, or the bowl of your stand mixer fitted with the paddle attachment, cream together the softened butter, granulated sugar, and packed light Brown Sugar. You want to beat these together until the mixture is light and fluffy, which usually takes about 3-5 minutes. This creaming process incorporates air into the dough, which is crucial for texture. Then, beat in the eggs one at a time, making sure to scrape down the sides of the bowl after each addition. Finally, stir in the vanilla extract until it’s well combined.
Step 4: Combine
Gradually add the dry ingredients to the wet ingredients, mixing on low speed (or stirring with a wooden spoon) until just combined. It’s really important not to overmix here! Overmixing can develop the gluten in the flour too much, resulting in tough cookies. You want to mix until you no longer see streaks of dry flour. Once the dough is just combined, fold in the semi-sweet chocolate chips, dark chocolate chips, and your toasted, chopped hazelnuts. Again, do this gently until they’re evenly distributed throughout the dough. The dough will be thick and wonderfully studded with chocolate and nuts!
Step 5: Prepare Filling
Since our “filling” is really just the delicious mix of chocolate and hazelnuts incorporated into the batter itself, this step is already covered! The key here is ensuring those hazelnuts are properly toasted and chopped. Toasting really unlocks their nutty aroma and flavor, making them so much more impactful in the cookie. If you skipped the toasting step, the flavor wouldn’t be nearly as deep and satisfying. Chopping them ensures you get a good distribution of nutty goodness in every single bite.
Step 6: Layer & Swirl
This step isn’t about layering in the traditional sense, but about ensuring even distribution. As you fold in the chocolate chips and hazelnuts, try to ensure they are spread throughout the entire dough. The “swirl” effect here is more about the delightful pockets of melted chocolate and nutty pieces that will emerge as the cookies bake. When scooping, I like to use a cookie scoop (about 1.5-2 tablespoons) to ensure uniform size, which helps with even baking. Roll the dough into balls and place them about 2 inches apart on your prepared baking sheets. You can gently press them down slightly if you prefer a flatter cookie, but I usually leave them as balls for a thicker, chewier center.
Step 7: Bake
Bake for 9-12 minutes, or until the edges are golden brown and the centers are still slightly soft. Keep an eye on them, as oven temperatures can vary. You don’t want to overbake them, as they’ll continue to cook a bit on the hot baking sheet after you take them out. For a chewier cookie, err on the side of less time; for a crispier cookie, bake them a minute or two longer. The aroma filling your kitchen at this stage is just heavenly!
Step 8: Cool & Glaze
Once they’re out of the oven, let the cookies cool on the baking sheets for about 5 minutes. This allows them to firm up enough to be moved without falling apart. Then, carefully transfer them to a wire rack to cool completely. If you’re opting for the glaze, melt the semi-sweet chocolate chips and butter in a small saucepan over low heat, stirring constantly, until smooth. Alternatively, you can melt them in a microwave-safe bowl in 30-second intervals, stirring between each. Stir in the milk or cream for a glossier finish. Once the cookies are completely cool, drizzle the glaze over them using a spoon or a piping bag. Let the glaze set before serving or storing.
“Packed with flavor and so simple. Exactly what I wanted from this Easy Chocolate Hazelnut Cookie Bites!”
Step 9: Slice & Serve
These chocolate hazelnut cookies are honestly best served at room temperature, after the glaze has set. You can cut them in half to admire the gooey chocolate and nutty interior, but they’re perfectly delicious served whole. They look absolutely beautiful on a plate, especially with that chocolate drizzle. I love pairing them with a cold glass of milk or a hot cup of coffee – they’re just that versatile!
What to Serve It With
These chocolate hazelnut cookies are truly fantastic on their own, but they also play wonderfully with a variety of beverages and occasions. For breakfast, they’re a delightful treat alongside a strong cup of coffee or a creamy latte. Imagine dunking one into your morning brew – pure bliss! For a more relaxed brunch spread, they add a touch of elegance, perhaps nestled next to some fresh fruit salad or alongside other pastries. They’re not too sweet to be a morning treat, but definitely feel special. As a dessert, they’re a dream. Serve them with a scoop of vanilla bean ice cream for a decadent warm cookie à la mode experience, or alongside a rich chocolate mousse for an intense chocolate fest. They’re also just perfect for those cozy snack times. I love having a few on hand for an afternoon pick-me-up with a glass of milk, or sharing them with friends who pop over unexpectedly. My kids always ask for these when they have friends over for playdates – they’re a guaranteed hit, and I love that they feel a bit more special than just plain chocolate chip cookies.
Top Tips for Perfecting Your Chocolate Hazelnut Cookies
Over the years, I’ve definitely learned a few tricks that make these chocolate hazelnut cookies even better. For the hazelnuts, toasting them is non-negotiable in my book. It truly transforms their flavor from mild to wonderfully aromatic. If you’re short on time, you can sometimes find pre-toasted hazelnuts, but doing it yourself is easy and the payoff is huge. Don’t over-toast them, though; they can go from perfectly toasted to burnt pretty quickly! When it comes to mixing the dough, remember that a gentle hand is key. Overmixing will lead to tough cookies, and nobody wants that. Mix just until the dry ingredients are incorporated. For the chocolate, I really recommend using a mix of semi-sweet and dark chocolate chips. The semi-sweet provides sweetness, and the dark chocolate adds a deeper, more complex flavor that balances the sweetness of the cookie. You can also chop up a good quality chocolate bar for chunks rather than chips; they melt beautifully. If you’re worried about your cookies spreading too much, you can chill the dough for at least 30 minutes to an hour before baking. This helps the butter firm up, resulting in a thicker cookie. For the glaze, consistency is everything. If it’s too thick, it will be hard to drizzle; if it’s too thin, it will just run off the cookies. You can adjust it by adding a tiny bit more milk or cream if it’s too thick, or a little more chocolate chips if it’s too thin. And remember, baking times are just guidelines. Your oven might run hotter or cooler, so keep an eye on those cookies and pull them out when the edges look perfectly golden brown but the centers still look a little soft. They’ll firm up as they cool!
Storing and Reheating Tips
These chocolate hazelnut cookies are wonderfully forgiving when it comes to storage. If you’ve got a few left (which is rare in my house!), you can keep them at room temperature in an airtight container for up to 3-4 days. Make sure they are completely cooled before sealing them up, otherwise, you’ll end up with a soggy bottom! If you want to keep them for longer, the refrigerator is your friend. Pop them in an airtight container or a resealable bag, and they should stay fresh for about a week. The texture might firm up a bit in the fridge, so I often pop them in the microwave for about 10-15 seconds before enjoying to bring back that lovely soft chew. Freezing is also a great option for these cookies. You can freeze baked cookies in a single layer on a baking sheet until firm, then transfer them to a freezer-safe bag or container for up to 3 months. Thaw them at room temperature or gently reheat them as mentioned. For the glaze, I usually add it once the cookies are completely cool, especially if they’re going to be stored at room temperature or in the fridge, so it has a chance to set properly. If you plan on freezing them with glaze, the glaze might get a bit soft upon thawing, but it’s usually still delicious. Just be prepared for a slightly different texture.
Frequently Asked Questions
Final Thoughts
I really hope you give these chocolate hazelnut cookies a try. They’re more than just a recipe to me; they’re a little slice of happiness, a guaranteed way to make a day a little brighter, and a fantastic way to share some love. The balance of rich chocolate and toasted hazelnuts is truly something special, and the fact that they’re so easy to make just makes them even more appealing. If you enjoy the deep, comforting flavors of this recipe, you might also love my Double Chocolate Fudge Brownies or my incredibly popular Salted Caramel Blondies for more decadent treats. Give these cookies a bake, let me know how they turn out in the comments below, and don’t forget to share your own little twists or favorite ways to enjoy them! Happy baking, friends!
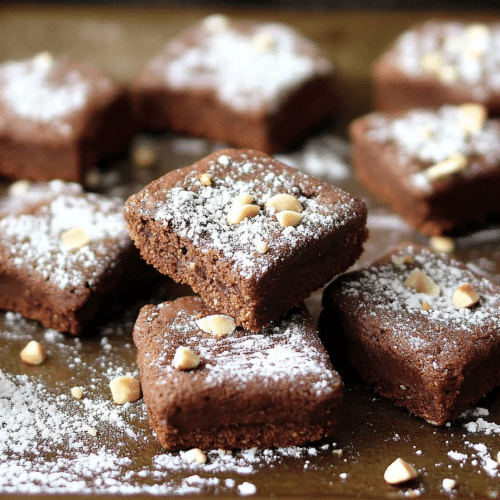
chocolate hazelnut cookies
Ingredients
Main Ingredients
- 0.5 cup Nutella
- 2 whole eggs
- 0.5 cup sugar
- 0.25 cup milk
- 1 teaspoon vanilla extract
- 0.5 cup all-purpose flour
- 0.5 cup powdered sugar for dusting
Instructions
Preparation Steps
- Preheat oven to 350°F.
- In a medium-sized mixing bowl, whisk together the Nutella, eggs, sugar, milk, and vanilla until smooth.
- Whisk in the flour and mix until the batter is smooth and creamy.
- Grease a mini brownie pan or mini cupcake pan with baking spray.
- Pour the Nutella mixture into each cavity, filling about 2/3 full.
- Bake for 14 to 15 minutes, or until a toothpick inserted in the center comes out clean or with moist crumbs.
- Invert the pan onto a cooling rack and let the cookies cool completely.
- Dust with powdered sugar and serve.


