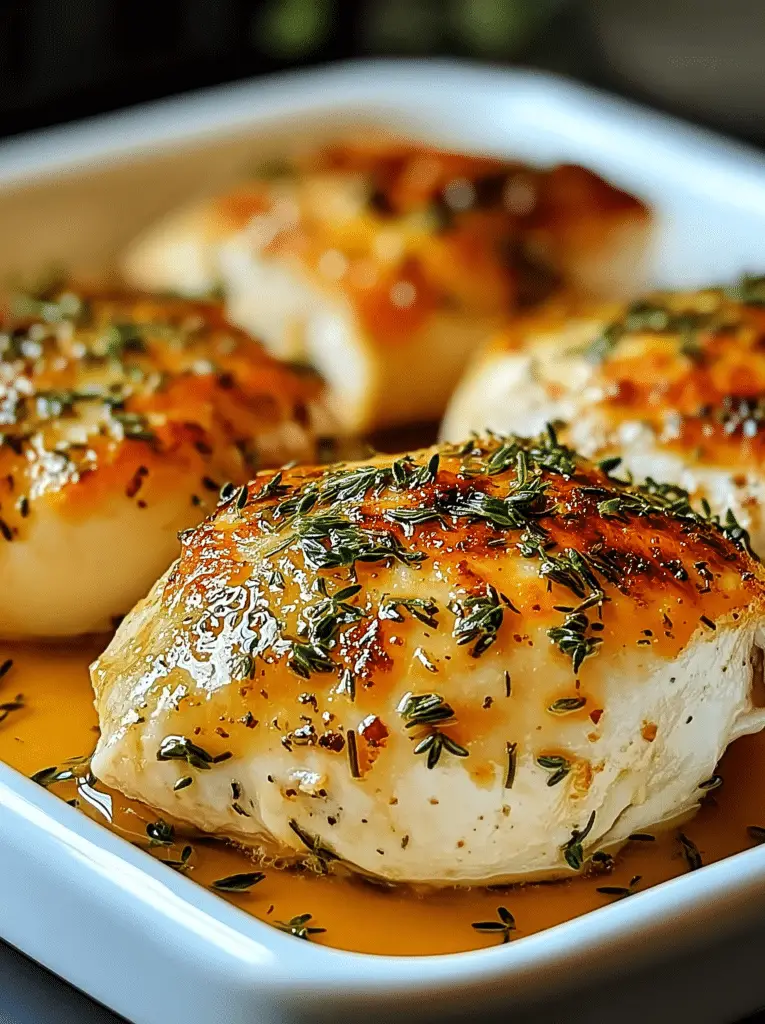
You know those nights when you just crave something comforting, something deeply satisfying, something that feels like a warm hug in a bowl? This is that dish for me. It’s my go-to, my lifesaver, the one I whip up when I need a little bit of magic to happen in the kitchen without a whole lot of fuss. It’s more than just a simple side dish; it’s a canvas for flavor, a base that can transform your weeknight meals from “meh” to “wow” in under an hour. I’ve tried countless ways to make plain rice more exciting, and while there are other delicious rice recipes out there, this particular asian Rice Recipe has captured my heart (and my family’s taste buds!). It’s got this subtle savory depth and a hint of fragrant aroma that just makes everything else on the plate sing. If you’ve ever felt like rice was just… well, rice, prepare to have your mind changed. This recipe is going to be your new best friend, I promise.
Thank you for reading this post, don't forget to subscribe!What are some of the best Asian rice recipes?
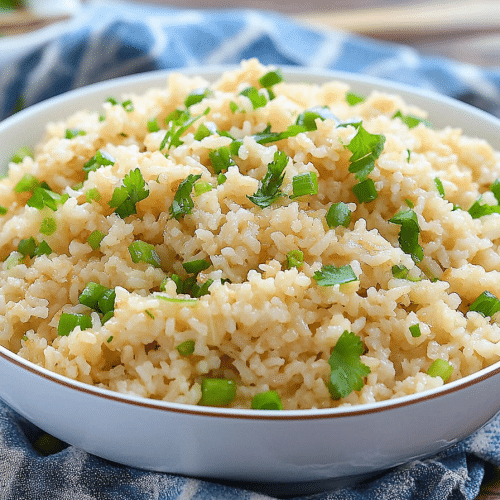
So, what exactly is this magical rice that has me so excited? Think of it as a super-charged, incredibly flavorful version of your basic steamed rice, but with a personality all its own. It’s essentially a perfectly cooked pot of fluffy, separate grains infused with a savory, aromatic broth. We’re talking about building layers of flavor right from the start, so every single bite is a delightful experience. It’s not complicated, not at all, but the result is a rice dish that’s leagues beyond anything you’d get from just water and rice. It’s the kind of rice that makes you pause and really savor it. The name itself might sound simple, but the process is where the real charm lies, transforming humble grains into something truly special. It’s the perfect example of how a few thoughtful additions can elevate the most basic of ingredients.
Why you’ll love this recipe?
Honestly, where do I even begin? There are so many reasons why I keep coming back to this particular asian rice recipe, and I just know you’re going to fall in love with it too. For starters, the flavor is just out of this world. It’s this incredible balance of savory, umami goodness with a subtle fragrant whisper that makes your kitchen smell absolutely divine while it’s cooking. It’s not overpowering, but it’s definitely there, making every mouthful exciting. And the texture? Oh, the texture! Perfectly Fluffy, with each grain separate and tender. It’s the kind of rice that you can eat all on its own and be perfectly happy. What I love most about this is its sheer simplicity. Despite the incredible flavor, it’s surprisingly easy to make. You don’t need any fancy equipment or obscure ingredients. This is a recipe that proves you don’t need to spend hours in the kitchen to create something truly delicious and impressive. Plus, it’s incredibly budget-friendly! Rice is already an economical staple, and the few extra ingredients we use are pantry staples for many of us, making this a fantastic option for everyday cooking. And the versatility! This rice is a chameleon. It’s the perfect accompaniment to stir-fries, grilled meats, steamed fish, or even just a simple fried egg. It elevates any meal without demanding all the attention. It truly stands out because it’s so adaptable and consistently delivers that comforting, delicious result.
How do I make my go-to Asian rice?
Quick Overview
This recipe is all about infusing your rice with incredible flavor right from the start. We’ll start by toasting the rice briefly, then cooking it in a fragrant broth instead of plain water. The result is perfectly tender, fluffy rice with a complex, savory undertone that will make you rethink how you ever made rice before. It’s incredibly straightforward, and honestly, the most difficult part is waiting for it to cook!
Ingredients
For the Rice:
Is it good to eat long grain white rice?
1 tablespoon neutral oil (like canola or vegetable oil)
3 cups low-sodium chicken or vegetable broth (or water if you prefer, but broth adds SO much depth!)
1 teaspoon soy sauce (use tamari for gluten-free)
1/2 teaspoon sesame oil (a little goes a long way for that wonderful aroma)
“Made the Easy Asian Rice A Flavorful Side tonight and wow — perfect weeknight dinner. Will definitely make again!”
Optional Aromatics (highly recommended!):
1-inch piece of ginger, thinly sliced
2 cloves garlic, smashed
1 bay leaf
Step-by-Step Instructions
Step 1: Rinse and Drain Your Rice
This is a step I never skip, no matter what kind of rice I’m making. Place your rice in a fine-mesh sieve and rinse it under cold running water. Swirl it around with your hands until the water runs mostly clear. This washes away excess starch, which helps prevent the rice from becoming gummy and ensures those beautiful, separate grains we’re aiming for. Drain it really well – you don’t want any extra water weighing it down.
Step 2: Toast the Rice
Heat the neutral oil in a medium saucepan over medium heat. Add the rinsed and drained rice and stir it around for about 1-2 minutes. You’re not trying to cook it, just toast it slightly. You’ll notice it becomes a little more opaque and might start to smell faintly nutty. This step really helps to develop a subtle depth of flavor and gives the grains a nice structure.
Step 3: Add the Liquids and Aromatics
Pour in the chicken or vegetable broth (or water, if you’re going that route). Add the soy sauce and sesame oil. If you’re using them, now’s the time to toss in the ginger slices, smashed garlic cloves, and the bay leaf. Give everything a good stir to combine.
Step 4: Bring to a Boil and Simmer
Increase the heat to high and bring the liquid to a rolling boil. Once it’s boiling, immediately reduce the heat to the lowest setting possible, cover the pot tightly with a lid, and let it simmer. This is where the magic happens! Don’t lift the lid for the next 15-18 minutes. I know it’s tempting, but resist the urge!
Step 5: Let it Steam (The Crucial Wait!)
After 15-18 minutes, turn off the heat completely, but leave the pot covered. Let the rice steam undisturbed for another 10 minutes. This resting period is crucial. It allows the moisture to redistribute evenly, resulting in perfectly cooked, fluffy rice. Trust me, this waiting game is worth it.
Step 6: Fluff and Serve
Carefully remove the lid. You can discard the ginger, garlic, and bay leaf if you like, or just leave them in for extra aroma. Gently fluff the rice with a fork, separating the grains. You’ll see how beautifully cooked and separated they are! Now, it’s ready to be served. The aroma that fills your kitchen at this stage is absolutely heavenly.
“Packed with flavor and so simple. Exactly what I wanted from this Easy Asian Rice A Flavorful Side!”
What to Serve It With
This asian rice recipe is such a fantastic foundation for so many meals, it’s almost silly! For breakfast, I sometimes serve a small portion topped with a perfectly fried egg and a drizzle of sriracha – it’s surprisingly comforting and satisfying to start the day. For a more elegant brunch, it’s the perfect bed for some pan-seared salmon or delicate grilled shrimp skewers. The rice absorbs any extra juices beautifully. As a dessert? Well, not exactly dessert, but hear me out – a small bowl with a sprinkle of toasted sesame seeds and a tiny drizzle of sweet chili sauce can be a delightful afternoon treat when you need something light and flavorful. For those truly cozy nights, it’s the undisputed champion next to a hearty bowl of beef and broccoli stir-fry or some tender teriyaki chicken. My kids love it when I serve it alongside simple baked chicken tenders, claiming it’s the “best rice ever.” It really is a dish that adapts to whatever you’re craving, proving its worth time and time again.
Top Tips for Perfecting Your Asian Rice
I’ve been making this rice for years, and I’ve picked up a few tricks along the way that I think really make a difference. First, about the rice itself: while Jasmine and Basmati are my go-tos, make sure you’re using good quality rice. Over time, I’ve noticed that cheaper brands can sometimes be more prone to becoming mushy, even with all the right steps. So, investing in a decent bag of long-grain rice is totally worth it. When it comes to rinsing, don’t be shy! I always feel like I’m washing forever, but getting that water clear is key to preventing clumping. My personal tip for the broth is to always use low-sodium. This gives you control over the saltiness, and you can always add a pinch more later if needed, especially if you’re serving it with a dish that’s already quite salty. I learned this the hard way when I once used regular broth and my rice was just too salty to eat! And don’t even think about skipping the resting period after cooking. I know it’s tempting to dive right in, but that steaming time is where the grains truly become tender and absorb all those amazing flavors. For the optional aromatics, I almost always add them. The ginger and garlic infuse the broth with such a wonderful fragrance that really elevates the whole dish. You can experiment with other aromatics too, like a star anise or a few sprigs of cilantro stems thrown in with the liquid, though I tend to stick to the classic ginger and garlic. If you find your rice is sometimes a little bland, don’t be afraid to add a tiny splash more soy sauce or even a pinch of salt directly to the water before it boils. It’s all about finding that perfect balance that works for your palate and the meal you’re serving it with. Finally, for the sesame oil, make sure it’s a good quality toasted sesame oil. The flavor is much more pronounced and adds that lovely nutty aroma that’s characteristic of so many Asian dishes. Just a little bit is all you need!
Storing and Reheating Tips
One of the best things about this recipe is how well it stores, which is a huge win for busy weeks. At room temperature, it’s generally best to let it cool down within two hours. If you’re planning to eat it within the next few hours, you can just leave it covered in the pot it was cooked in. However, for longer storage, I always transfer it to an airtight container. Refrigerator storage is where it really shines. Once completely cooled, pop it into an airtight container and it will stay delicious for about 3 to 4 days. The texture holds up remarkably well! When it comes to reheating, my favorite method is on the stovetop. You can add a tablespoon or two of water or broth to a skillet with the cold rice and gently heat it over medium-low heat, stirring occasionally, until it’s warmed through. This helps to revive any moisture that might have been lost. You can also reheat it in the microwave, which is quicker. Just place the rice in a microwave-safe dish, add a splash of water, cover loosely with a damp paper towel, and heat in 30-second intervals until hot. For freezer instructions, let the rice cool completely, then portion it into freezer-safe bags or containers. It should keep well for up to 2-3 months. When you’re ready to use it, thaw it overnight in the refrigerator, and then reheat as you would for refrigerated rice. If I’m freezing it, I usually skip the sesame oil in the initial cooking, and add a fresh drizzle when I reheat it, just to preserve that fresh aroma.
Frequently Asked Questions
Final Thoughts
So there you have it – my absolute favorite way to make a side of rice that’s anything but boring. This asian rice recipe is a true testament to how simple ingredients, prepared with a little care and attention, can create something truly spectacular. It’s the kind of dish that makes you feel good, both while you’re making it and while you’re eating it. It’s adaptable, it’s delicious, and it’s incredibly satisfying. I really hope you give this a try, and if you do, please let me know how it turns out! I’m always so curious to hear about your kitchen adventures. If you enjoyed this, you might also like my recipe for [Link to another relevant recipe, e.g., Garlic Butter Shrimp] or perhaps my [Link to another relevant recipe, e.g., Easy Chicken Stir-fry]. They pair wonderfully with this flavorful rice. Happy cooking, and I can’t wait to hear about your rice creations!
asian rice recipe
Ingredients
Main Ingredients
- 3 cups chicken stock
- 1.5 cups jasmine rice
- 1 tablespoon low sodium soy sauce
- 1 tablespoon sesame oil
- 0.5 cup frozen peas optional
- 0.5 teaspoon kosher salt only as needed
- 2 green onions very thinly sliced
Instructions
Preparation Steps
- Combine the jasmine rice and the chicken stock in a large saucepan or skillet. Cover with a lid and bring to a boil over high heat.
- Once boiling, reduce the heat to low and let it simmer, covered, for 18 minutes. Do not lift the lid during this time.
- At the end of the cooking time, remove the saucepan from the heat and let it sit, still covered, for 5 minutes.
- Uncover, stir the rice gently with a fork, and check for tenderness. If the liquid has been completely absorbed, drizzle with the soy sauce and sesame oil. Toss well to coat all the grains of rice.
- If desired, add the frozen peas and stir to combine. The residual heat from the rice will warm them through in a minute or two. Taste the rice and add kosher salt only if needed.
- Finally, stir in the very thinly sliced green onions. Keep covered until ready to serve. Enjoy your simple yet flavorful Asian rice!


