
There’s something about that perfect combination of peanut butter and chocolate — it’s like a warm hug in every bite. I’ve always loved the way the two flavors dance together, creating this irresistible, rich candy that’s just as comforting as it is decadent. Honestly, I’ve made countless versions of this fudge over the years, tinkering with different types of chocolate, adding nuts, swirling in caramel — but this recipe? It’s the one I come back to whenever I need a quick, foolproof treat that never lets me down. Whether I’m craving something sweet at 10pm or bringing a little gift to a friend’s house, peanut butter chocolate fudge is my go-to. And the best part? It’s absurdly easy to make. No fancy equipment, no baking — just a few simple ingredients and a little patience. This one’s truly a lifesaver on busy nights or when I want that nostalgic flavor that takes me straight back to childhood. Trust me on this: once you make it, it’ll disappear in minutes at your house too!
Thank you for reading this post, don't forget to subscribe!What is peanut butter chocolate fudge?
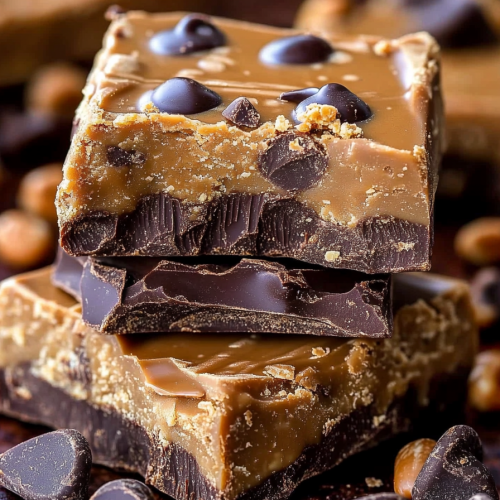
Think of peanut butter chocolate fudge as the lovechild of creamy peanut butter and silky chocolate nestled into a rich, luscious square. It’s essentially a no-bake treat that combines the best of both worlds — the salty, nutty depth of peanut butter with the deep, velvety sweetness of chocolate. The name might make you think of dense, heavy candy, but in reality, it’s smooth, melt-in-your-mouth goodness that’s super easy to cut into squares. The “fudge” part just means it’s soft enough to leave a little gooey impression on your finger, but firm enough to hold its shape. I love calling it my “kitchen shortcut,” because with just a handful of ingredients you probably already have, you can whip this up in no time. Think of it as a homemade chocolate peanut butter cup in bar form — but way more addictive and, bonus, you get to control the ingredients and sweetness.
Why you’ll love this recipe?
What I love most about this peanut butter chocolate fudge is its simplicity — no baking, no complicated steps, just a handful of ingredients that come together so quickly. It’s perfect for when a chocolate craving hits out of nowhere, or if you need a last-minute gift that feels special but is honestly so easy to make. Plus, the flavor is *insane*: rich, creamy, with that irresistible sweet-salty combo that makes your taste buds sing. The texture? Oh, it’s just right. It’s soft without being crumbly, smooth without being greasy, and melts in your mouth delightfully. My kids actually ask for this all the time, and I’ve even snuck in a handful of chocolate chips or some chopped nuts to make it even more tempting. And since it’s budget-friendly, you can whip up a batch without feeling guilty about splurging a little on quality chocolate or natural peanut butter. Honestly, I like to keep a batch in the fridge at all times — it’s perfect for those late-night cravings or fun movie nights during the weekend. Trust me, once you try this, it might become your new favorite go-to treat.
How do I make peanut butter chocolate fudge?
Quick Overview
This recipe is honestly so straightforward that I almost feel guilty calling it “recipe.” You melt chocolate and peanut butter together, pour into a pan, swirl in some extras if you like, and then chill until firm. It’s a one-bowl, no-bake wonder that takes about 10 minutes of active prep. Once it’s set, just slice into squares, and you’re done. The magic comes from how silky and indulgent it looks — perfect for sharing or just for munching on when you need a little sweet boost. And since it’s so versatile, you can easily customize the flavors or add-ins to make it uniquely yours. I promise, once you try it, you’ll be making this on repeat.
Ingredients
For the Main Fudge: What is the main fudge?
“The Decadent Peanut Butter Chocolate Gooey Bars turned out amazing. My kids asked for seconds. Saving this one!”
- 1 ½ cups semi-sweet chocolate chips — I always use good quality chocolate — it makes all the difference.
- 1 cup creamy peanut butter — natural or classic, I tested both and loved them equally.
- ¼ cup unsalted butter — melted for that velvety texture.
- 1 teaspoon vanilla extract — for depth of flavor.
- ¼ teaspoon salt — enhances the overall taste, especially if you’re using unsalted peanut butter.
Optional Fillings & Toppings:
- Chopped nuts (peanuts, almonds) for crunch.
- Sea salt flakes for a sweet-salty burst.
- Chocolate chips or white chocolate drizzles for extra flair.
Step-by-Step Instructions
Step 1: Preheat & Prep Pan
Line an 8×8-inch baking dish with parchment paper. This makes removing the fudge so much easier. No need to butter or spray — parchment is your best friend here. Sit that aside while you prepare the melting station.
Step 2: Melt Chocolate & Peanut Butter
In a microwave-safe bowl, combine the chocolate chips and butter. Microwave in 30-second bursts, stirring well after each, until everything is smooth and glossy. Alternatively, you can melt them over a double boiler on the stove if you prefer. Stir in the peanut butter and vanilla until the mixture is silky and combined. This is the good stuff — it smells like heaven and looks so decadent already!
Step 3: Pour & Spread
Pour the chocolate-peanut butter mixture into your prepared dish. Use a spatula to spread it evenly. At this stage, I like to sprinkle a pinch of sea salt or chopped nuts on top — makes it look pretty and adds an extra layer of flavor.
Step 4: Chill
Pop it in the fridge for at least 2 hours, or until it’s firm enough to cut. If you’re in a rush, the freezer works too — just watch that it doesn’t freeze completely, or it might get a little harder to cut cleanly.
Step 5: Cut & Serve
Once set, lift the fudge out of the dish using the parchment paper and cut into small squares. The edges will be smooth and shiny. Serve at room temperature or chilled for a firmer bite. I love serving mine with a glass of cold milk or a hot cup of coffee — it’s the perfect cozy combo.
Extra Tips
If you want to get fancy, swirl some melted peanut butter or dark chocolate on top before chilling. For a fun twist, fold in mini marshmallows or crushed graham crackers into the mixture before pouring. Just keep in mind that these additions might affect how quickly it sets up, so keep an eye on the fridge.
“Packed with flavor and so simple. Exactly what I wanted from this Decadent Peanut Butter Chocolate Gooey Bars!”
What to Serve It With
This fudge pairs beautifully with a simple cup of coffee or hot tea. It’s also fantastic alongside a scoop of vanilla ice cream if you want to make a quick sundae — the warm, melty peanut butter chocolate flavor melting over something cold is pure bliss. For brunch, toss a few pieces into a fruit platter or serve alongside oatmeal bars for a breakfast dessert vibe. My family loves to keep a little stash hidden in the fridge for those “just because” moments. During holidays or family gatherings, I layer it with sliced strawberries or drizzle it with caramel for an elevated look. Honestly, this fudge is the kind of treat that makes everyone ask for seconds — it’s just irresistible, and I love that it’s one of those recipes you can customize endlessly.
Top Tips for Perfecting Your Peanut Butter Chocolate Fudge
Even after making this more times than I can count, I learned a few tricks to make it perfect every single time. First, choosing the right chocolate is key. I always go for semi-sweet because it’s balanced, but if you love it extra sweet, milk chocolate works beautifully too. When melting, be patient and gentle — high heat can burn the chocolate or cause unwanted clumping. I’ve found that stirring in small increments and using a microwave makes it less messy, but a double boiler is foolproof if you have the patience. For the peanut butter, natural ones tend to be thicker and a little oilier, but I tested this recipe with both and loved the creamy consistency of the classic, processed kind. If you want a richer, more indulgent flavor, toss in a handful of chopped Reese’s or peanut butter cups before pouring. A tip I swear by is pressing plastic wrap directly onto the surface if I plan to store it overnight in the fridge — prevents any awkward frosting or moisture from forming. For the swirls and toppings, use a toothpick or skewer to create pretty marbled patterns, but don’t overdo it — keep it natural and casual, like a little piece of edible art. Also, I’ve found that slightly under-baking or just chilling before slicing helps avoid cracking or uneven edges. In short: patience, good ingredients, and a little love are all you need to master this fudge. Oh, and don’t forget to lick the spatula!
Storing and Reheating Tips
This peanut butter chocolate fudge stays happiest in the fridge — I usually wrap the dish tightly in plastic wrap or store it in an airtight container. It lasts up to a week that way, but honestly, it rarely sticks around that long at my house. If you want to keep it longer, pop it in the freezer for up to 3 months. Just wrap it well with plastic wrap and a layer of foil if you’re stacking it or storing in a big bag. To serve after freezing, let it thaw in the fridge for a few hours or at room temperature for about 30 minutes — it will soft up beautifully without losing that silky texture. Avoid reheating it to a melted state because that can change its consistency; instead, just slice it cold or at room temp. If you want to refresh the flavor, a quick sprinkling of sea salt or a drizzle of honey can revive the taste after storage. The key is to keep it airtight and cool, avoiding unnecessary moisture or drying out. Honestly, this fudge keeps its charm no matter how long it hangs around — I just love how it’s always ready when the sweet tooth strikes!
Frequently Asked Questions
Final Thoughts
If you ask me, peanut butter chocolate fudge is a classic for a reason. It’s one of those recipes I keep coming back to because it’s simple, satisfying, and endlessly customizable. I love how the flavors come together in that perfect melt-in-the-mouth way — it’s like a little moment of heaven you can make at home, anytime you want. Whether you’re celebrating something special or just need a quick pick-me-up, this fudge has your back. My family devours it faster than I can say “more,” and I secretly love that it’s one of those treats that makes everyone—kids and grown-ups alike— smile from ear to ear. So, grab your ingredients and get ready to create something truly addictive. Yes, it’s that good. Happy baking, and I can’t wait to hear how yours turns out!
Peanut Butter Chocolate
Ingredients
Main Ingredients
- 1.5 cups unsalted butter
- 0.75 cup granulated sugar
- 1 cup light brown sugar
- 2 large eggs
- 1 tbsp vanilla extract
- 1 tsp baking soda
- 0.5 tsp salt
- 3.25 cups all-purpose flour
- 0.75 cup chocolate chips
- 30 pieces Miniature Peanut Butter Cups
- 1 can fat-free sweetened condensed milk
- 0.25 cup creamy peanut butter
Instructions
Preparation Steps
- Preheat the oven to 350°F. Line a 9x13 inch baking dish with parchment paper and lightly spray.
- In a large bowl, melt the butter. Mix in granulated sugar and brown sugar until combined.
- Add eggs one at a time, mixing well. Stir in vanilla extract, baking soda, and salt.
- Gradually add the flour, mixing until just combined. Stir in chocolate chips.
- In a small bowl, combine sweetened condensed milk with peanut butter until smooth.
- Spread half of the cookie dough evenly into the prepared baking dish. Top with peanut butter cups.
- Pour the condensed milk mixture over the cookie dough layer. Break up remaining cookie dough and place on top. Press gently to flatten.
- Bake for 40 minutes or until golden brown on top. Allow to cool before slicing.


