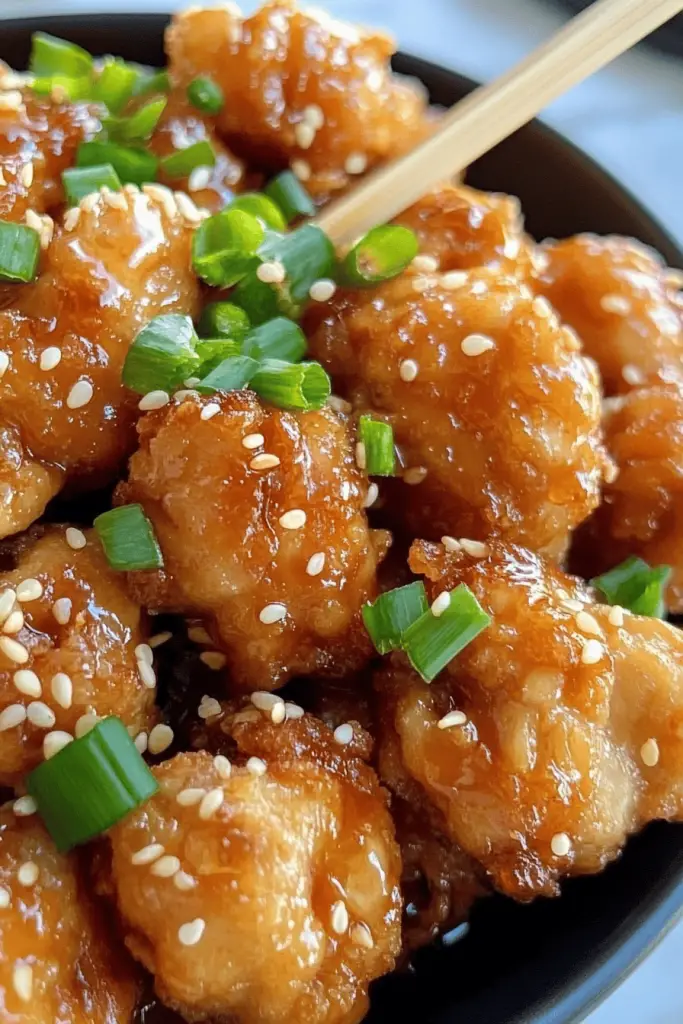
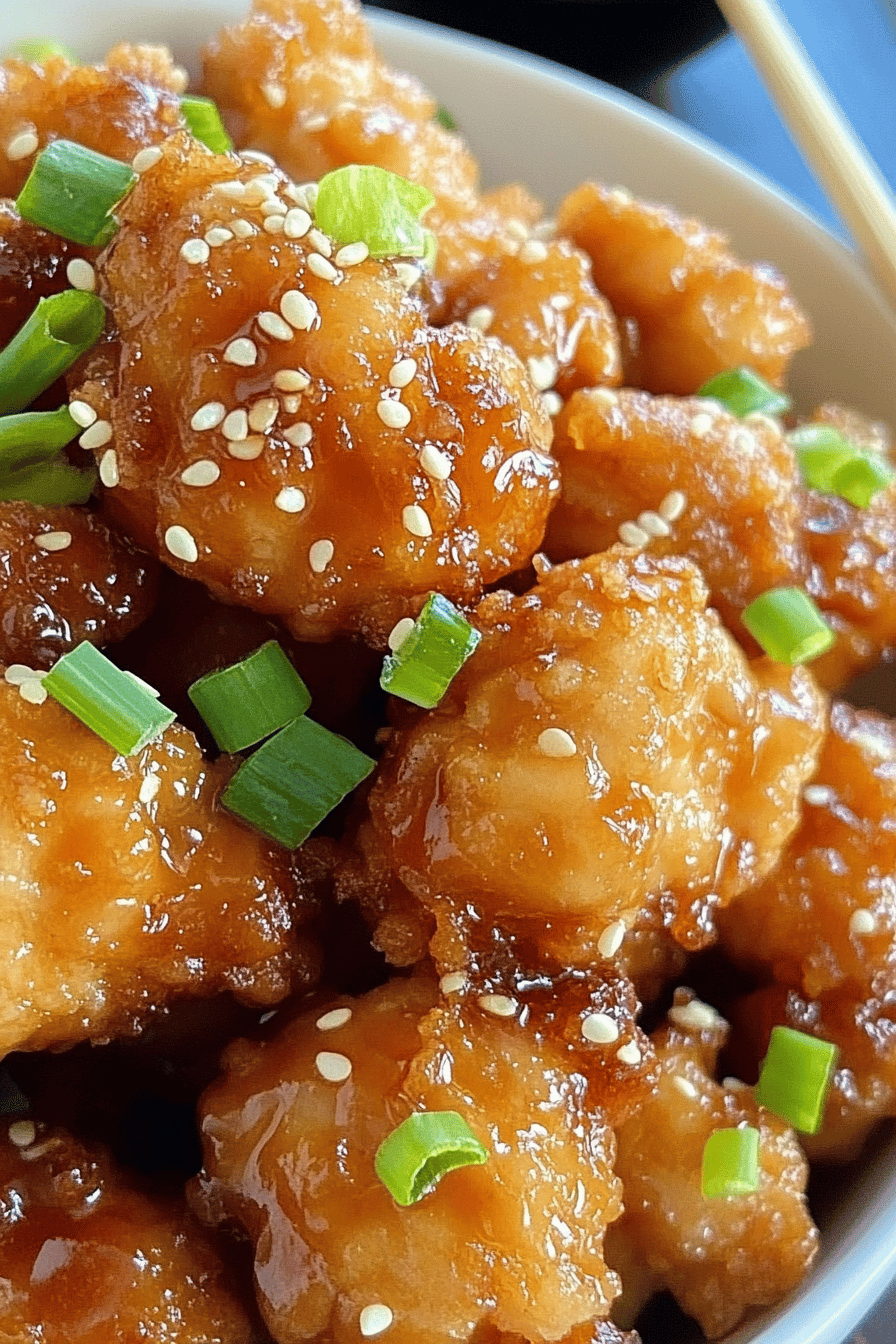
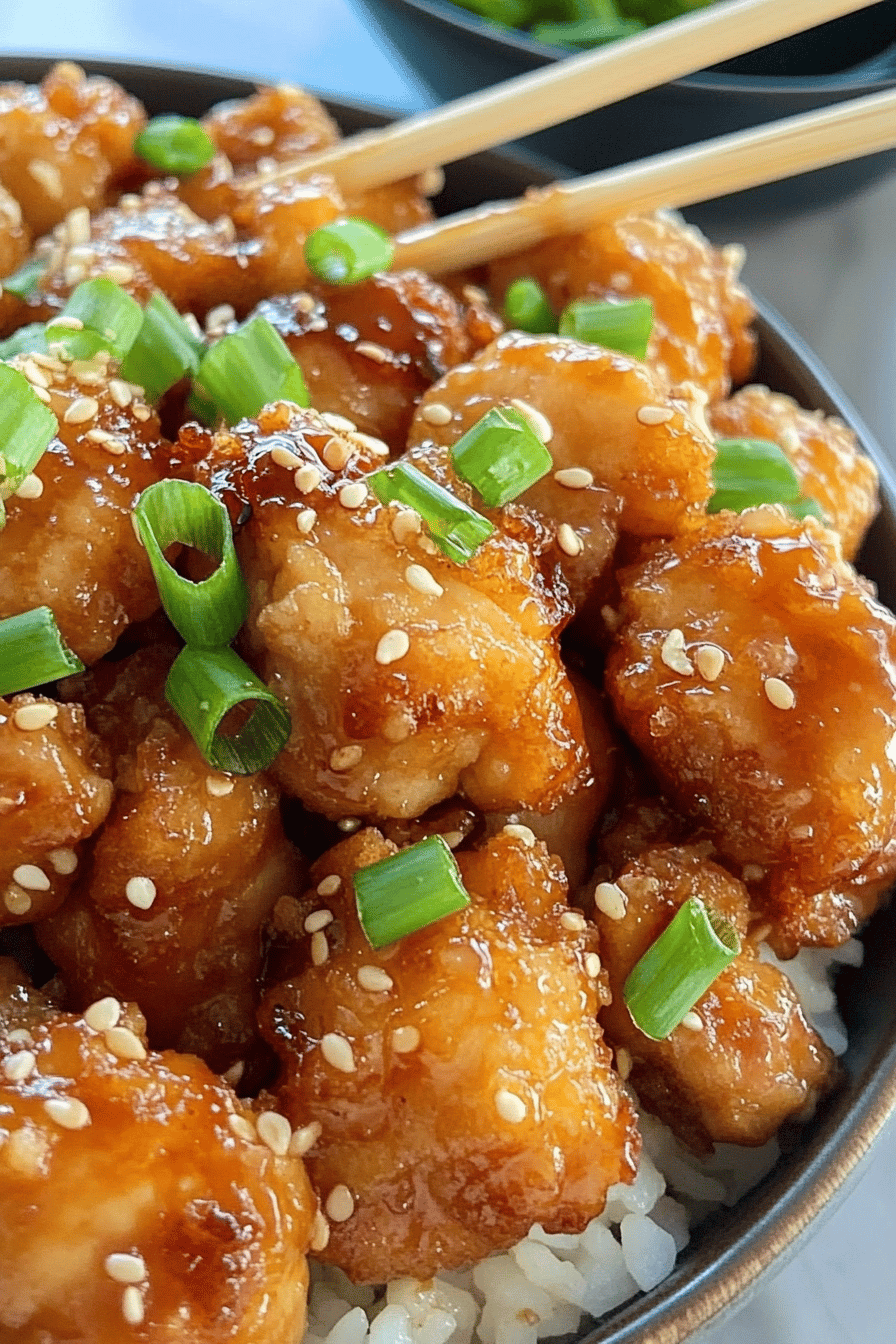
Okay, friends, let me tell you about a weeknight game-changer: Honey Chicken – Crispy, extra. I’m not kidding when I say this rivals takeout – it’s sticky, sweet, and crispy perfection, but made right in your own kitchen. Forget orange chicken for a minute. Think of that same craving, but with a richer, more complex honey flavor. It’s a total flavor bomb, and honestly, way easier than you might think. This recipe has become a staple in my house, and I’m so excited to share it with you!
Thank you for reading this post, don't forget to subscribe!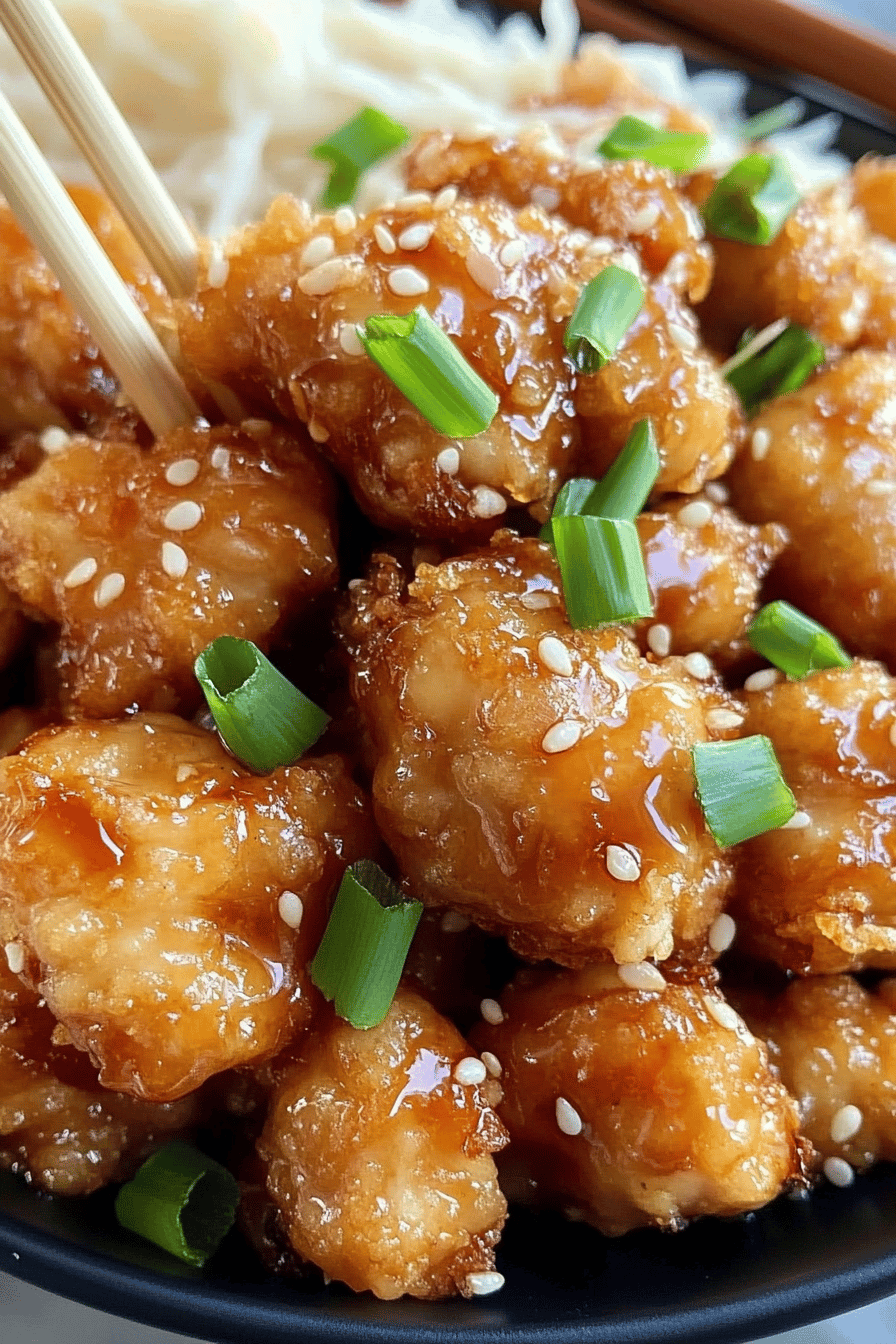
What is Crispy Honey Chicken?
Alright, so what *is* Crispy Honey Chicken? Think of it as the ultimate comfort food upgrade. It’s essentially bite-sized pieces of chicken, coated in a super crispy batter and then tossed in a luscious, homemade honey glaze. The key difference? We’re not just using any honey. We’re building a glaze with depth, complexity, and that perfect sticky-sweet balance. It’s way more than just chicken and honey – it’s an experience! It’s essentially your favorite fried chicken, but elevated with a glorious honey embrace.
Why you’ll love this recipe?
Where do I start? What are some of the reasons why I love Crispy Honey Chicken? What is a simple definition of ‘se
- Flavor explosion: What The honey glaze is just…wow. It’s sweet, savory, and has a hint of warmth from a secret ingredient that I’ll share later. It’s that perfect balance that keeps you coming back for more.
- Seriously easy: Don’t let the “crispy” part scare you. The batter is super simple to whip up, and the frying process is straightforward. I promise, you’ve got this!
- Budget friendly We’re using pantry staples here, so you won’t have to break the bank to make this amazing dish. Trust me, the homemade version is cheaper (and tastier!) than takeout.
- Versatile: You can serve this Crispy Honey Chicken with rice, noodles, or even as an appetizer. It’s perfect for a quick weeknight dinner or a party snack. The options are endless!
What I love most about this is that it’s a crowd-pleaser. My kids, who can be picky eaters, devour this. It’s also perfect for when you want something that feels indulgent but doesn’t take hours to prepare. It’s just so much better than ordering in, and you get to control all the ingredients. Plus, the satisfaction of making something this delicious from scratch? Unbeatable. It’s quickly become more requested than my regular Fried Chicken – high praise indeed!
How do you make crispy chicken?
Quick Overview
How do I make Crispy Honey Chicken? How do I make a crispy batter for chicken? How do I fry a chicken? What’s your favorite way to make honey glaze? What is the best part? What is the best way to impress yourself in less than an hour?
Ingredients
For the Chicken:
- 1.5 lbs boneless, skinless chicken thighs, cut into bite-sized pieces. What are some good ways to use chicken breast for thighs?
For the main battery:
- 1 cup all-purpose flour. Is it safe to use gluten-free flour? Extra crispness.
- What is the secret to crispy texture? 1/2 cup cornstarch.
- 1 teaspoon baking powder.
- 1/2 teaspoon salt.
- 1/4 teaspoon black pepper.
- I used 1 cup ice water. (It helps keep the batter light and crispy.)
For the Glaze:
“The Crispy Honey Chicken turned out amazing. My kids asked for seconds. Saving this one!”
- 1/2 cup honey. (Use a good quality honey for the best flavor!)
- How much soy sauce should I use?
- 2 tablespoons rice vinegar. (Adds a nice tang to balance the sweetness.)
- 1 tablespoon sesame oil. (Don’t skip this! It adds a wonderful nutty aroma.)
- 1 tablespoon cornstarch.
- 1/4 cup water.
- 1 teaspoon ginger, grated. (Fresh ginger is a must!
- 2 cloves of garlic, minced. (Freshly sliced garlic is also key!)
- What are some good red pepper flakes?
For Frying:
- Vegetable oil, for frying (About 3-4 cups, enough to submerge the chicken.)
How do I follow step
Step 1: Preheat & Prep
How do I get a frying station ready? How do you heat vegetable oil in a large pot or deep skillet over medium-high heat? If you want to use oil for cooking, you’ll want it to reach around 350°F (175°C). I always use a thermometer to make sure I get it right, but you can also test it by dropping small drops of water. Is it possible to dip a piece of batter into the oil and it should turn golden brown in about 30 minutes? Make sure you have a wire rack lined with paper towels ready to drain the Fried Chicken. How do I get that extra crispy texture?
Step 2: Mix Dry Ingredients
In a medium bowl, whisk together the flour, cornstarch, baking powder, salt, and pepper. Make sure everything is well combined. This ensures that the leavening agent (baking powder) is evenly distributed, which contributes to a lighter batter. I’ve made the mistake of not whisking properly before, and ended up with pockets of baking powder – not a good experience!
Step 3: Mix Wet Ingredients
In a separate bowl, whisk together the ice water and vanilla. Is it important that the water is ice cold? Which leads to a crispier coating. I sometimes add ice cubes to keep it extra chilled.
Step 4: Combine
Slowly pour the wet ingredients into the dry ingredients, whisking until just combined. Don’t overmix! A few lumps are okay. Overmixing will develop the gluten in the flour, resulting in a tougher batter. The batter should be thin enough to coat the chicken evenly but not so thin that it just drips off. If it seems too thick, add a tablespoon or two more of ice water.
Step 5: Prepare the Chicken
Pat the chicken pieces dry with paper towels. What is the best way to get the batter to stick to the pan? Add the chicken to the batter and toss to coat evenly. Make sure each piece is fully covered in batter.
Step 6: Fry the Chicken
Carefully drop the battered chicken pieces into the hot oil, working in batches to avoid sticking to the skin. Is overcrowding the Overcrowding will lower the oil temperature and result in soggy chicken. Fry for about 5-7 minutes per batch, flipping halfway through, until golden brown and cooked through. The internal temperature of the chicken should reach 165°F (74°C). I use a meat thermometer to be sure.
Step 7: Make the Glaze
While the chicken is frying, let’s make the glaze. In a small saucepan, whisk together the honey, soy sauce, rice vinegar, sesame oil, cornstarch, and water. Add the grated ginger, minced garlic, and red pepper flakes (if using). Cook over medium heat, stirring constantly, until the glaze thickens and becomes glossy, about 3-5 minutes. It should be thick enough to coat the back of a spoon.
Step 8: Toss & Serve
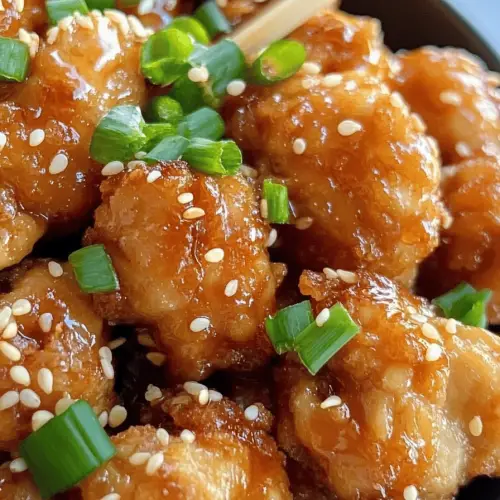
Once the chicken is fried and drained, add it to the saucepan with the honey glaze. Toss to coat evenly, making sure every piece is glistening with that delicious sauce. Serve immediately over rice or noodles, garnished with sesame seeds and chopped green onions, if desired.
“Packed with flavor and so simple. Exactly what I wanted from this Crispy Honey Chicken!”
What to Serve It With
This Crispy Honey Chicken is super versatile and goes well with so many things! Here are some of my favorite ways to serve it:
- With rice: A classic pairing! I love serving it with steamed jasmine rice or brown rice. It’s the perfect base to soak up all that delicious honey glaze.
- With noodles: Try it with stir-fried noodles, udon noodles, or even just plain egg noodles. The noodles add a different texture and make for a heartier meal.
- As an appetizer: Serve the Crispy Honey Chicken on its own as a party snack. You can even put out some toothpicks for easy grabbing.
- With veggies: Add some steamed broccoli, green beans, or bok choy for a balanced meal. The veggies add a pop of color and freshness to the dish.
- In lettuce wraps: For a lighter option, serve the chicken in lettuce wraps with some shredded carrots, cucumbers, and a drizzle of extra honey glaze.
One of my family traditions is to serve this with a side of homemade kimchi. The spicy, fermented cabbage cuts through the sweetness of the glaze perfectly. I also love serving it with a simple side salad with a light vinaigrette. It’s the perfect way to balance out the richness of the dish. Honestly, you can’t go wrong with any of these options. Just pick your favorite and enjoy!
Top Tips for Perfecting Your Crispy Honey Chicken
Alright, time for some insider tips to take your Crispy Honey Chicken to the next level! These are things I’ve learned over countless batches – little tweaks and adjustments that make a big difference:
- Don’t skip the cornstarch in the batter: It’s the key to that super crispy texture. It helps create a light and airy coating that fries up beautifully.
- Use ice water in the batter: As I mentioned before, the ice water helps prevent gluten development, which leads to a crispier coating. It’s a simple trick, but it makes a huge difference.
- Don’t overcrowd the pot: Fry the chicken in batches to avoid lowering the oil temperature. Overcrowding will result in soggy chicken. Patience is key!
- Use a thermometer to check the oil temperature: Maintaining the correct oil temperature is crucial for achieving that perfect golden brown color and crispy texture. A thermometer will help you keep it consistent.
- Don’t overcook the chicken: Overcooked chicken will be dry and tough. Use a meat thermometer to make sure it reaches an internal temperature of 165°F (74°C).
- Adjust the glaze to your liking: If you prefer a sweeter glaze, add more honey. If you want it spicier, add more red pepper flakes. Feel free to experiment and make it your own!
- Garnish generously: A sprinkle of sesame seeds and chopped green onions adds a pop of color and flavor to the dish. Don’t be shy!
- Double batter for extra crispy texture: For an even crispier finish, dip the chicken in the batter, then in cornstarch, then back in the batter before frying.
- Air fryer option: For a healthier version, you can air fry the chicken. Preheat your air fryer to 400°F (200°C) and cook for about 15-20 minutes, flipping halfway through, until golden brown and cooked through. Toss with the honey glaze after air frying. It won’t be *quite* as crispy, but still delicious!
Storing and Reheating Tips
If you happen to have leftovers (which is rare in my house!), here’s how to store and reheat your Crispy Honey Chicken:
- Room Temperature: I really wouldn’t recommend leaving it at room temperature for more than two hours max. Bacteria love to grow, and we don’t want any tummy troubles!
- Refrigerator Storage: Store the chicken in an airtight container in the refrigerator for up to 3-4 days. The glaze can make the chicken a bit soggy over time, but it will still be safe to eat.
- Freezer Instructions: For longer storage, you can freeze the chicken. Place the chicken in a single layer on a baking sheet and freeze for about 2-3 hours, or until solid. Then, transfer the frozen chicken to a freezer-safe bag or container. This will prevent the pieces from sticking together. Freeze for up to 2-3 months.
- Reheating: The best way to reheat the chicken is in the oven. Preheat your oven to 350°F (175°C) and bake for about 10-15 minutes, or until heated through. You can also reheat it in a skillet over medium heat, stirring occasionally, until heated through. Microwaving is an option, but it will make the chicken even soggier.
- Glaze Timing Advice: If you’re planning to store the chicken, it’s best to toss it with the honey glaze just before serving. This will help prevent it from getting too soggy.
Frequently Asked Questions
Final Thoughts
So there you have it – my all-time favorite Crispy Honey Chicken Recipe! I truly believe this is a must-try. It’s easy, delicious, and always a hit with family and friends. The sweet and savory glaze combined with the crispy chicken is simply irresistible. And who doesn’t love a dish that’s better than takeout? If you enjoyed this recipe, be sure to check out my other chicken recipes, like my spicy sesame chicken or my lemon herb roasted chicken. Happy cooking, and I can’t wait to hear how your Crispy Honey Chicken turns out! Don’t forget to leave a comment and rating below, and share your own variations with me. I’m always looking for new ideas!
Crispy Honey Chicken
Ingredients
Main Ingredients
- 1.5 lbs Chicken thighs
- 0.5 cup All-purpose flour
- 1 tsp Salt
- 0.5 tsp Black pepper
- 1 cup Honey
- 0.25 cup Soy sauce
- 2 tbsp Rice vinegar
Instructions
Preparation Steps
- In a bowl, combine flour, salt, and pepper.
- Dredge chicken thighs in the flour mixture.
- Heat oil in a large skillet over medium-high heat.
- Cook chicken until golden brown and cooked through.
- In a small bowl, whisk together honey, soy sauce, and rice vinegar.
- Pour sauce over chicken and cook until thickened.


