You know those days? The ones where a craving hits you like a ton of bricks, but the thought of pulling out a million ingredients and spending hours in the kitchen just feels… impossible? Yeah, I’ve been there. So many times. That’s exactly why I practically live by this recipe for coconut bars. They’re not just easy; they’re ridiculously good. Imagine this: a soft, chewy base that’s got just the right amount of sweetness, topped with a rich, creamy coconut layer, all kissed with a drizzle of something decadent. They’re like a hug in dessert form. Honestly, they’re my secret weapon when unexpected guests pop over or when I just need a little pick-me-up that doesn’t involve a whole cake project. They’re truly the Best Coconut bars I’ve ever made, and I’ve made quite a few!
Thank you for reading this post, don't forget to subscribe!
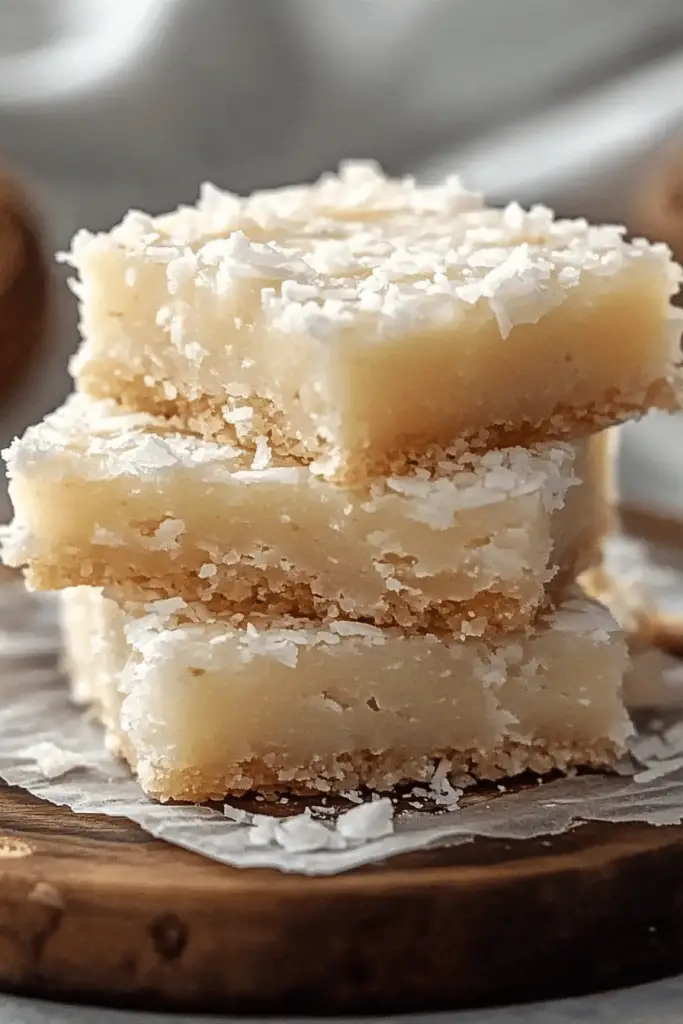
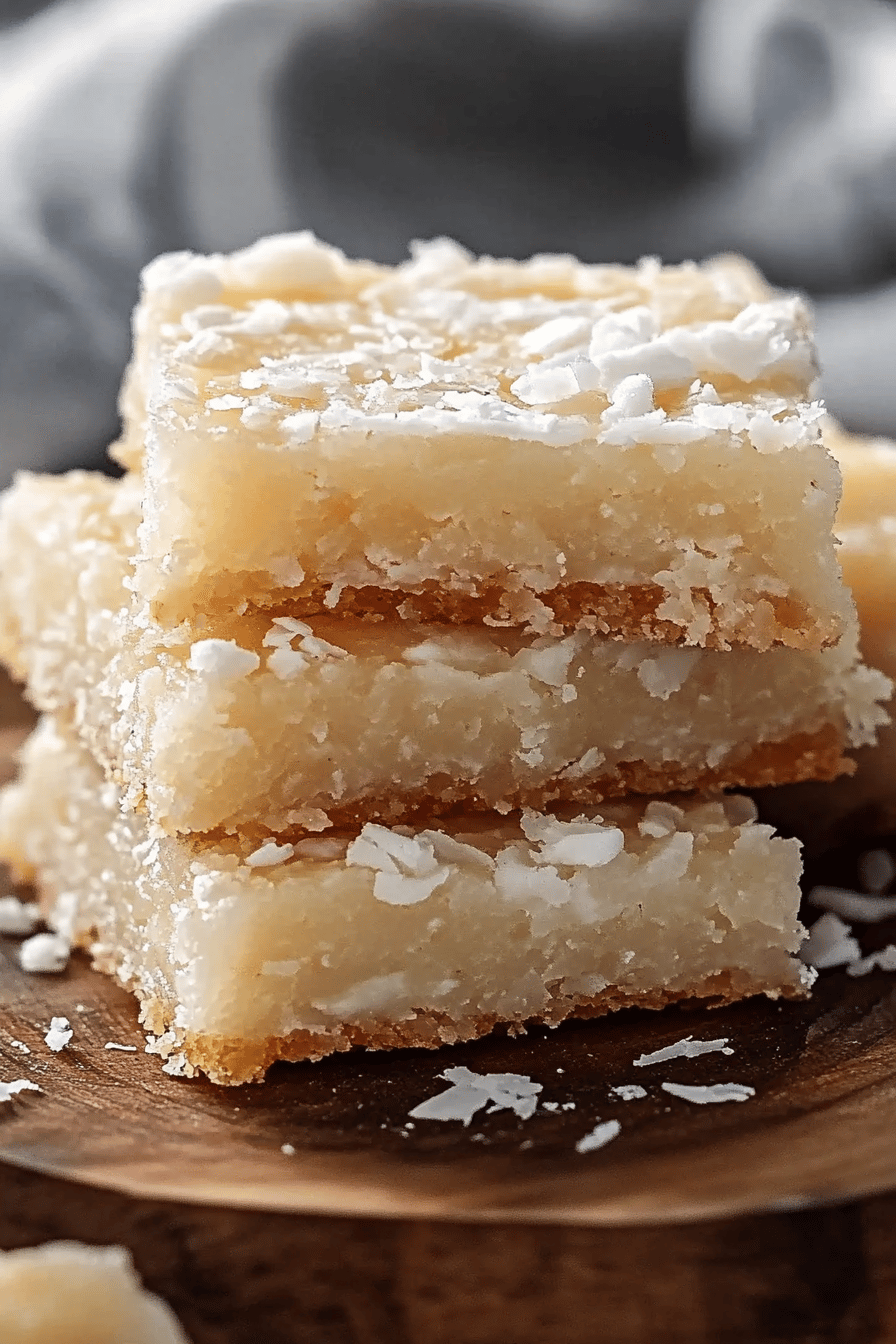
What are coconut bars?
Okay, so what exactly *are* these magical little squares of happiness? Think of them as the sophisticated cousin of a classic blondie, but with a tropical twist that will transport you straight to a sun-drenched beach. They’re essentially a dense, buttery, and wonderfully moist bar with a generous swirl of sweetened coconut filling baked right into the center. The magic happens when everything bakes together, creating this incredible texture where the bottom layer is slightly cakey and the coconut swirl becomes this gooey, slightly caramelized dream. They’re not overly complicated, but the flavor payoff is HUGE. The name just felt right because, well, coconut is the star here, but it’s balanced with that comforting bar base. It’s simple, it’s pure, and it’s utterly delicious.
Why you’ll love this recipe?
There are so many reasons why this recipe has become a staple in my kitchen, and I’m pretty sure you’ll fall in love with it for all the same ones! First off, the flavor is just out of this world. You get that warm, buttery richness from the base, followed by the sweet, slightly toasted coconut that’s just divine. It’s not cloyingly sweet, which I really appreciate. Then there’s the simplicity – seriously, you can whip these up in no time. They’re a lifesaver on busy weeknights when the sweet tooth strikes unexpectedly. And let’s talk cost-efficiency! Most of the ingredients are pantry staples, which means you can probably make them right now without a special trip to the store. Plus, they’re incredibly versatile. I mean, they’re fantastic on their own, but they’re also amazing with a scoop of vanilla Ice Cream or a dusting of powdered sugar. What I love most about these coconut bars, though, is the consistent results. I’ve made this recipe countless times, and it *never* fails to impress. It’s the kind of recipe that makes people ask, “How did you make these?!” and that’s always a good sign, right?
How do I make coconut bar?
Quick Overview
The beauty of these coconut bars lies in their straightforward approach. You’ll basically mix up a simple batter, create a quick and luscious coconut filling, layer them together, and bake until golden. It sounds simple, and it truly is! The whole process is designed to be fuss-free, meaning you can go from craving to creation in under an hour, with minimal cleanup. Trust me, it’s the kind of recipe that makes you feel like a baking superhero, even if you’re just starting out.
Ingredients
For the Main Batter:
1 cup unsalted butter, softened: Make sure it’s nice and soft, not melted! This helps create that perfect tender crumb. I always use unsalted so I can control the saltiness myself.
1 ½ cups granulated sugar: The classic sweetener that works beautifully here.
2 large eggs: Room temperature is best for easier mixing and a smoother batter.
1 teaspoon vanilla extract: The secret ingredient that boosts all the other flavors!
1 ½ cups all-purpose flour: Spooned and leveled, not scooped, for accuracy. This is key to getting the right texture.
½ teaspoon baking soda: For a little lift, but not too much, as we want a dense bar.
“New family favorite! This Coconut bars was so flavorful and ridiculously easy. Crowd-pleaser for sure.”
¼ teaspoon salt: Balances the sweetness and enhances all the flavors.
For the Filling:
1 (14 ounce) can Sweetened Condensed Milk: This is what makes the filling so rich and gooey. Don’t use evaporated milk; it has to be sweetened condensed!
1 ½ cups shredded sweetened coconut: I like the regular shred for texture, but you can use fine if you prefer. Sweetened is definitely the way to go here.
½ cup chopped pecans or walnuts (optional): If you love a little crunch, these are a fantastic addition!
For the Glaze:
1 cup powdered sugar: Sifted to avoid lumps.
2-3 tablespoons milk (or coconut milk for extra flavor!): Start with 2 tablespoons and add more until you reach your desired drizzling consistency.
½ teaspoon vanilla extract (optional): Just a little extra flavor boost.

Step-by-Step Instructions
Step 1: Preheat & Prep Pan
First things first, let’s get your oven ready. Preheat it to 350 degrees F (175 degrees C). Now, grab an 8×8 inch baking pan. I like to line mine with parchment paper, leaving a little overhang on the sides. This makes lifting the finished bars out so much easier later, trust me on this one. Then, lightly grease the parchment and the exposed sides of the pan. This little bit of prep work saves you a world of hassle later on!
Step 2: Mix Dry Ingredients
In a medium bowl, whisk together your flour, baking soda, and salt. Giving them a good whisk ensures that the baking soda and salt are evenly distributed throughout the flour, which means your bars will bake up evenly and have the perfect texture. You don’t want any pockets of saltiness!
Step 3: Mix Wet Ingredients
In a large bowl, cream together the softened butter and granulated sugar until light and fluffy. This is where you build that wonderful base texture! Beat in the eggs, one at a time, until well combined, then stir in the vanilla extract. The mixture should look smooth and creamy.
Step 4: Combine
Gradually add the dry ingredients to the wet ingredients, mixing on low speed (or by hand with a spatula) until just combined. Be careful not to overmix here! Overmixing can lead to tough bars, and nobody wants that. You just want to see no streaks of flour left. The batter will be thick, and that’s exactly what we’re going for.
Step 5: Prepare Filling
Now for the star! In a separate bowl, combine the Sweetened Condensed Milk, shredded coconut, and optional chopped nuts. Stir it all together until everything is nicely coated. This filling is so simple but packed with amazing flavor. It smells incredible even at this stage!
“Packed with flavor and so simple. Exactly what I wanted from this Coconut bars!”
Step 6: Layer & Swirl
Spread about two-thirds of the main batter evenly into your prepared baking pan. It might be a little sticky, so a spatula or your lightly greased fingers can help. Then, dollop the coconut filling over the batter. Don’t worry about making it perfect; a rustic look is lovely! Dollop spoonfuls of the remaining one-third of the batter over the coconut filling. Using a knife or a skewer, gently swirl the top batter into the coconut layer. You’re not trying to completely mix them, just create beautiful marbling. This step is super fun!
Step 7: Bake
Pop that pan into your preheated oven and bake for 25-30 minutes, or until the edges are golden brown and the center is set. You can test for doneness by inserting a toothpick into the center; it should come out with moist crumbs attached, but not wet batter. Keep an eye on it towards the end, as ovens can vary!
Step 8: Cool & Glaze
This is crucial for the perfect texture! Let the bars cool completely in the pan on a wire rack. I know it’s tempting to dive in warm, but resisting this step makes them slice much cleaner and allows the flavors to meld. Once they’re completely cool, whisk together the powdered sugar, 2 tablespoons of milk, and vanilla extract for the glaze. Add more milk, a teaspoon at a time, until you reach a nice drizzling consistency. Drizzle the glaze over the cooled bars. Let the glaze set for about 15-20 minutes before slicing.
Step 9: Slice & Serve
Once the glaze has set, use the parchment paper overhang to lift the entire slab out of the pan. Place it on a cutting board and slice into squares. I usually get about 16 bars out of an 8×8 pan. Serve them at room temperature and watch them disappear!
What to Serve It With
These coconut bars are so wonderfully versatile, they fit into any occasion! For breakfast, they’re an absolute treat. I love pairing them with a hot cup of coffee, maybe a simple black coffee to let the bar’s flavors shine. They make mornings feel a little more special. For brunch, they look beautiful on a platter. I’ll often cut them into smaller, bite-sized squares and arrange them with fresh berries. A mimosa or a sparkling rosé is the perfect drink to complement their sweetness. As a dessert, well, they’re a no-brainer! They’re fantastic on their own, of course, but if you want to go all out, serve them slightly warmed with a scoop of good quality vanilla bean Ice Cream. The contrast of warm bar and cold ice cream is heavenly. And for those cozy snack times? They’re perfect with a tall glass of cold milk. My kids especially love them this way. Honestly, the simplicity of a good cookie and a glass of milk is timeless, and these coconut bars take that to a whole new level.
Top Tips for Perfecting Your Coconut Bars
I’ve made these coconut bars more times than I can count, and along the way, I’ve picked up a few tricks that I think really make a difference. For the main batter, using room temperature eggs and softened butter is key. It sounds minor, but it really ensures everything emulsifies properly, leading to a much better texture – no one wants a dense, heavy bar! When you’re mixing the wet and dry ingredients, pay attention to not overmixing. Seriously, just mix until you don’t see any dry flour. Overmixing develops the gluten in the flour, and that’s what can lead to a tough, chewy bar instead of a tender, cake-like one. For the coconut filling, I always use sweetened shredded coconut. If you use unsweetened, you’ll definitely want to adjust the sugar in the filling, but the sweetened kind just brings that perfect sweetness and texture. I’ve experimented with different types of nuts in the filling, and while pecans or walnuts are great, I’ve also tried adding some toasted macadamia nuts for an extra tropical flair, which was amazing! When it comes to baking, every oven is a little different. My best advice is to watch for those golden brown edges and the set center. If your oven tends to run hot, you might want to reduce the temperature by 10-15 degrees and check a few minutes earlier. For the swirl, don’t overthink it. A few gentle passes with a knife create a beautiful visual without disturbing the layers too much. If you find your glaze is too thick, just add a tiny bit more milk, a teaspoon at a time. If it’s too thin, you can whisk in a little more powdered sugar. And a final tip: let them cool completely before glazing and slicing. It might be the hardest step, but it’s so worth it for clean cuts and perfect bars!
Storing and Reheating Tips
Storing these lovely coconut bars is pretty straightforward, and they tend to stay delicious for a good few days. If you’re planning to eat them within a day or two, keeping them at room temperature is perfectly fine. Just make sure they’re in an airtight container. This keeps them from drying out and maintains that lovely chewy texture. If you think they might take longer than two days to disappear (which, let’s be honest, is rare in my house!), I recommend refrigerator storage. Pop them into an airtight container and they should stay fresh and delicious for up to a week. The slight chill can sometimes even make the glaze a little firmer, which I personally enjoy. Now, if you find yourself with an abundance and want to save them for a rainy day, freezing is a fantastic option! I like to cut them into squares first, then wrap each square tightly in plastic wrap, followed by a layer of aluminum foil or popping them into a freezer-safe bag. They’ll keep wonderfully in the freezer for about 2-3 months. To thaw, just unwrap them and let them come to room temperature, or you can even pop them in the microwave for about 10-15 seconds if you want them slightly warm. If you’ve glazed them before freezing, the glaze should hold up well. If you’re planning to freeze them *before* glazing, that’s also totally fine! Just glaze them after they’ve thawed and are at room temperature.
Frequently Asked Questions
Final Thoughts
Honestly, these coconut bars are more than just a recipe to me; they’re a little slice of happiness. They’re the kind of treat that brings smiles to faces, whether it’s my own family devouring them in minutes or happy comments from friends who’ve tried them. The balance of textures and flavors is just perfect, and the ease with which they come together makes them a truly guilt-free indulgence. If you love coconut, or if you’re just looking for a reliable, delicious bar that’s sure to impress, please give these a try. I’m so excited for you to experience them! You might find yourself making them as often as I do. And when you do, I’d absolutely love to hear about it! Let me know in the comments below how yours turned out, if you added any special twists, or what your favorite way to enjoy them is. Happy baking, everyone!
Coconut bars
Ingredients
Main Ingredients
- 3 cups Shredded coconut, sweetened
- 0.5 cup Butter, melted
- 1 can Sweetened condensed milk 14 ounce
- 1 teaspoon Vanilla extract
Instructions
Preparation Steps
- Preheat your oven to 350°F (175°C). Line an 8x8 inch baking pan with parchment paper, leaving an overhang on the sides for easy removal.
- In a large bowl, combine the shredded coconut, melted butter, sweetened condensed milk, and vanilla extract. Stir until all ingredients are well incorporated.
- Pour the mixture into the prepared baking pan and spread it evenly.
- Bake for 25 to 30 minutes, or until the edges are golden brown and the top is lightly toasted.
- Let the bars cool completely in the pan before lifting them out using the parchment paper. Cut into squares and serve.


