Oh, I am SO excited to share this recipe with you all! You know those days when a craving for something sweet hits, but you just don’t have the energy for a full-blown baking project? Yeah, me too. That’s precisely when these Cinnamon Twists become my absolute hero. They’re wonderfully soft, bursting with that comforting cinnamon-sugar goodness, and that swirl? Pure magic! Honestly, they’re like a warm hug in dessert form. I remember the first time I made these for a family gathering, and they practically vanished before I could even sit down. My nephew, who’s usually the pickiest eater on the planet, asked for seconds and then thirds! It’s funny, because people often think of cinnamon rolls when they hear “cinnamon twists,” but these have a slightly different texture, a bit more of a cake-like crumb, and they’re just so ridiculously easy. If you love a good cinnamon-sugar swirl but want something a little less fuss than traditional rolls, you are going to fall head over heels for these cinnamon twists.
Thank you for reading this post, don't forget to subscribe!What are cinnamon twists?
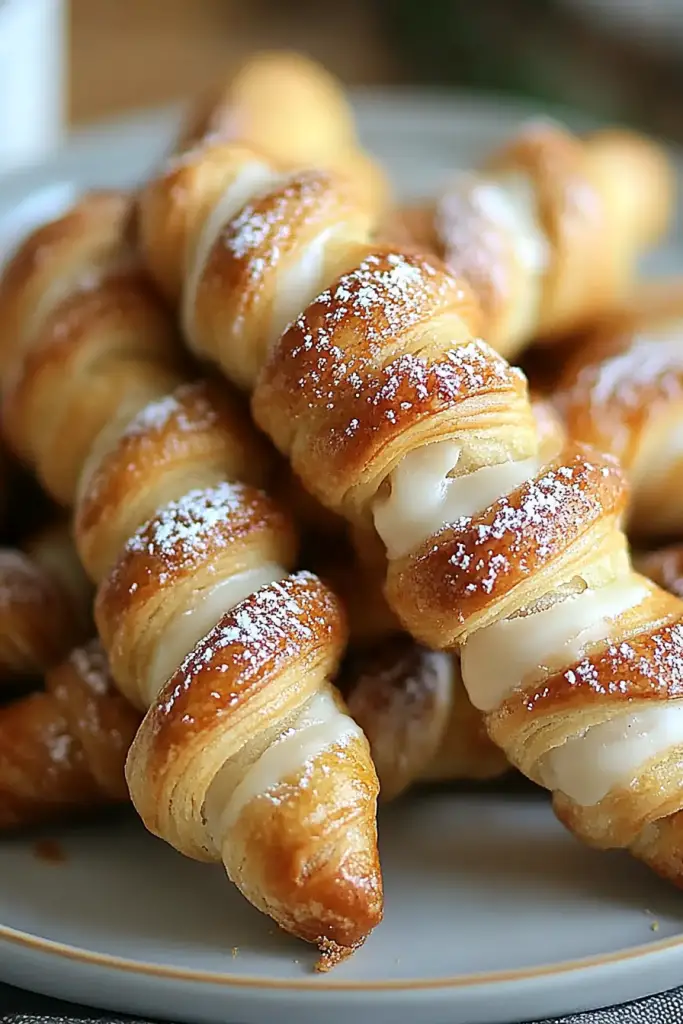
So, what exactly are these delightful little treats we’re talking about? Think of them as your shortcut to cinnamon-sugar heaven. They’re essentially a soft, tender cake batter swirled generously with a spiced sugar filling, baked until golden and often finished with a simple drizzle of glaze. The “twist” comes from how the dough is rolled and cut, creating those beautiful, swirly patterns that make them so appealing. It’s not a yeasted dough like traditional Cinnamon Rolls, which is what makes them so quick and easy – no waiting for dough to rise! They have a slightly denser, more cake-like texture that just melts in your mouth. The name “cinnamon twists” perfectly captures their essence: the comforting flavor of cinnamon with that lovely, twisted presentation. They’re just so darn approachable, and they always turn out beautifully, even if you’re not a seasoned baker.
Why you’ll love this recipe?
I love cinnamon twists, and I know you will too. I’m a cinnamon fanatic. I’flavor is just out of this world. That warm, fragrant cinnamon paired with sweet sugar, all baked into a tender cake – it’s pure comfort. The aroma that fills your kitchen while these bake is something else; it’s like an instant mood booster. Then there’s the simplicity. Seriously, this is a lifesaver on busy weeknights or when unexpected guests drop by. You can whip up the batter and filling in minutes, and the whole process is so straightforward. No fancy equipment needed, just a bowl, a whisk, and a baking pan. And let’s talk about Cost-efficiency: What is the best way to measure cost-efficiency?! The ingredients are all pantry staples – flour, sugar, butter, cinnamon. It’s incredibly budget-friendly, especially compared to buying treats from a bakery. Plus, they are so versatile! Serve them for breakfast, a mid-afternoon snack, or even a light dessert. They’re fantastic on their own, but I’ll get into some serving ideas later. What I love most about this recipe is that it delivers maximum deliciousness with minimal effort. It’s one of those recipes that makes you feel like a baking rockstar without spending hours in the kitchen. It’s a true winner, and I think it’ll quickly become a go-to in your recipe collection, just like it is in mine.
How to Make Cinnamon Twists
Quick Overview
Making these cinnamon twists is a breeze! We’ll start by quickly mixing up a simple cake-like batter, then prepare a luscious cinnamon-sugar filling. The magic happens when we layer the filling over the batter and swirl it gently, creating those signature twists. After a relatively short bake, you’ll be rewarded with warm, fragrant, and utterly delicious cinnamon twists, ready for a simple glaze. It’s a foolproof method that guarantees a delightful treat without any fuss.
Ingredients
For the Main Batter:
2 cups all-purpose flour
1 ½ teaspoons baking powder
½ teaspoon salt
¾ cup granulated sugar
½ cup unsalted butter, softened
2 large eggs, room temperature
1 teaspoon vanilla extract
½ cup milk (whole or 2% recommended for richness)
For the Filling:
½ cup packed light Brown Sugar
2 tablespoons ground cinnamon
¼ cup unsalted butter, melted
For the Glaze:
1 cup powdered sugar
2-3 tablespoons milk or cream
½ teaspoon vanilla extract (optional)
“The cinnamon twists turned out amazing. My kids asked for seconds. Saving this one!”
Step-by-Step Instructions
Step 1: Preheat & Prep Pan
First things first, let’s get our oven preheated to 350°F (175°C). I like to use a 9×13 inch baking pan for these. Grease it really well with butter or cooking spray – this is key to making sure they don’t stick. You can even line it with parchment paper if you want extra insurance, leaving a little overhang to help you lift them out later. A well-greased pan means easy cleanup and perfectly lifted twists!
Step 2: Mix Dry Ingredients
In a medium bowl, whisk together the all-purpose flour, baking powder, salt, and granulated sugar. Whisking them together thoroughly ensures that the leavening agent and salt are evenly distributed, which means your twists will rise beautifully and have a consistent flavor throughout. Just a good, quick whisk until everything is combined is all you need here. Don’t overthink it!
Step 3: Mix Wet Ingredients
In a separate, larger bowl, cream together the softened butter and eggs until they’re light and fluffy. This usually takes about 2-3 minutes with an electric mixer, or a bit longer if you’re doing it by hand. Beat in the vanilla extract. Then, gradually add the milk while mixing on low speed. You want everything to be well combined and smooth. The batter will look a little loose at this stage, which is perfectly normal.
Step 4: Combine
Now, let’s bring it all together. Gradually add the dry ingredients to the wet ingredients, mixing on low speed (or gently by hand) until just combined. It’s really important not to overmix here! Overmixing can develop the gluten too much, resulting in tougher twists. Stop mixing as soon as you no longer see streaks of dry flour. A few small lumps are totally fine and actually preferable.
Step 5: Prepare Filling
In a small bowl, combine the packed light Brown Sugar and ground cinnamon. This is your flavor powerhouse! Give it a good stir to make sure the cinnamon is evenly distributed throughout the sugar. Then, pour in the melted butter and stir until it forms a thick, sandy paste. This filling is what gives our cinnamon twists that incredible flavor and aroma. You can even add a pinch of nutmeg or cardamom here if you’re feeling adventurous!
Step 6: Layer & Swirl
Pour the batter into your prepared baking pan and spread it out evenly. Now, dollop spoonfuls of the cinnamon-sugar filling over the top of the batter. Don’t worry about making it perfect; just get most of it distributed. Then, using a knife or a skewer, gently swirl the filling into the batter. You can do figure-eights or just a gentle back-and-forth motion. The goal is to create those beautiful marbled patterns, not to completely mix it in. It’s okay if some of the batter peeks through; that’s what gives them their charm!
Step 7: Bake
Pop the pan into your preheated oven and bake for 25-30 minutes. You’ll know they’re done when the edges are golden brown and a toothpick inserted into the center comes out clean (or with a few moist crumbs attached, but no wet batter). The exact time can vary depending on your oven, so keep an eye on them after the 20-minute mark. They’ll smell amazing!
Step 8: Cool & Glaze
Once they’re baked, let the cinnamon twists cool in the pan for about 10-15 minutes. This allows them to set up a bit. While they’re cooling, whip up the glaze by whisking together the powdered sugar, milk, and vanilla extract (if using) until smooth. You want a consistency that’s thick enough to drizzle but not so thick it won’t spread. Once the twists have cooled slightly, drizzle the glaze all over the top. You can use a spoon or a piping bag for more control, but a simple drizzle looks rustic and delicious.
“Made the cinnamon twists tonight and wow — perfect weeknight dinner. Will definitely make again!”
Step 9: Slice & Serve
Let the glaze set for a few more minutes, then slice the cinnamon twists into squares or rectangles. I like to serve them warm, but they’re also delicious at room temperature. They are just heavenly when they’re fresh out of the oven, especially with that melty glaze.
What to Serve It With
These cinnamon twists are so versatile, they truly fit into any occasion! For Breakfast, they’re a dream. Pair them with a strong cup of coffee or a glass of fresh orange juice. They add a touch of sweetness and flair to a simple morning routine. For Brunch, they look elegant on a buffet table. I love arranging them on a pretty platter alongside fresh berries or a dollop of whipped cream. They pair beautifully with mimosas or a creamy iced latte. If you’re looking for something sweet for Dessert, these are perfect. Serve them slightly warm with a scoop of vanilla Ice Cream or a drizzle of caramel sauce. They’re a lighter option than a heavy cake but still satisfyingly sweet. And for those cozy Snacks? These are unbeatable. Grab one (or two!) with a mug of hot chocolate or a comforting cup of tea. They’re the ultimate comfort food. My family has a tradition of having these on movie nights, and they’re always a huge hit. Honestly, they’re good with pretty much anything you’d enjoy with a sweet treat!
Top Tips for Perfecting Your Cinnamon Twists
I’ve made these cinnamon twists more times than I can count, and over the years, I’ve picked up a few tricks that make them even better. First, for the batter, using room temperature eggs and butter really makes a difference. They incorporate much more smoothly, leading to a more tender crumb. If you forget to take them out, you can quickly warm eggs by placing them in a bowl of warm water for a few minutes. For the butter, just give it a quick soften in the microwave (be careful not to melt it!). When it comes to mixing the batter, remember my earlier warning: Do NOT overmix! Seriously, this is probably the most crucial tip. A few streaks of flour are better than a tough cake. Mix just until the ingredients are combined. For the filling, make sure your brown sugar is packed tightly; this ensures that lovely caramel-like flavor. If your brown sugar has hardened, a quick zap in the microwave with a damp paper towel can revive it. When you’re swirling, be gentle. You want defined swirls, not a muddy mess. Think delicate art, not vigorous mixing! If your cinnamon-sugar paste seems too dry or crumbly, add another teaspoon of melted butter. For ingredient swaps, if you don’t have milk, you can use buttermilk for extra tanginess or even a non-dairy milk like almond or oat milk – I’ve tried it with almond milk and it actually made it even creamier! If you want to amp up the flavor, add a pinch of nutmeg or allspice to the cinnamon-sugar filling. For baking, always trust the toothpick test. Ovens can be so different, so don’t rely solely on the time. If the tops start browning too quickly, you can loosely tent the pan with foil. And for the glaze, it’s all about consistency. Too thick and it’s hard to spread; too thin and it just runs off. Start with 2 tablespoons of milk and add more, a teaspoon at a time, until you reach your desired drizzle-ability. These little tips have really elevated my cinnamon twists from good to absolutely sublime!
Storing and Reheating Tips
One of the best things about these cinnamon twists is how well they store. If you have any leftovers (which is rare in my house!), you can keep them at Room Temperature for up to 2 days. Just make sure to cover the pan tightly with plastic wrap or transfer them to an airtight container. They tend to dry out a bit if left uncovered. For longer storage, up to 4-5 days, you can keep them in the Refrigerator. Again, an airtight container is your best friend here. When you’re ready to enjoy them from the fridge, you can eat them cold, but I highly recommend giving them a quick reheat. For Freezer Instructions, these freeze beautifully! You can freeze them either unfrosted or frosted. If unfrosted, wrap them very tightly in plastic wrap, then in a layer of aluminum foil, or place them in a freezer-safe airtight container. They’ll keep well for up to 2-3 months. To thaw, transfer them to the refrigerator overnight, then let them come to room temperature. If you froze them frosted, let them thaw at room temperature, as the glaze can get sticky if thawed in the fridge. For reheating, a short stint in the oven or toaster oven (around 300°F or 150°C for 5-10 minutes) works wonders to bring back their soft, fresh texture. You can also microwave them for about 15-20 seconds, but be careful not to overheat them, or they can become tough. The Glaze Timing Advice is simple: if you plan to store them at room temperature or freeze them, it’s often best to add the glaze *after* reheating or thawing and bringing them closer to room temperature, as the glaze can get melty or sticky if stored for too long. If you’re eating them the same day, glazing right after cooling is perfectly fine!
Frequently Asked Questions
Final Thoughts
I truly hope you give these cinnamon twists a try. They are such a joyful recipe, bringing a little bit of homemade happiness without all the fuss. They’re perfect for a lazy weekend breakfast, a delightful afternoon pick-me-up, or even a simple dessert that feels special. The way the cinnamon and sugar meld together in that tender cake is just divine, and the beautiful swirls make them a treat for the eyes as well. If you love this recipe and are looking for other easy, comforting bakes, you might also enjoy my classic banana bread or my simple blueberry scones. They share that same spirit of achievable deliciousness. I can’t wait to hear how yours turn out! Please leave a comment below with your thoughts, or share your own variations and tips. Happy baking, and enjoy every delicious, cinnamon-scented bite!
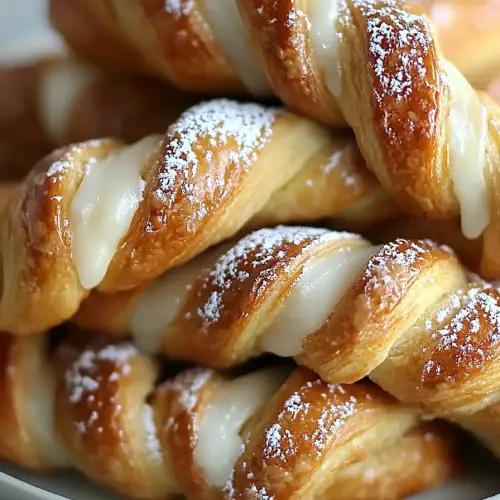
Cinnamon Twists
Ingredients
Dough
- 1 sheet Puff pastry thawed
Filling
- 0.5 cup Granulated sugar
- 2 tablespoons Ground cinnamon
- 0.25 cup Unsalted butter melted
Glaze (Optional)
- 1 cup Powdered sugar
- 2 tablespoons Milk
Instructions
Preparation Steps
- Preheat your oven to 400°F (200°C). Line a baking sheet with parchment paper.
-
Unfold the thawed puff pastry sheet onto a lightly floured surface. If it's still cold, let it sit for a few minutes to become more pliable.1 sheet Puff pastry
-
In a small bowl, mix together the granulated sugar and ground cinnamon.1 sheet Puff pastry
-
Brush the puff pastry sheet evenly with the melted butter.1 sheet Puff pastry
-
Sprinkle the cinnamon-sugar mixture evenly over the buttered pastry.1 sheet Puff pastry
- Starting from one of the longer sides, carefully roll up the puff pastry tightly into a log. Press lightly to seal the edge.
- Cut the log into 12 even slices, about 1/2 inch thick.
- Place the cinnamon twists onto the prepared baking sheet, leaving some space between them.
- Bake for 10-12 minutes, or until golden brown and puffed up.
-
While the twists are baking, prepare the glaze by whisking together the powdered sugar and milk until smooth. Add more milk if a thinner glaze is desired.1 sheet Puff pastry
- Once baked, remove the cinnamon twists from the oven and let them cool slightly on the baking sheet. Drizzle with glaze if using.


