Oh, Christmas cookies! Just saying the words brings back a flood of memories, doesn’t it? I can practically smell the cinnamon and sugar wafting through my childhood kitchen. Every year, the anticipation of baking these little jewels was almost as exciting as tearing into presents. While there are a million and one cookie recipes out there, and I’ve dabbled in almost all of them, there’s one that always, *always* steals the show. This isn’t just any Christmas cookie; it’s my go-to, the one my family begs for, the one that disappears in minutes at holiday parties. Think of it as the classic Chocolate Chip Cookie‘s festive, more sophisticated cousin, but with a texture so wonderfully chewy it’s like a warm hug. If you’re looking for a cookie that’s both incredibly comforting and undeniably festive, you’ve landed in the right spot. These Christmas cookies are just pure magic.
Thank you for reading this post, don't forget to subscribe!What are some of the best Christmas cookies?
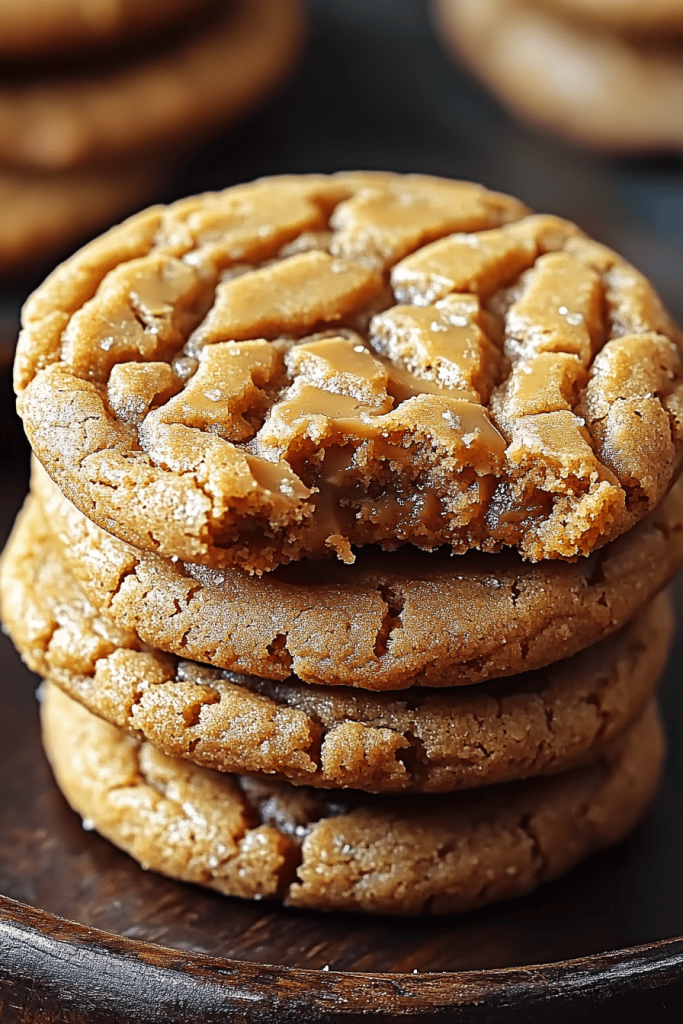
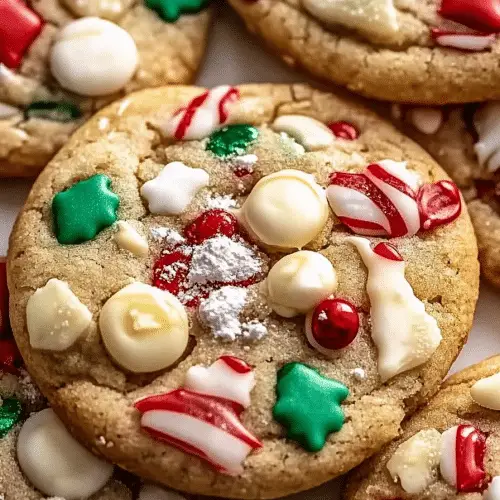
So, what exactly *are* these wonderful Christmas cookies I’m raving about? Well, imagine a cookie that’s soft and chewy in the center, with just the slightest crisp around the edges. It’s got all those warm, comforting flavors we associate with the holidays – a hint of spice, a touch of sweetness, and a generous amount of something absolutely delightful that makes them so special. They’re not overly fussy, which is a huge win during the busy holiday season, and they look absolutely gorgeous on a cookie platter. Think of them as a delightful surprise in every bite, a little moment of joy that perfectly captures the spirit of the season. They’re essentially a perfectly balanced treat that hits all the right notes, from aroma to flavor to that irresistible texture.
Why you’ll love this Christmas cookie recipe?
Let me tell you, there are so many reasons why this Christmas cookie recipe has earned a permanent spot in my baking rotation. First and foremost, the flavor. Oh, the flavor! It’s a beautiful balance of sweet and warm spice, with a depth that makes you want to savor every single bite. It’s not just sugary; it’s got a cozy, inviting taste that just screams holiday. Then there’s the texture. These are the quintessential chewy cookies. They have that perfect soft middle that just melts in your mouth, contrasted with a slightly crisp edge that gives them just enough structure. It’s truly the best of both worlds. And honestly, for something so delicious, they’re surprisingly simple to whip up. I can have a batch ready to go even on a hectic afternoon. Plus, the ingredients are all pretty standard pantry staples, which is a lifesaver when you’re trying to keep holiday budgets in check. What I love most about these Christmas cookies, though, is their versatility. They’re fantastic on their own, of course, but they’re also incredible with a glass of milk or a warm mug of APPLE CIDER. They’re the kind of cookie that makes everyone feel happy and festive, no matter their age. If you’ve ever loved a really good ginger snap or a classic sugar cookie, I promise you’ll adore these. They take the best parts of those and elevate them into something truly special for Christmas.
How do you make these delicious Christmas cookies?
Quick Overview
Making these Christmas cookies is really straightforward, I promise! You’ll basically be mixing up a simple batter, then letting the magic happen in the oven. The key is to not overmix and to let them cool properly – little steps that make a big difference. The whole process, from mixing to pulling the first batch out, usually takes less than an hour, making them totally doable even when life gets a bit chaotic. It’s the kind of recipe that makes you feel like a baking pro without the stress!
Ingredients
For the Main Cookie Batter:
You’ll want to grab some unsalted butter, softened to room temperature. I always use unsalted so I can control the salt level myself. About 1 cup (2 sticks) is usually perfect.
Granulated sugar and light Brown Sugar are essential for that perfect chewy texture and sweet flavor. I use about 3/4 cup granulated and 1 cup packed brown sugar.
Eggs, at room temperature too, help bind everything together. Two large eggs are what I typically use.
Vanilla extract is a non-negotiable for me. I like to use a good quality one, and I’m not shy with it – about 2 teaspoons!
All-purpose flour is the base. Around 2 1/2 cups should do it.
Baking soda is crucial for leavening and that signature chewy texture. 1 teaspoon is about right.
Salt, just a pinch to balance the sweetness. 1/2 teaspoon is usually enough.
Warm spices! This is where the Christmas magic really starts. I love using 1 teaspoon of ground cinnamon and about 1/2 teaspoon of ground nutmeg. You can totally adjust these to your liking, or even add a pinch of cloves or ginger if you’re feeling adventurous!
For the Optional Christmas Cookie Sprinkle Mix:
Some extra granulated sugar (about 1/4 cup) mixed with a touch more cinnamon (1/2 teaspoon) for rolling the dough balls. This gives them a lovely sparkle and extra flavor!
For the Optional Simple Icing (If You Want to Get Fancy):
Powdered sugar (about 1 cup) whisked with a tablespoon or two of milk or water until it’s a drizzling consistency. A drop of vanilla extract here is nice too.
Step-by-Step Instructions
Step 1: Preheat & Prep Pan
First things first, get your oven preheating to 350°F (175°C). This is a pretty standard temperature for most cookies, and it works like a charm for these. While the oven is heating up, grab your baking sheets. I like to line them with parchment paper. It makes cleanup a breeze and ensures the cookies don’t stick. If you don’t have parchment paper, a lightly greased baking sheet will work too, but I find parchment gives you a more even bake.
Step 2: Mix Dry Ingredients
In a medium bowl, whisk together your all-purpose flour, baking soda, salt, cinnamon, and nutmeg. Whisking them all together first makes sure the leavening agents and spices are evenly distributed throughout the flour. This is important so you don’t end up with a cookie that’s too salty or has pockets of spice. You want that flavor to be consistent in every single bite!
Step 3: Mix Wet Ingredients
In a large bowl, cream together your softened unsalted butter with both the granulated sugar and the packed light Brown Sugar. Use an electric mixer (handheld or stand mixer) for this. You want to beat them until the mixture is light and fluffy, which usually takes about 2-3 minutes. This creaming process is what incorporates air, and that air is what helps give cookies their texture. Then, beat in the room temperature eggs one at a time, mixing well after each addition. Stir in the vanilla extract. The mixture should look smooth and well combined.
Step 4: Combine
Now, it’s time to bring the wet and dry ingredients together. Gradually add the dry ingredient mixture to the wet ingredients, mixing on low speed (or by hand with a spatula) until *just* combined. Be careful not to overmix here! Overmixing can develop the gluten in the flour too much, which can lead to tough cookies. Stop mixing as soon as you don’t see any more streaks of dry flour. The dough will be soft and a bit sticky, and that’s exactly what you want for chewy Christmas cookies.
“The Christmas cookies turned out amazing. My kids asked for seconds. Saving this one!”
Step 5: Prepare Filling
For these particular Christmas cookies, there isn’t a separate filling, but if you wanted to add something extra, this is where you’d prep it! You could chop up some festive sprinkles or even add some finely chopped nuts like pecans or walnuts right into the dough at this stage if you like. I’m keeping this version classic, but feel free to get creative!
Step 6: Layer & Swirl
This step is really for more intricate designs, but for these chewy Christmas cookies, we’re going to form them into balls. If you’re using the sprinkle mix, put it in a shallow bowl. Take a heaping tablespoon of Cookie Dough, roll it into a ball between your palms, and then gently roll the ball in the cinnamon-sugar mixture until it’s evenly coated. Place the dough balls about 2 inches apart on your prepared baking sheets. They’ll spread as they bake, so giving them space is key.
Step 7: Bake
Bake for 9-12 minutes, or until the edges are lightly golden brown and the centers look slightly underbaked. The key to chewy cookies is to slightly underbake them. They’ll continue to set up as they cool on the baking sheet. I usually start checking around the 9-minute mark. Ovens can vary, so keep an eye on them!
Step 8: Cool & Glaze
Let the cookies cool on the baking sheets for about 5-10 minutes before transferring them to a wire rack to cool completely. This is super important for chewy cookies. If you move them too soon, they can fall apart. Once they’re completely cool, if you’re feeling fancy, you can whip up a simple powdered sugar glaze. Just mix powdered sugar with a tablespoon or two of milk or water and a splash of vanilla until it’s a drizzling consistency. Drizzle it over the cooled cookies. It adds a little extra sweetness and looks so pretty!
Step 9: Slice & Serve
Once they’re fully cooled (and glazed, if you chose to do that), these Christmas cookies are ready to be enjoyed! I love slicing them into wedges if they’ve spread a bit too much, or just serving them as is. They look stunning piled high on a festive plate. They’re best served at room temperature, but honestly, they’re delicious any time.
What to Serve Them With
These Christmas cookies are so versatile, they really go with everything! For a simple breakfast treat, they are absolutely divine with a steaming mug of coffee or a nice hot chocolate. My kids sneak one (or two!) with their breakfast on weekends when they’re allowed a little indulgence. For a proper holiday brunch, I like to arrange them artfully on a tiered stand, perhaps alongside some fresh fruit and pastries. They add a touch of homemade charm that’s hard to beat. A crisp mimosa or a sparkling cider pairs wonderfully. As a dessert, they’re the perfect sweet ending to a festive meal. I love serving them with a scoop of vanilla bean ice cream or alongside a slice of rich chocolate cake – the combination of textures is just heavenly. And for those cozy, quiet evenings when you just need a little something sweet, they are the ultimate comfort food. Pair them with a warm glass of milk, a good book, and a roaring fire, and you’ve got perfection. We also have a family tradition of making a big batch to leave out for Santa, and they always disappear!
Top Tips for Perfecting Your Christmas Cookies
Over the years, I’ve picked up a few tricks that make these Christmas cookies consistently amazing. Here are my best bits of advice:
Dough Consistency: The key to that perfect chewy texture is the ratio of wet to dry ingredients, and avoiding overmixing. If your dough feels too dry, it’s probably because your flour measured too much, or your butter wasn’t soft enough. If it feels too wet, it might need just a tablespoon more flour. But always err on the side of a slightly softer, stickier dough – that’s what leads to chewiness!
Room Temperature Ingredients: I can’t stress this enough! Softened butter and room temperature eggs emulsify better, creating a smoother, more uniform batter. This means a better texture in the final cookie. If you forget to take them out, you can soften butter in a pinch by cutting it into small cubes and letting it sit for 10-15 minutes, or microwave eggs for about 15-20 seconds (be careful not to cook them!).
Don’t Overbake: This is probably the most crucial tip for chewy cookies. Pull them out when the edges are set and golden, but the centers still look a little soft and underdone. They will firm up beautifully on the hot baking sheet as they cool. Trust me on this – pulling them out a minute or two earlier is always better than pulling them out a minute too late for chewy results.
Spice Level: I find 1 teaspoon of cinnamon and 1/2 teaspoon of nutmeg to be the sweet spot for that warm, Christmassy flavor. However, everyone’s spice tolerance is different! Feel free to adjust. You can also add a tiny pinch of cloves or ginger for a bit more complexity. Just start small if you’re experimenting.
Cooling is Key: Letting them cool on the baking sheet for at least 5-10 minutes before moving them to a wire rack is essential. This allows them to set up properly. If you try to move them too soon, they might break, and nobody wants a broken cookie!
Ingredient Swaps: While I haven’t experimented with major substitutions in this recipe (it’s pretty perfect as is!), you *could* try using half whole wheat flour for a slightly nuttier flavor, but it might affect the chewiness a bit. For dairy-free, I’ve had success with vegan butter sticks that are 1:1 in baking and a flax egg (1 tbsp flaxseed meal + 3 tbsp water, let sit for 5 minutes) instead of regular eggs. The texture might be slightly different, but still delicious!
“I don’t know if I’ve ever eaten a better Christmas cookies. The rub alone is wonderful, but the sauce??? Over the top!”
Rolling Balls: For uniformity, use a cookie scoop or a tablespoon to portion out your dough. Rolling them into smooth balls ensures even baking. And that optional cinnamon-sugar roll? It adds a lovely crunch and extra flavor burst – highly recommended!
Storing and Reheating Tips
These Christmas cookies are fantastic for making ahead, which is a huge bonus during the holidays. Here’s how I store them to keep them tasting as fresh as the day they were baked:
Room Temperature Storage: Once completely cooled, I store them in an airtight container at room temperature. They generally stay wonderfully chewy and delicious for about 3-4 days. If you’re stacking them, placing a piece of parchment paper between layers can help prevent them from sticking together, especially if you’ve drizzled them with icing.
Refrigerator Storage: While I usually don’t need to refrigerate them because they get eaten so quickly, if you do need to store them for longer, an airtight container in the fridge is your best bet. They should keep well for up to a week. The texture might become a little firmer in the fridge, but they’ll still be tasty.
Freezer Instructions: These cookies freeze like a dream! You have a couple of options. You can freeze the baked and cooled cookies. Wrap them tightly in plastic wrap, then place them in a freezer-safe bag or container. They’ll keep their quality for up to 2-3 months. Alternatively, you can freeze the cookie dough balls before baking. Place them on a parchment-lined baking sheet and freeze until solid, then transfer them to a freezer bag. You can bake them directly from frozen – just add a few extra minutes to the baking time. It’s like having homemade Christmas cookies ready in minutes whenever the craving strikes!
Glaze Timing Advice: If you’re planning to freeze the cookies, I highly recommend glazing them *after* they’ve thawed. If you freeze them with the glaze on, the moisture can sometimes cause it to become sticky or uneven. For room temperature or refrigerator storage, you can glaze them before storing, just make sure they are completely cool first.
Frequently Asked Questions
Final Thoughts
There you have it – my tried-and-true recipe for the most wonderfully chewy Christmas cookies! I truly hope you give them a try this holiday season. They’re more than just a treat; they’re a little piece of comfort, a memory maker, and a whole lot of holiday cheer baked into one delicious package. The aroma that fills your kitchen while they bake is honestly half the joy, and then that first bite… oh, it’s pure bliss. If you love these, you might also enjoy my Spiced Apple Cider Donuts for another festive flavor explosion, or my No-Bake Peppermint Bark for a super quick holiday treat. I can’t wait to hear how yours turn out! Please leave a comment below and let me know your thoughts, or share any fun variations you came up with. Happy baking, and Merry Christmas!
Christmas cookies
Ingredients
Main Ingredients
- 2.5 cup all-purpose flour
- 1 teaspoon baking powder
- 0.5 teaspoon salt
- 1 cup unsalted butter, softened
- 1.5 cup granulated sugar
- 2 large eggs
- 1 teaspoon vanilla extract
Instructions
Preparation Steps
- In a medium bowl, whisk together the flour, baking powder, and salt. Set aside.
- In a large bowl, cream together the softened butter and granulated sugar until light and fluffy.
- Beat in the eggs one at a time, then stir in the vanilla extract.
- Gradually add the dry ingredients to the wet ingredients, mixing until just combined.
- Divide the dough in half, flatten each half into a disk, wrap in plastic wrap, and chill in the refrigerator for at least 1 hour.
- Preheat oven to 375°F (190°C). Line baking sheets with parchment paper.
- On a lightly floured surface, roll out one disk of dough to about 1/4-inch thickness. Cut out shapes using cookie cutters.
- Place the cookies on the prepared baking sheets, about 1 inch apart.
- Bake for 10-12 minutes, or until the edges are lightly golden.
- Let the cookies cool on the baking sheets for a few minutes before transferring them to a wire rack to cool completely.
- Decorate as desired with frosting and sprinkles once completely cooled.


