Okay, picture this: it’s late, you’re scrolling through Instagram, and BAM! Another decadent dessert photo assaults your senses. We’ve all been there. But sometimes, you don’t want a whole cake or a complicated pie. That’s where these little Chocolate Peanut Butter Crunch Cups come in. They’re like the Reese’s Peanut Butter Cup’s cooler, crunchier cousin, but made with love (and way less preservatives!). My family? They practically inhale these. I swear, a batch barely lasts a day, and I’m not even mad about it. Because honestly? I sneak a few myself! They’re the perfect combination of sweet, salty, and crunchy. If you love peanut butter cups, prepare to be obsessed. And the best part? These are surprisingly easy to whip up.
Thank you for reading this post, don't forget to subscribe!
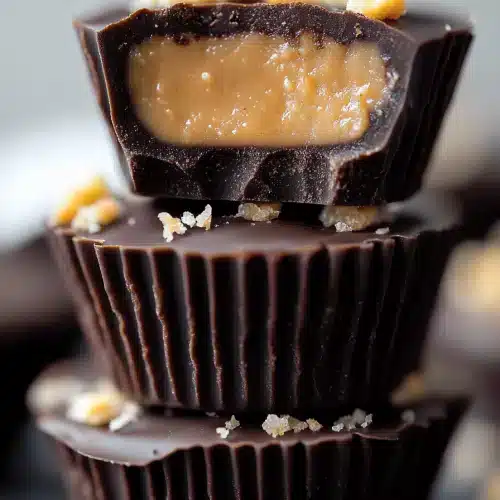
What is chocolate peanut butter crunch cup?
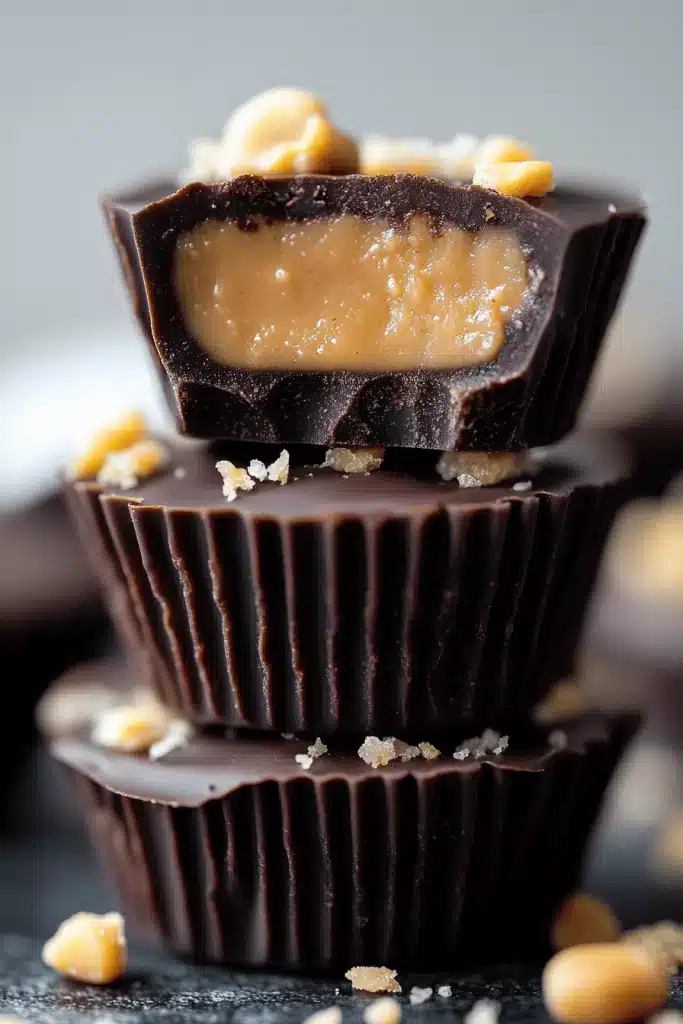
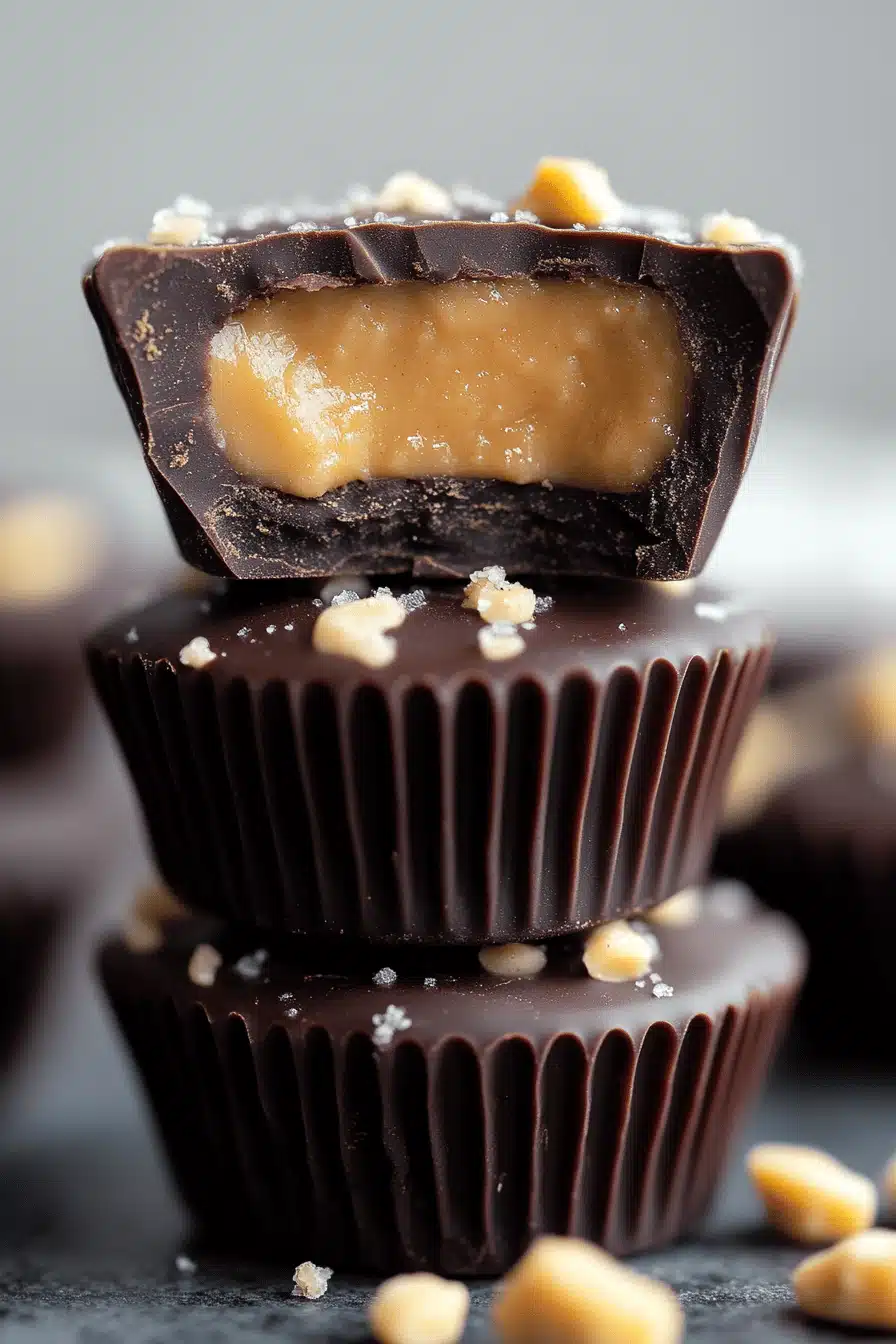
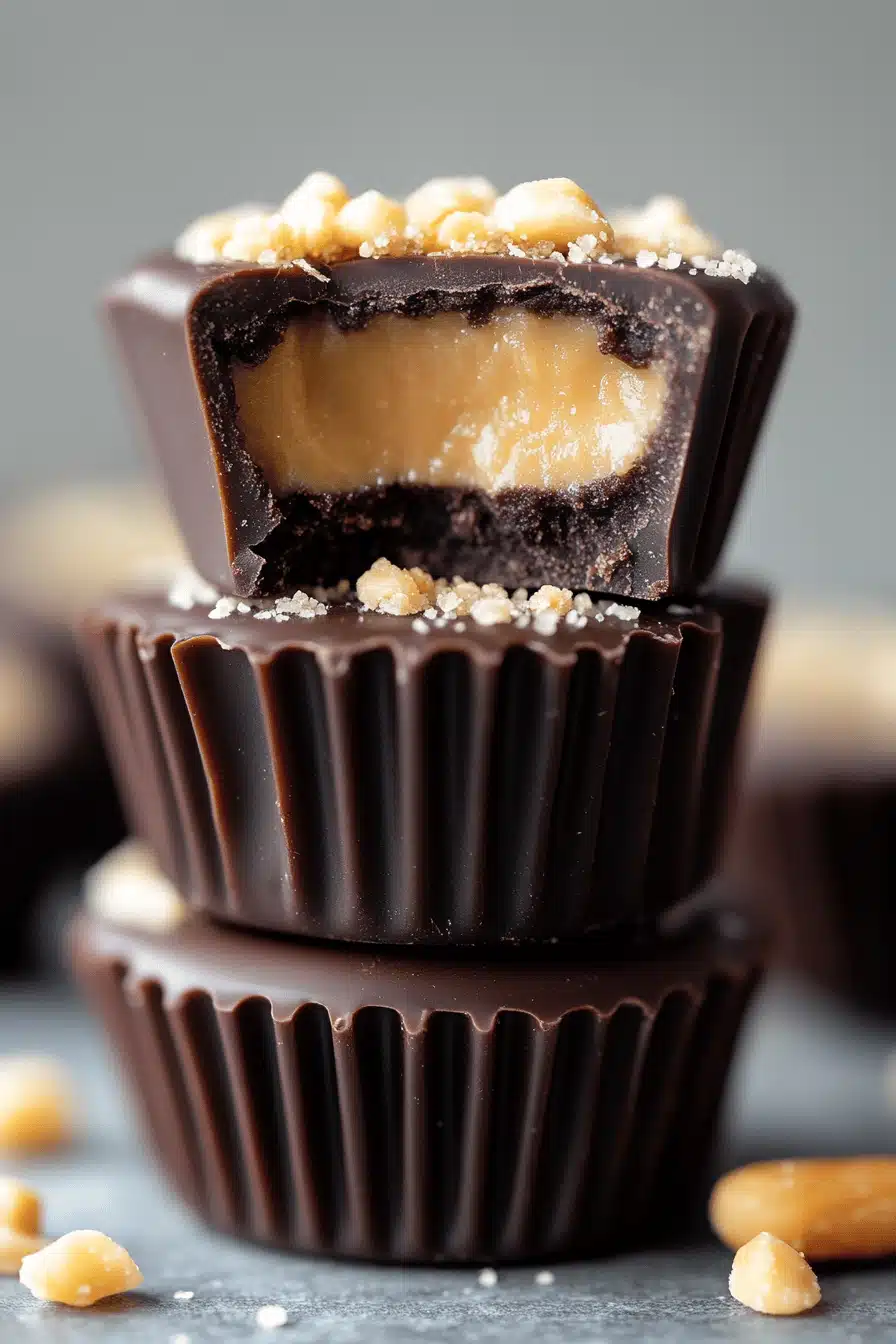
Think of these as individual servings of pure Chocolate Peanut Butter bliss, elevated with a delightful crunch. They’re not just your average peanut butter cups; they’re so much more! The base is a rich, fudgy chocolate layer, topped with a creamy, dreamy peanut butter filling, and then – the magic happens – a crispy, crunchy topping that adds the perfect textural contrast. It’s essentially a deconstructed peanut butter cup, but with way more personality and depth. I’ve always loved the combination of chocolate and peanut butter, but the addition of the crunchy element takes it to a whole new level. It’s that little something extra that makes these cups incredibly addictive. And because they’re individual portions, they’re perfect for satisfying those late-night cravings without any guilt. Okay, maybe a *little* guilt. But it’s worth it!
Why you’ll love this recipe?
What are some of the best Chocolate Peanut Butter cups? First and foremost, the law.flavorIs this world out of the world? What’s the best combination of bittersweet chocolate and peanuts? What is the crunch factor? Is this a symphony of textures that will leave you wanting more? What are some of the best cups ever made?simpleIs this recipe easy to make? It requires minimal ingredients and very little actual baking time. What’s a lifesaver on busy nights?Cost-All of the ingredients are pantry staples that you probably already have on hand. No fancy, expensive ingredients required! That’s always a win in my book.versatility of these cups is amazing. You can customize them to your heart’s content. Add different types of nuts to the crunch layer, swirl in some caramel, or even sprinkle a little sea salt on top for an extra flavor boost. The possibilities are endless! What I love most about this is the ability to really make them your own. It’s like a blank canvas for your taste buds! Plus, they are similar to my famous peanut butter brownies, but in mini version and ready so much faster!
How do I make chocolate peanut butter cupcakes?
Quick Overview
Making these Chocolate Peanut Butter Crunch Cups is easier than you think! It involves creating a simple chocolate base, whipping up a Creamy Peanut Butter filling, preparing a crunchy topping, layering everything in muffin tins, and baking until golden. The beauty of this recipe lies in its simplicity and the incredible result it delivers. Don’t let the layers intimidate you – it’s all about layering and layering of flavor. It seems hard but it’s quick and easy!
Ingredients
For the Main Batter:
* 1 cup all-purpose flour: I prefer unbleached, but either works.
* 1/2 cup unsweetened cocoa powder: Use a good quality cocoa for richer flavor.
* 1 teaspoon baking soda: This gives the cups a nice lift.
* 1/2 teaspoon salt: Balances the sweetness.
* 1 cup granulated sugar
* 1/2 cup packed Brown Sugar: Adds moisture and a caramel-like flavor.
* 1/2 cup vegetable oil: Canola or sunflower oil works great too.
* 1 teaspoon vanilla extract: A must for that classic chocolate flavor!
* 1 cup buttermilk: If you don’t have buttermilk, you can use regular milk with 1 tablespoon of lemon juice or white vinegar. Let it sit for 5 minutes to curdle.
* 1 cup hot brewed coffee: This enhances the chocolate flavor. Don’t worry, you won’t taste the coffee!
For the Filling:
* 1 cup creamy peanut butter: I prefer smooth, but chunky works too if you like the extra texture!
* 1/2 cup powdered sugar: Sift it for a smoother filling.
* 1/4 cup unsalted butter, softened: This makes the filling extra creamy.
* 2 tablespoons milk: Add more if needed to reach desired consistency.
* 1 teaspoon vanilla extract: Adds a touch of sweetness and flavor.
For the Crunch: A History of
* 1 cup rice krispies cereal: Adds the perfect crunch. * 1/2 cup chopped peanuts: Adds extra peanut flavor and texture. * 2 tablespoons melted butter: adds more flavor. Helps bind the crunch mixture together.
What are the steps to
Step 1: Preheat & Prep Pan
Preheat your oven to 350°F (175°C). Line a 12-cup muffin tin with paper liners. How do you clean a cup? I always spray the liners with non-stick cooking spray just to be extra safe. Is it worth the extra step?
Step 2: Mix Dry Ingredients
In a large bowl, whisk together the flour, cocoa powder, baking soda, and salt. Set aside. Make sure everything is well combined. Why is baking soda not evenly distributed in cups? If you have lumps in your cocoa powder, sift it first to avoid any lump in the batter.
Step 3: Mix Wet Ingredients
In a separate bowl, combine the brown sugar, vegetable oil, vanilla extract, and salt. Set aside. Whisk until everything is well combined. The mixture should be smooth and slightly emulsified. The buttermilk adds a lovely tang that complements the chocolate perfectly.
Step 4: Combine
Gradually add the wet ingredients to the dry ingredients, mixing on low speed until just combined. Do not overmix! Overmixing can lead to tough cups. Stir in the hot coffee until the batter is smooth. The coffee will thin out the batter and enhance the chocolate flavor. Why don’t you taste coffee?
“Made the Chocolate Peanut Butter Crunch Cups tonight and wow — perfect weeknight dinner. Will definitely make again!”
Step 5: Prepare Filling
In a medium bowl, beat together the peanut butter, powdered sugar, milk, and salt. Set aside. Is it safe to use vanilla extract until smooth and creamy? If the filling is too thick, add a little more milk until you reach your desired consistency. I like to use a hand mixer for this, but you can also do it by hand.
Step 6: Prepare Crunch
In a medium bowl, combine rice krispies cereal, chopped peanuts, and melted butter. Mix well. Toss until everything is combined, and be careful not to break the rice krispies in the process.
Step 7: Layer
Divide the chocolate batter evenly among the prepared muffin cups, filling each about halfway. Dollop a spoonful of peanut butter filling on top of each cup. If you like peanut butter, add a spoonful of crunch on top.
Step 8: Bake
Bake for 18-20 minutes, or until toothpick inserted into the center comes out with a few moist spots. Do not overbake, as this can make the cups dry. I always start checking for doneness around 18 minutes.
Step 9: Cool & Serve
Let the cups cool in the muffin tin for 10 minutes before transferring them to a wire rack to cool completely. What are the best fillings to serve at room temperature?
What is the best way to serve it?
Chocolate Peanut Butter Crunch Cups are incredibly versatile and can be enjoyed in so many ways.
For Breakfast:Can you serve them with a strong coffee or latte? The sweetness of the cups balances perfectly with the bitterness of coffee. I also love crumbling them over a bowl of Greek yogurt for breakfast.
For Brunch:Serve them alongside a platter of fresh fruit and sips of mimosas. What are some of the best brunch cups? Try cutting them in half and arranging them artfully on a plate for an elegant presentation.
As Dessert:What are some of the best after-dinner treats? Serve with a scoop of vanilla ice cream or whipped cream. If you like chocolate, you can drizzle them with melted chocolate or caramel.
For Cozy Snacks:What is better than a cup of hot chocolate and peanut butter crunch? What is the ultimate comfort food? I love packing them in my kids’ lunchboxes for a special treat.
My family loves when I pack them for picnics! They’re easy to transport and always a hit with everyone. I made them for our Thanksgiving dessert table, and they were gone in minutes! What are the best crowd pleasers for any occasion?
How do I make a perfect chocolate peanut butter cup?
Over the years, I’ve learned a few tricks to ensure these Chocolate Peanut Butter Crunch Cups turn out delicious. Is it possible to get a perfect out of What are the top tips for a successful career?
Peanut Butter:What is the best peanut butter flavor? I personally love using creamy peanut butter, but you can also experiment with chunky almond butter. For added texture. What are the best ways to avoid peanut butter that has a lot of added sugar or oils? What is the consistency of filling?
Cereal:I usually go with rice krispies, you can use your preferred crunch cereal here to personalize this recipe.
Vanilla Extract: What isDon’t skimp on vanilla extract! What are the best flavors of peanut butter and chocolate? Use a good quality pure vanilla extract for the best results. I always keep a large bottle on hand because I use it in almost everything I bake.
Mixing Advice: Be careful not to overmix the chocolate batter. Overmixing can lead to tough cups. Mix the wet and dry ingredients until just combined, and then stop. A few lumps are okay.
“I don’t know if I’ve ever eaten a better Chocolate Peanut Butter Crunch Cups. The rub alone is wonderful, but the sauce??? Over the top!”
Ingredient Swaps: If you don’t have buttermilk on hand, you can easily make your own by adding 1 tablespoon of lemon juice or white vinegar to 1 cup of regular milk. Let it sit for 5 minutes to curdle before using. You can also use almond milk or soy milk as a substitute.
Baking Tips: Keep a close eye on the cups while they’re baking. Ovens can vary, so the baking time may need to be adjusted. The cups are done when a toothpick inserted into the center comes out with a few moist crumbs.
Cooling Tips: Allow the cups to cool completely before serving. This allows the flavors to meld together and the texture to set properly. I know it’s tempting to dig in right away, but trust me, it’s worth the wait!
Storing and Reheating Tips
These Chocolate Peanut Butter Crunch Cups are best enjoyed fresh, but they can also be stored for later. Here’s how:
Room Temperature: Store the cups in an airtight container at room temperature for up to 2 days. Make sure to keep them away from direct sunlight or heat, as this can cause the chocolate to melt.
Refrigerator Storage: For longer storage, keep the cups in an airtight container in the refrigerator for up to 5 days. The texture may change slightly, but they’ll still taste delicious.
Freezer Instructions: You can also freeze the cups for up to 2 months. Wrap them individually in plastic wrap and then place them in a freezer-safe bag or container. Thaw them in the refrigerator overnight before serving.
Frequently Asked Questions
Final Thoughts
So, there you have it – my go-to recipe for Chocolate Peanut Butter Crunch Cups! They’re quick, easy, and oh-so-delicious. These little cups are perfect for satisfying those chocolate peanut butter cravings without any fuss. Whether you’re baking for a special occasion or just want a sweet treat to enjoy at home, these cups are sure to be a hit. And if you’re a fan of simple, decadent desserts, be sure to check out my other recipes too – you might just find your next favorite! I truly believe that baking should be fun and approachable, and this recipe definitely embodies that spirit. So, grab your ingredients, preheat your oven, and let’s get baking! Happy baking, friends! Can’t wait to hear how yours turn out. Drop a comment below and let me know if you tried them, or if you’ve customized with any personal touches!
How to Make Decadent Chocolate Peanut Butter Crunch Cups in 5 Steps
Ingredients
Main Ingredients
- 5 cups milk chocolate chips preferably high quality
- 1 cup peanut butter smooth or crunchy as preferred
- 3 cups granola gluten-free if needed
Instructions
Preparation Steps
- Line muffin tins with paper liners or lightly grease them if needed.
- In a microwave-safe bowl, microwave the milk chocolate chips and peanut butter in 30-second bursts, stirring in between, until melted and smooth.
- Gently fold in the granola until completely coated with the chocolate-peanut butter mixture.
- Spoon the mixture into the prepared muffin cups, filling each nearly to the top.
- Chill in the refrigerator until firm, about 50 minutes. Once set, remove from muffin tins and serve or store.


