Oh, friends, if there’s one thing that instantly transports me back to cozy winter evenings and bustling holiday gatherings, it’s the smell of melting chocolate. And when that chocolate meets the salty crunch of a pretzel rod? Pure magic. I’m talking about my absolute favorite, can’t-get-enough, always-a-crowd-pleaser: chocolate covered Pretzel Rods. Seriously, these aren’t just a treat; they’re little edible works of art that are shockingly easy to whip up. Forget those fancy, fussy desserts that require a culinary degree and a whole afternoon. These chocolate covered pretzel rods are the answer to your sweet cravings when you need something incredible, pronto. They’re the perfect blend of salty and sweet, crunchy and smooth, and honestly, they disappear faster than you can say “more, please!” My family devours them, my friends beg for the recipe, and they’ve become my secret weapon for impromptu get-togethers and even little edible gifts. They’re just so… satisfying.
Thank you for reading this post, don't forget to subscribe!What are chocolate covered pretzel rods?
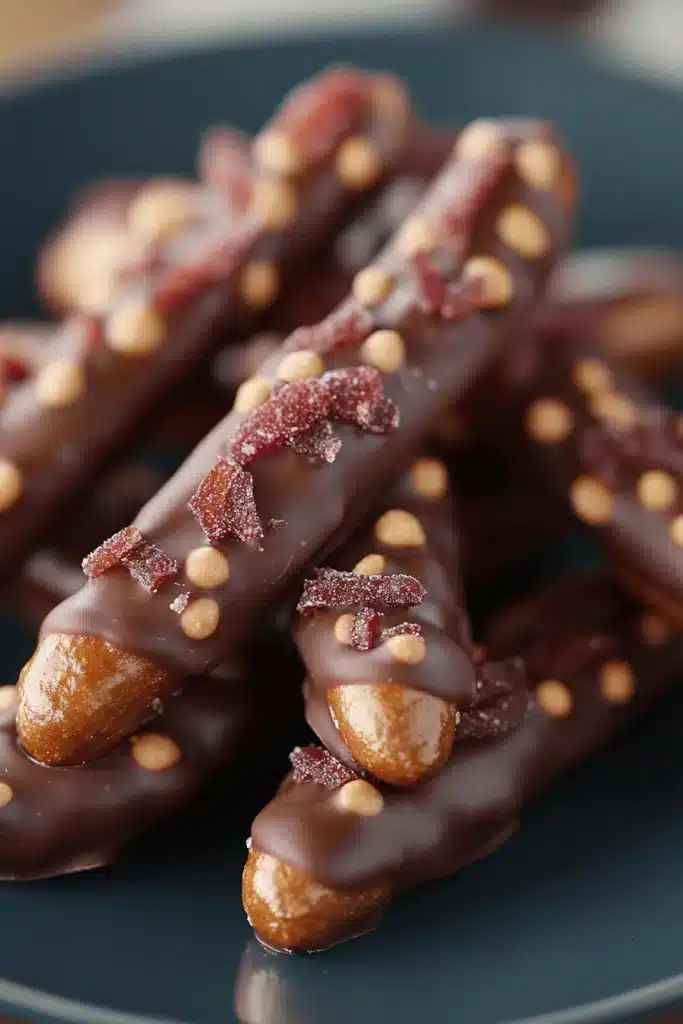
So, what exactly are these delightful little things? Think of them as a classic snack elevated to an art form. At their core, they’re simply sturdy pretzel rods that have been dipped or coated in melted chocolate. But that’s just the beginning! The beauty of chocolate covered pretzel rods lies in their versatility. You can use milk chocolate, dark chocolate, White Chocolate, or even a combination. Then comes the fun part: the toppings! Sprinkles, chopped nuts, sea salt flakes, mini chocolate chips, drizzles of contrasting chocolate – the possibilities are endless. It’s essentially a customizable sweet and salty explosion in every bite. They’re like the perfect bite-sized celebration, a tiny party in your mouth that happens to be incredibly simple to create in your own kitchen. It’s that perfect marriage of textures and flavors that just hits all the right notes.
Why you’ll love this recipe?
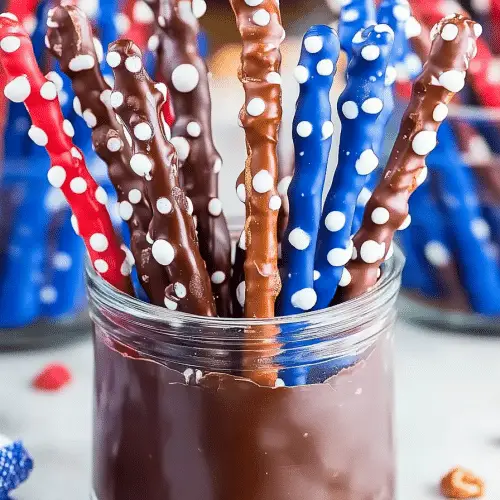
Let me tell you why this recipe for chocolate covered Pretzel Rods has earned a permanent spot in my recipe binder and my heart. First and foremost, the FLAVOR is just out of this world. That satisfying crunch of the pretzel, followed by the rich, smooth chocolate – it’s a taste combination that’s simply irresistible. It hits that perfect sweet and salty balance that everyone raves about. Next up, SIMPLICITY. Honestly, if you can melt chocolate and dip something, you can make these. There’s no complicated baking involved, no fancy equipment. It’s a lifesaver when you’re short on time but still want to serve something special. And let’s talk about COST-EFFICIENCY. Pretzels and chocolate are relatively inexpensive ingredients, especially when you buy them in bulk. You get so much bang for your buck with these, making them a budget-friendly way to impress. Finally, the VERSATILITY is a huge draw. You can customize them for any holiday, any occasion, or just your personal mood. Need a quick Halloween treat? Dip them in orange and black sprinkles. Valentine’s Day? Pink and red drizzles. A birthday? Rainbow sprinkles galore! They’re also fantastic for gifting – they look so professional, but they’re made with love from your own kitchen. I’ve even seen people dip them halfway for a more elegant look. They really are the perfect canvas for your creativity.
How do I make chocolate covered pretzel rods?
Quick Overview
Making these chocolate covered pretzel rods is a breeze! You’ll melt your chosen chocolate, dip the pretzel rods until they’re mostly coated, and then add your favorite toppings before letting them set. It’s a straightforward process that takes minimal time but yields maximum deliciousness. The key is good quality chocolate and a little patience as they set up, but trust me, it’s worth every second. It’s the ultimate no-bake treat that’s always a hit.
Ingredients
For the Pretzel Base:
– 1 (16 ounce) bag of sturdy pretzel rods: Look for the thicker, sturdier ones. The thin ones tend to snap easily once dipped, and nobody wants a broken pretzel rod when they’re craving perfection. I always grab the classic salted ones for that extra flavor pop.
For the Chocolate Coating:
– 24 ounces of good quality melting chocolate (chips or wafers): You can use milk, dark, or White Chocolate, or even a mix! For the best results and smooth melting, I highly recommend using chocolate wafers or high-quality chocolate chips. If you use regular chocolate chips, you might need a little extra oil (like coconut oil) to get the right consistency. I find a good quality dark chocolate gives a beautiful contrast to the saltiness of the pretzel. Ghirardelli or Guittard are my go-tos for a smooth, professional finish.
“Made the chocolate covered pretzel rods tonight and wow — perfect weeknight dinner. Will definitely make again!”
– 1-2 tablespoons of vegetable oil or coconut oil (optional, to help with thinning if needed): Only add this if your chocolate seems too thick to coat smoothly. A little goes a long way!
For the Toppings (Get Creative!):
– Sprinkles (jimmies, nonpareils, edible glitter, themed sprinkles)
– Chopped nuts (peanuts, almonds, walnuts, pistachios)
– Sea salt flakes (Maldon sea salt is fantastic for this)
– Mini chocolate chips or chocolate chunks
– Crushed cookies (Oreos, graham crackers)
– Toffee bits
– Shredded coconut
– Drizzles of contrasting chocolate (melted White Chocolate on dark, or vice versa)
Step-by-Step Instructions
Step 1: Prepare Your Workspace
This is crucial for smooth chocolate dipping! Line a large baking sheet or two with parchment paper or wax paper. You want plenty of space for the pretzel rods to dry without touching each other. Set out all your toppings in small bowls so they’re ready to go. Having everything prepped makes the dipping process much less stressful. Make sure your dipping bowls are clean and dry, as any water can make your chocolate seize up.
Step 2: Melt Your Chocolate
There are two main ways to melt chocolate for dipping: microwave or double boiler. For the microwave method, place your melting chocolate (and optional oil) in a microwave-safe bowl. Heat in 30-second intervals, stirring well after each interval, until the chocolate is almost completely melted. Stir until smooth. Be careful not to overheat, as chocolate can burn quickly! If using a double boiler, fill the bottom pot with about an inch of water and bring it to a gentle simmer. Place the chocolate in the top bowl, ensuring it doesn’t touch the water. Stir constantly until smooth and melted. Remove from heat immediately once melted.
Step 3: Dip the Pretzel Rods
Hold a pretzel rod by the tip and dip it into the melted chocolate, rotating it to coat about two-thirds to three-quarters of the rod. Let any excess chocolate drip back into the bowl. You can use a spoon to help smooth out any bare spots if needed, but don’t overwork it, or you’ll end up with a lumpy mess. I usually hold the pretzel rod vertically and let the chocolate drip down, giving it a nice, smooth finish. Some people prefer to lay them flat and use a spoon to drizzle, which works too, but I find the vertical dip gives a more uniform coating.
Step 4: Add Your Toppings
Before the chocolate sets, immediately sprinkle or press your chosen toppings onto the still-wet chocolate. Work quickly, as the chocolate will start to harden. If you’re doing drizzles, wait until the first layer of chocolate has set a bit, then melt your contrasting chocolate and drizzle it over the rods using a fork or a piping bag. For sprinkles, I often just hold the rod over the bowl of sprinkles and gently sprinkle them on, or press them gently into the chocolate. If using Sea Salt, a light sprinkle is all you need – you don’t want to overpower the chocolate.
Step 5: Let Them Set
Carefully place the decorated pretzel rods onto the prepared parchment-lined baking sheet. Make sure they have enough space so they don’t stick to each other. You can stand them upright in a tall glass or jar to help them set with a beautiful, smooth finish if you have enough space, but laying them flat is perfectly fine too. Allow them to set completely at room temperature, which usually takes about 30-60 minutes, or you can speed things up by popping them in the refrigerator for about 10-15 minutes. Just be careful not to leave them in too long, or condensation can form on the chocolate.
Step 6: Enjoy!
Once the chocolate is fully hardened, your delicious chocolate covered pretzel rods are ready to be enjoyed! They are best served at room temperature.
“New family favorite! This chocolate covered pretzel rods was so flavorful and ridiculously easy. Crowd-pleaser for sure.”
What to Serve It With
These chocolate covered pretzel rods are so versatile, they fit into almost any occasion! For breakfast, they’re not typically served *with* breakfast, but they make a fantastic “treat” that the kids (and let’s be honest, the adults too!) look forward to. Imagine a small platter on the breakfast table for a special weekend morning, paired with a steaming mug of coffee or hot chocolate. For brunch, they can be a delightful addition to a dessert bar or a sweet-and-salty element on a cheese board. Arrange them artfully in a tall vase or a beautiful dish. As a dessert, they’re an absolute winner after dinner. Serve them alongside Ice Cream, or as a standalone sweet treat for a party. I love them with a small cup of espresso. And for cozy snacks? These are perfect for movie nights! Just pile them up in a bowl and let everyone dig in. They’re also wonderful for afternoon tea, offering a delightful contrast to delicate pastries and finger sandwiches. Honestly, they pair well with almost anything, but a good cup of coffee or a glass of milk is always a classic choice.
Top Tips for Perfecting Your Chocolate Covered Pretzel Rods
I’ve made enough of these chocolate covered pretzel rods to fill a small warehouse, and over the years, I’ve picked up a few tricks that really make a difference. First, about the PRETSEL RODS: Always opt for the sturdier ones. Those thinner, more delicate pretzel sticks are just asking to break when you’re trying to dip them. You want a good, solid base. Trust me on this one; it’s saved me a lot of frustration! When it comes to MIXING THE CHOCOLATE, patience is key. Don’t rush the melting process. Stirring frequently and using short bursts in the microwave, or gentle heat on the stovetop, prevents scorching and ensures a silky-smooth consistency. If your chocolate seems too thick to coat easily, a tiny bit of oil (about a teaspoon at a time) can work wonders. Just add it slowly and stir until you get that perfect dipping consistency. OVER-DIPPING is also something to watch out for; you want a nice even coat, but too much chocolate can make them heavy and clunky. For the TOPPINGS, prepare everything beforehand. Have your sprinkles, nuts, or other goodies in small bowls, ready to go right after dipping. Chocolate hardens quickly, so you don’t want to be scrambling for toppings. If you want really crisp edges on your sprinkles, or if you’re doing multiple layers of toppings, it helps to let the first layer set for a few minutes before adding more. For DRIZZLES, I use a fork. Melt a small amount of contrasting chocolate, dip the tines of a fork in it, and then flick the chocolate back and forth over the pretzel rods. It takes a little practice to get thin, even lines, but it looks so professional! And finally, for SETTING, I always recommend letting them set at room temperature if you have the time. It gives the smoothest finish. If you’re in a hurry, the fridge works, but be mindful of condensation, which can dull the shine. I learned this the hard way after a batch got a bit cloudy in the fridge on a humid day!
Storing and Reheating Tips
Keeping your chocolate covered pretzel rods fresh and delicious is pretty straightforward, but a few things will help maintain their quality. For ROOM TEMPERATURE storage, it’s best to keep them in an airtight container. If you’ve only made a small batch, the original bag they came in, sealed well, can work. They’ll typically stay good at room temperature for about a week, especially if your environment isn’t too warm and humid, as that can cause the chocolate to soften or bloom. I usually store them in a cool, dry pantry. If REFRIGERATOR STORAGE is necessary, especially in warmer climates, definitely use an airtight container. They can last for about two weeks this way. The only drawback is that sometimes condensation can form when you take them out, especially if it’s humid, which can affect the chocolate’s shine. I usually let them sit at room temperature for about 15-20 minutes before serving if they’ve been in the fridge. FREEZER INSTRUCTIONS are for longer storage. Wrap the pretzel rods individually in plastic wrap, then place them in a freezer-safe bag or container. They can last for up to 2-3 months. To thaw, unwrap them and let them come to room temperature slowly, ideally on a counter for a few hours, again to prevent condensation. When it comes to GLAZE TIMING, I always recommend applying any decorative drizzles *after* the initial chocolate coating has set, but before it’s completely hardened if you want them to stick well without adding another layer of fully hardened chocolate. If you’re storing them for a long time, it’s often best to add drizzles just before serving for the freshest look.
Frequently Asked Questions
Final Thoughts
Honestly, making these chocolate covered pretzel rods is one of those simple joys that brings a big smile to my face, and even bigger smiles to everyone who gets to eat them. They’re proof that you don’t need to be a gourmet chef to create something truly special and delicious. The combination of salty crunch and sweet chocolate is just timeless, and the ability to customize them with your favorite toppings makes them uniquely yours. Whether you’re looking for an Easy Party treat, a thoughtful homemade gift, or just a way to satisfy a serious sweet tooth, these chocolate covered pretzel rods are an absolute winner. They’ve brought so much happiness to my table, and I truly hope they do the same for yours. Give them a try, get creative with your toppings, and most importantly, have fun with it! I can’t wait to hear all about your creations and what amazing topping combinations you come up with!
Chocolate Covered Pretzel Rods
Ingredients
Main Ingredients
- 12 pieces pretzel rods
- 12 oz chocolate chips semi-sweet or milk chocolate
- 1 tablespoon vegetable shortening optional, for smoother melting
- 0.5 cup sprinkles for decorating
Instructions
Preparation Steps
- Line a baking sheet with parchment paper.
- Melt the chocolate chips (and shortening, if using) in a microwave-safe bowl in 30-second intervals, stirring in between, until smooth.
- Dip each pretzel rod into the melted chocolate, rotating to coat about two-thirds of the rod. Let excess chocolate drip off.
- Place the chocolate-covered pretzel rods on the prepared baking sheet.
- Immediately sprinkle the chocolate-covered portion with sprinkles, if desired.
- Allow the chocolate to set completely at room temperature or in the refrigerator for about 10-15 minutes.


