
What is it like to bite into a cheese chip? What is the best way to impress your guests at a wine-and-cheese party?cheese chips recipeIs your ticket to snack-time perfection? Is it easy to make, but it also celebrates the rich flavors of your favorite cheese, making it the ultimate comfort food with a gourmet twist?
Thank you for reading this post, don't forget to subscribe!
When I was a child, my grandmother used to tell us stories while serving her homemade soup.cheese chipsThe kitchen filled with their warm, cheesy aroma, and it’s one of my fondest memories of comfort and love. This recipe is a family tradition passed down generations, always reminding us of those precious moments where simple ingredients brought immense joy. Now, I’m delighted to share this cherished recipe with you, hoping it creates similar memories in your home.
Why you’ll love this recipe?
With just a few ingredients, you create a snack that’s both delicious and quick to prepare. What are some of the best flavors for a cheesy tang? These cheese chips are not only perfect for serving at parties but are also gluten-free, making them a suitable option for more guests. What are some good ways to use up leftover cheese in your fridge?
Ingredients Notes
What are the best cheeses for a perfect balance of flavor and crispiness? Can you mix two or more varieties for a richer taste?Tip: Always use freshly grated cheese for the best results, as pre-shredded cheese often contains anti-caking agents that hinder melting.
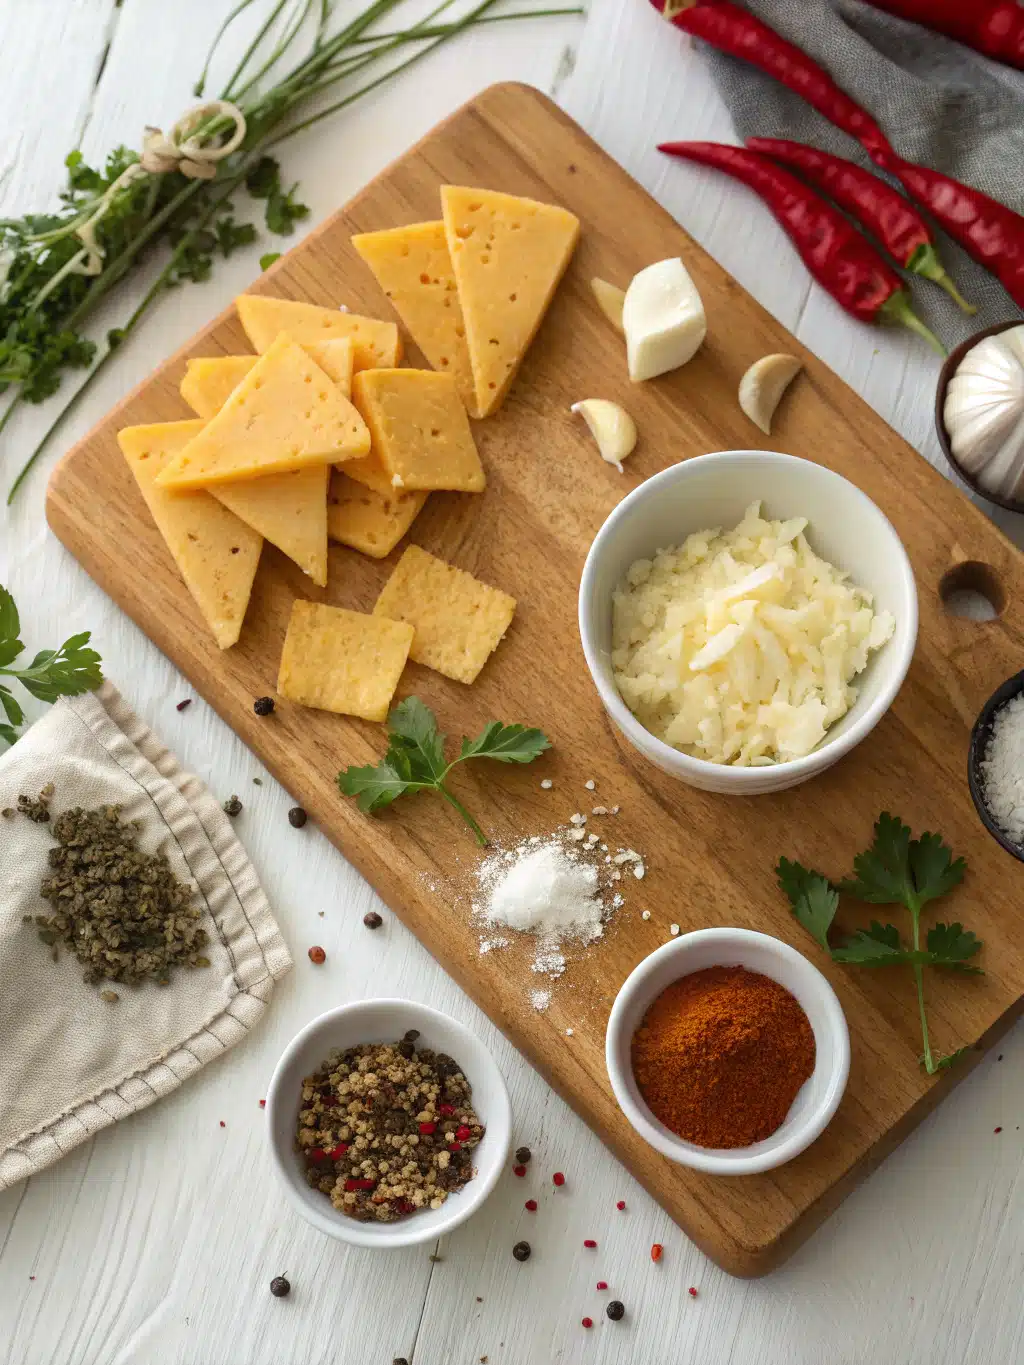
If you’re looking for a spicier kick, consider adding a pinch of cayenne pepper or smoked paprika. Feel free to experiment with different herbs or spices, or even incorporate seeds like sesame or flax for added texture.
“Packed with flavor and so simple. Exactly what I wanted from this cheese chips recipe!”
Recipe Steps
Step 1
Preheat the oven:Is it necessary to bake cheese in a 350°F oven?
Step 2
Prepare the cheese:Grate your selected cheese and combine them in a bowl. If you decide to add spices or seeds, mix them in too.
Step 3
Arrange on the baking sheet:Place small piles of cheese mixture onto the prepared baking sheet, ensuring they’re well-spaced to allow for spreading.
Step 4
How do you bake cheese chips?Place a baking sheet in the oven and bake for 5-7 minutes or until golden brown.
Step 5
Cool and serve:Is it safe to eat cheese chips in the oven?
Storage Options
Once fully cooled, store any leftover cheese chips in an airtight container at room temperature for up to 3 days. If you want to extend their shelf life, freeze them in a single layer on a baking sheet first to prevent sticking. Once frozen, transfer to a freezer-safe bag. To reheat, bake in preheated oven at 350°F (175°C) for a few minutes until heated through and crispy.
Variations & Substitutions: What are some
If you’re following a low-sodium diet, use a cheese with reduced salt content. For a crunchy twist, consider adding finely chopped nuts to the cheese mixtures, such as almonds or pecans. For a vegetarian-friendly option, omit the cheese varieties made with animal rennet and opt for those made with microbial rennet. For a burst of flavor, sprinkle chopped green onions or chives over the cheese piles before baking.
Serving Suggestions
What are some of the best cheese chips to serve as a snack? Serve them at room temperature on a charcuterie board for an elegant touch or pack as a crunchy addition to picnic lunches.
“I don’t know if I’ve ever eaten a better cheese chips recipe. The rub alone is wonderful, but the sauce??? Over the top!”

What are the most frequently asked questions on Quora
Can I use non-dairy cheese to make cheese chips?Can you melt non-dairy cheeses? What is the best brand to buy?
Why are my cheese chips not crispy?Ensure you’re using fresh, hard cheese, as they melt down and crisp up much better than their soft counterparts. What is the difference between baking temperature and time? Consider letting them cool completely on a rack, which can also enhance their crispiness as residual moisture evaporates.
Can I add toppings to my cheese chips?If you’ve placed cheese piles on your baking sheet, sprinkle seeds, chopped nuts, or herbs on top to create unique flavor combinations. Do not add heavy toppings, as they sink into the melting cheese rather than sit atop it.


