You know those days? The ones where you just need something comforting, something sweet, something that feels like a warm hug from your grandma? That’s exactly what these Caramel Crumb Bars are for me. They’re not fussy, they don’t require a million ingredients, and honestly, the smell that fills the house while they’re baking is enough to make anyone’s day a little brighter. They’re like a shortcut to happiness, a little square of pure bliss that doesn’t require hours of slaving away. If you’ve ever loved a good blondie or a perfectly chewy cookie, you’re going to fall head over heels for these. I swear, they’re one of the first things I ever learned to bake successfully, and they’ve been a staple in my kitchen ever since. The way the soft, caramelly middle just melts in your mouth against that slightly crisp, buttery crumb topping? It’s pure magic, I tell you.
Thank you for reading this post, don't forget to subscribe!What are Caramel Crumb Bars?
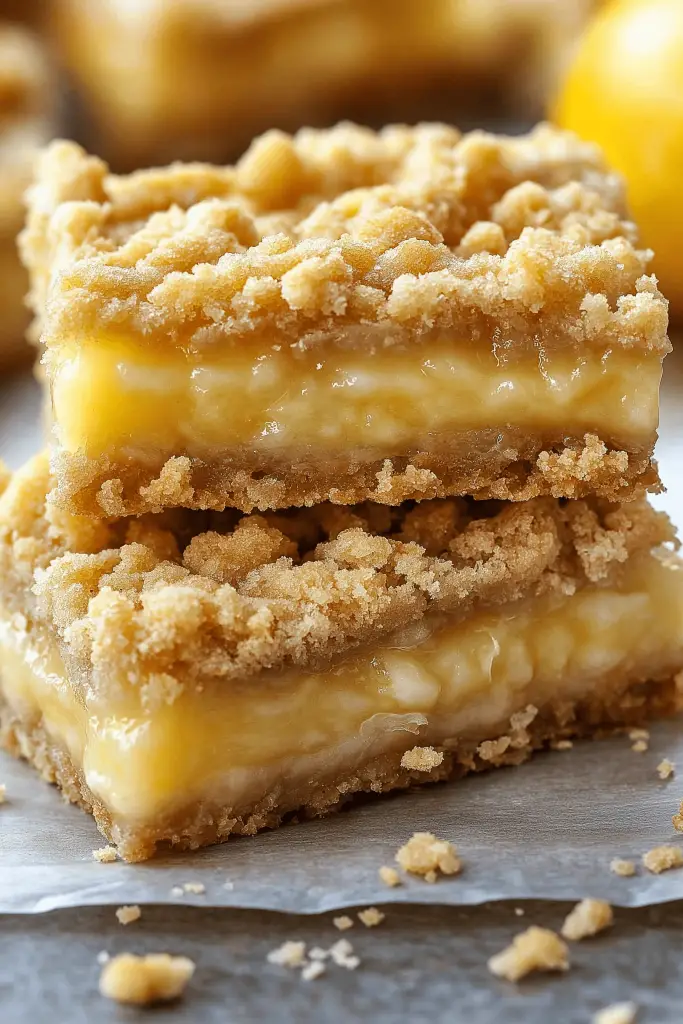
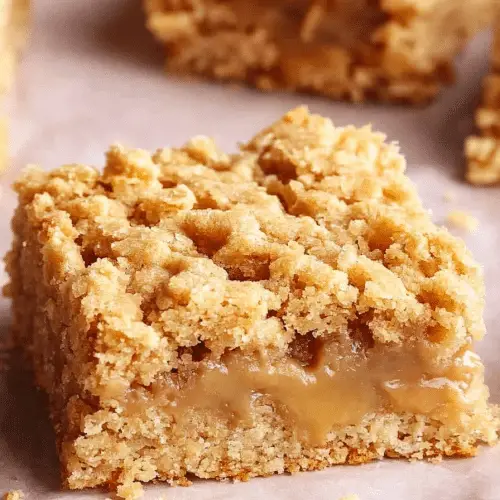
So, what exactly are these delightful little squares of joy? Think of them as a kind of bar cookie, but with layers of incredible flavor and texture. At their heart, they have a soft, chewy, almost cake-like base, but the real star of the show is that gooey, luscious caramel swirl running through the middle. And then, to top it all off, there’s a generous layer of buttery, golden crumb topping that gets perfectly crisp around the edges. It’s the kind of dessert that hits all the right notes: sweet, a little salty (if you’re using Salted Caramel, which I highly recommend!), and oh-so-satisfying. They’re not as dense as a brownie, nor as light as a cake, they sit in that perfect sweet spot that makes them utterly addictive. Honestly, the name says it all – it’s a beautiful combination of chewy bars and crunchy crumbs, all tied together with that irresistible caramel goodness.
Why you’ll love this recipe?
Oh, where do I even begin with why I adore this recipe? First off, the flavor profile is just out of this world. You get that rich, deep sweetness from the caramel, balanced beautifully by the buttery, slightly nutty notes from the crumb topping and the base. It’s not cloyingly sweet, which is a huge win in my book. Then there’s the texture – it’s a textural masterpiece! You have the tender chew of the bar, the glorious gooeyness of the caramel, and the delightful crunch of the topping all in one bite. It’s truly spectacular. And let’s talk about simplicity. This is a lifesaver on busy nights or when unexpected guests pop over. The ingredients are super basic, things you probably already have in your pantry. You can whip up the batter and topping in just a few minutes, and the rest is hands-off baking time. Plus, they’re incredibly cost-effective! No fancy extracts or expensive nuts needed here, just good old-fashioned pantry staples creating something truly special. I also love how versatile they are. They’re perfect for a midday pick-me-up, a fantastic addition to a potluck, or even dressed up a bit for dessert. They never fail to impress, and honestly, they’re usually gone in minutes at my house. What I love most about this is that it feels like a special treat, but it’s surprisingly easy to make, which is the perfect combination for any home baker.
How do I make caramel crumb bars?
Quick Overview
The process for these caramel crumb bars is wonderfully straightforward. You’ll basically make a simple Cookie Dough batter for the base, whip up a quick caramel sauce (or use store-bought if you’re in a pinch!), and then create a buttery crumb topping. You layer half the batter in the pan, spoon over the caramel, sprinkle with the remaining batter, and then top it all off with that irresistible crumb mixture. It bakes up into a golden, gooey, irresistible bar that’s pure comfort. It really is as simple as mixing, layering, and baking. You’ll be amazed at how little effort goes into such a delicious result.
Ingredients
For the Main Batter:
1 cup (2 sticks) unsalted butter, softened – Make sure it’s truly softened, not melted. I always take mine out of the fridge about an hour beforehand. It makes a world of difference in getting a smooth batter.
1 ½ cups granulated sugar – This gives us that classic sweetness.
2 large eggs – At room temperature, please! They incorporate much better.
1 teaspoon vanilla extract – The heart and soul of so many baked goods. Don’t skimp on this!
2 cups all-purpose flour – Standard stuff, works like a charm.
1 teaspoon baking powder – Just enough to give it a little lift.
½ teaspoon salt – Balances the sweetness beautifully. If you use salted butter, you can slightly reduce this.
For the Filling:
1 cup caramel sauce – You can buy a good quality one or make your own. If making your own, let it cool slightly before using.
Optional: A pinch of Sea Salt flakes to sprinkle over the caramel before the topping goes on. Trust me on this!
For the Glaze:
1 cup powdered sugar
2-3 tablespoons milk (or cream for extra richness)
½ teaspoon vanilla extract – Just a little hint of flavor.
“I don’t know if I’ve ever eaten a better Caramel Crumb Bars. The rub alone is wonderful, but the sauce??? Over the top!”
Step-by-Step Instructions
Step 1: Preheat & Prep Pan
First things first, get your oven preheating to 350 degrees Fahrenheit (175 degrees Celsius). This ensures it’s at the perfect temperature when your bars are ready to go in. You’ll need a 9×13 inch baking pan. I like to line mine with parchment paper, leaving a little overhang on the sides. This makes lifting the bars out so much easier later on, and clean-up is a breeze! Just grease the pan lightly before lining, or grease the parchment paper itself. That little bit of extra effort saves you so much hassle.
Step 2: Mix Dry Ingredients
Grab a medium bowl and whisk together your flour, baking powder, and salt. Give it a good whisk so everything is evenly distributed. This step might seem small, but it ensures your leavening agent and salt are spread throughout, meaning no surprise pockets of saltiness or flatness in your bars. It’s all about evenness for that perfect texture.
Step 3: Mix Wet Ingredients
In a large bowl, cream together the softened butter and granulated sugar until it’s light and fluffy. This is where the electric mixer really shines, but you can certainly do it by hand if you’re feeling ambitious! Beat in the eggs, one at a time, making sure each is fully incorporated before adding the next. Then, stir in the vanilla extract. You want a smooth, well-combined mixture here – no streaks of butter or egg.
Step 4: Combine
Now, it’s time to bring the wet and dry ingredients together. Gradually add the dry ingredients to the wet ingredients, mixing on low speed (or stirring gently by hand) until just combined. Be careful not to overmix! Overmixing develops the gluten in the flour, which can lead to tough bars. You want a tender crumb, so stop as soon as you don’t see any dry flour streaks. It should be a thick, scoopable batter.
Step 5: Prepare Filling
If you’re making your own caramel sauce, now’s the time to do it! Otherwise, just have your store-bought caramel sauce ready. If it’s too thick, you can gently warm it in the microwave for a few seconds until it’s pourable but not hot. This makes it easier to spread evenly over the batter.
Step 6: Layer & Swirl
Take about half of your batter and spread it evenly into the prepared baking pan. It might be a bit stiff, so use a spatula or your fingers (lightly greased if needed) to press it into an even layer. Now, carefully spoon the caramel sauce over the batter, spreading it as evenly as you can without going all the way to the edges (you don’t want it oozing out everywhere!). Then, dollop spoonfuls of the remaining batter over the caramel. This can look a little messy, but that’s okay! It will spread and bake together. For an extra flourish, you can gently swirl the top layer of batter into the caramel with a knife or toothpick, but don’t overdo it. You want distinct layers of caramel and cake.
Step 7: Bake
Pop the pan into your preheated oven. Bake for about 30-40 minutes, or until the edges are golden brown and a toothpick inserted into the center comes out with moist crumbs attached (not wet batter). The caramel might bubble up a bit, which is perfectly normal. Keep an eye on it, as oven temperatures can vary.
Step 8: Cool & Glaze
This is a crucial step for the best texture! Let the bars cool completely in the pan on a wire rack. I know, the temptation is overwhelming, but cutting them while warm will make them fall apart. Once completely cool, whisk together the powdered sugar, milk, and vanilla extract for the glaze. Start with 2 tablespoons of milk and add more, a teaspoon at a time, until you reach your desired drizzling consistency. Drizzle this over the cooled bars. The glaze will set slightly as it dries.
“Made the Caramel Crumb Bars tonight and wow — perfect weeknight dinner. Will definitely make again!”
Step 9: Slice & Serve
Once the glaze has set a bit, use the parchment paper overhang to lift the entire slab out of the pan. Place it on a cutting board and slice into squares. I usually cut mine into about 24 bars, but you can make them bigger or smaller depending on how you’re serving them. They’re absolutely delicious at room temperature, but a slight chill from the fridge can also be lovely. I love serving them with a cup of coffee or a glass of cold milk.
What to Serve It With
These Caramel Crumb Bars are so wonderfully versatile, they fit into almost any occasion. For breakfast, I love pairing them with a hot cup of strong coffee. They’re not too sweet for the morning, and that crumbly topping just screams “treat yourself.” You can even cut them into smaller squares and serve them alongside a fruit salad for a lovely brunch spread. For dessert, they’re a dream. I like to serve them slightly warm with a scoop of vanilla bean Ice Cream or a dollop of whipped cream. The contrast of the warm, gooey bar and the cold ice cream is divine. If you’re feeling fancy, a drizzle of extra caramel sauce or a sprinkle of sea salt flakes on top takes them to the next level. And for those cozy snack moments? They’re perfect just as they are, perhaps with a glass of milk or even a rich hot chocolate on a chilly evening. My kids always ask for these when they’re craving something sweet after school, and honestly, they’re a lifesaver when I need a quick, crowd-pleasing treat. They’re the kind of dessert that brings smiles to everyone’s faces, no matter the setting.
Top Tips for Perfecting Your Caramel Crumb Bars
Over the years, I’ve learned a few tricks that really elevate these bars from good to absolutely stellar. For the batter, the most crucial thing is not to overmix once you add the flour. Just mix until it’s combined, and you’ll get that lovely tender texture. If you overwork it, you risk tough bars, and nobody wants that! For the caramel filling, I always suggest using a good quality sauce. If you’re making your own, ensure it cools down enough so it doesn’t melt the batter too much, but is still pourable. I also love to add a tiny pinch of sea salt flakes right over the caramel before I add the top layer of batter and crumb topping. It just elevates the caramel flavor and adds a delightful little salty contrast. When it comes to the crumb topping, the key is really cold butter. Rubbing it into the flour until it resembles coarse crumbs is where that delightful crispiness comes from. Don’t overwork it; you want those little bits of butter to create pockets of flakiness as they bake. If your batter is a bit stiff and hard to spread, don’t worry! Just dollop it on and use a spatula to gently press it down. And for the glaze, consistency is everything. Start with less milk and add more slowly until you get a nice, drizzle-able texture. Too much milk, and it’ll be watery; too little, and it’ll be too thick to spread. My biggest lesson learned has been patience during the cooling phase. I know it’s hard to wait, but letting them cool completely in the pan is essential for them to set up properly so you can slice them cleanly. If you cut them too soon, they’ll just turn into a gooey mess, which, while still tasty, isn’t quite as pretty!
Storing and Reheating Tips
One of the best things about these Caramel Crumb Bars is how well they keep. If you find yourself with any leftovers (which is rare in my house!), they store beautifully. For room temperature storage, keep them in an airtight container at cool room temperature for up to 3 days. They’ll maintain their chewiness and flavor perfectly. If you prefer them chilled, or if your kitchen is on the warmer side, they can be stored in the refrigerator for up to a week. Just make sure they are well-covered in an airtight container to prevent them from drying out. When you want to serve them from the fridge, I find they are best enjoyed at room temperature or slightly warmed. To reheat, you can pop a square or two in the microwave for about 10-15 seconds, just until they’re slightly softened. Be careful not to overheat, or the caramel can become too runny. If you want to freeze them, I recommend doing so before glazing. Wrap individual bars tightly in plastic wrap, then place them in a freezer-safe bag or container. They’ll keep well for up to 2-3 months. Thaw them overnight in the refrigerator, then let them come to room temperature before glazing, or glaze them after thawing and bringing them to room temp. If you glaze them before freezing, the glaze might get a bit sticky or crack during thawing, so I usually save that step for after they’re thawed.
Frequently Asked Questions
Final Thoughts
These Caramel Crumb Bars are more than just a dessert to me; they’re a little slice of home, a reliable source of comfort, and a surefire way to make any day a little bit sweeter. They perfectly capture that blend of chewy, gooey, and crispy textures that we all crave in a baked treat, and the caramel adds that irresistible touch of indulgence. They’re proof that you don’t need complicated techniques or exotic ingredients to create something truly special. If you love my Chocolate Chip Cookie Bars or my Brown Butter Blondies, I have a feeling these caramel wonders will quickly become a favorite for you too. I really hope you give them a try! They’re so forgiving and so rewarding. I can’t wait to hear what you think, and I’d love to see your creations! Feel free to share your own twist or any tips you discover in the comments below. Happy baking, my friends!
Caramel Crumb Bars
Ingredients
Crumb Base and Topping
- 1.5 cup all-purpose flour
- 0.75 cup granulated sugar
- 0.5 cup packed brown sugar
- 0.5 teaspoon salt
- 0.75 cup cold unsalted butter cut into cubes
Caramel Filling
- 1 can caramel sauce (11 or 14 ounce)
Instructions
Preparation Steps
- Preheat your oven to 350°F (175°C). Grease and flour a 9x13 inch baking pan.
- In a large bowl, whisk together the flour, granulated sugar, brown sugar, and salt.
- Cut in the cold butter using a pastry blender or your fingertips until the mixture resembles coarse crumbs.
- Press about two-thirds of the crumb mixture evenly into the bottom of the prepared baking pan to form the crust.
- Bake the crust for 10-12 minutes, or until lightly golden.
- Remove the crust from the oven. Pour the caramel sauce evenly over the hot crust.
- Sprinkle the remaining crumb mixture evenly over the caramel layer.
- Bake for another 20-25 minutes, or until the topping is golden brown and the caramel is bubbly.
- Let the bars cool completely in the pan on a wire rack before cutting into squares.


